Street Source is shutting down April 30th, 2026. Read the announcement

Project D350 Build Thread

mjavy7
+1y
Wow this truck has come a LONG!!! way. Congrats man it looking great. All the innovation and time...its priceless.
I am very surprised that minitruckingweb did not spot your ride. I'm really digging the dash, new roof, and the intake!
things like this are the ones that get you on the map (not to mention the more obvious ones). Keep up the great work!
I am very surprised that minitruckingweb did not spot your ride. I'm really digging the dash, new roof, and the intake!
things like this are the ones that get you on the map (not to mention the more obvious ones). Keep up the great work!

D350
+1y
Edited: 5/9/2011 10:20:23 PM by D350
D350
+1y
Oops! Can I delete that post? ^^^
D350
+1y
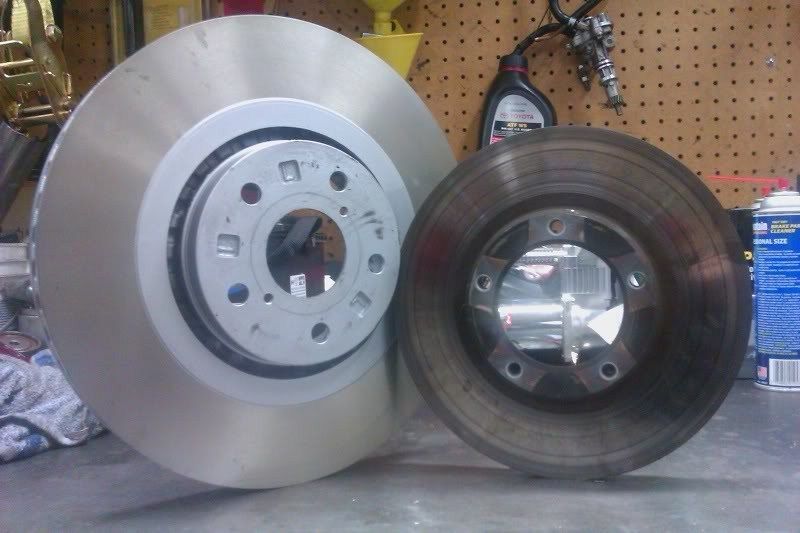
Thanks guys!So here's the lowdown on the brake upgrade...
On page 2 of this build thread you saw that I converted my 6 lug front hubs to 5 lugs using Pre 94 Toyota pickup hubs and Tacoma rotors. After having the opportunity to drive the truck as much as I have, I realized that this brake set up was terrible. It makes sense though: I chose to install brakes that were meant for a little truck with a lightweight 4 cylinder motor, not a V8 with a bunch of extra steel on the chassis. After a few close calls of nearly rear ending people, I realized no matter how hard I mashed the brake pedal, I could NOT lock up the front wheels to save my life. Not to mention the brake fade after the rotors heat up.
I'm always building on a budget so instead of spending big $ on some sort of Brembo kit, I frankensteined my own system.
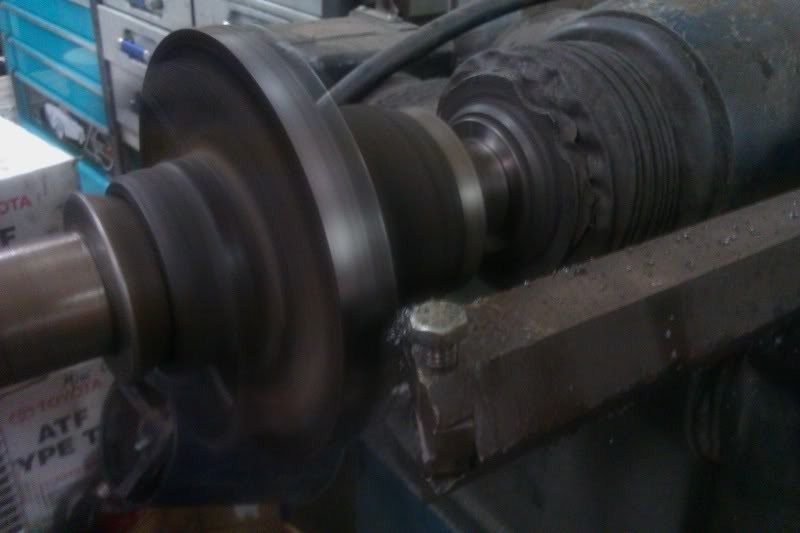
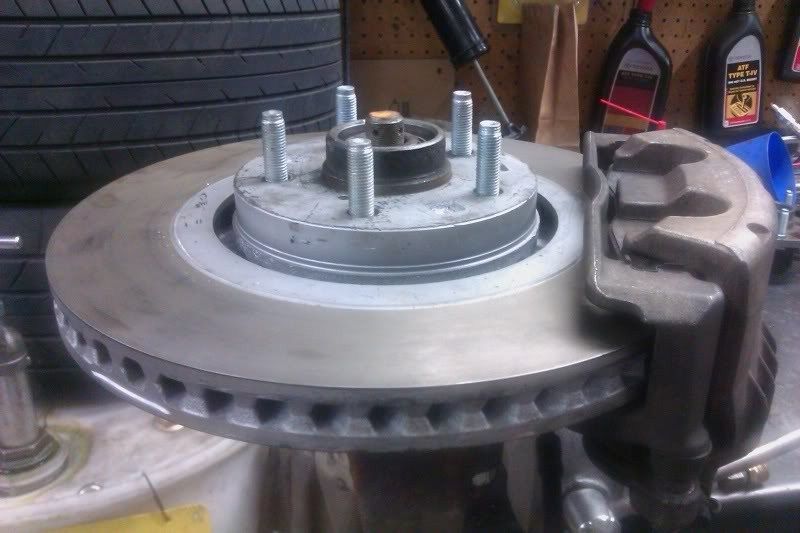
I started the project when I acquired a pair of huge 13" Lexus GS rotors from work. Used but still usable after turning. My first hurdle was that the Lexus rotors are floating rotors (held in place against the hub by the wheel) and my truck rotors bolt to the back side of the hub. After inspecting my hubs I decided I could put floating rotors on them with a couple of changes...
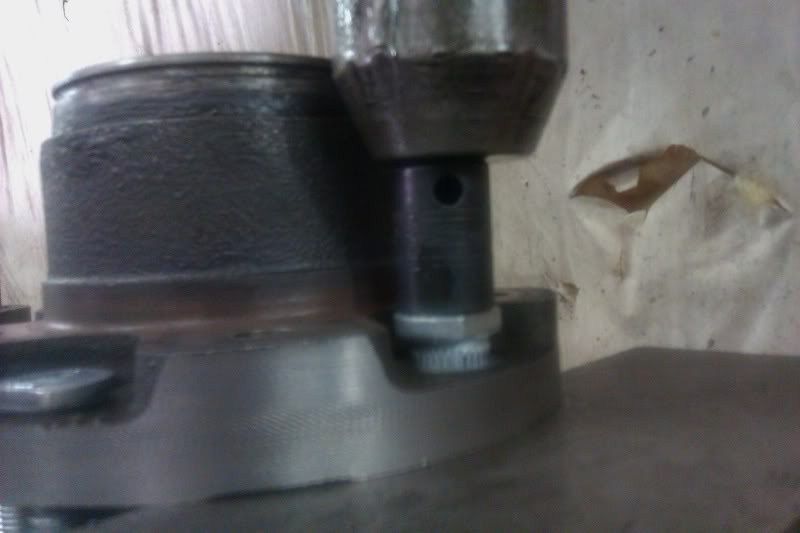
First, I had to machine the outer edge of the hub so that it would fit inside the back of the Lexus rotors. I also had to machine the hub center of the Lexus rotors to fit snugly over the front of the Toyota hubs. The lug pattern already matches.
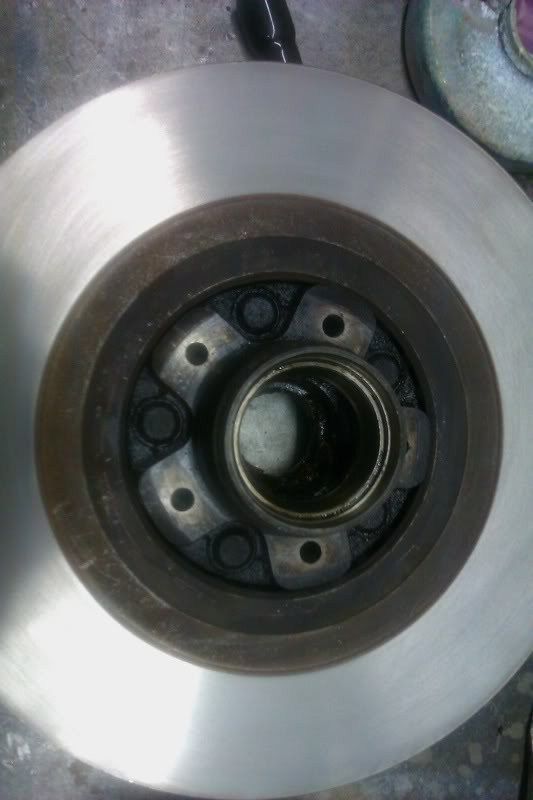
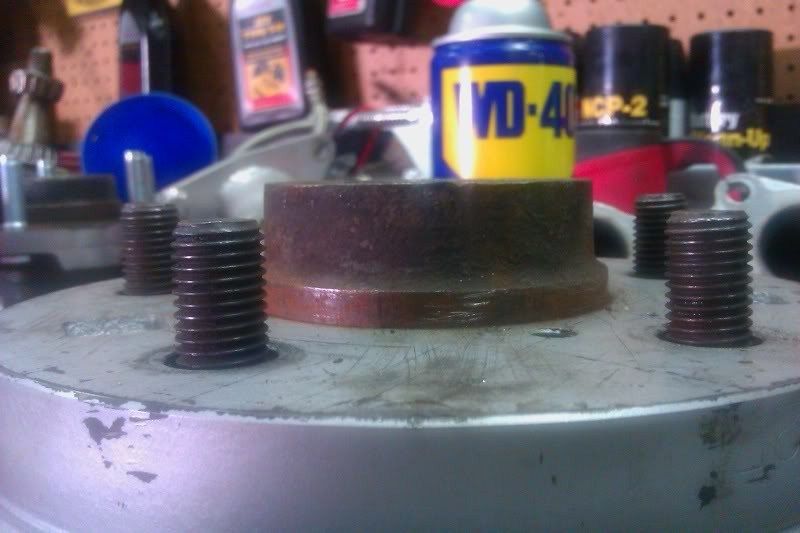
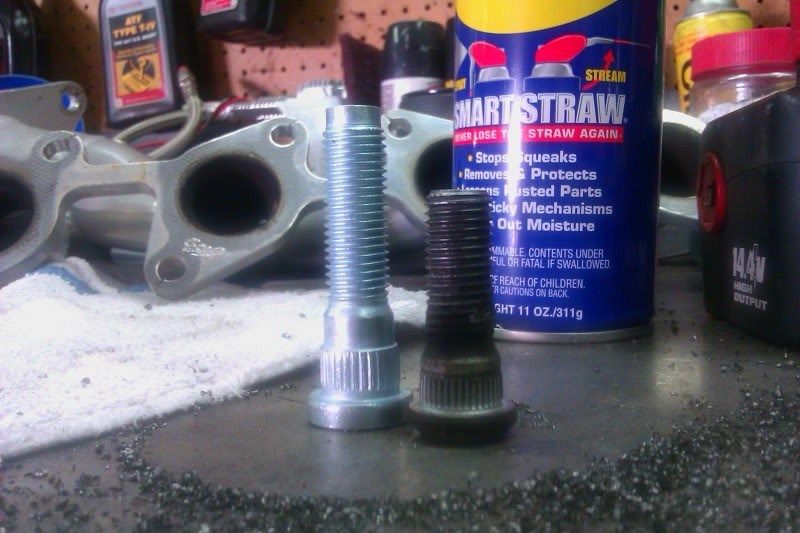
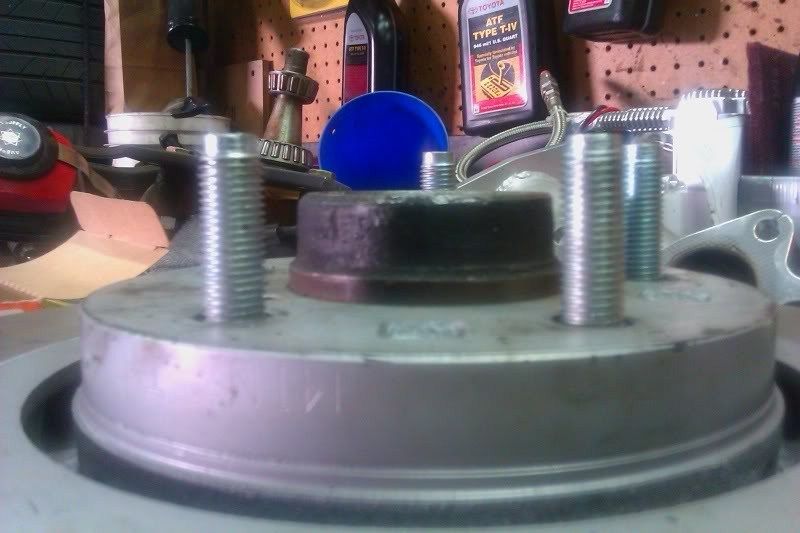
After getting the rotors to fit properly, I saw that there wasn't going to be enough lugs protruding for me to safely mount a wheel. The only replacements I could find that were long enough had a slightly larger knurl... so I had to drill out the holes a bit and then press the new lugs in.
I will continue on as soon as I confirm my photos are showing up properly.
;:^)> Mankandie
On page 2 of this build thread you saw that I converted my 6 lug front hubs to 5 lugs using Pre 94 Toyota pickup hubs and Tacoma rotors. After having the opportunity to drive the truck as much as I have, I realized that this brake set up was terrible. It makes sense though: I chose to install brakes that were meant for a little truck with a lightweight 4 cylinder motor, not a V8 with a bunch of extra steel on the chassis. After a few close calls of nearly rear ending people, I realized no matter how hard I mashed the brake pedal, I could NOT lock up the front wheels to save my life. Not to mention the brake fade after the rotors heat up.
I'm always building on a budget so instead of spending big $ on some sort of Brembo kit, I frankensteined my own system.
I started the project when I acquired a pair of huge 13" Lexus GS rotors from work. Used but still usable after turning. My first hurdle was that the Lexus rotors are floating rotors (held in place against the hub by the wheel) and my truck rotors bolt to the back side of the hub. After inspecting my hubs I decided I could put floating rotors on them with a couple of changes...
First, I had to machine the outer edge of the hub so that it would fit inside the back of the Lexus rotors. I also had to machine the hub center of the Lexus rotors to fit snugly over the front of the Toyota hubs. The lug pattern already matches.
After getting the rotors to fit properly, I saw that there wasn't going to be enough lugs protruding for me to safely mount a wheel. The only replacements I could find that were long enough had a slightly larger knurl... so I had to drill out the holes a bit and then press the new lugs in.
I will continue on as soon as I confirm my photos are showing up properly.
;:^)> Mankandie

D350
+1y
Here is where thinking I'm smart got me into trouble and created a lot of unnecessary work.
I had the brilliant idea that I could mock up the entire brake system on my work bench without dismantling my truck using a spare set of drop spindles I have. The only problem... I don't have drop spindles on my truck, I have factory ones.
My theory was this: It shouldn't matter where the spindle is located, the holes for mounting the caliper will be the same distance away from the hub, and the same depth behind the rotor. After all, drop spindle manufacturers expect you to bolt on your factory brakes right? Yes, but I overlooked one thing. The location of the steering arm on the spindle changes dramatically. And it wasn't until I completed the project and tried to bolt it all on the truck that I realized that this arm is now IN THE WAY OF THE BOTTOM MOUNTING HOLE!!! Time to start over. F*@#!!!
For shiggles, here's my first attempt: I mounted the spindle in the vise and mounted the hub and rotor. Then I placed the 4th Generation Camaro caliper on the rotor making sure that it was centered in the caliper and had enough clearance around the rotors edge.
Then I measured the space between mounting surface on the caliper and the mounting surface on the spindle. The space was 3/4 of an inch. I don't have any 3/4 inch steel plate but I do have some 1/2" and some 1/4". I'll just sandwich them together. Next I cut a cardboard template out large enough to cover the holes in both the caliper and the spindle. I drilled holes in the cardboard that match the spindle and bolted the cardboard to the spindle. The I used a sharpie marker to mark the location of the caliper holes by poking the marker through the holes. I cut out the cardboard template, traced it onto the steel plates and used a plasma cutter to cut it out. I got a little creative before welding the two plates together. Then I test fitted... PERFECT!!! ...for DROP SPINDLES!
So if you have a D50 or a Mighty Max with drop spindles and you would like to copy this brake upgrade, I'll ship these brackets to you for the price of shipping.
To be continued...
D350
+1y
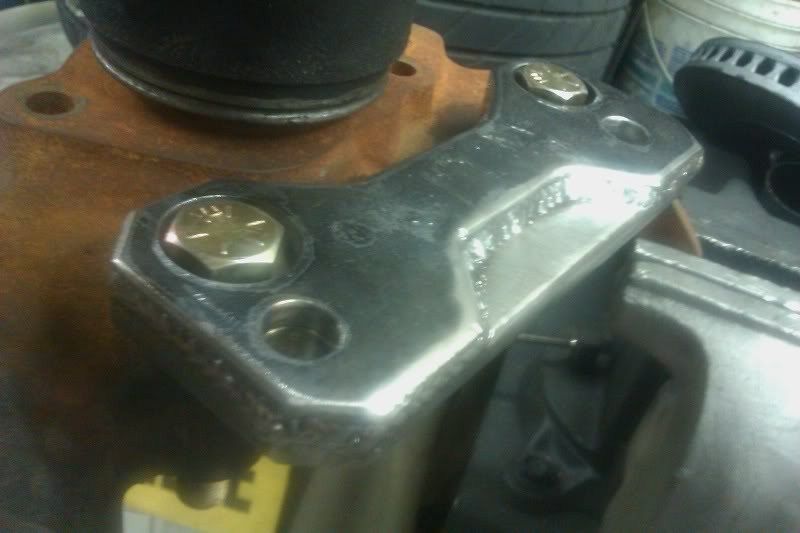
So after throwing a tantrum after wasting 3 hours on drop spindle brackets, I pulled the truck onto the lift and disassembled the stock brakes like I should have the first time.
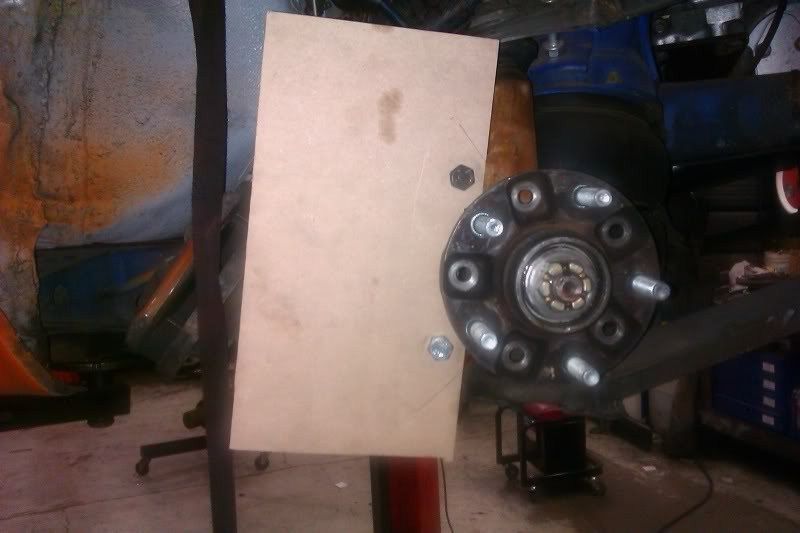
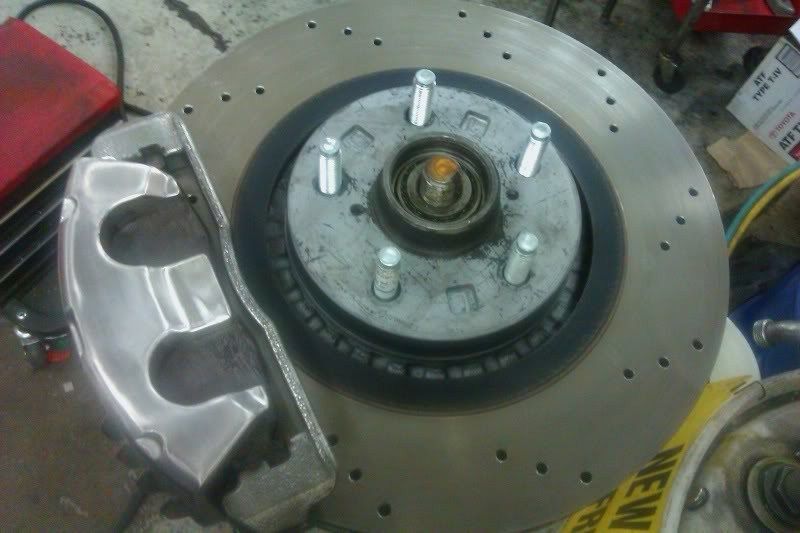
Having had practice now, my method the second time was more refined. Instead of using cardboard to make templates, I located some sheets of MDF (wood) the same thickness of the steel plate I was using. The wood was an amazing idea because its obviously easier to form and drill than steel and it's strong enough that I could actually bolt the calipers to it to check for clearances before firing up the plasma cutter.
I drilled holes in the MDF that matched the spindle and bolted it up.
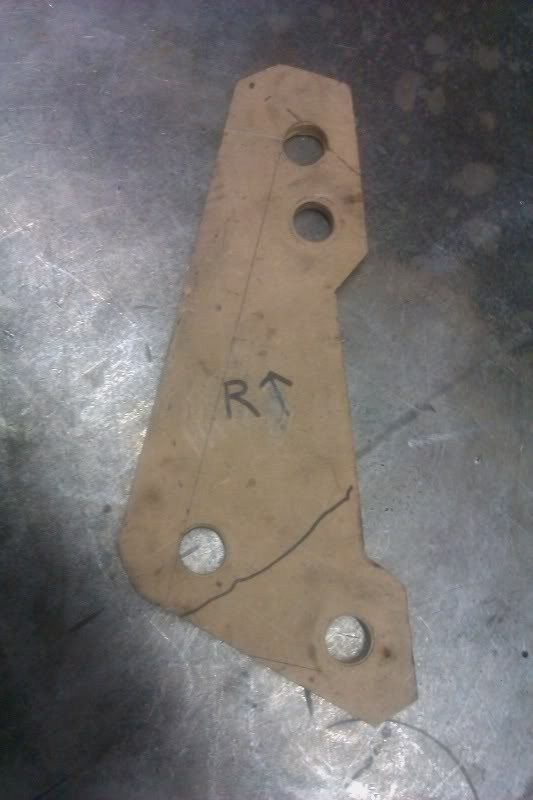
I already knew how far the caliper mounting holes needed to be from the hub, they just needed to be shifted upwards 10 to 20 degrees to get the lower hole away from the steering arm. After marking and drilling, I cut out the templates with a jigsaw.
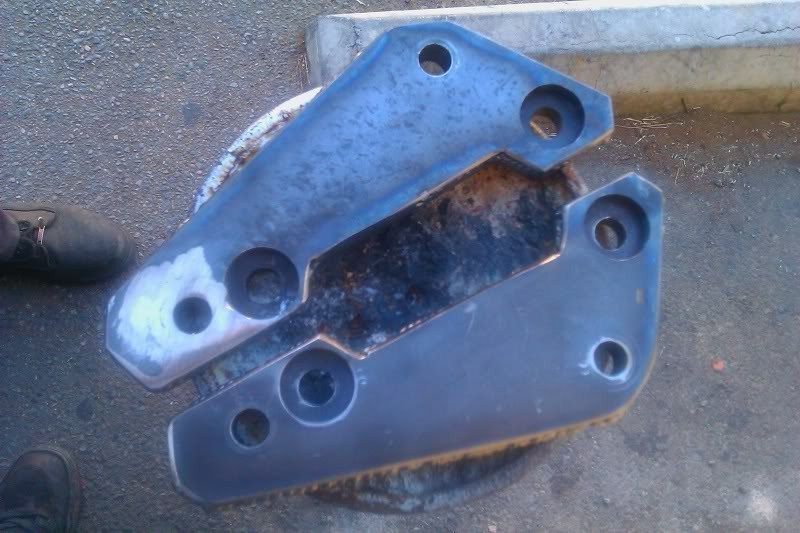
After assembling the brake system with wooden brackets with no problems I used the templates themselves to trace around with the plasma cutter nozzle. The second brackets look so much better that the first set that I cut freehand.
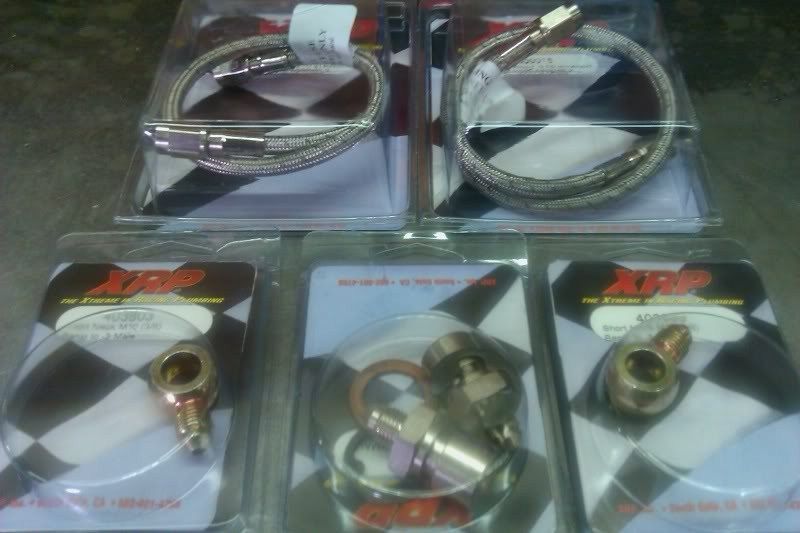
I wasn't in the mood for re-flaring the brake lines so I a took a trip to So Cal Speed Shop to spend some money I didn't have on stainless steel lines and fittings that matched the new equipment.
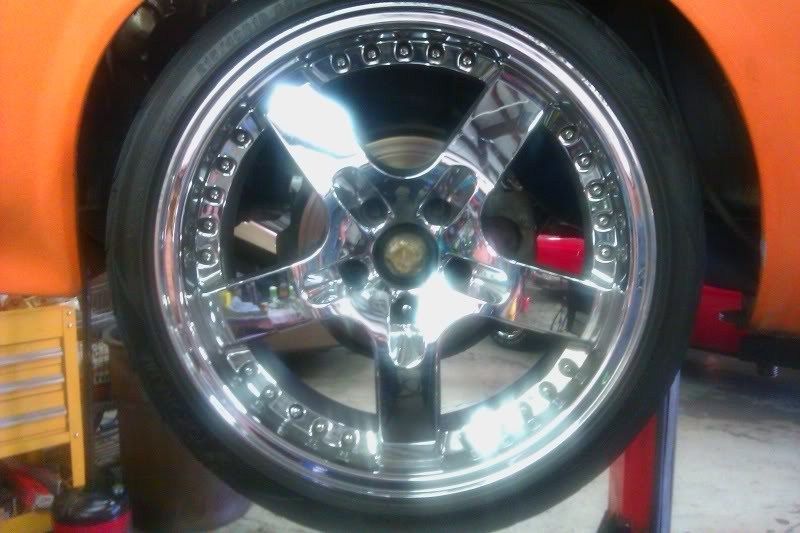
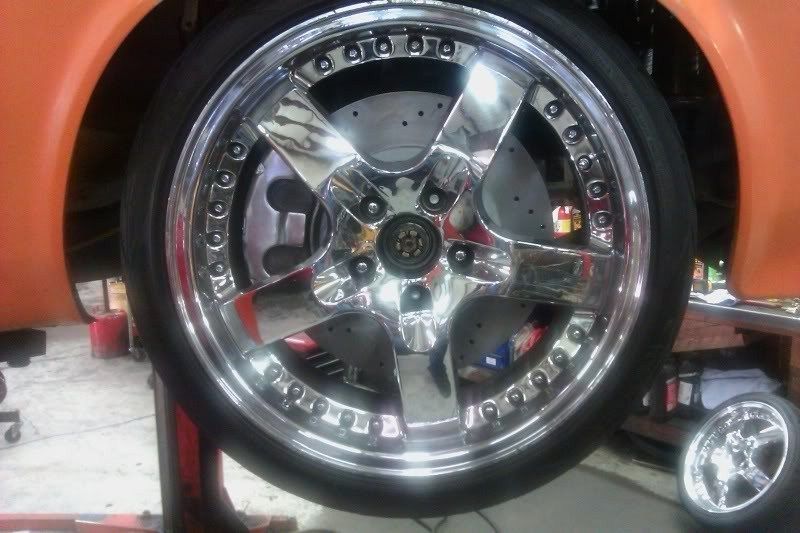
Lastly! I figured since there's a whole lot of visible rotor behind the wheel now, I spend some extra time making them pretty. 3 hours straight at the drill press and a little more time polishing the aluminum calipers and THEN I was done.
I'm happy to report that I'm able to lock up the front wheels with ease and the brake fade is non existent even after numerous heavy stops.
I'll end with before and after photos...
Until the next mod... drag safely.
Having had practice now, my method the second time was more refined. Instead of using cardboard to make templates, I located some sheets of MDF (wood) the same thickness of the steel plate I was using. The wood was an amazing idea because its obviously easier to form and drill than steel and it's strong enough that I could actually bolt the calipers to it to check for clearances before firing up the plasma cutter.
I drilled holes in the MDF that matched the spindle and bolted it up.
I already knew how far the caliper mounting holes needed to be from the hub, they just needed to be shifted upwards 10 to 20 degrees to get the lower hole away from the steering arm. After marking and drilling, I cut out the templates with a jigsaw.
After assembling the brake system with wooden brackets with no problems I used the templates themselves to trace around with the plasma cutter nozzle. The second brackets look so much better that the first set that I cut freehand.
I wasn't in the mood for re-flaring the brake lines so I a took a trip to So Cal Speed Shop to spend some money I didn't have on stainless steel lines and fittings that matched the new equipment.
Lastly! I figured since there's a whole lot of visible rotor behind the wheel now, I spend some extra time making them pretty. 3 hours straight at the drill press and a little more time polishing the aluminum calipers and THEN I was done.
I'm happy to report that I'm able to lock up the front wheels with ease and the brake fade is non existent even after numerous heavy stops.
I'll end with before and after photos...
Until the next mod... drag safely.

slamdtaco
+1y
amazing build so far. keep it up
3
340i
+1y
nice brake upgrade. and awesome build! love it.

Rob Clayhill
+1y
those brakes look sick, 2 thumbs up for you my friend!

dragginbonez
+1y
wow, i never even knew dodge made these, but its now on my top ten fav. bodystyles.
The build is just great, cant wait to see it complete...althou it ight be e a while.
The build is just great, cant wait to see it complete...althou it ight be e a while.
Related Discussions in Minitruckin' Magazine
Thread
Posts
Last Post
29

last post by
e10pvmt +1y
Any Tri City, Wa Mini Truckers on here and want to hang out/ go to a show?

last post by
tacomatoy2001 +1y
0
0
last post by
tacomatoy2001 +1y
