York 210 build and Accuair install

75dually
+1y
I am doing a separate post on installing a York 210 on my dually, and my Accuair system. This thread is going to concentrate on that aspect of my build. I wanted to do a separate post so that when people search the internet hopefully they can find this thread, and if I do it right it will be a help to those guys trying to do a similar system for their rides.
The more I searched on forums and the internet for information to put a York on my ride more often than not it was guys using them on 4WD Jeeps and the like. Fine for them, but the system I wanted had different requirements. Granted this air system is going to be similar but I hope the detail I present is going to be more current to our type of vehicles.
Hopefully I will not mess the whole thing up along the way, and I am sure that my friends on this great forum will be there to straighten me out if I get off course.
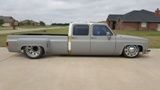
For those of you who have not seen my dually build here is the link:
" target="_blank
I will take lots of pics, so stay tuned...
The more I searched on forums and the internet for information to put a York on my ride more often than not it was guys using them on 4WD Jeeps and the like. Fine for them, but the system I wanted had different requirements. Granted this air system is going to be similar but I hope the detail I present is going to be more current to our type of vehicles.
Hopefully I will not mess the whole thing up along the way, and I am sure that my friends on this great forum will be there to straighten me out if I get off course.
For those of you who have not seen my dually build here is the link:
" target="_blank
I will take lots of pics, so stay tuned...
75dually
+1y
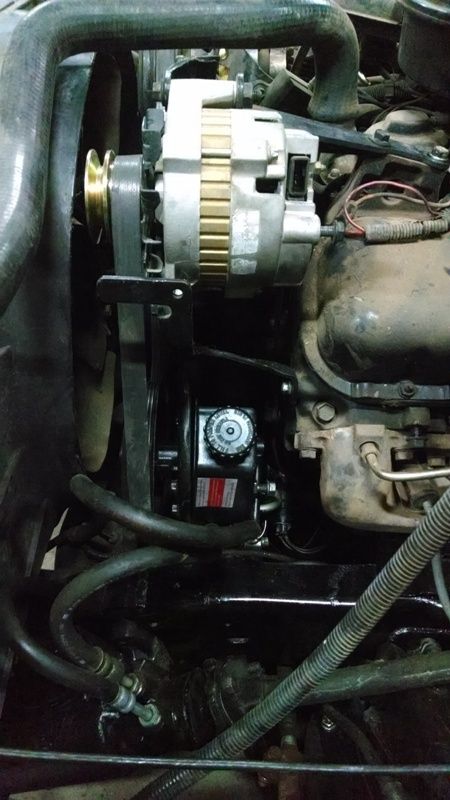
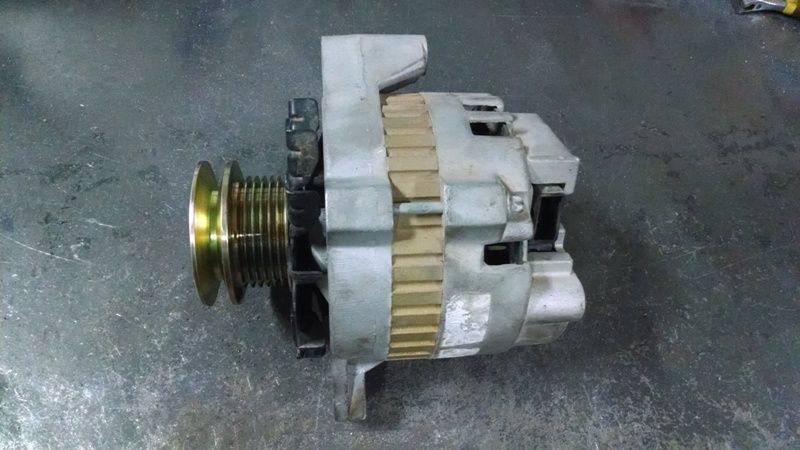
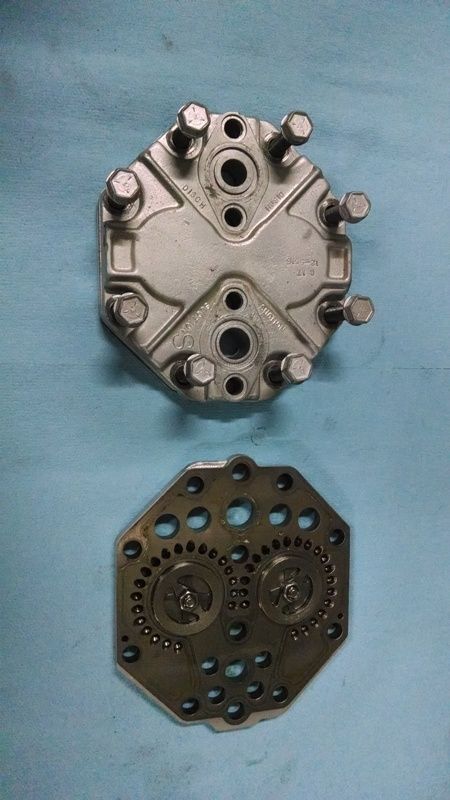
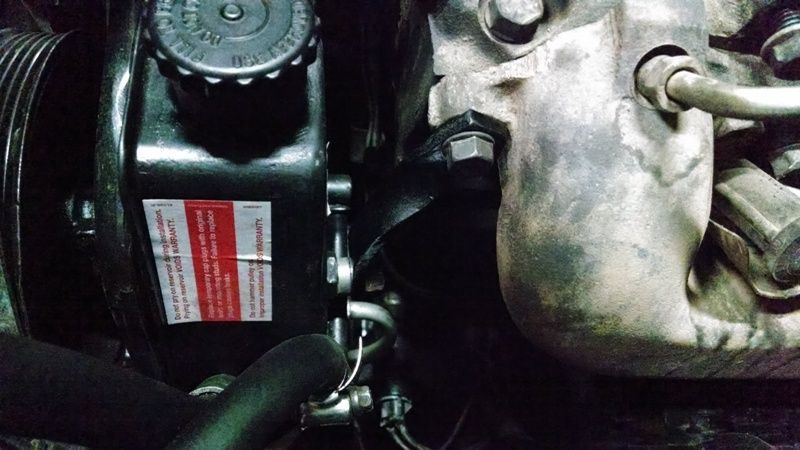
Here is York 210 that I am using for my dually. The other pic is showing the side of my 454 where I plan on mounting the York.
If you look at the below pic you can see that the power steering pump is slightly out of alignment. This is because the bracket that it is mounted to is bent... The previous owner had tried to repair it by welding it back together where it had bent and fatigued. It fatigued because they did not support the back of the pump correctly in the first place. Trust me when I say that this will be fixed.
So tonight I am going to start on the York brackets and fix the OEM bracket (straighten and properly weld it back together). I got a new power steering pump today and have already installed it in place of the slimy/grease ball old one.
So stay tuned...


75dually
+1y
As I progress with this portion of the build I know some of you are going to want to see some details I might miss. Let me know if there is something you would like to see and I will try my best to add it. Because if you want to see it, certainly others will as well.
75dually
+1y
Last night I got the OEM mounting bracket bent back into shape and welded up a plate on the backside to strengthen the bracket. I still have to paint it, but I am waiting until I finish the York bracket and do them both at the same time. At least now the power steering pump is straight!
I also got the Kilby Enterprises alternator pulley installed. Pic below.
Tonight I will start to work on the York bracket. Once I get that completed I will post some pics.
I also got the Kilby Enterprises alternator pulley installed. Pic below.
Tonight I will start to work on the York bracket. Once I get that completed I will post some pics.
75dually
+1y
I tackled the bottom bracket that mounts to the power steering pump. Then I moved on to do the oil fix on the York 210 pump.
A couple of simple items on the oil fix. First of all it is super easy. From what I understand and have read this takes care of a great deal of the oil that tries to enter the airline. We shall see...
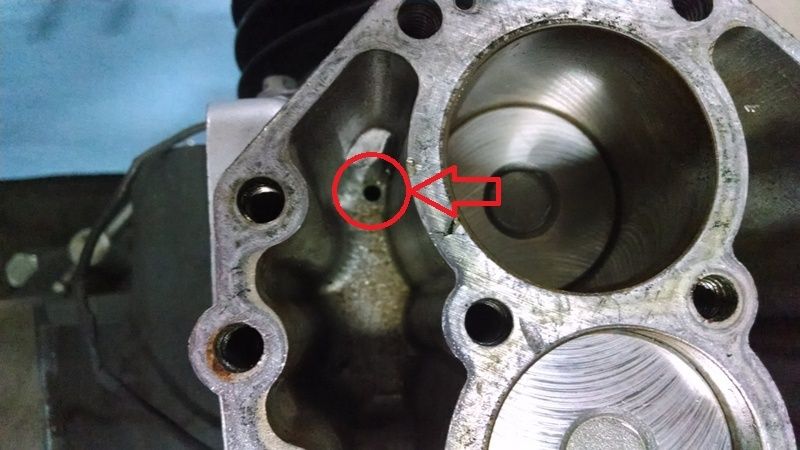
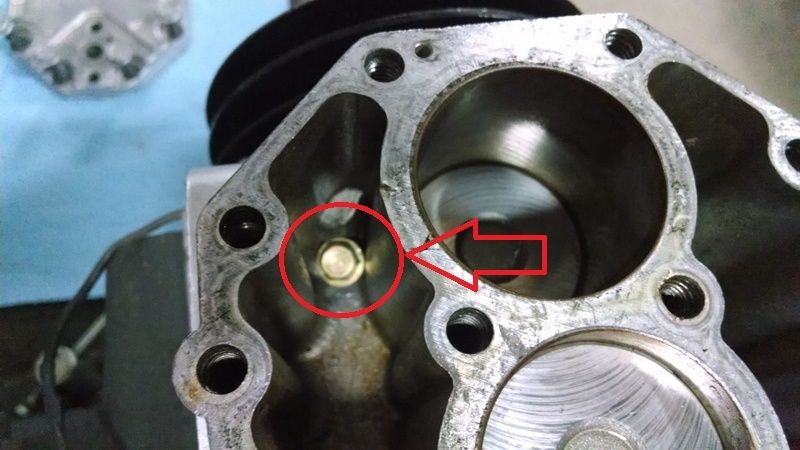
So what I did was disassemble the head and lay it aside with the upper valve assembly. In the below pic you can see the small hole in the bottom of the oil well right next to the pistons (see the red circle with the arrow pointing at it). This is the hole you want to close off. I found a sheet metal screw with the correct diameter. All I have seen in past builds it that they simply screwed in the fastener, but I want to suggest if you try this fix take some RVT and put some on the threads before assembly. Make sure it is high temp RVT. Just a small dab will do, but if you don't want any oil to get past your fastener then this is a must do.
Then once that was finished I put the head back on in the order I took the parts off and followed the torque sequence laid out in the York manual. You can find a copy of it at:
Because I do not know how to link my pics together I will have to do a couple of posts to get all the pics in.
A couple of simple items on the oil fix. First of all it is super easy. From what I understand and have read this takes care of a great deal of the oil that tries to enter the airline. We shall see...
So what I did was disassemble the head and lay it aside with the upper valve assembly. In the below pic you can see the small hole in the bottom of the oil well right next to the pistons (see the red circle with the arrow pointing at it). This is the hole you want to close off. I found a sheet metal screw with the correct diameter. All I have seen in past builds it that they simply screwed in the fastener, but I want to suggest if you try this fix take some RVT and put some on the threads before assembly. Make sure it is high temp RVT. Just a small dab will do, but if you don't want any oil to get past your fastener then this is a must do.
Then once that was finished I put the head back on in the order I took the parts off and followed the torque sequence laid out in the York manual. You can find a copy of it at:
Because I do not know how to link my pics together I will have to do a couple of posts to get all the pics in.
75dually
+1y
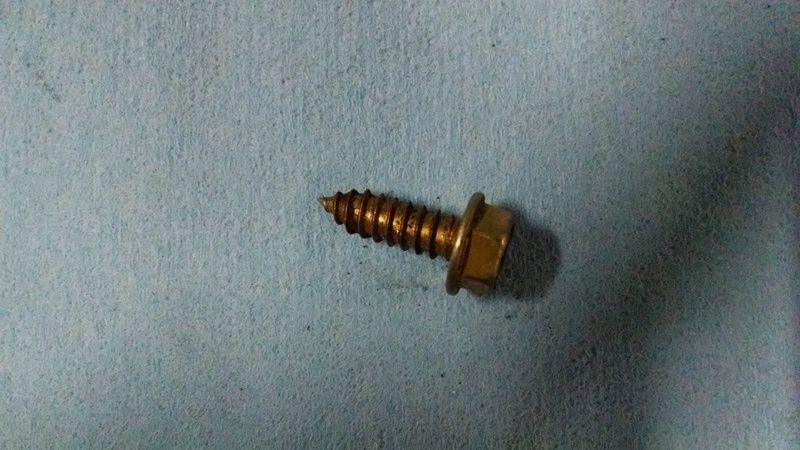
Below you can see the fastener I used in the oil fix. In the middle pic is the fastener installed with a dab of high temp RVT. Simple but effective.
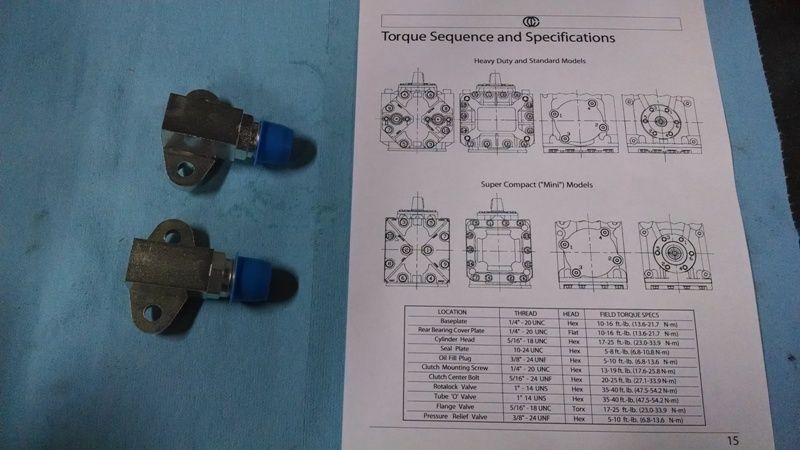
The last pic shows the flange fittings I picked for my build. I got these and the pulley from Kilby's. They are 1/2 NPT fittings. Also in the same pic is the torque sheet I printed off from the York manual.
The last pic shows the flange fittings I picked for my build. I got these and the pulley from Kilby's. They are 1/2 NPT fittings. Also in the same pic is the torque sheet I printed off from the York manual.
Post was last edited on Apr 18, 2014 05:27. Edited 1
time.
75dually
+1y
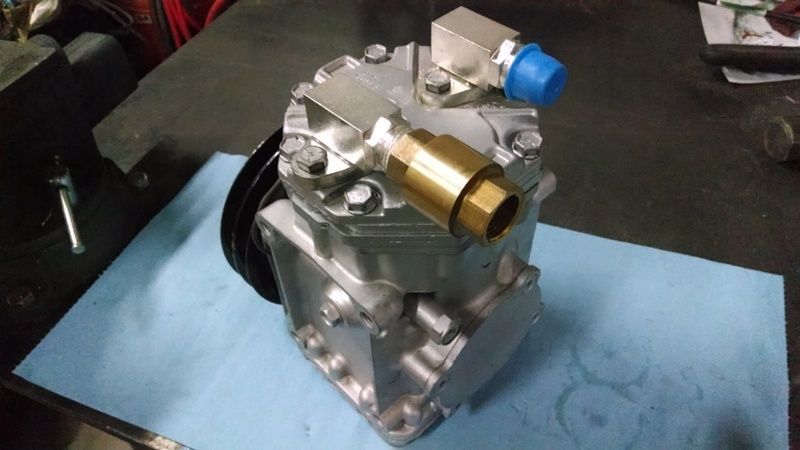
Here is my York all buttoned back up. I have the valves installed, the head torqued, and I have installed a check valve on the pressure side. Tomorrow I need to go buy a 1/2" connector for the suction side so I can install the air filter. When I get that done I will take a pic of the final setup.
Before you ask... I will be running a couple of check valves at several key points in the system. I got these off eBay. They are brass, well made, and made for 250 psi. That will be more than enough for this setup. I have check valve coming right off the head to help the system not bleed pressure back to the compressor. I will also be putting one at the end of the main hose before the tank, and a check valve at the air valve manifold. More on that later...
Before you ask... I will be running a couple of check valves at several key points in the system. I got these off eBay. They are brass, well made, and made for 250 psi. That will be more than enough for this setup. I have check valve coming right off the head to help the system not bleed pressure back to the compressor. I will also be putting one at the end of the main hose before the tank, and a check valve at the air valve manifold. More on that later...

comegetsome
+1y
Sweet progress man.....so the head and valves lift straight off.....no little parts falling out everywhere? My compressor still blows oil in my tank bad....might snatch the head off and run a screw in mine too
75dually
+1y
Brandon - Yeah the head just comes straight off. No little parts that I saw. I have seen some York's that had dowel pins in the block to align the head, but mine did not have any. It is maybe a 5 minute job, and that includes a break to grab a cold Coke!
comegetsome
+1y
Sweet.....there isn't any kind of problem with doing this on a pump that's laying on its side is there? MIne is mounted horizontal instead of vertical
Related Discussions in Dually Suspension
Thread
Posts
Last Post
Michigan Metal Works A-Arm group buy 88-98 Chevy/GMC 1500 to 3500 and dually's
S
last post by
Strokersace +1y
8
8
S
last post by
Strokersace +1y
