Street Source is shutting down April 30th, 2026. Read the announcement
Mitsu Macro Cab - turbo swap, bags

droppedmitsu
+1y
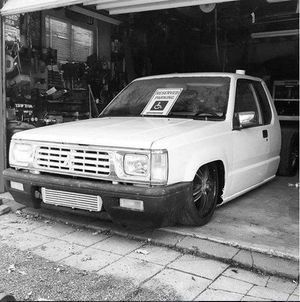
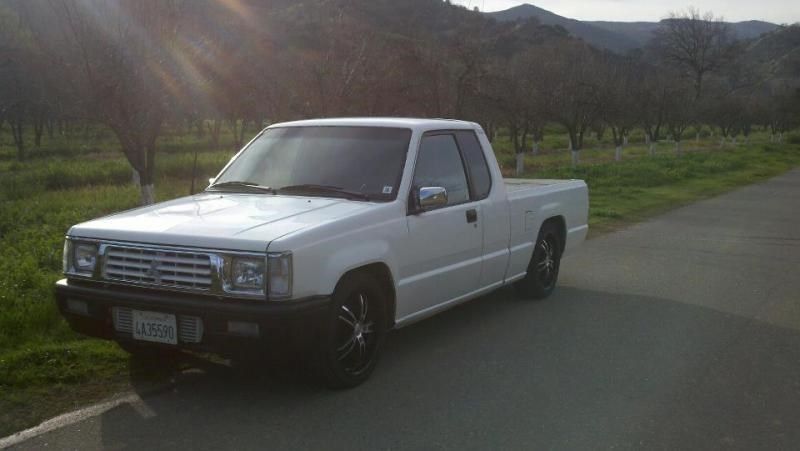
Figured I'd finally start a build thread for my truck. It is a 1989 Mitsubishi Mighty Max Macro Cab. Started it's life with the carbed 2.6l until it cracked the head, so I decided it would finally be the time to swap in the 2.0L turbocharged Eclipse 4g63t engine that was in my single cab Mighty Max that wasn't driving. That was about about two and a half years ago that I swapped it into the Macro. I daily drove it until about a year ago when I bought a nice daily/commuter and put this on the side until I got some money to bag it and fix the little problems it had.
droppedmitsu
+1y
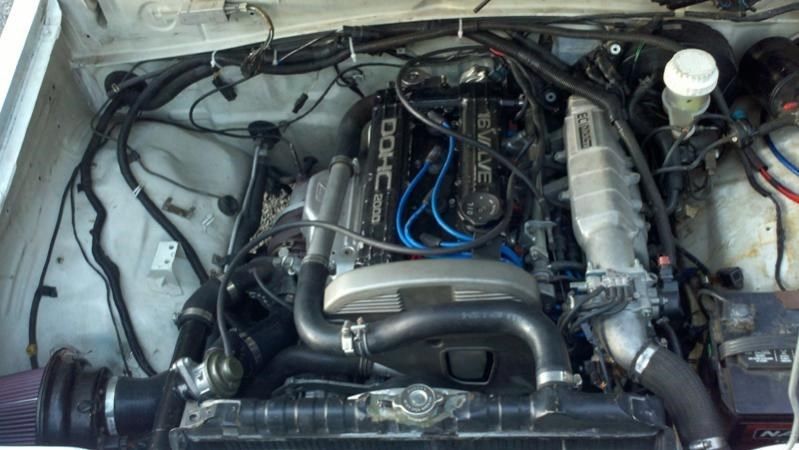
The pics in the above post are the engine cleaned up again and ready to put into the truck, then the engine just installed into the truck, and then with my new 18's after doing a 5 lug swap.
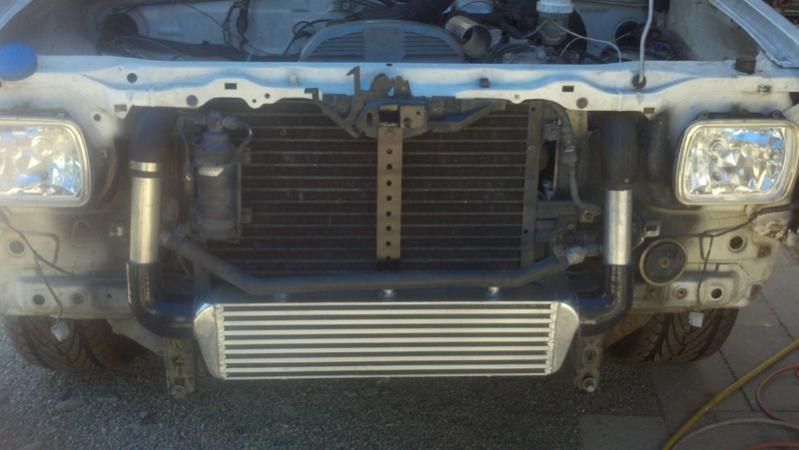
Got the intercooler in its place so I can retain my A/C. Its size is 27x5.5x2.75. It fits right under the a/c lines and the piping goes right around them. Sticks right through the middle of the bumper so should see plenty of fresh cold air.
Engine finished being installed and how it sat until the recent pull apart.
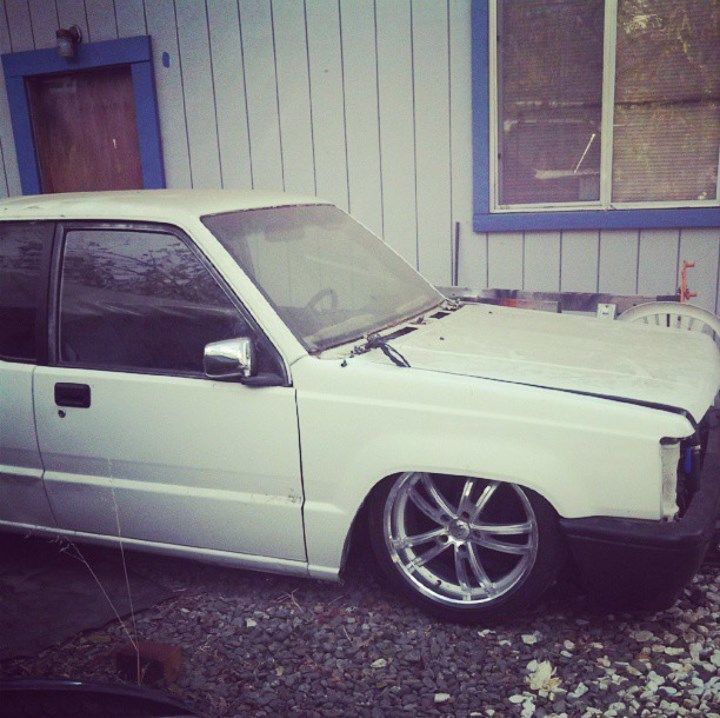
Sporting a ~ 4/5 drop after the engine swap
Got the intercooler in its place so I can retain my A/C. Its size is 27x5.5x2.75. It fits right under the a/c lines and the piping goes right around them. Sticks right through the middle of the bumper so should see plenty of fresh cold air.
Engine finished being installed and how it sat until the recent pull apart.
Sporting a ~ 4/5 drop after the engine swap
droppedmitsu
+1y
Got a new all aluminum radiator for the truck, the old one was falling apart and I think leaking a little too. This one was $135 shipped, got it from sheperdautoparts.com , they are also on ebay for a little more depending on which truck you have. It is of pretty good quality and definitely cant complain for the price, everything fit like the OEM one also. Also put on a new upper rad. hose and pipe.
Painted one side of my trucks wheels black to see how it would look.
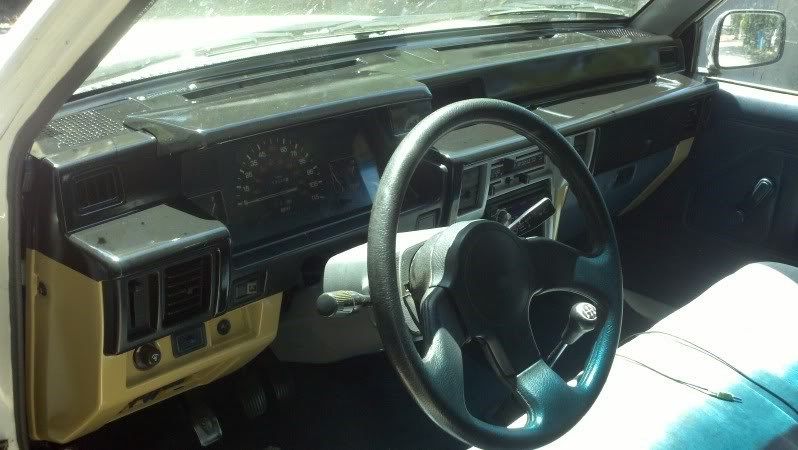
I smoothed and painted the dash. Took tons of sanding and high build primer, came out pretty good I would say.
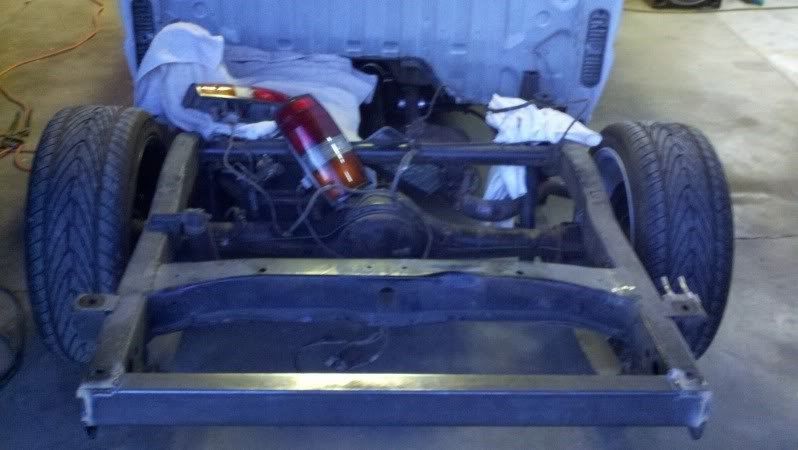
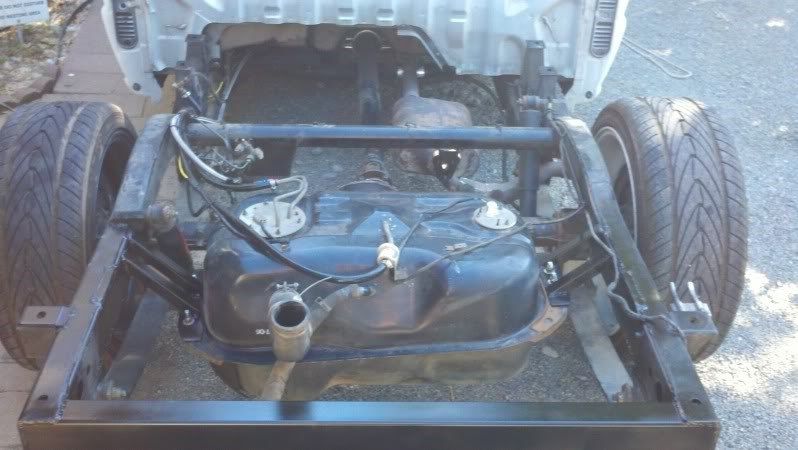
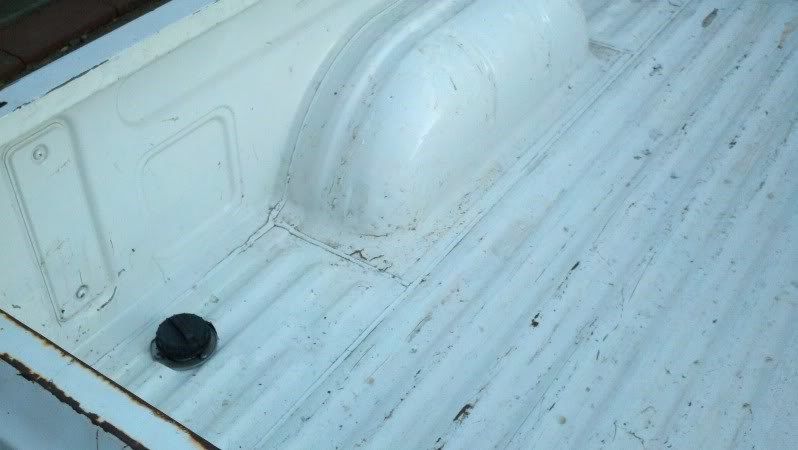
Moved the tank behind the axle because I switched to a f.i. tank with the pump in the tank, and in prep for bags. Fuel filler location and tank were temporary, as they were changed for an aluminum fuel cell and a different filler location.
Painted one side of my trucks wheels black to see how it would look.
I smoothed and painted the dash. Took tons of sanding and high build primer, came out pretty good I would say.
Moved the tank behind the axle because I switched to a f.i. tank with the pump in the tank, and in prep for bags. Fuel filler location and tank were temporary, as they were changed for an aluminum fuel cell and a different filler location.


droppedmitsu
+1y
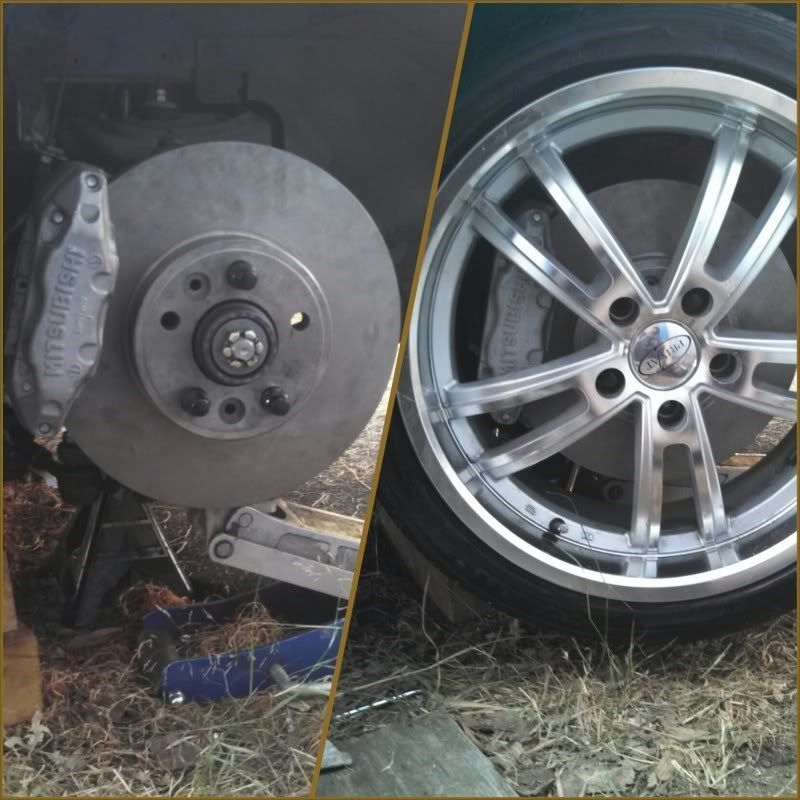
Been working on a big brake kit for our trucks. I'm going to be using 3000gt VR4 4 piston calipers and 12.5" rotors. I've almost got it finished, I have my test bracket made and it all lines up pretty good, just need to make my final version for both sides.
AND THIS IS WHERE I AM RIGHT NOW
Still working on the brake upgrade, pass side is pretty much done, drivers side will require a bracket with a little different shape and I haven't even messed with it.
I have been working on bagging my truck and have the front about 75% done, waiting on a few parts for it and some powder coat and it will be finished up. I still need to buy all the parts for the back of my truck to bag it but I'll worry about that soon enough. Here's a pic with the front almost laying
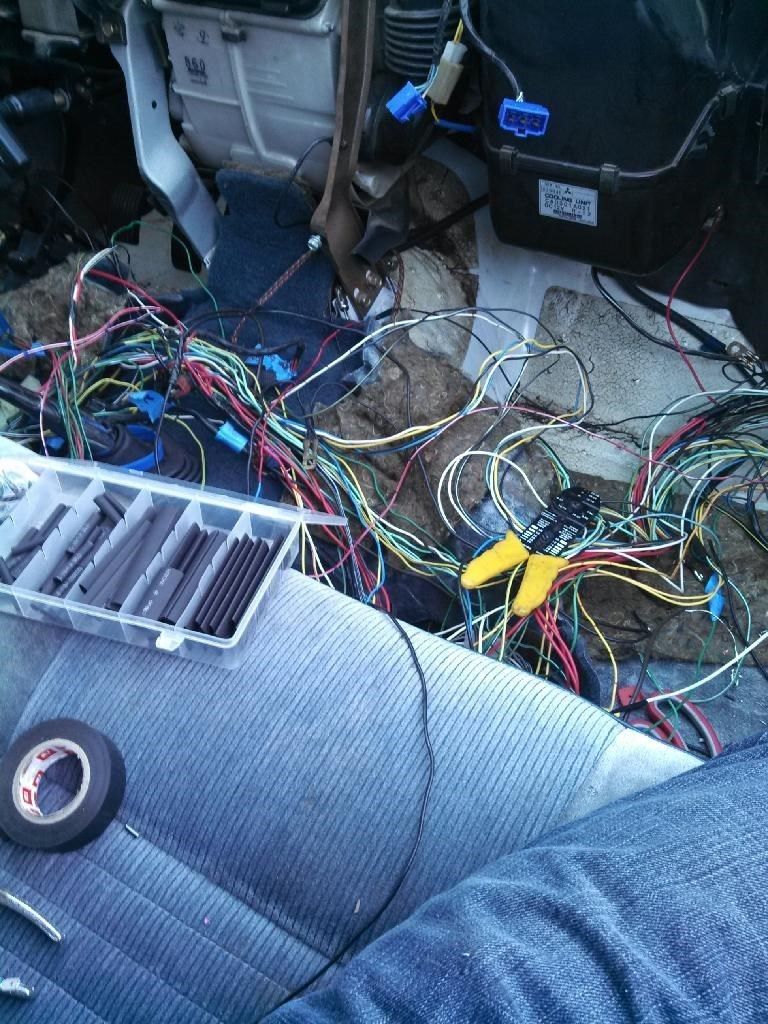
Also working on a wire tuck and major harness clean up/redo. The engine harness will be ran inside behind the firewall and come out on the lower drivers side firewall and run to the engine/acc. You will be able to see it but hopefully not a whole lot of it, we shall see. The chassis harness on the drivers side will come out of the cab behind the fender/in front of door and run behind the fender along the inner fender well and then to all there respective places. Battery is being relocated to the back under the bed, on the side of the frame rail.
This was barely just the start of unlooming the engine harness, its a mess now lol
AND THIS IS WHERE I AM RIGHT NOW
Still working on the brake upgrade, pass side is pretty much done, drivers side will require a bracket with a little different shape and I haven't even messed with it.
I have been working on bagging my truck and have the front about 75% done, waiting on a few parts for it and some powder coat and it will be finished up. I still need to buy all the parts for the back of my truck to bag it but I'll worry about that soon enough. Here's a pic with the front almost laying
Also working on a wire tuck and major harness clean up/redo. The engine harness will be ran inside behind the firewall and come out on the lower drivers side firewall and run to the engine/acc. You will be able to see it but hopefully not a whole lot of it, we shall see. The chassis harness on the drivers side will come out of the cab behind the fender/in front of door and run behind the fender along the inner fender well and then to all there respective places. Battery is being relocated to the back under the bed, on the side of the frame rail.
This was barely just the start of unlooming the engine harness, its a mess now lol


truck action
+1y
Looks good,keep up the work!!
droppedmitsu
+1y
Thanks Gary, can't wait to drive my truck again so I'm working hard on it.
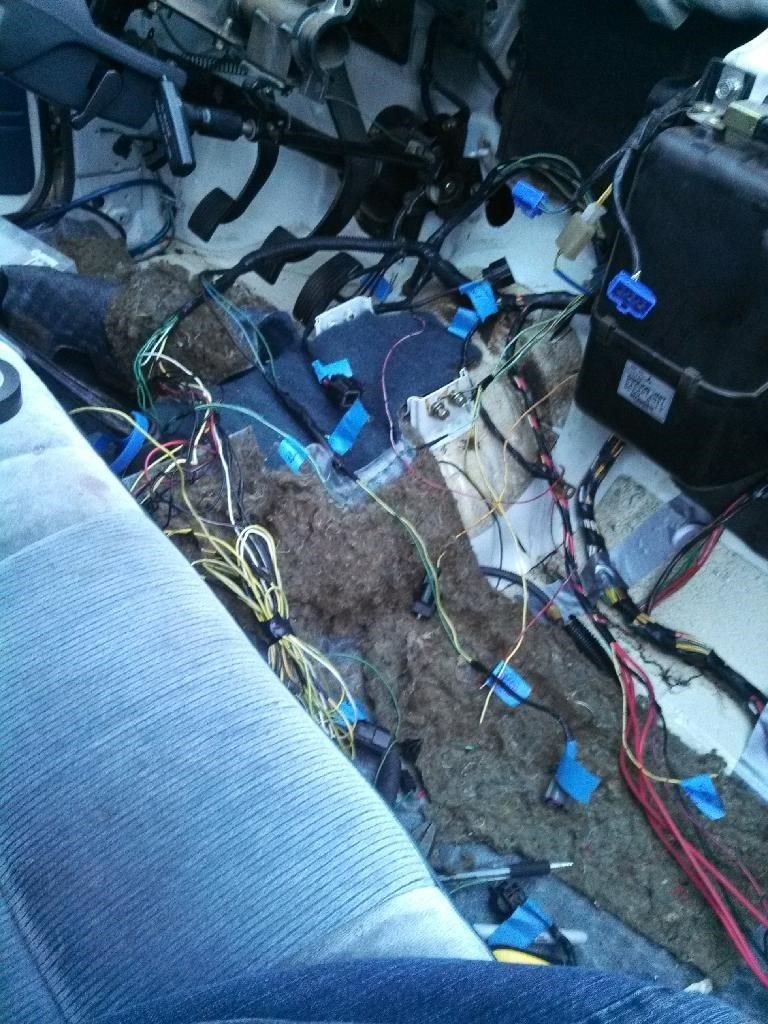
Cleaning my engine wiring harness up still, had tons of wires to trace to make sure I could remove them and lots of connections to fix. Also having to clean up some of my rushed/cheaply done wiring work. It is looking much cleaner now and I might have it pretty close to finished tomorrow or for sure Friday. After that I'll start on the chassis/power wiring that was on the drivers side fenderwell.
Here's where I left off yesterday:
[IMG]http://i32.photobucket.com/albums/d27/mxracer728/IMG_20131231_141711_zpsskgvt07z.jpg[/IMG]
Here's where I end today:
[IMG]http://i32.photobucket.com/albums/d27/mxracer728/IMG_20140101_155559_zpsxgrgixsx.jpg[/IMG]
droppedmitsu
+1y
.

Deluxe_D100
+1y
Sweet! Looking forward to seeing the progress. The thought of dealing with all that wiring gives me a headache.
droppedmitsu
+1y
Yea Brandon there is tons of wiring to go through, kind of a pain but well worth it in the end. I am lucky that wiring doesn't bother me too much, kind of relaxing IMO.
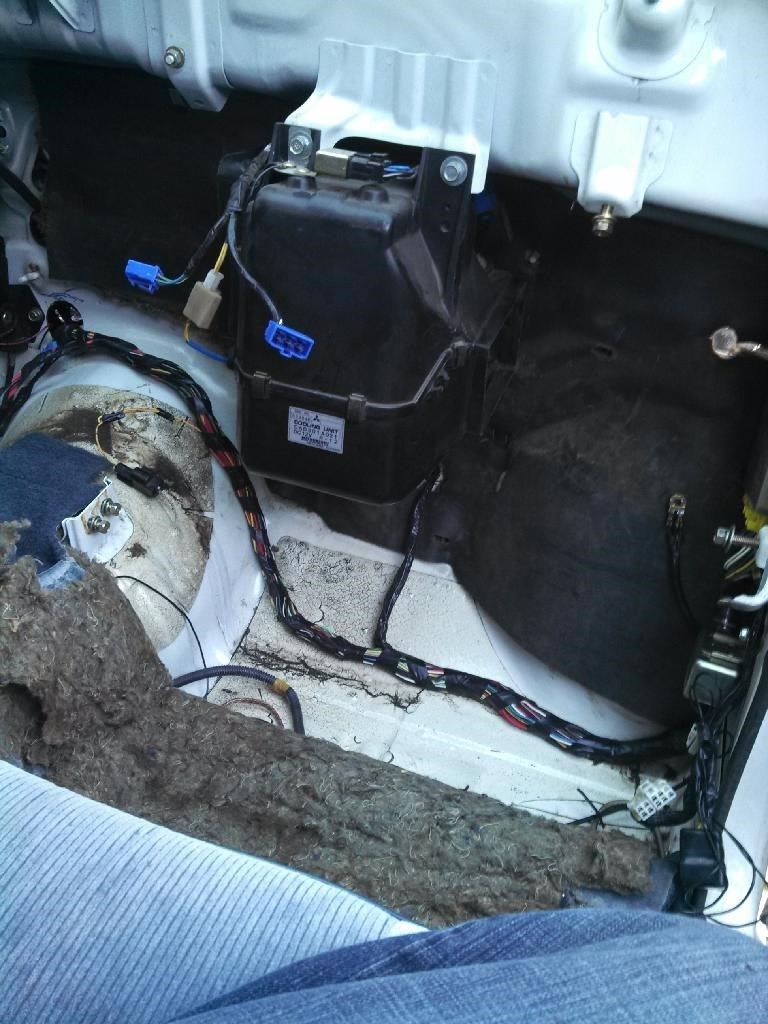
You can't tell by the last pic but here is where I left off:
Engine harness pretty much done, still have to put the plugs on for the injectors, MAF, and o2 sensor. And connect my power wires(red ones) to the fuse box/chassis harness.
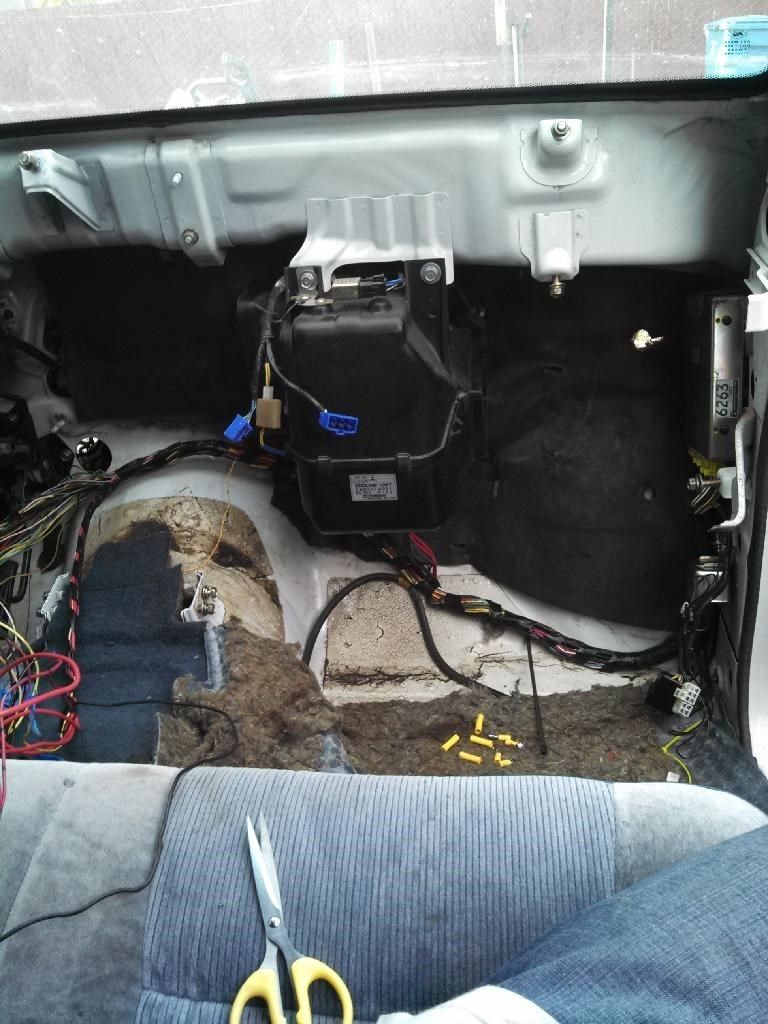
Inside floorboard:
And pic of the engine bay, pretty much no electrical wiring can be seen besides a few little parts:
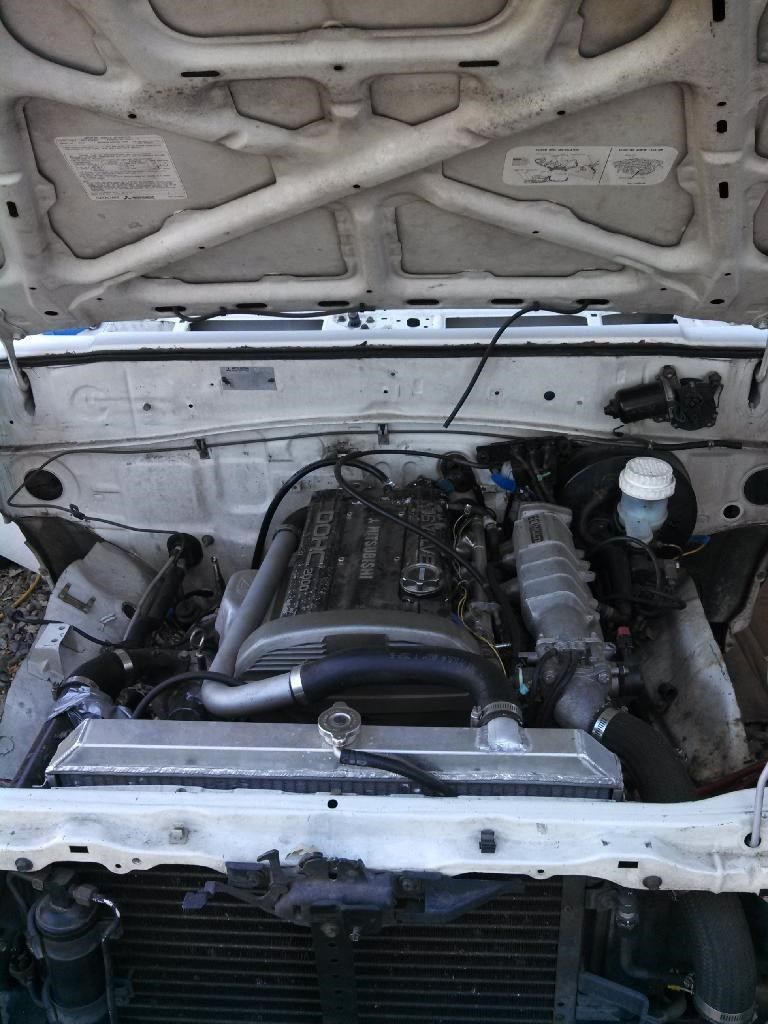
I'll get better engine bay pics once I get my truck a little further along. Still have to do the driver's side battery/chassis harness next.
You can't tell by the last pic but here is where I left off:
Engine harness pretty much done, still have to put the plugs on for the injectors, MAF, and o2 sensor. And connect my power wires(red ones) to the fuse box/chassis harness.
Inside floorboard:
And pic of the engine bay, pretty much no electrical wiring can be seen besides a few little parts:
I'll get better engine bay pics once I get my truck a little further along. Still have to do the driver's side battery/chassis harness next.

truck action
+1y
Wiring work to most is a pain,!
Here's a tool I use very much: Scotch Code ,made by 3M
SWD Write-on tape dispenser #054007-11954
The refills are pricey but will worth it for labeling wires,which pays off years later.
Goggle it to see what it looks like,can find @ most electrical supplies!
Use a fine point Sharpie!!
Here's a tool I use very much: Scotch Code ,made by 3M
SWD Write-on tape dispenser #054007-11954
The refills are pricey but will worth it for labeling wires,which pays off years later.
Goggle it to see what it looks like,can find @ most electrical supplies!
Use a fine point Sharpie!!
Related Discussions in Build-Ups
Thread
Posts
Last Post
32

last post by
baha 5 mo
0
V
last post by
Vic 9 mo

168
last post by
truck action +1y