Street Source is shutting down April 30th, 2026. Read the announcement

Turbo KIA FE3 Stroker Build

jmuse8482
+1y
Well here it goes...... It has taken almost 1 1/2 year to complete this project, and there is still more I'd like to do. But, i thought I'd share what i have done thus far and create a build thread, for everyone if they have the urge to follow. With all the controversy on this topic that is out there aside, no oil issues, no spun bearings it just simply works when done right. Following is a list of parts used.
Engine : 1998 Kia Sportage
Connecting Rods : Kia Sportage
Crankshaft : Mazda F2
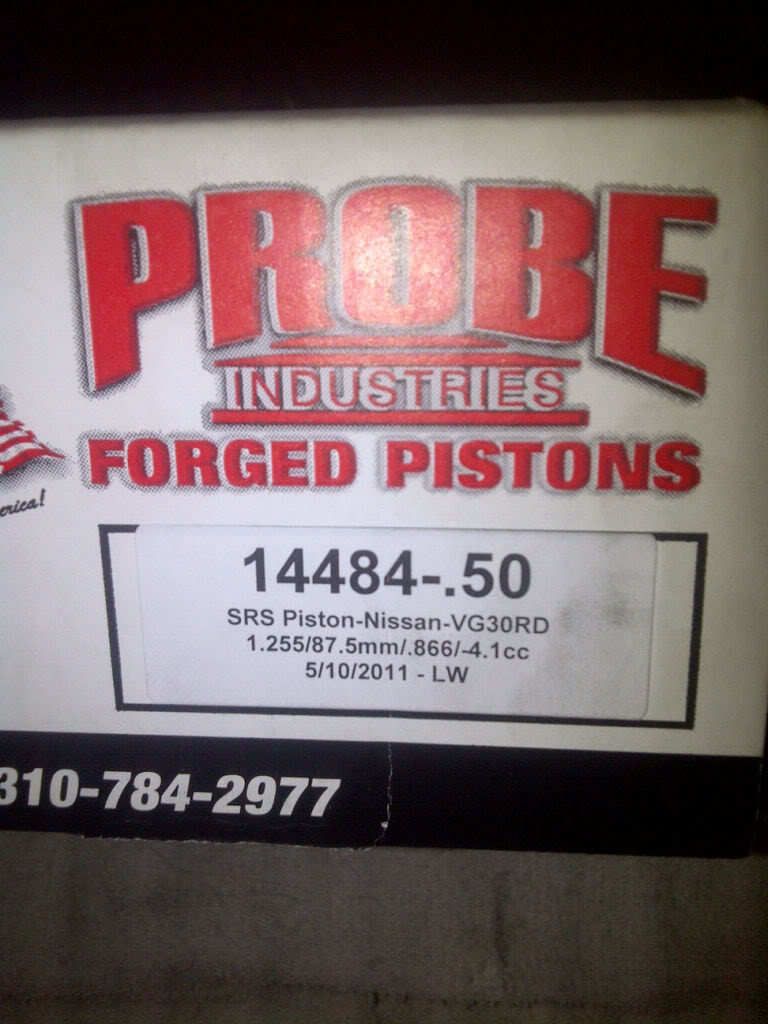
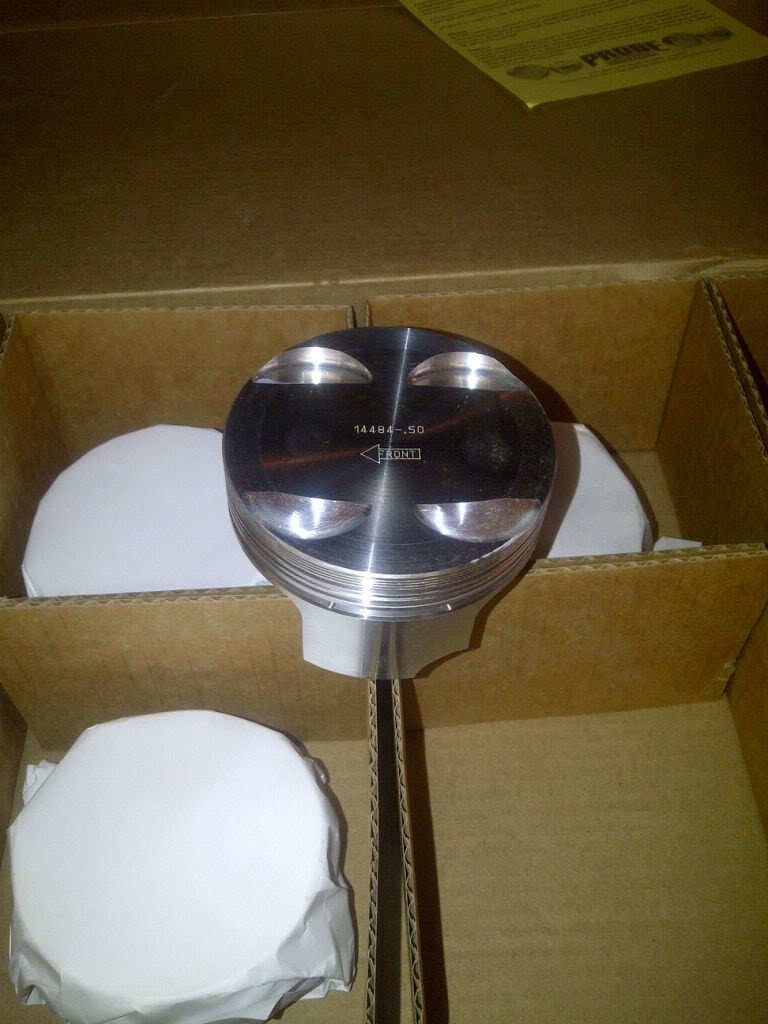
Pistons : Probe Industries SRS Forged 87.5mm
Nissan VG30DETT -4.1 Reverse Dome 1.25CH
Piston Rings : Nissan VG30DETT Over Bore 87.5mm
Head Fastener : ARP Head Studs, Nuts & Washers
Part #AU4.800-1LUB / 300-8307 / 200-8516
Cylinder Head : Kia Sportage
Head Gasket : Kia Sportage
Valve Springs : Vw VR6 Springs
Turbo Manifold : Modified T25 Miata BP18 Tubular
Turbo : GT3076R 14.5psi Intake :4 inch
Outlet: 2.5 inch
Compressor trim: 70 ar
Compressor Wheel diameter: 59.00 / 73.05
Turbine wheel diameter : 47.05 / 54.50
Exhaust trim: .86ar
Turbine flange type: t25 flange
Downpipe flange type : 2.5 v band
Cooling type: oil and water cool
Engine Accessories : All Mazda B2200
Engine Management : MegaSquirt
Injectors : Supra 440cc
Fuel Rail : Modified Kia Sportage
Intake : Kia Sportage Upper with modified Kia Lower
Ignition : 2 GM Coil Packs (w) Crank Trigger
Clutch : Modified F2T Flywheel and Pressure Plate with B2200 Ring Gear Installed. Custom Clutch Disk all from South Bend.
And i still maybe forgetting somethings but i should remember as i go..................... NOW ..........
The Machine Work :
I wanted to do these as cheaply as possible, but i made a few mistakes along the way which cost me more. So with this info hopefully it wont happen to anyone else. I started with an acceptable Kia Block, had line bore checked, deck checked and everything checked for cracks. One of the biggest reason i used these particular pistons mentioned above is because of cost. Probe was and has since discontinued their line of import pistons. So i got those pistons rated to well over 800hp in a set of 6 for $100 Shipped. NO SHIZZLE ! They are 1.5mm bigger than the Fe3 bore, so obviously i had to have the engine bored. Even with that much machining, there is still allot of meat left and can still use factory head gasket. Now for a few pictures :
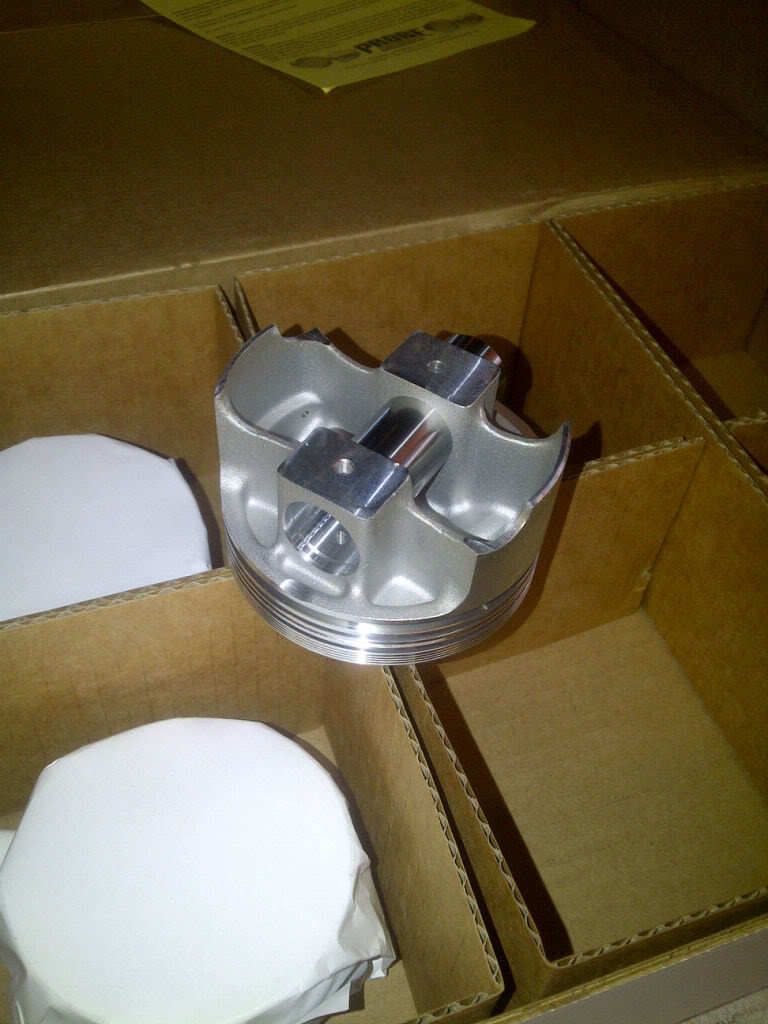
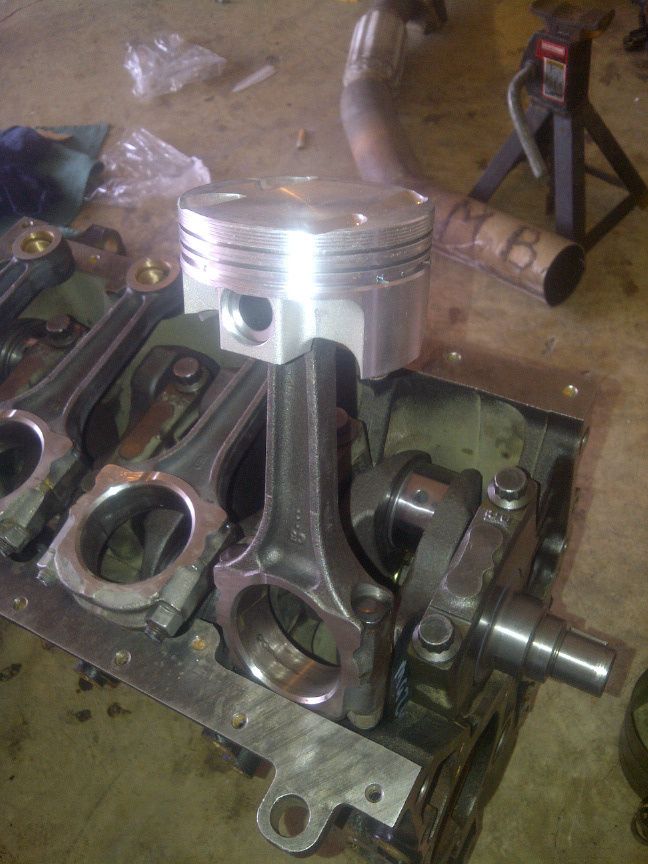
The Piston :
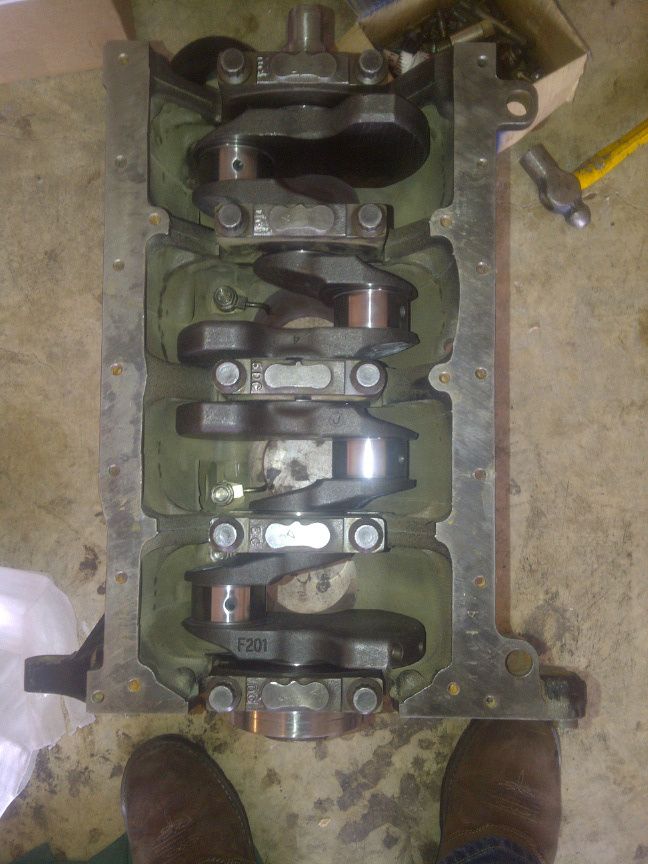
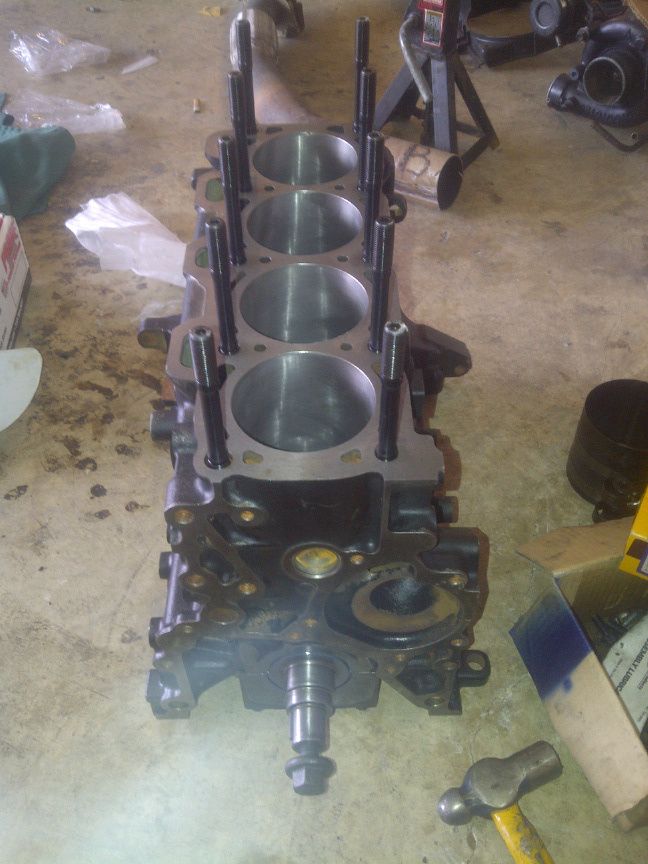
The Block With F2 Crank and after machining :
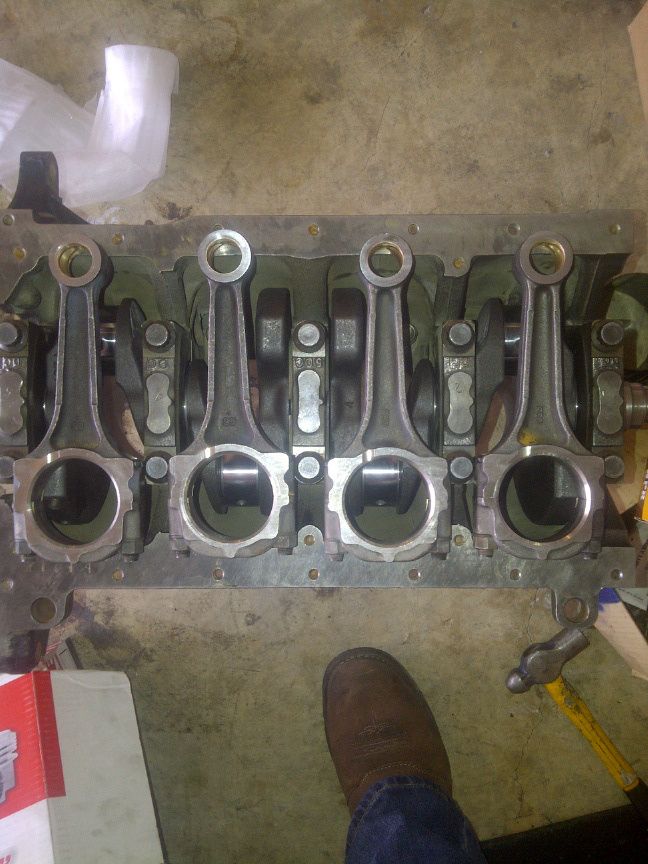
Now, Kia/FE3 connecting rods in their present form will NOT fit the VG30DETT pistons.
You will have to have them machined to fit as they are wider than the piston is. Wrist
pin diameter is the same and still full floating.
(NOTE):I was sure to have everything checked before assembly to make sure the tolerance were
correct and the rotating assembly was balanced. I had the block decked, head decked and crank machine as well. As for the bearings, I used F2 main bearings, but you cannot use F2 rod bearings in a KIA/FE3 rod. Will not fit, one of my other $$ mistakes.
Engine : 1998 Kia Sportage
Connecting Rods : Kia Sportage
Crankshaft : Mazda F2
Pistons : Probe Industries SRS Forged 87.5mm
Nissan VG30DETT -4.1 Reverse Dome 1.25CH
Piston Rings : Nissan VG30DETT Over Bore 87.5mm
Head Fastener : ARP Head Studs, Nuts & Washers
Part #AU4.800-1LUB / 300-8307 / 200-8516
Cylinder Head : Kia Sportage
Head Gasket : Kia Sportage
Valve Springs : Vw VR6 Springs
Turbo Manifold : Modified T25 Miata BP18 Tubular
Turbo : GT3076R 14.5psi Intake :4 inch
Outlet: 2.5 inch
Compressor trim: 70 ar
Compressor Wheel diameter: 59.00 / 73.05
Turbine wheel diameter : 47.05 / 54.50
Exhaust trim: .86ar
Turbine flange type: t25 flange
Downpipe flange type : 2.5 v band
Cooling type: oil and water cool
Engine Accessories : All Mazda B2200
Engine Management : MegaSquirt
Injectors : Supra 440cc
Fuel Rail : Modified Kia Sportage
Intake : Kia Sportage Upper with modified Kia Lower
Ignition : 2 GM Coil Packs (w) Crank Trigger
Clutch : Modified F2T Flywheel and Pressure Plate with B2200 Ring Gear Installed. Custom Clutch Disk all from South Bend.
And i still maybe forgetting somethings but i should remember as i go..................... NOW ..........
The Machine Work :
I wanted to do these as cheaply as possible, but i made a few mistakes along the way which cost me more. So with this info hopefully it wont happen to anyone else. I started with an acceptable Kia Block, had line bore checked, deck checked and everything checked for cracks. One of the biggest reason i used these particular pistons mentioned above is because of cost. Probe was and has since discontinued their line of import pistons. So i got those pistons rated to well over 800hp in a set of 6 for $100 Shipped. NO SHIZZLE ! They are 1.5mm bigger than the Fe3 bore, so obviously i had to have the engine bored. Even with that much machining, there is still allot of meat left and can still use factory head gasket. Now for a few pictures :
The Piston :
The Block With F2 Crank and after machining :
Now, Kia/FE3 connecting rods in their present form will NOT fit the VG30DETT pistons.
You will have to have them machined to fit as they are wider than the piston is. Wrist
pin diameter is the same and still full floating.
(NOTE):I was sure to have everything checked before assembly to make sure the tolerance were
correct and the rotating assembly was balanced. I had the block decked, head decked and crank machine as well. As for the bearings, I used F2 main bearings, but you cannot use F2 rod bearings in a KIA/FE3 rod. Will not fit, one of my other $$ mistakes.
Post was last edited on Jun 02, 2013 05:59. Edited 1
time.
jmuse8482
+1y
This is the engine block assembled :
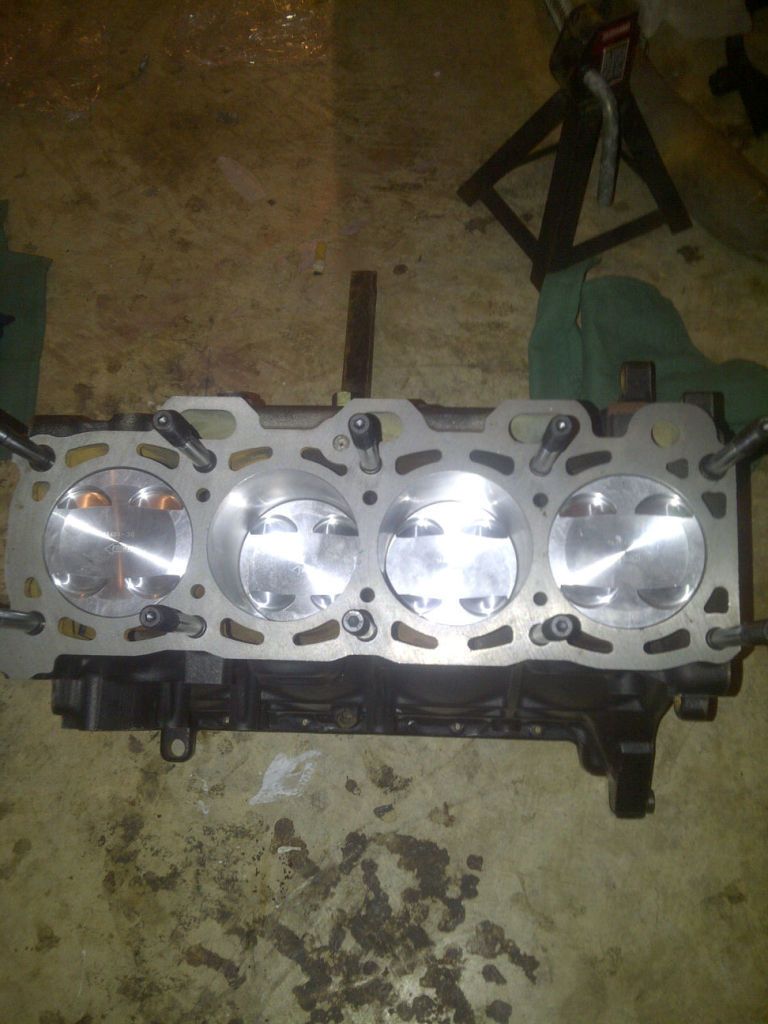
Shown with factory gasket :
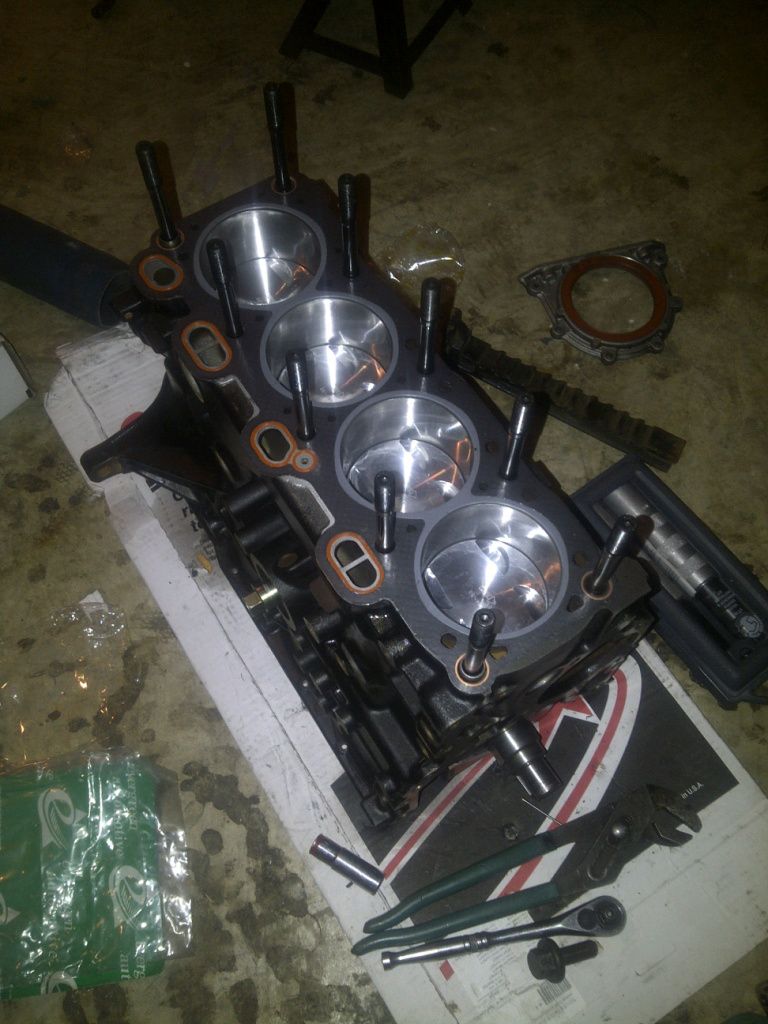
So with the F2 crank and the 87.5mm pistons I ended up with a total displacement of 2261cc's. With the pistons and all the machine work i ended up with a 10.1:1 Compression ratio.
Shown with factory gasket :
So with the F2 crank and the 87.5mm pistons I ended up with a total displacement of 2261cc's. With the pistons and all the machine work i ended up with a 10.1:1 Compression ratio.
Post was last edited on Jun 01, 2013 08:33. Edited 1
time.
jmuse8482
+1y
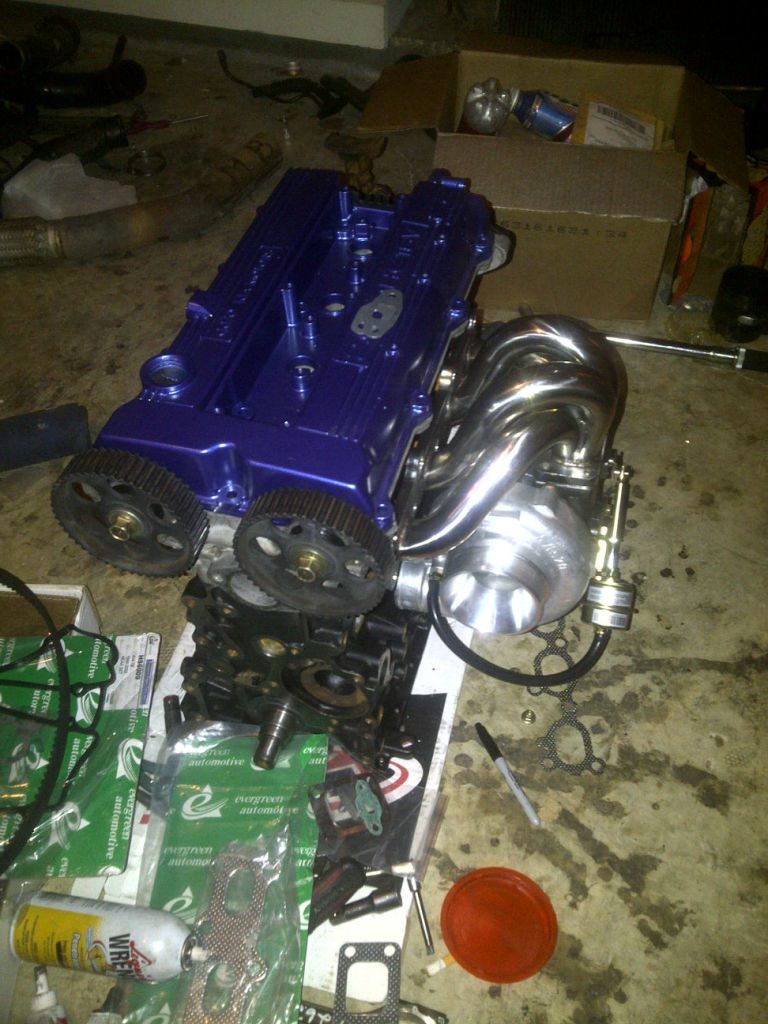
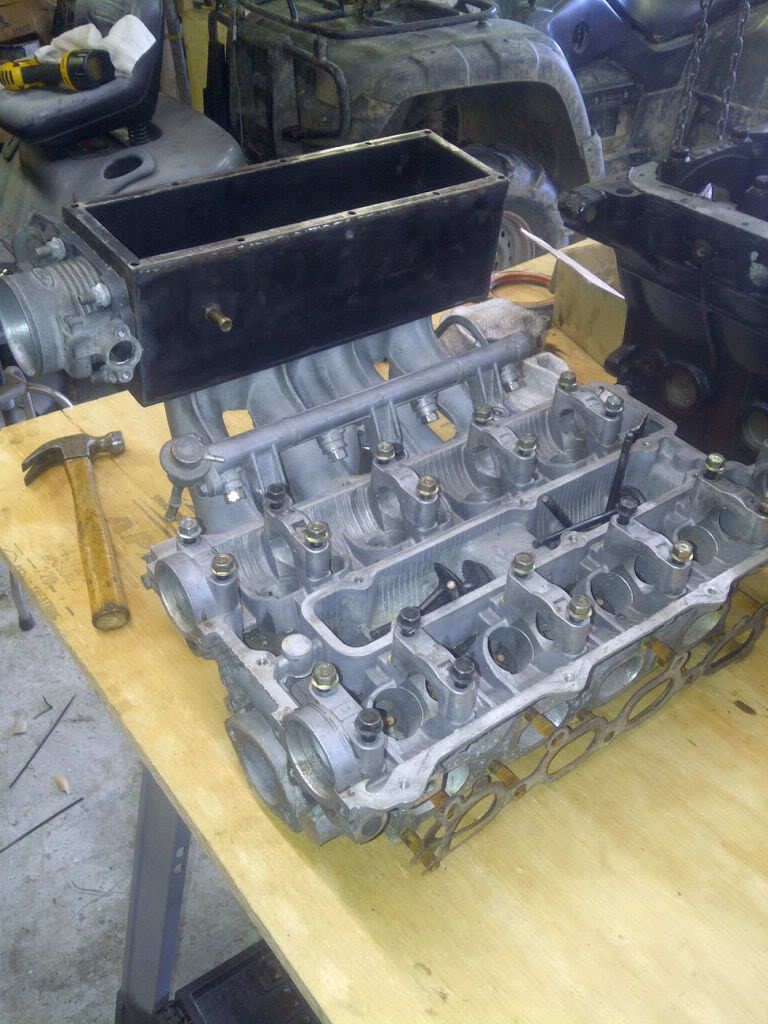
Cylinder head :
I did not dive to far into head modifications. The head received a valve job and I did gasket match everything. I used Volkswagen VR6 valves springs along with the factory Kia Inner valve spring. I did this so the engine would rev past 7K without valve float.
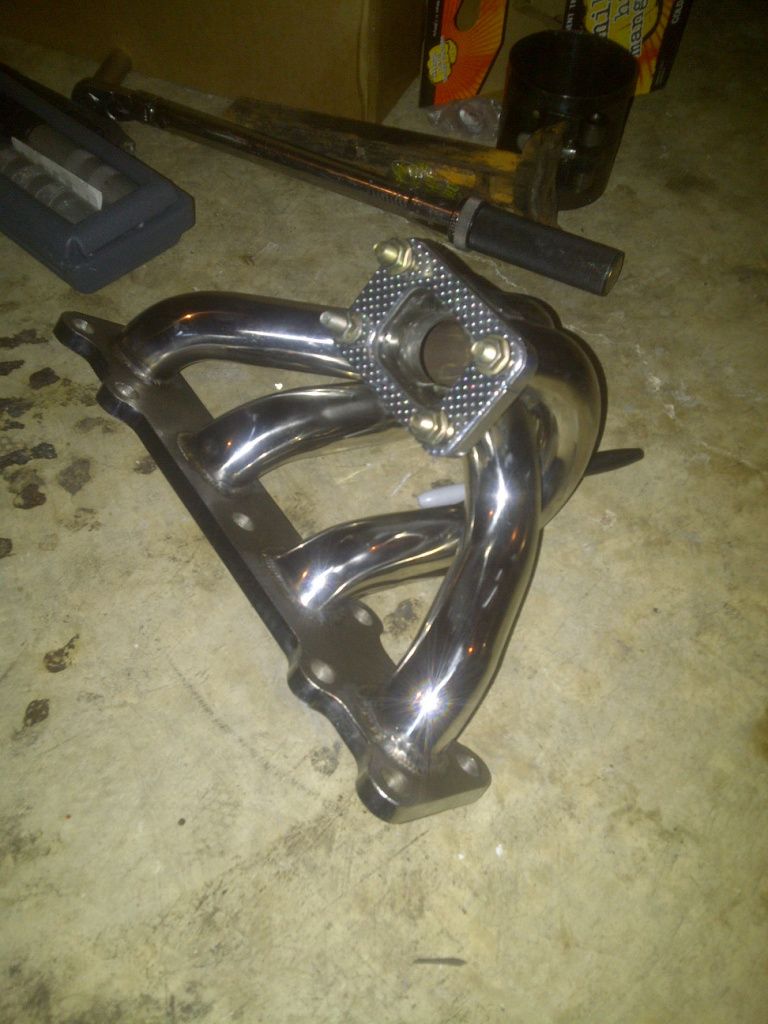
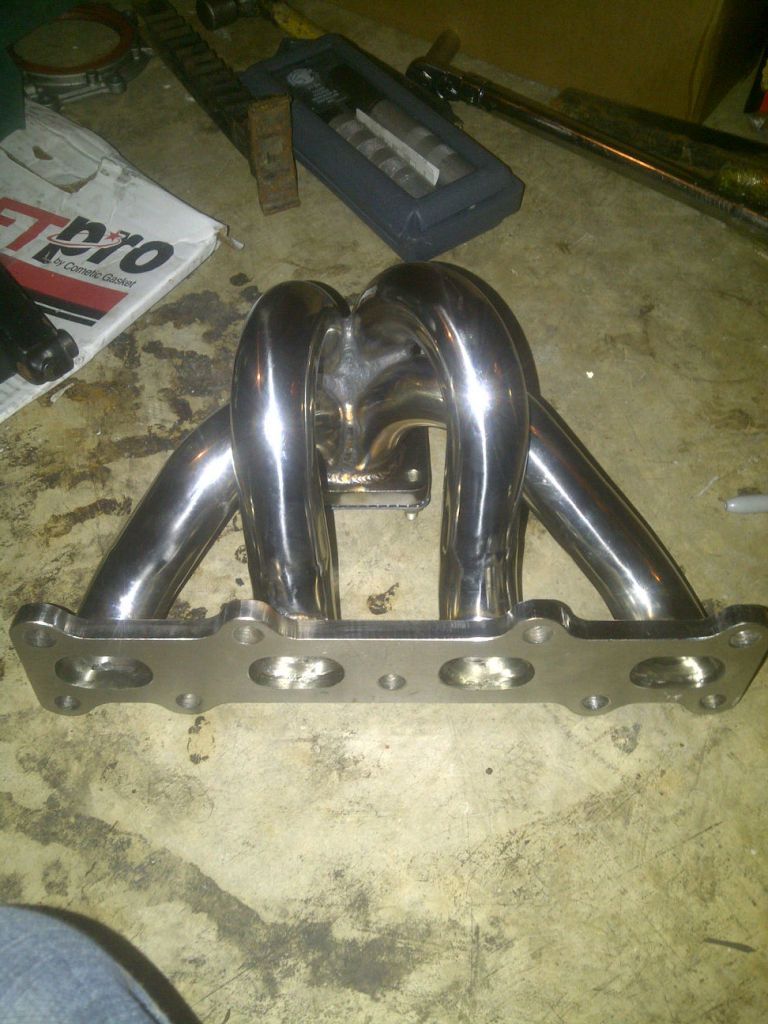
The exhaust Manifold :
All though probably not ideal, but for 100$ and some elbo grease and some extra support welds, it works out quite nicely. As you can see from using the BPT18 manifold, there is some drilling/cutting and porting required.

I did not dive to far into head modifications. The head received a valve job and I did gasket match everything. I used Volkswagen VR6 valves springs along with the factory Kia Inner valve spring. I did this so the engine would rev past 7K without valve float.
The exhaust Manifold :
All though probably not ideal, but for 100$ and some elbo grease and some extra support welds, it works out quite nicely. As you can see from using the BPT18 manifold, there is some drilling/cutting and porting required.
jmuse8482
+1y
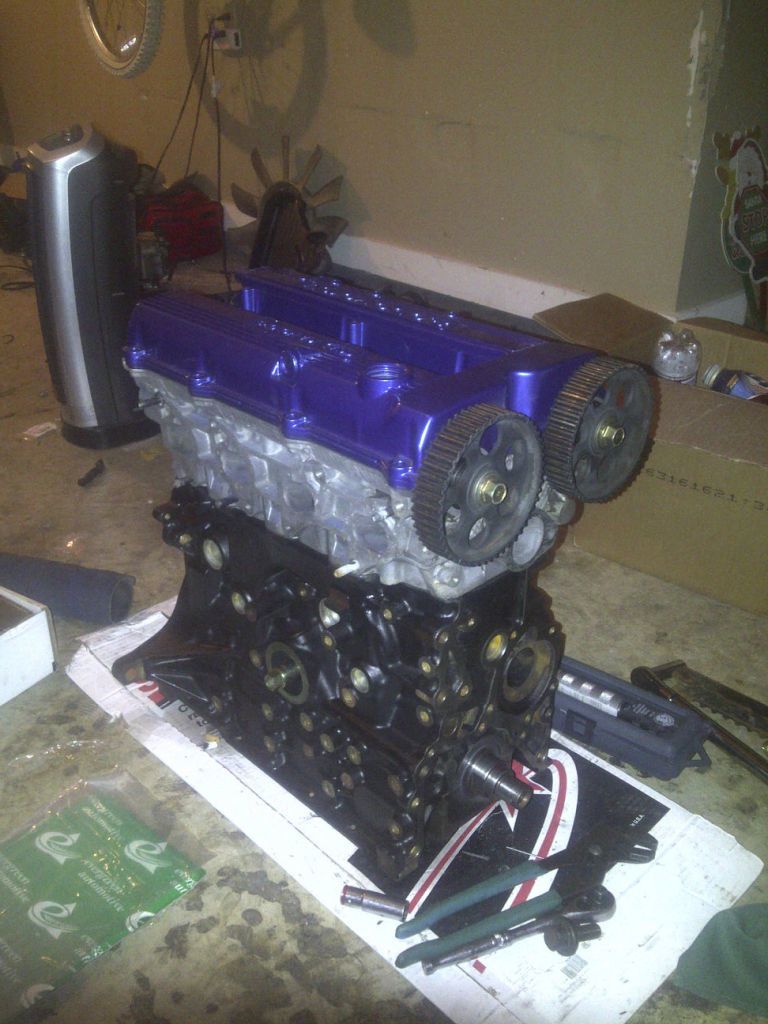
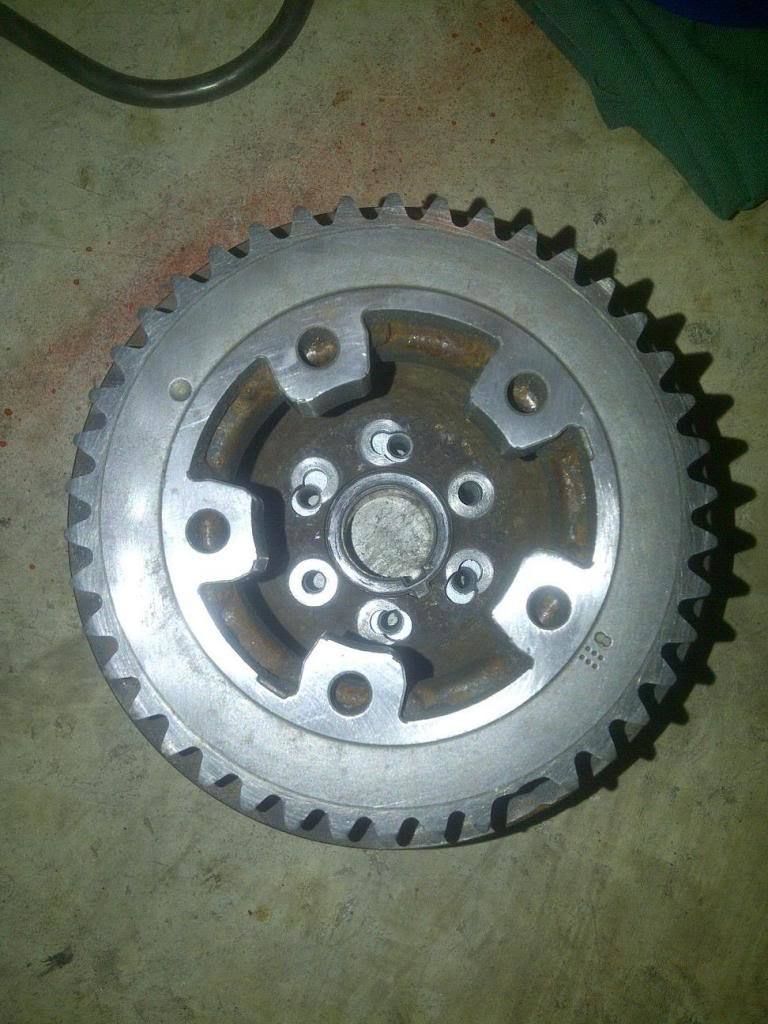
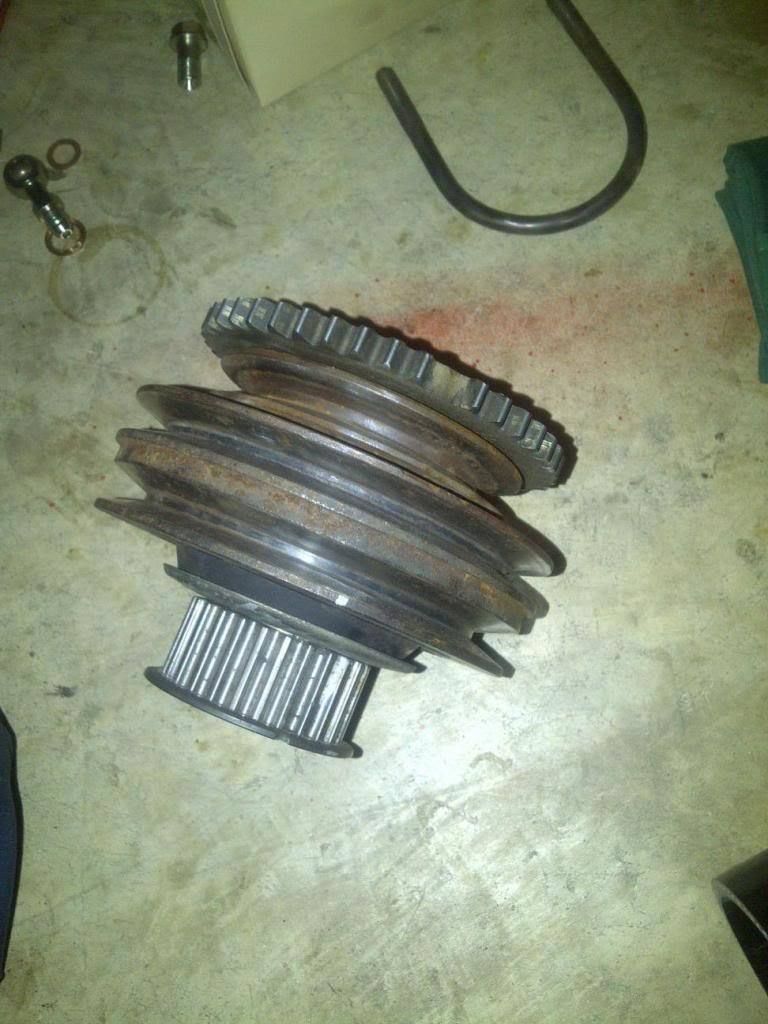
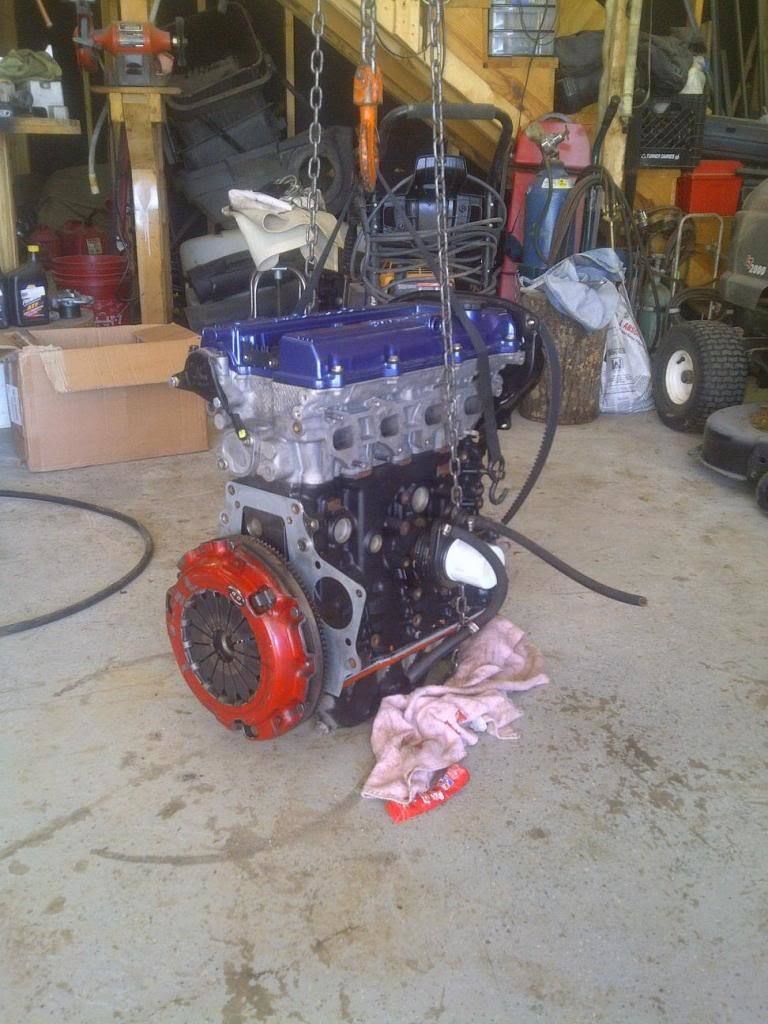
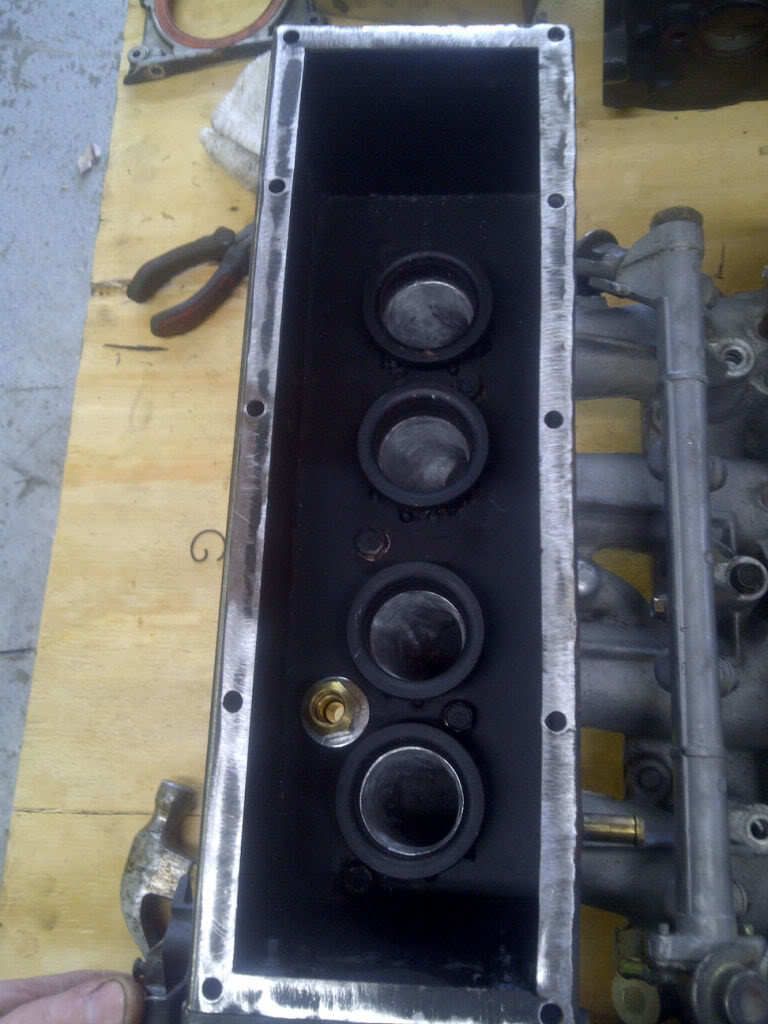
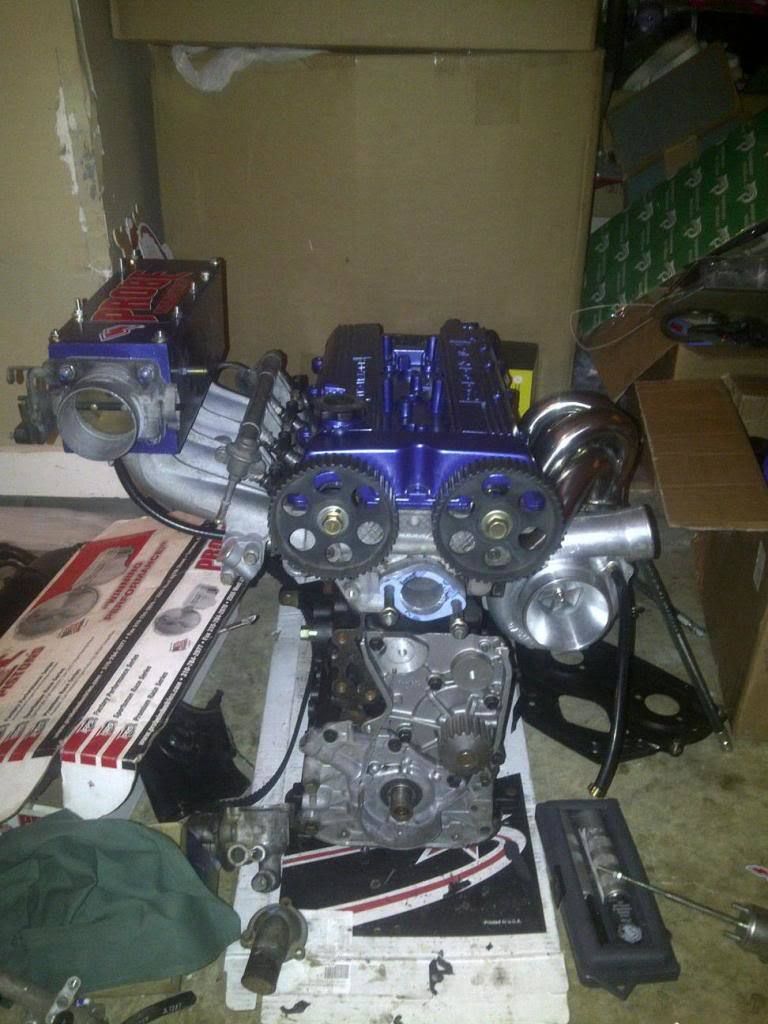
Using your B2200 Accessories :
Plain and simple, you have to use the kia timing sprocket for the crank and it fits on the F2 snout without a hitch. But, balancer bolt holes will not line up. And you cant use F2 sprocket nor the F2 water pump as the Timing Belt tooth spacing is way different. Drilling/Elongating bolt holes is required but not harmful and does not affect alignment due to key way. Everything else is plug and play and bolts right to the block MINUS the B2200 Clutch Fan hub as it hits the bottom of the KIA T-STAT Housing. I said the hell with it and went with some slim fans (electric). This is mine with Crank trigger pressed in.
Plain and simple, you have to use the kia timing sprocket for the crank and it fits on the F2 snout without a hitch. But, balancer bolt holes will not line up. And you cant use F2 sprocket nor the F2 water pump as the Timing Belt tooth spacing is way different. Drilling/Elongating bolt holes is required but not harmful and does not affect alignment due to key way. Everything else is plug and play and bolts right to the block MINUS the B2200 Clutch Fan hub as it hits the bottom of the KIA T-STAT Housing. I said the hell with it and went with some slim fans (electric). This is mine with Crank trigger pressed in.
jmuse8482
+1y
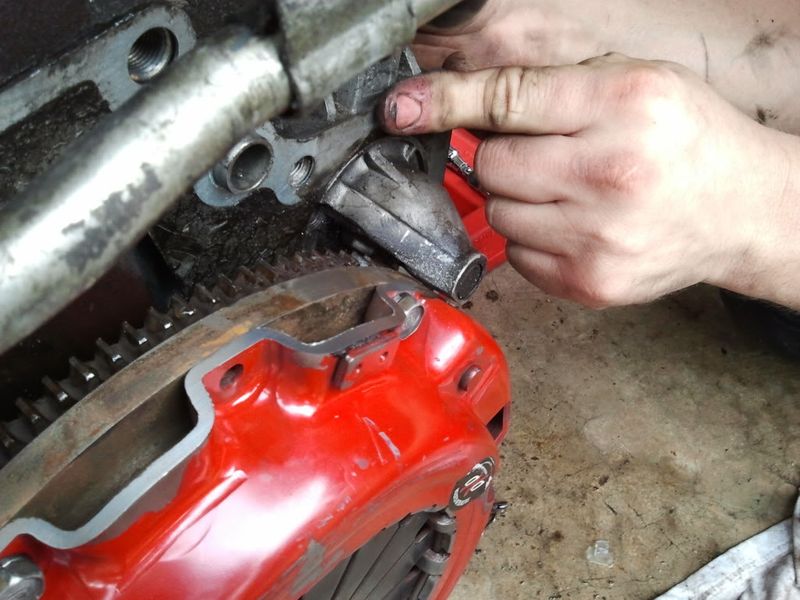
As for the clutch. The F2T has a bigger flywheel disk area and has a bigger clutch disk. So to keep from using the tiny b2200 or kia clutch. I chose to use the F2t flywheel as it has a RX7 Turbo disk. Big Difference. It wont fit the b2200 bell without machining. You will need the ring gear off the b2200's factory flywheel. I took the F2T flywheel to my machinist, had them shave 2mm off the radius with the F2t pressure plate bolted to it. Got it all back and stuck the flywheel in freezer and ring gear of from the b2200 in the over for about 30 min and the ring gear falls right on and looks like this.
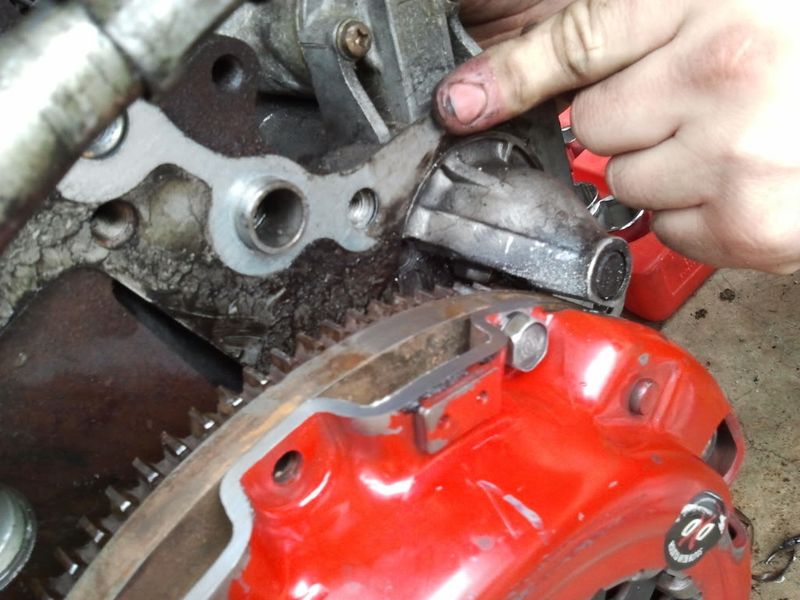
I custom disk is needed to the diameter of the F2T (MX6GT or ProbeGT or Rx7 Turbo II) with the inpute shaft specs from the b2200. You will have to make the very high castings inside the transmissions bell housing go away > it will rub other wise.
I custom disk is needed to the diameter of the F2T (MX6GT or ProbeGT or Rx7 Turbo II) with the inpute shaft specs from the b2200. You will have to make the very high castings inside the transmissions bell housing go away > it will rub other wise.
jmuse8482
+1y
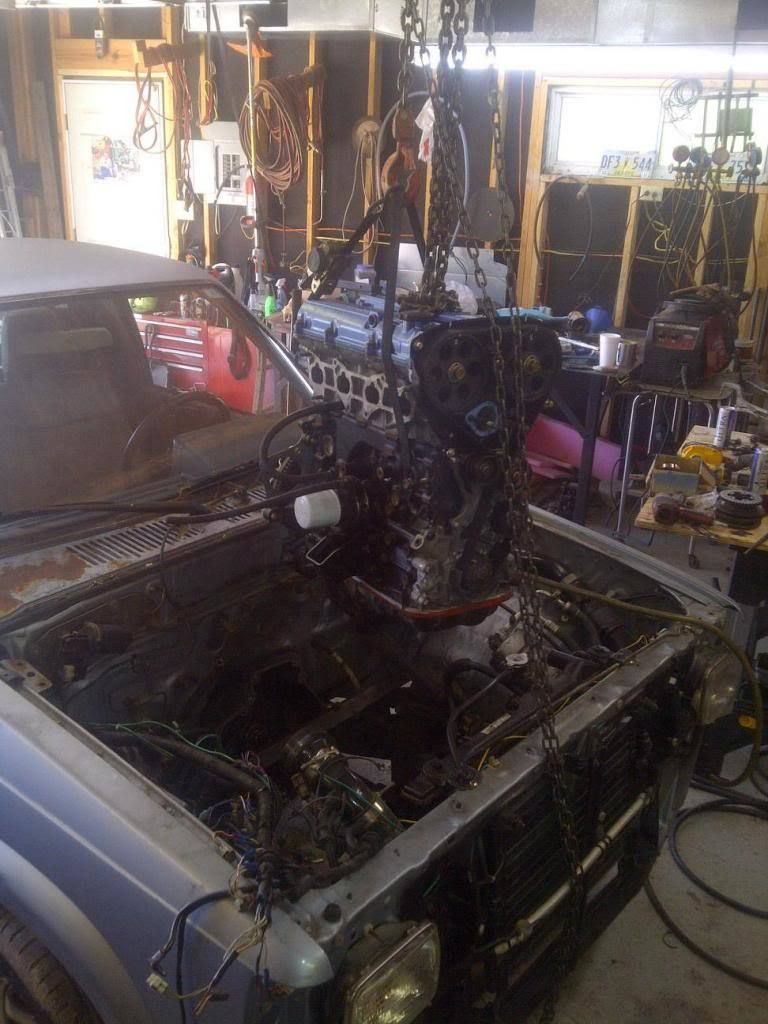
In we go !


applianceguy
+1y
AWESOME!!
I am going to check back periodically to see your progress. I am really looking forward to hearing this thing run!
Thanks for the info!
I am going to check back periodically to see your progress. I am really looking forward to hearing this thing run!
Thanks for the info!
X
xgolferdude
+1y
Do u have any pics of the intake that u are using? Looks like one hell of a build up.
jmuse8482
+1y
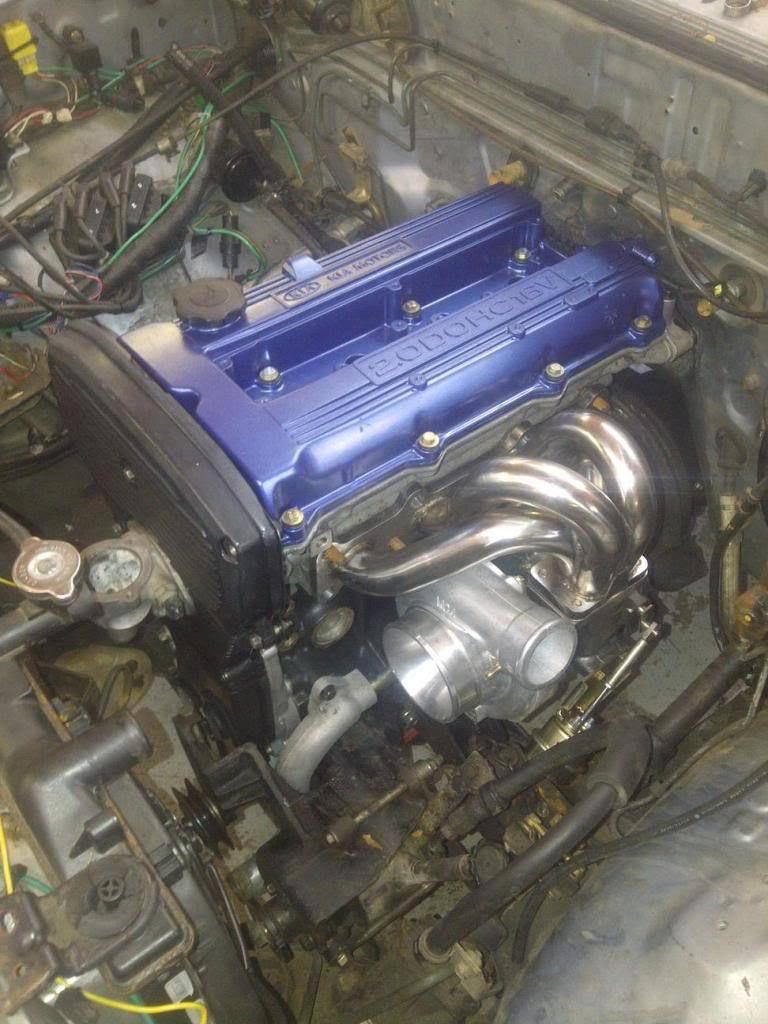
Okay, ill go straight to the intake.
Well, i had at first built my own :
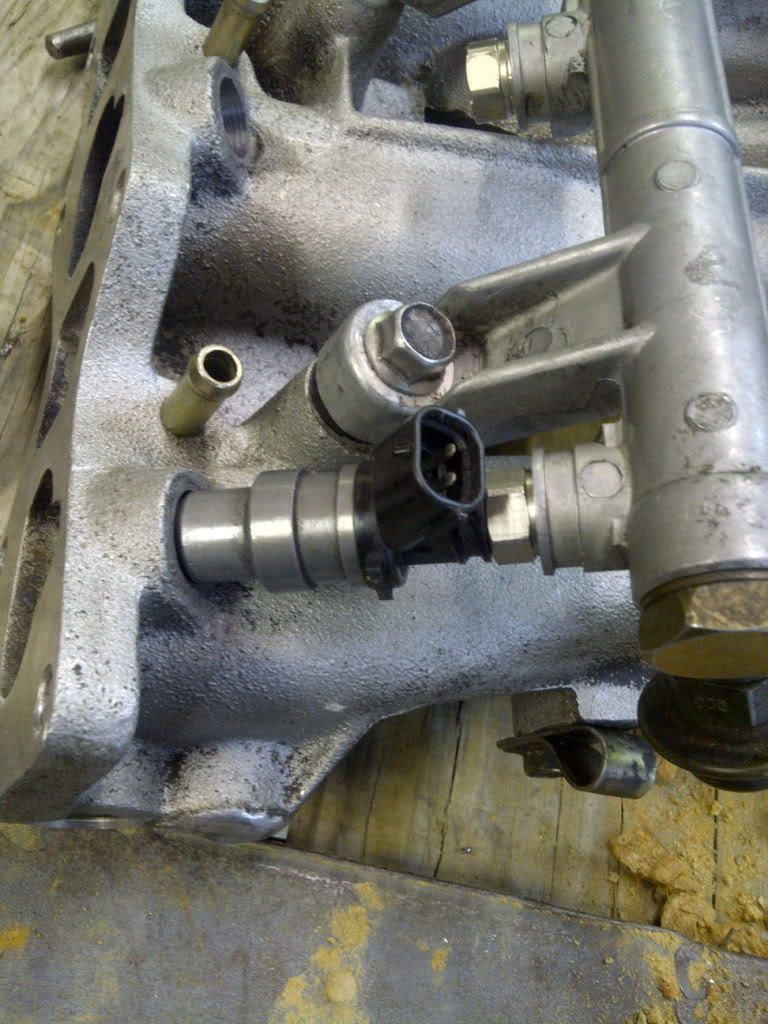
But, sad to say once it was in the truck it didnt clear the front half of the hood by like 6 inches. My mistake, I didnt take into considerations the downwards taper of the hood. So, i ended up using the Kia Sportage Upper and lower. Now, the Kias have those stupid Air Shrouded Fuel injectors, and the injector bosses in the lower in take air absolutely huge as well in the fuel rail. So the fuel rail had to be modified as well along with the lower intake to accept the Supra 440's i was going to use. If i had it to do all over again i would have just tried to find different injectors that would fit. But i was committed so i rolled with it.
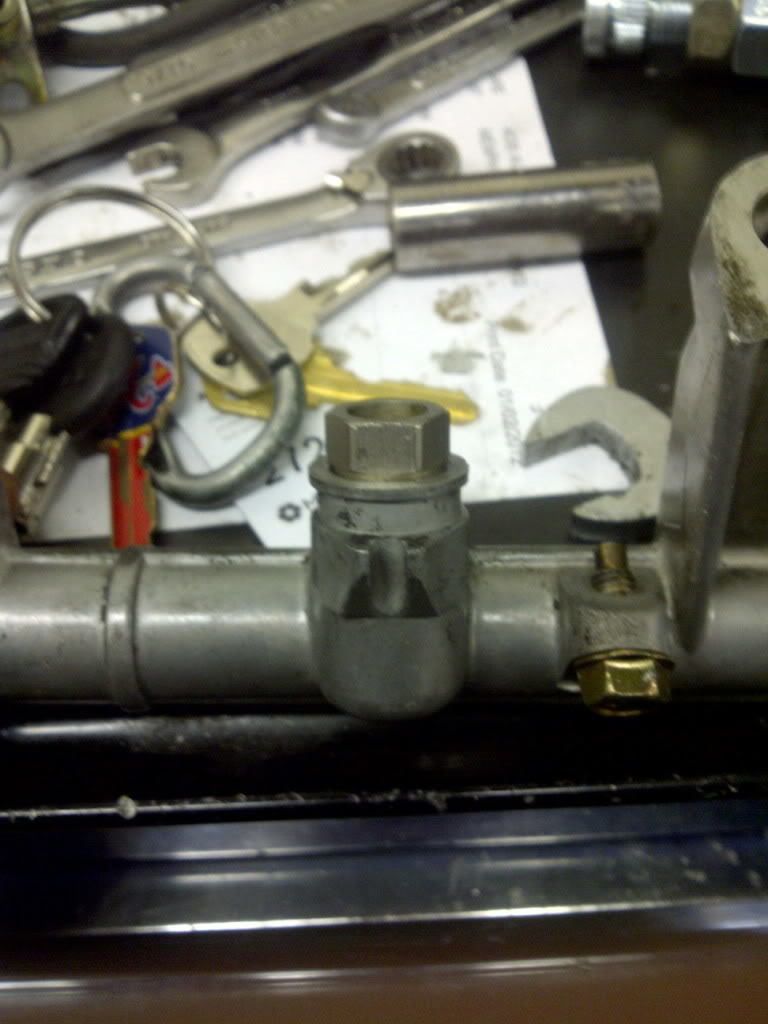
Here is what i did : I got these Ford 4.6 Early 3v plugs (Same place the crankshaft trigger gear came from im using).
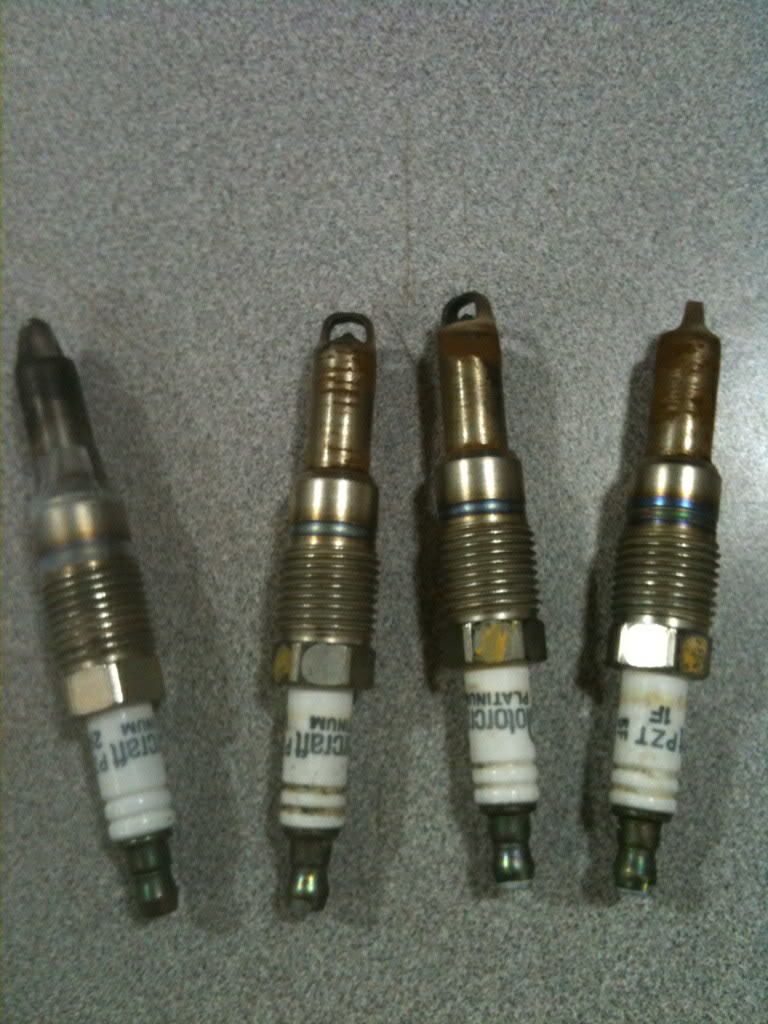
When you cut them apart is looks like this :
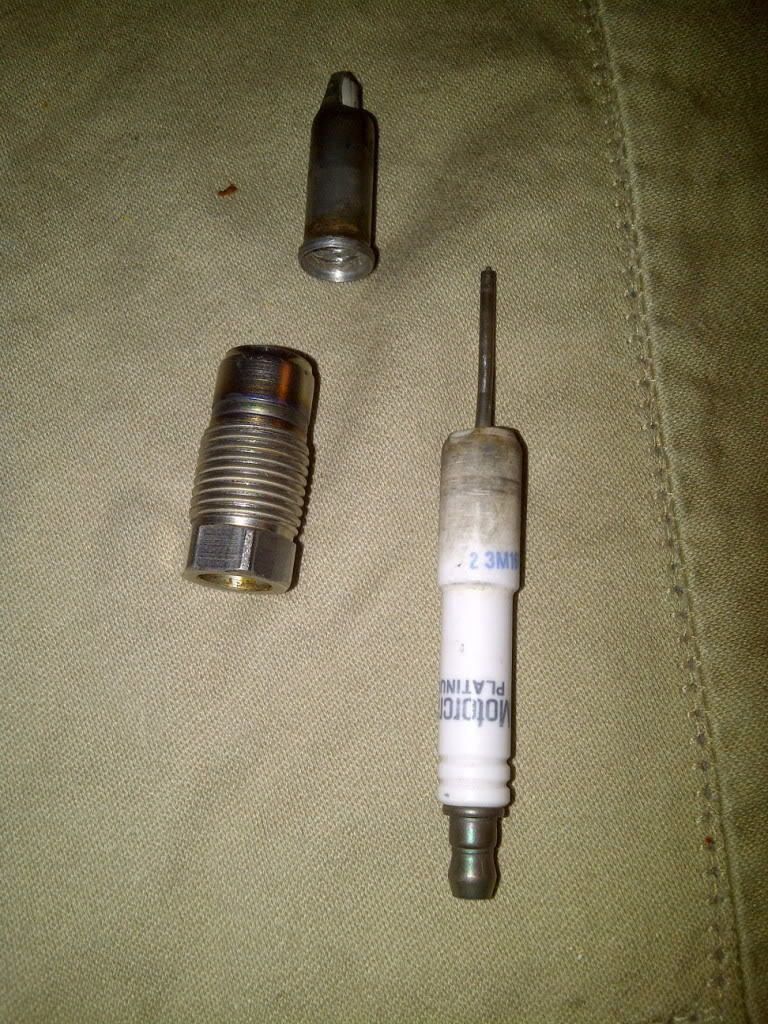
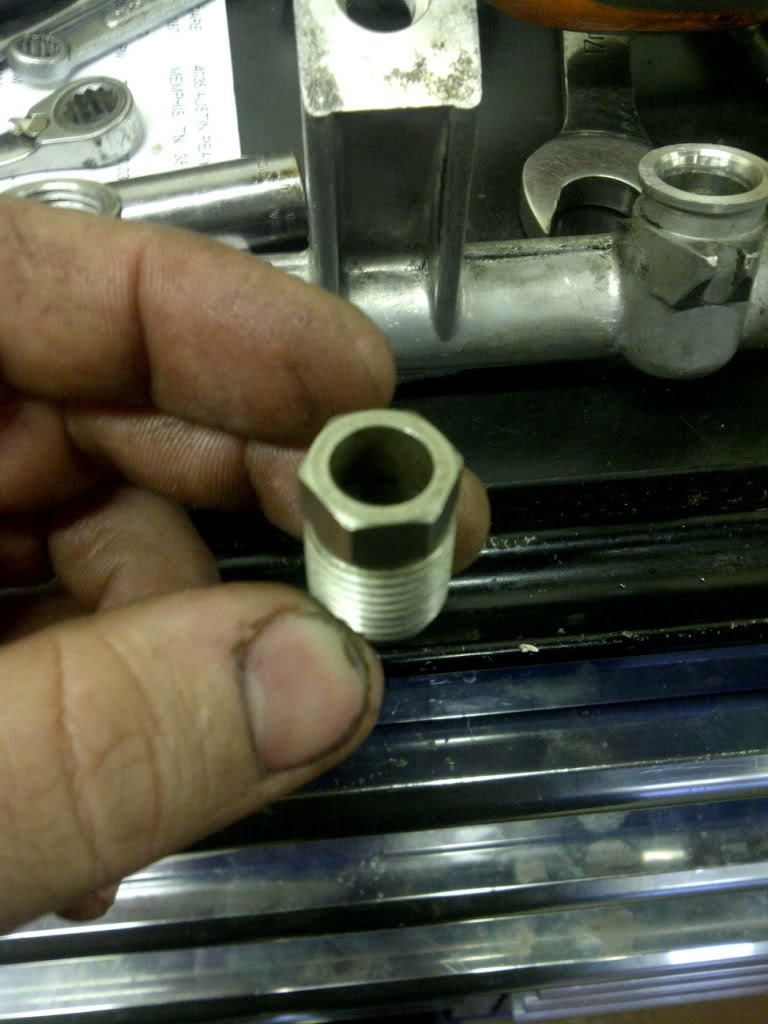
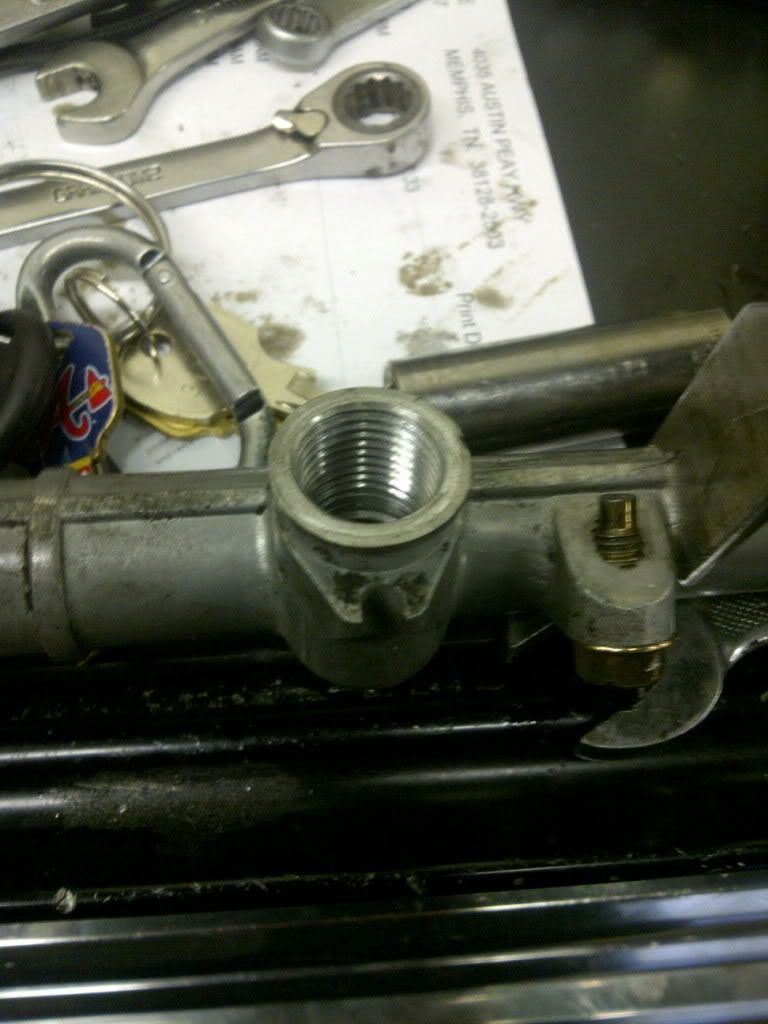
So i threaded the fuel rail injector ends.
Prior :

So I measured the injector openings on my mx6 gt fuel rail as the supra 440's fit right in that rail (But no where close bolts up to the kia manifold.) I took the threaded ends of the spark plugs and stuck the in my lathe and drilled them to the exact size of the mx6 fuel injector opening. So now it they thread into the Kia Fuel rail and are adjustable to some degree.
Well, i had at first built my own :
But, sad to say once it was in the truck it didnt clear the front half of the hood by like 6 inches. My mistake, I didnt take into considerations the downwards taper of the hood. So, i ended up using the Kia Sportage Upper and lower. Now, the Kias have those stupid Air Shrouded Fuel injectors, and the injector bosses in the lower in take air absolutely huge as well in the fuel rail. So the fuel rail had to be modified as well along with the lower intake to accept the Supra 440's i was going to use. If i had it to do all over again i would have just tried to find different injectors that would fit. But i was committed so i rolled with it.
Here is what i did : I got these Ford 4.6 Early 3v plugs (Same place the crankshaft trigger gear came from im using).
When you cut them apart is looks like this :
So i threaded the fuel rail injector ends.
Prior :
So I measured the injector openings on my mx6 gt fuel rail as the supra 440's fit right in that rail (But no where close bolts up to the kia manifold.) I took the threaded ends of the spark plugs and stuck the in my lathe and drilled them to the exact size of the mx6 fuel injector opening. So now it they thread into the Kia Fuel rail and are adjustable to some degree.
jmuse8482
+1y
Now, a fuel pressure regulator from a Mx6 gt 89-92 will bolt right into the kia rail. And it is a turbo FPR. I dont have any pictures yet of the lower manifolds injector bosses that i made for the lower intake. BUt ill explain how i made those as well and post pics later.
Related Discussions in Mazda Projects
Thread
Posts
Last Post
852

last post by
skrapinsask +1y
150

last post by
cherokeed +1y