Street Source is shutting down April 30th, 2026. Read the announcement

The Toyota Build Bible

guiltybydesign
+1y
I got one of those coming soon as well
guiltybydesign
+1y
Clutch Reservoir Relocation:
Each step listed in this article corresponds with the picture in order.
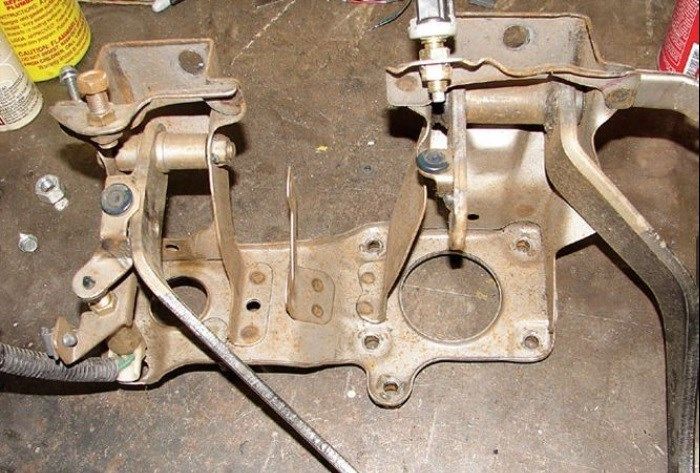
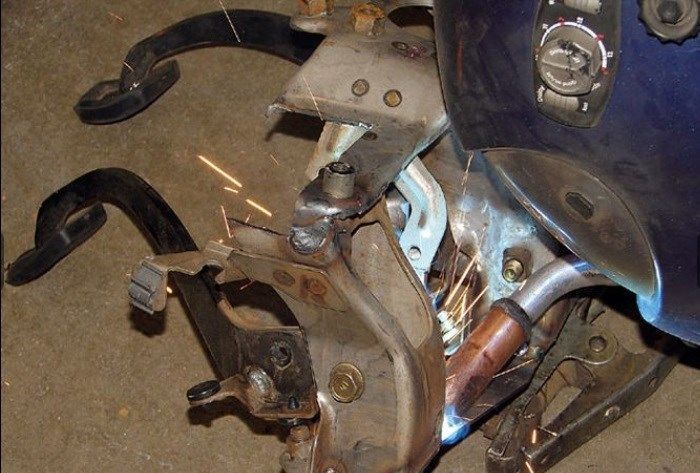
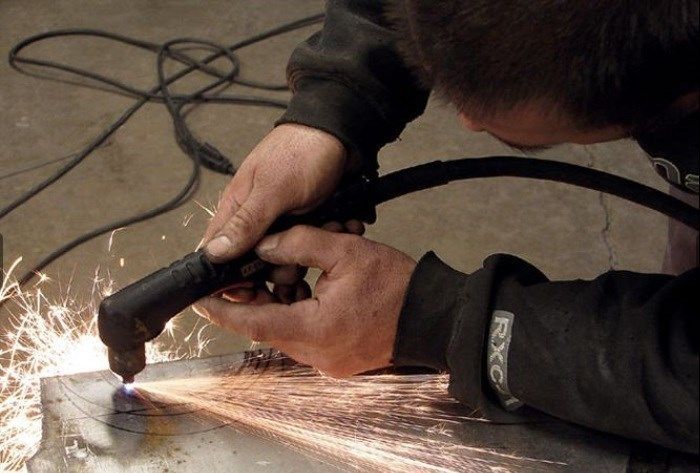
1.With the firewall tubbed for the body-drop, the stock pedal assembly will hit the upper left corner. So, we'll cut out what was in the way, as we'll be building a new brace anyways.
2. We removed the sensor, because we'll still be using that. Then, we marked and cut out the section that hits the tub.
3. With that section removed, you can see that the stock pedal assembly will bolt right back in.
4. Now, we measured where we could place the clutch cylinder.
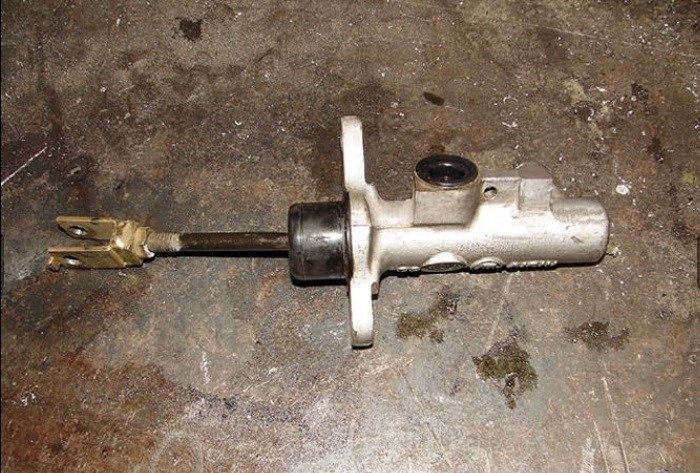
5. We cut off the reservoir, because we'll be feeding the cylinder through our brake booster.
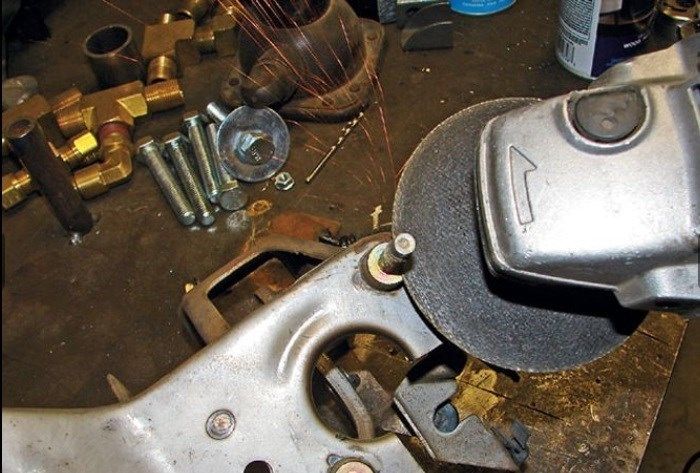
6. Next, we tapped the end to make more thread for our end link.
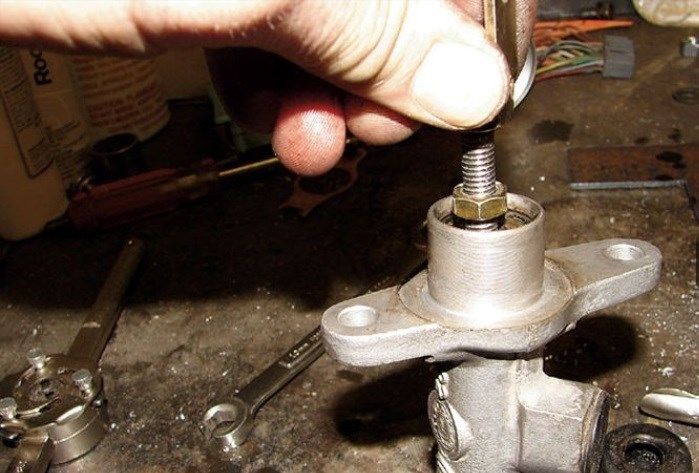
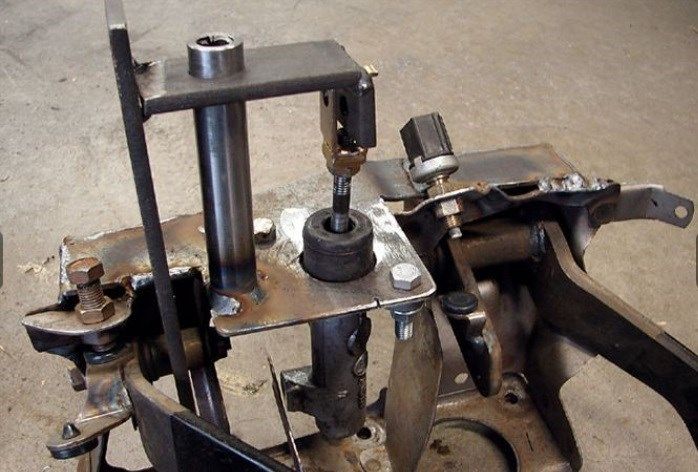
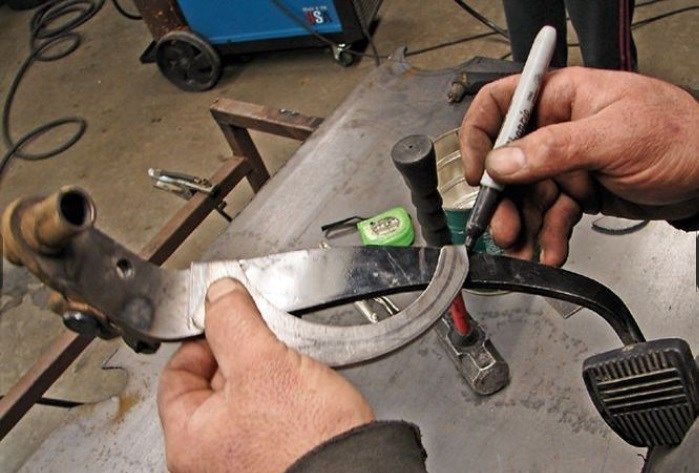
7. After measuring out the front of the pedal assembly, we cut and built a faceplate to mount the clutch cylinder onto.
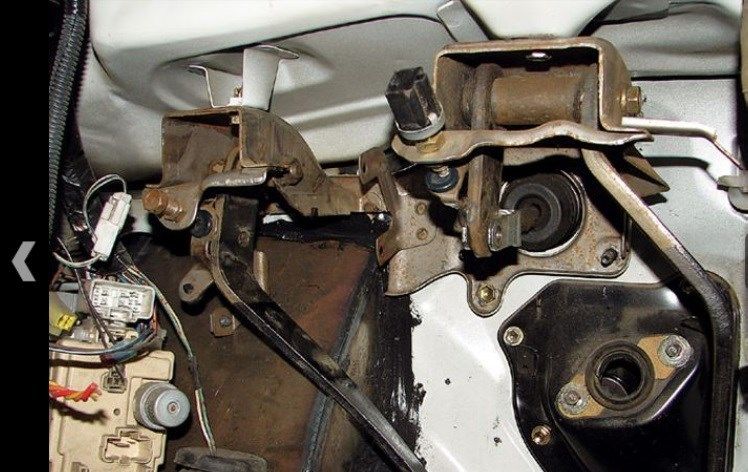
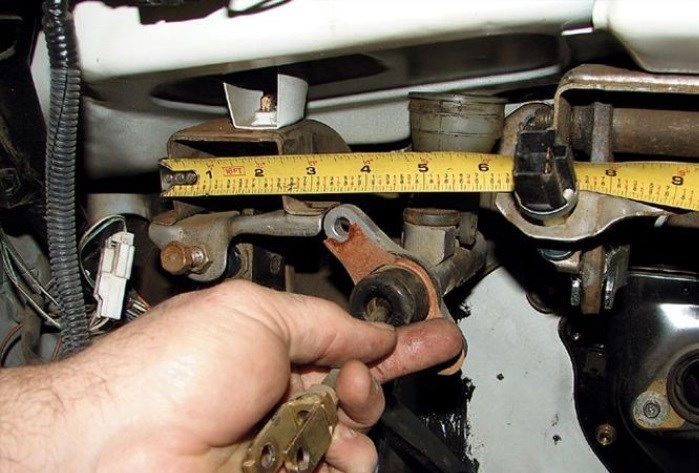
8. The faceplate was welded to the pedal assembly, then the link system was measured. Here, we needed 3.5 inches from the pedal to the cylinder
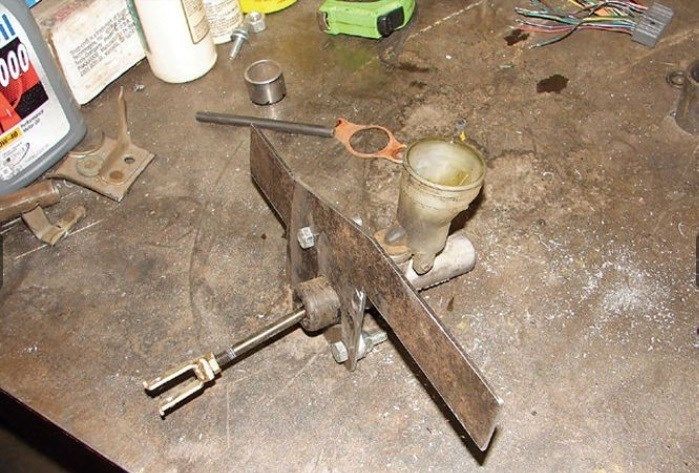
9. and 10. Using a piece of spare 1/2-inch tubing and 1-inch flat stock, Bobby set up a link system that allows the pedal to be pushed down, which in turn pulls the clutch cylinder. At first, we just tacked it together for testing.
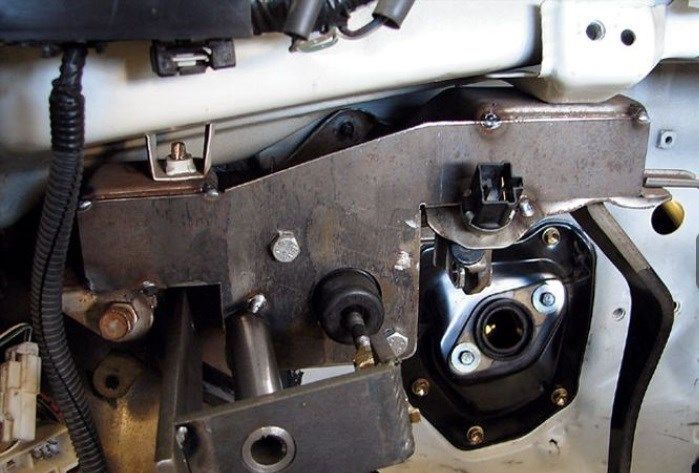
11. Here's a look at how the setup works. The flat stock is attached to the pedal. So, as you push in the pedal, it slides down the tubing compressing the clutch master cylinder. All that will need to run to the engine bay is a brake line to fill the reservoir
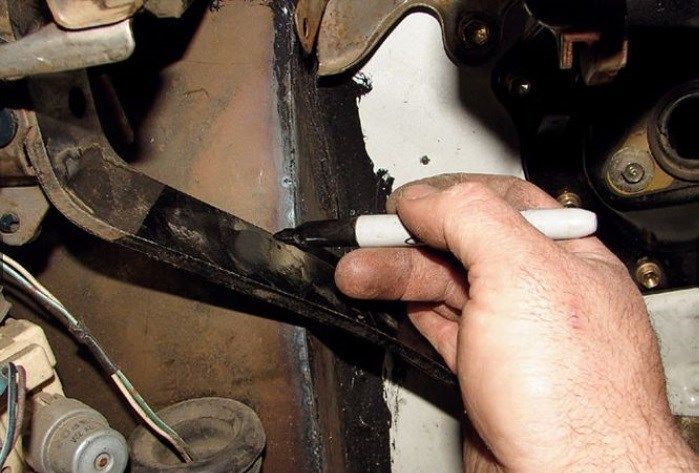
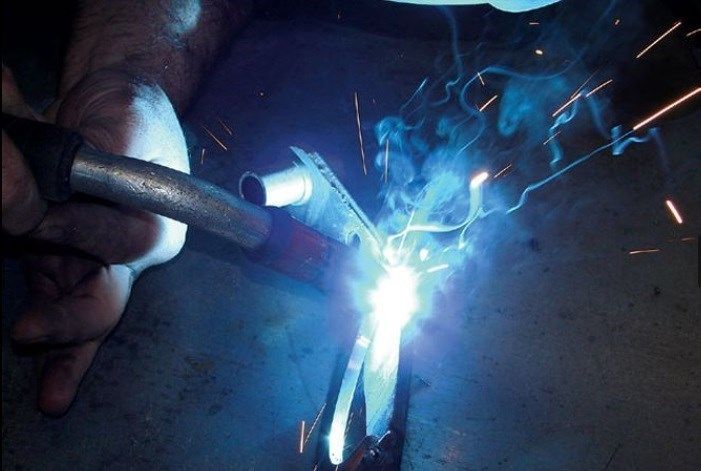
12. The last thing to be addressed is the actual pedal, which also hits the firewall tub. We measured out exactly where it hits.
13. A piece of 1/4-inch was cut out in the shape needed to clear the wheel tub.
14. The new piece of the pedal was lined up and marked.
15. The piece was welded into place, so the center (stock section) could be cut out.
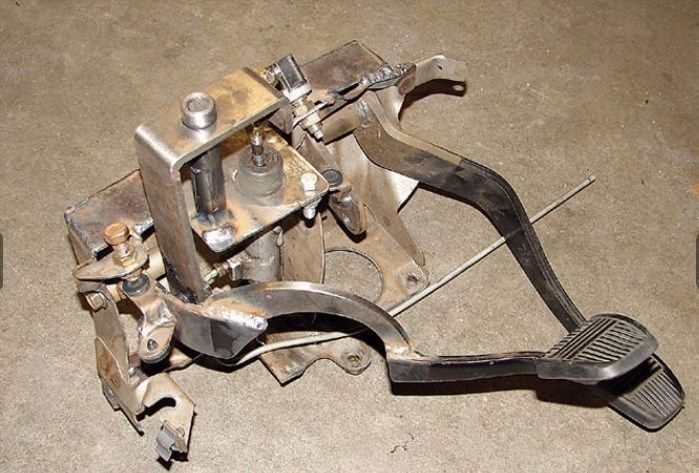
16. And there you have it: A new pedal assembly that houses the clutch cylinder, so your firewall is clean, and there's plenty of room for those big wheels.
Thanks to Mike Alexander for the photos and article.
Each step listed in this article corresponds with the picture in order.
1.With the firewall tubbed for the body-drop, the stock pedal assembly will hit the upper left corner. So, we'll cut out what was in the way, as we'll be building a new brace anyways.
2. We removed the sensor, because we'll still be using that. Then, we marked and cut out the section that hits the tub.
3. With that section removed, you can see that the stock pedal assembly will bolt right back in.
4. Now, we measured where we could place the clutch cylinder.
5. We cut off the reservoir, because we'll be feeding the cylinder through our brake booster.
6. Next, we tapped the end to make more thread for our end link.
7. After measuring out the front of the pedal assembly, we cut and built a faceplate to mount the clutch cylinder onto.
8. The faceplate was welded to the pedal assembly, then the link system was measured. Here, we needed 3.5 inches from the pedal to the cylinder
9. and 10. Using a piece of spare 1/2-inch tubing and 1-inch flat stock, Bobby set up a link system that allows the pedal to be pushed down, which in turn pulls the clutch cylinder. At first, we just tacked it together for testing.
11. Here's a look at how the setup works. The flat stock is attached to the pedal. So, as you push in the pedal, it slides down the tubing compressing the clutch master cylinder. All that will need to run to the engine bay is a brake line to fill the reservoir
12. The last thing to be addressed is the actual pedal, which also hits the firewall tub. We measured out exactly where it hits.
13. A piece of 1/4-inch was cut out in the shape needed to clear the wheel tub.
14. The new piece of the pedal was lined up and marked.
15. The piece was welded into place, so the center (stock section) could be cut out.
16. And there you have it: A new pedal assembly that houses the clutch cylinder, so your firewall is clean, and there's plenty of room for those big wheels.
Thanks to Mike Alexander for the photos and article.

jaredmxg
+1y
wow nice post. I am not a Toyota guy, but this is a great thread, I hope people will post to keep it going. Why was the pedal notched?
guiltybydesign
+1y
To clear the firewall tub. Thanks for the compliment. Its something were trying to do exclusively on SSM and we will eventually have one for every make.
jaredmxg
+1y
Oh got ya. Yeah I glanced through and didnt really notice anything that it was clearing but all and all nice work.
B
bagged90
+1y
I would by this whole assembly for the clutch relocation. I could build one but I am building my trucks all by myself..stuff takes forever on your own. I did the Z in my frame now im getting stuff ready for CanDo arms and would like some advice..any help?
guiltybydesign
+1y
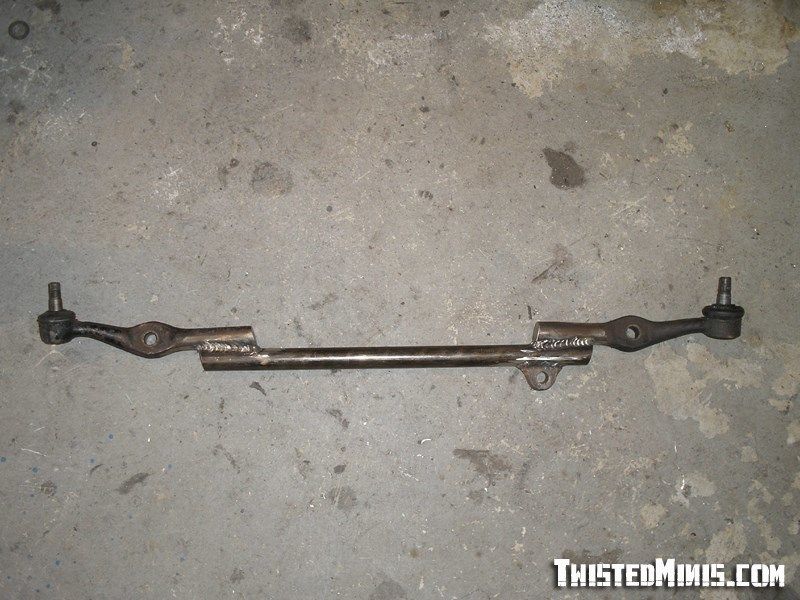
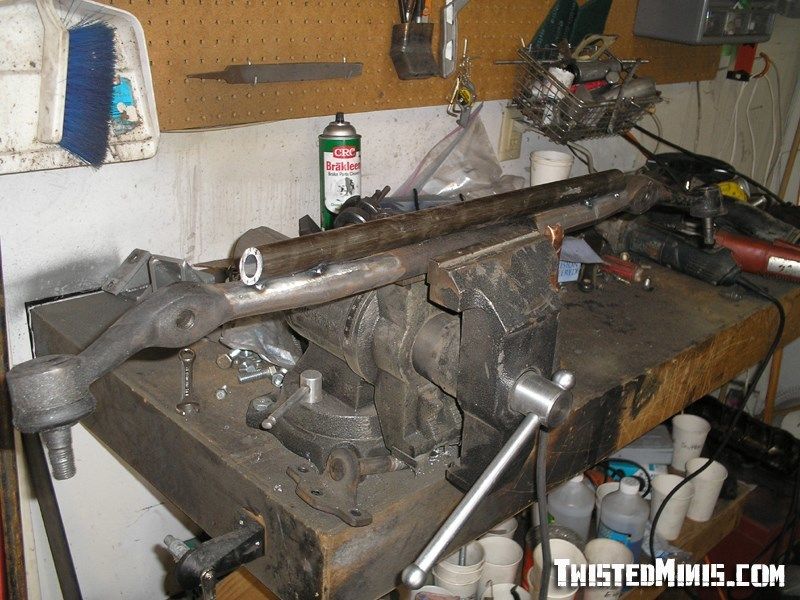
Drag Link Modification:
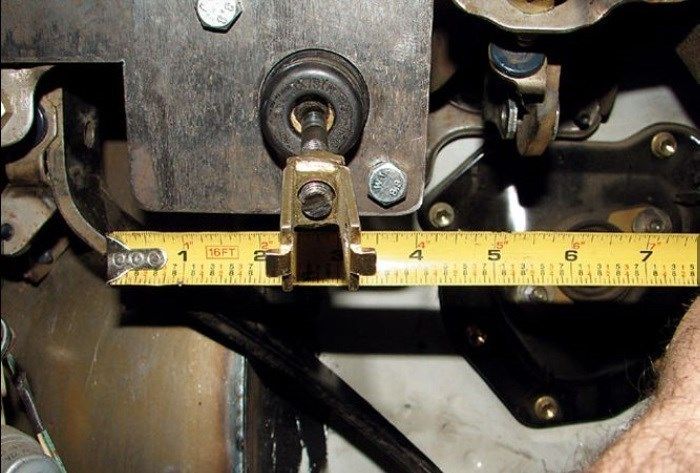
If you've lowered your motor youll come to see that the oil pan will hit the drag linkage. You can solve this problem one of two ways, you can notch the oilpan wich is pretty self explanatory or you can modify the drag linkage to clear. Youll start by getting a piece of substantial material to attach to the bottom side of the stock linkage, this will become the actual structure so youll want it to either be a piece of heavy wall 1'' DOM or even 1''solid. Youll need 18'' and you can cut the ends on an angle like Seth did here. Youll want to take measurements on where the steering stabilizer eyelet is located since it will need to be put back, Seth put it at 4 3/8'' from the tie rod eyelet.. After removing the eyelet you can weld your material to the bottom side of the stock linkage. You can use any method to weld with, MIG TIG or even stick welding works just be sure to clean the surface well and get good penetration.
***Since the stock linkage is cast iron it is important to let the metal cool naturally to prevent it cracking. Do not cool with compressed air or water***
After your new material is welded in place simply cut out the center of the stock linkage. Again, Seth kept it classy here with an angle cut. Just be sure to turn the steering lock to lock to ensure the linkage wont hit the side of the oil pan and your done. He says it takes around an hour.
Thanks to Seth from Twisted Minis for the info and pics.


leydbck
+1y
Love this thread. Lots of good info, thanks for taking the time.

baha
+1y
I'm itching to get back to work on my Yota if these house repairs would just stop coming up. :)
Related Discussions in Toyota Trucks
Thread
Posts
Last Post


