Street Source is shutting down April 30th, 2026. Read the announcement

The Toyota Build Bible

guiltybydesign
+1y
This will be an ongoing ultimate list of specs and how to's for all Toyota model pickups comprised of info found online, in my personal experience, and other info threads found on ssm. Each new post will deal with one specific aspect of the truck.
guiltybydesign
+1y
Wheelbase info:
72-78 Hilux (N20)
Reg cab = 102''
Reg cab long bed = 110''
78-83 Hilux (N30)
Reg cab = 101.8''
Reg cab long bed = 110.2''
83-88 Hilux (N40)
Reg cab = 103''
Reg cab long bed = 112''
X cab longbed = 121.5''
89-95.5 SR5
Reg cab = 103''
Reg cab long bed = 112.2''
X cab = 121.5, but V6 versions measured 121.9''
95.5-04 Tacoma
Reg cab = 103.3'' but 01-04 reg cabs measured 104.3''
X cab = 121.7''
Crewcab = 112.4''
05-current Tacoma
Reg cab 2WD = 109.4''
Reg cab 4WD = 110''
X cab = 127.8''
Double cab longbed = 140.9''
99-06 Tundra
Reg cab = 128.3''
Double cab = 140.5''
07-current tundra
Reg cab 6.5' bed = 126.8''
Double cab 8' bed = 164.6''
All other models = 145.7''
guiltybydesign
+1y
Axle Specs:
Through the years Toyota has steadily made their trucks wider, therefore the axles come in a variety of widths. This info can come in handy when running wider rear wheels to avoid having to narrow your rearend. All measurements are WMS to WMS.
73-78 = 53''
79-83 = 55''
84-88 = 57''
89-95.5 = 58.5''
Tacoma 95.5-04 = 60''
05-present = 61''
Tundra 99-06 = 64.9''
07-present = 67.9''
The Toyotas use one of 2 lug patterns being either the 5 on 4.5'' (114.3mm) or the 6 on 5.5''. They typicaly have a 60mm hub bore.
guiltybydesign
+1y
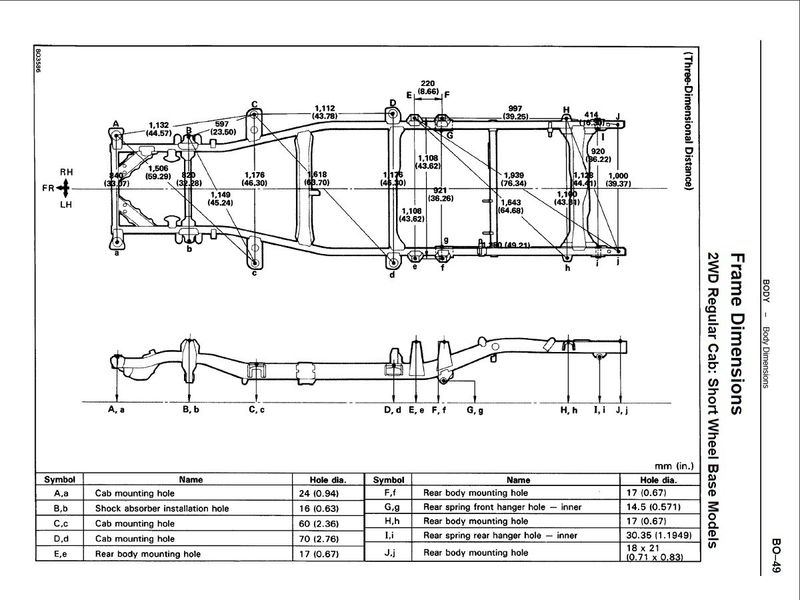
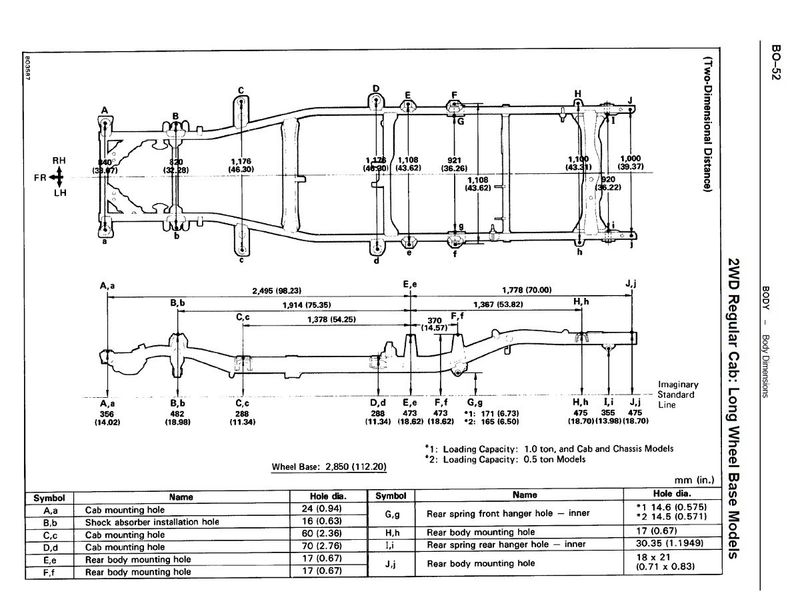
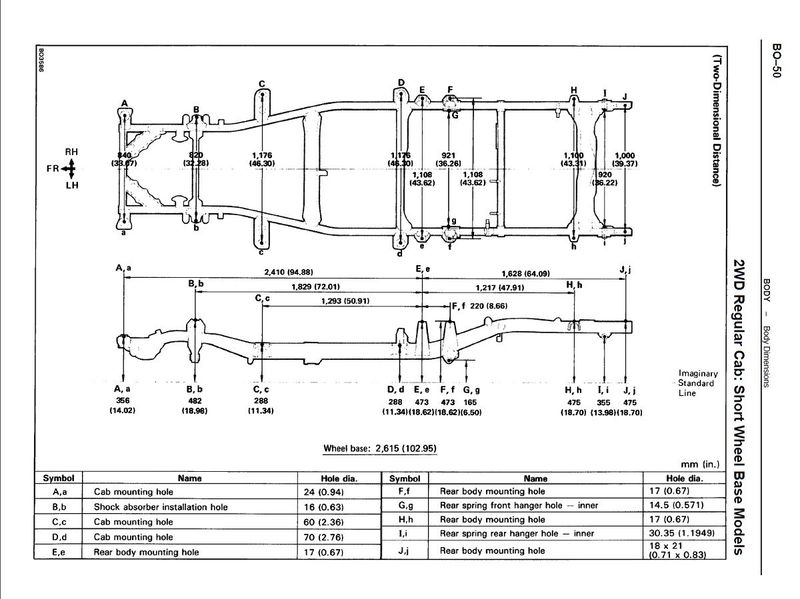
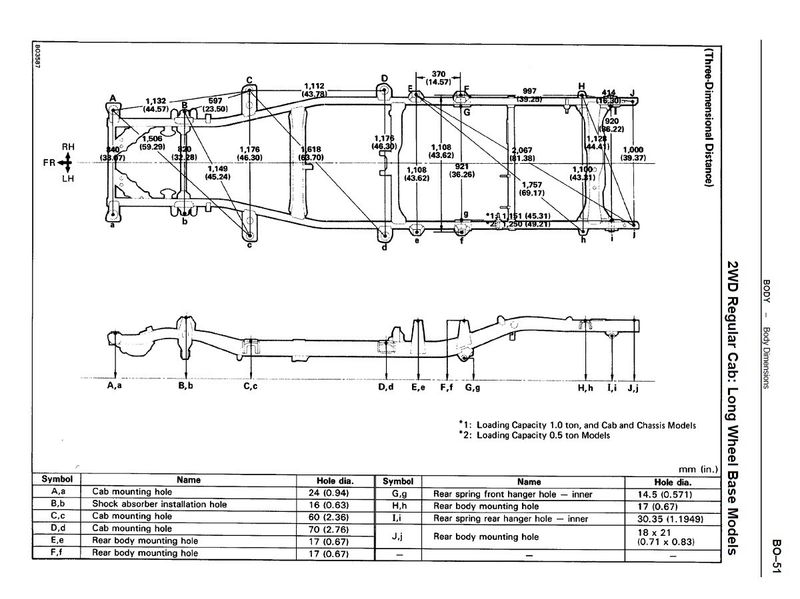
Frame Schematics:
These are drawings for the 89-95 SR5 pickup
These are drawings for the 89-95 SR5 pickup


guiltybydesign
+1y
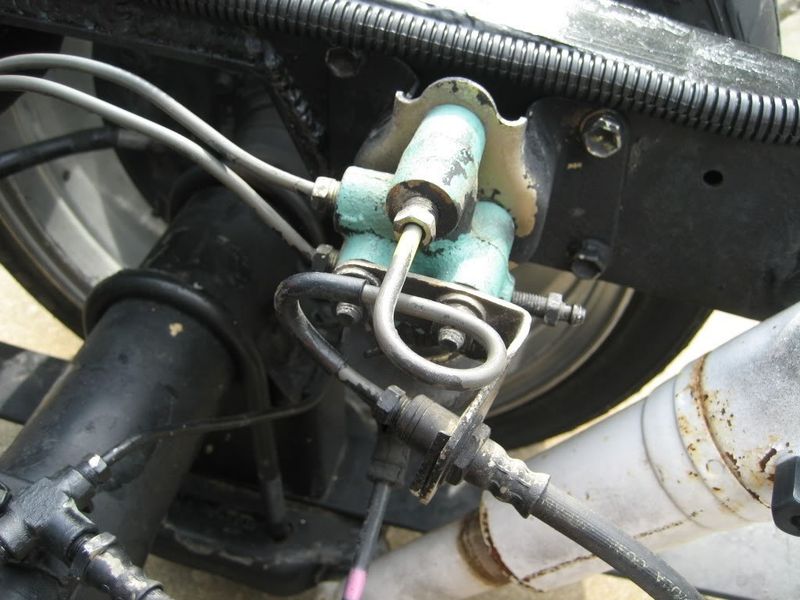
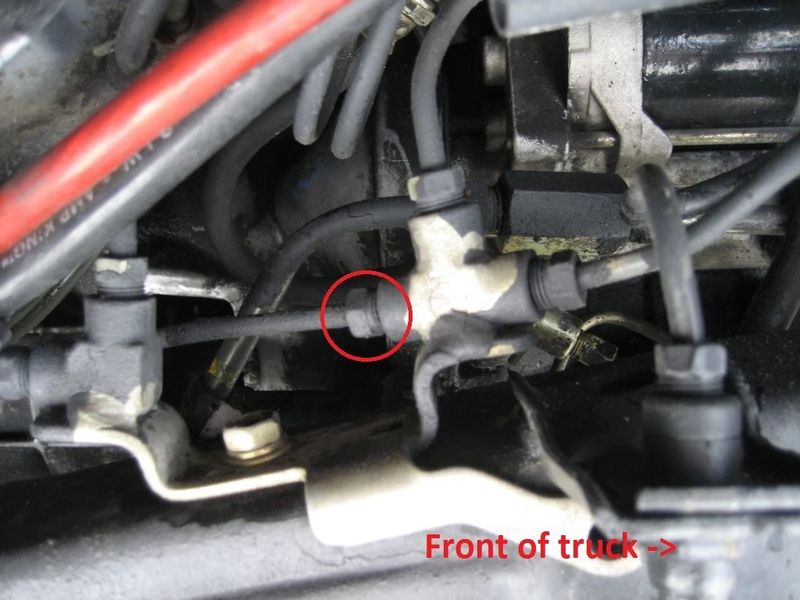
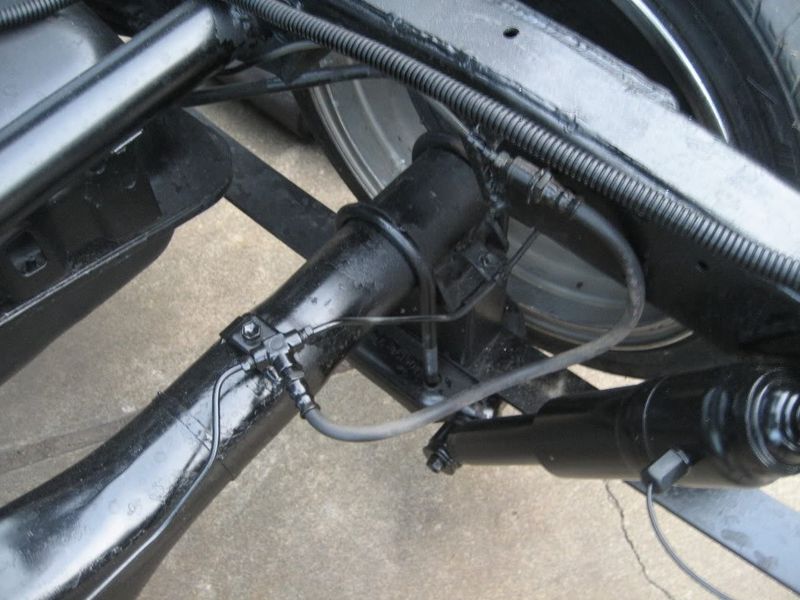
Removing rear proportioning valve:
If your wanting to remove the valve or just don't know what it is heres a step by step how to.
The valve in question is not needed and can easily be removed by capping the high pressure line leading back to it from the T fitting located on the passenger side framerail just in front of the firewall with a 1/8'' NPT plug. After that you can remove the high pressure line along with the proportioning valve and simply hook the remaining low pressure line directly into your rubber T line. Bleed the brakes to insure theres no air in the line and your done.
Thanks to smctoy on yotascene for the pics.
guiltybydesign
+1y
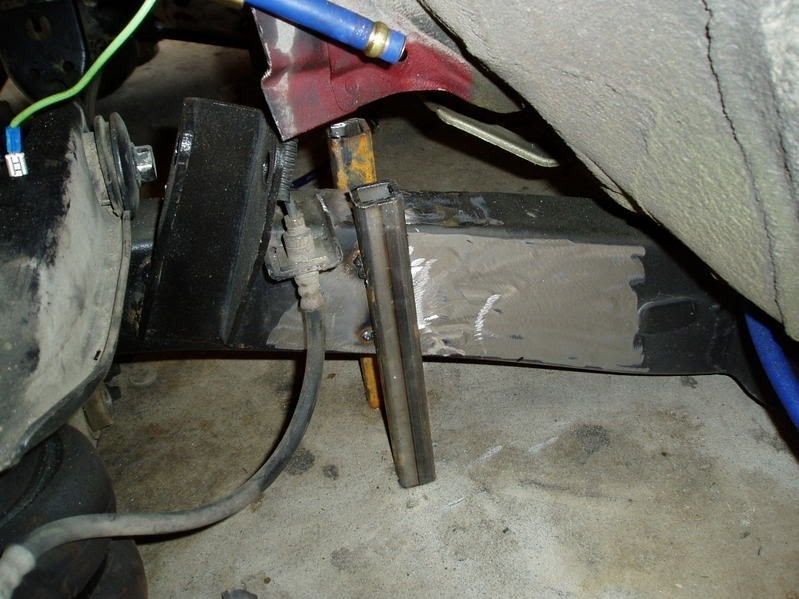
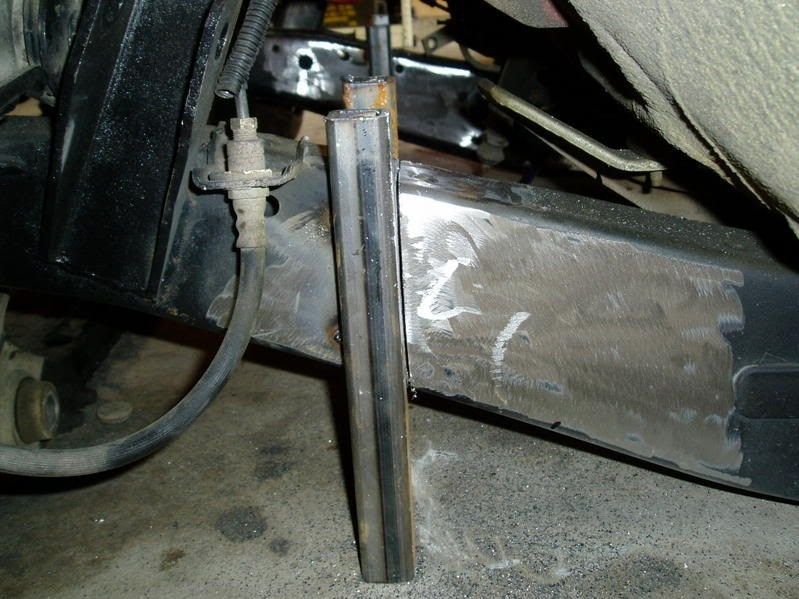
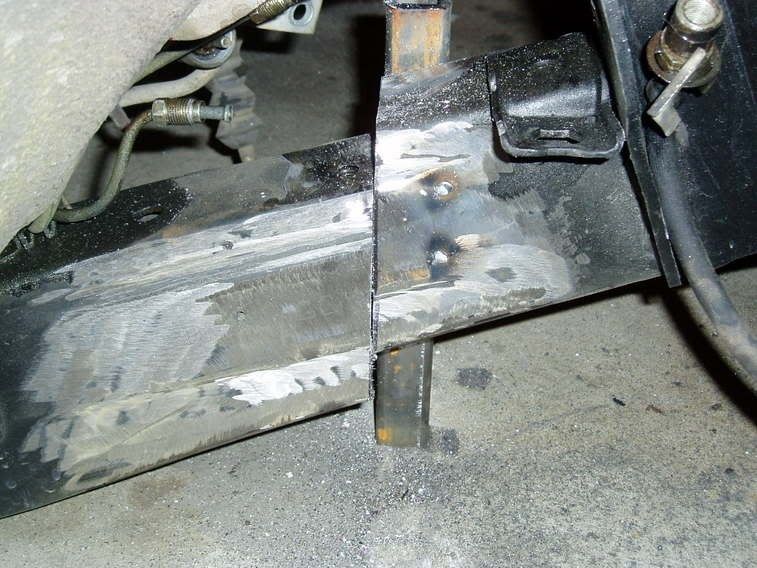
How to Z the front clip:
The frame designs on the Toyota trucks have the front suspension crossmember and transmission crossmember hanging below the bottom of the framerails. This means if you fully want to lay out youll need to raise the suspension crossmember cradle... or Z the frame as its called. The easiest way ive found to do this is with the truck on a lift and to fix the front clip solid, but since most people don't have a lift you can fix the clip to the floor and adjust the truck as needed. You will need to undo some brakelines to gain room to work in the area.
Leveling the truck on jackstands is critical. Make sure your truck is level both front to back as well as side to side. Youll need to weld some temporary stands to hold the front clip level with the ground. Weld them in at a perfect 90* angle to the ground so you can use them as guides for when you cut the framerail. Once the clip is secure and braced you can make your vertical cuts. You will have 1 cut in front of the suspension and 1 behind on each side of the truck. If you braced well the clip should not move in relation to the rest of the truck. You can now raise the front clip by lowering the truck on the jackstands the 1 1/4'' required. This should bring the bottom of the front crossmember level with the bottom of the framerails. You can now begin welding the rails back together. It is a good idea to make some shear load plates to weld on over the area for extra load support. I did not have to lower my motor after doing a Z but a lot of people go ahead and either cut and slide the mounts down the 1 1/4'' or fabricate new mounts to bolt to the engine block. The 1 1/4'' is a measurement I personally did on my truck, some people go more and some go less.
Thanks to Tim Brown for the pictures.


rizz0
+1y
when you do it on a lift how do you stop the truck from falling off after you cut the front frame since none of the weight to counter balance the truck anymore?
guiltybydesign
+1y
I did mine on a 2 post so I had the lift arms places where the frame kicks up from the ground both front and back, so the truck was pretty balanced. I did it about 5' of the ground with my stands holding the front crossmember and since my lift doesn't leak I was able to do it between locking locations so I could just let it down the 1 1/4'' without having to move it otherwise.
guiltybydesign
+1y
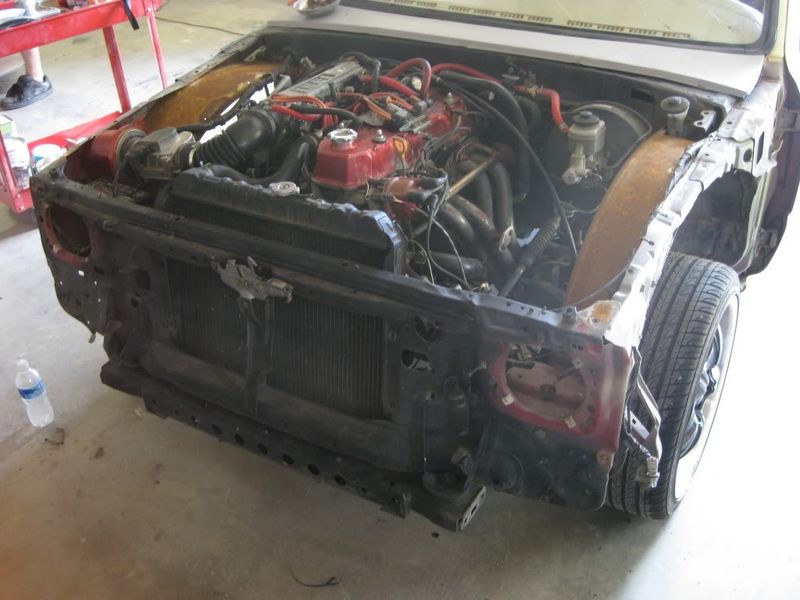
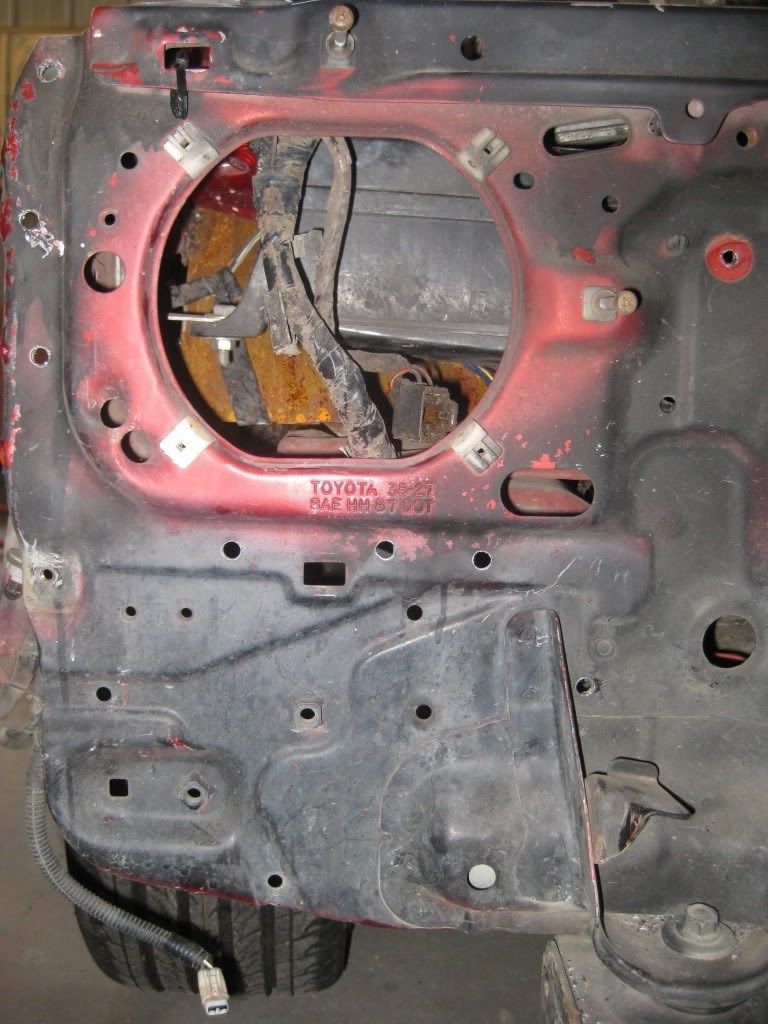
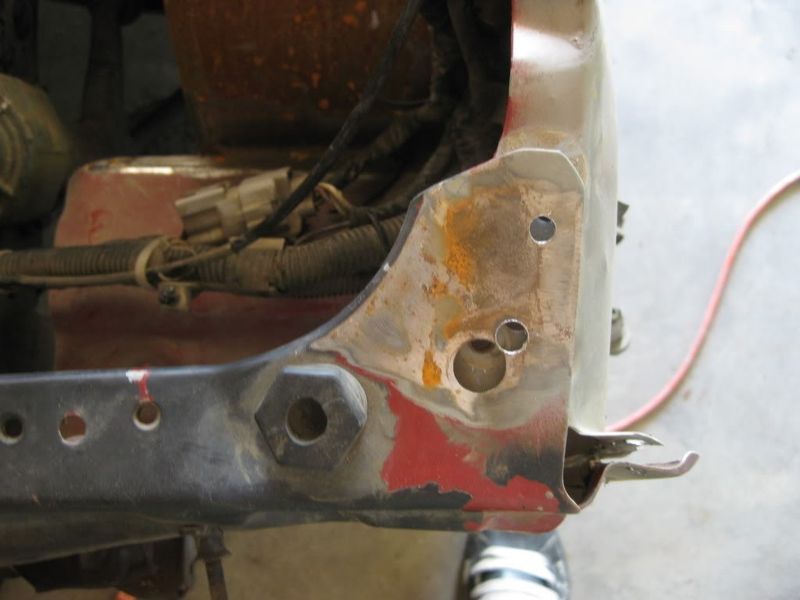
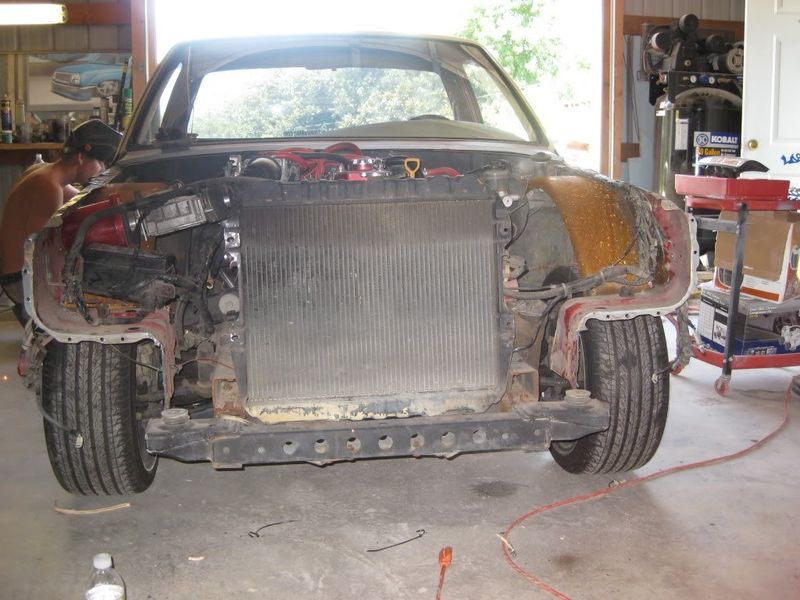
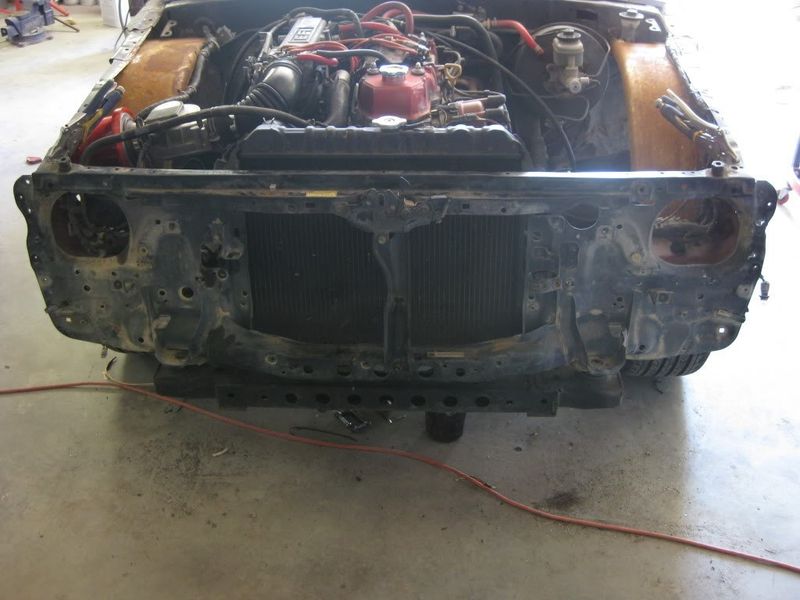
4runner front clip conversion:
Youll start by acquiring a 4runner core support along with the grill, bumper and lights. The fenders and hood are interchangeable between the pickup and 4runner models so you wont need to purchase them if yours are in good condition. Youll need to completely remove the front sheetmetal along with the radiator and anything else mounted to the core support. Youll be searching for the factory spot welds holding the core support to the frontend structure of the truck and drilling them out. Once you've drilled out all the welds the core support should come right off. Youll want to do the same with the 4runner core support and grind off all paint from the mating surfaces. The new core support should fit directly onto the structure of the truck and can be temporarily secured with clecos or sheetmetal screws while you check the fenders and frontend gaps for proper fitment. Hang the fenders, grill, bumper and hood and check that everything aligns well and that you have even gaps. Once your satisfied with fitment you can go back and weld the spot weld holes up just like factory. Hit the new areas with some paint and reassemble your components and sheetmetal and your done with the swap.
Thanks to slammedtoys over on yotascene for the pictures.


The major
+1y
I can't help but laugh at the shirtless guy with the welding helmet on. that's how you get a tan like a true mini trucker. Another good tutorial would be the clutch reservoir relocation.
Related Discussions in Toyota Trucks
Thread
Posts
Last Post


