Street Source is shutting down April 30th, 2026. Read the announcement
Rear Speaker Install/Swap 1990 B2600i Cab Plus
9814 views
2 replies
3 following
S
Rear Speaker Install/Swap 1990 B2600i Cab Plus
Y
yeoldraker
+1y
Just got my hands on a 1900 B2600i and the stereo didn't work at all when I picked it up. After pulling out the stereo and getting a good laugh at however Helen Keller had tried to wire this thing up, I cut it all out and started from Scratch. And I do mean I got a good laugh, It looked like someone had an electrical tape and pliers party back there. After fixing the stereo, and finally getting sound out of the speakers. I see why someone had shitcanned the stereo. Haha. I ordered some Alpines to replace the rears and that brings you guys up to speed.
First, pull out the little seat cushions, and the entire middle set of panels/backrests.. This has to be done to get the Side Upper and Lower panels off that cover the rear speakers. I use paper bowls for screws/parts of each stage of disassembly. Then I stack them up, so you just work down to the last bowl when you are putting things back together. Also, as far as that back wall, there are about 12 or so small plastic toggle style screws and 3 or 4 of each type of larger screws that hold the seats and back panel all together.
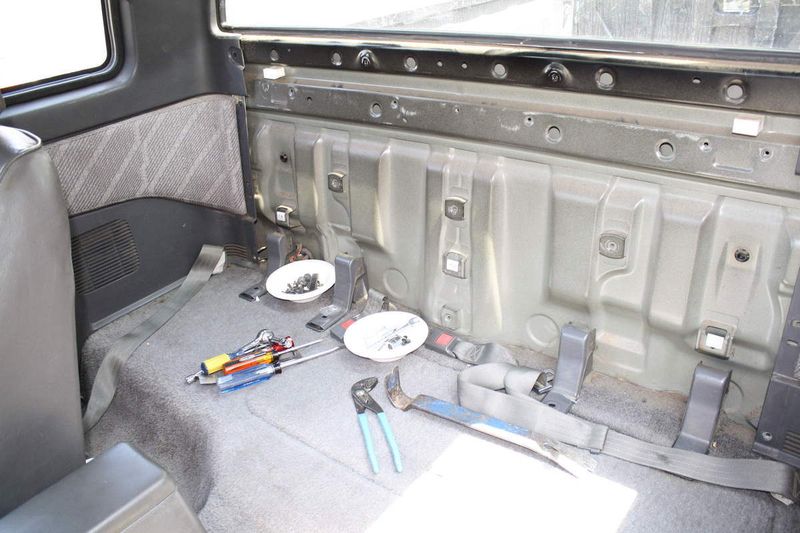
Taking off the side panels was a PITA. Start with the upper side panels, take out the window, use a pry bar to pry off the things that snap the panel to the wall. Pulling and prying by hand seemed super sketchy and was much safer and easier with the bar. I also unscrewed the door step panel to pry it up to get the rubber door liner out. I didn't fully get the top panel off, just got it off enough to reach the only 4 screws at the top of the lower panel that hold the lower in. **One Note, those hinges that hold the side windows in have really soft screws and are easily stripped without a ton of pressure. I think I ended up only getting the lower hinges actually off. Also take off the top seatbelt connection, just to get that out of your way when your pulling the side plastic panels out.
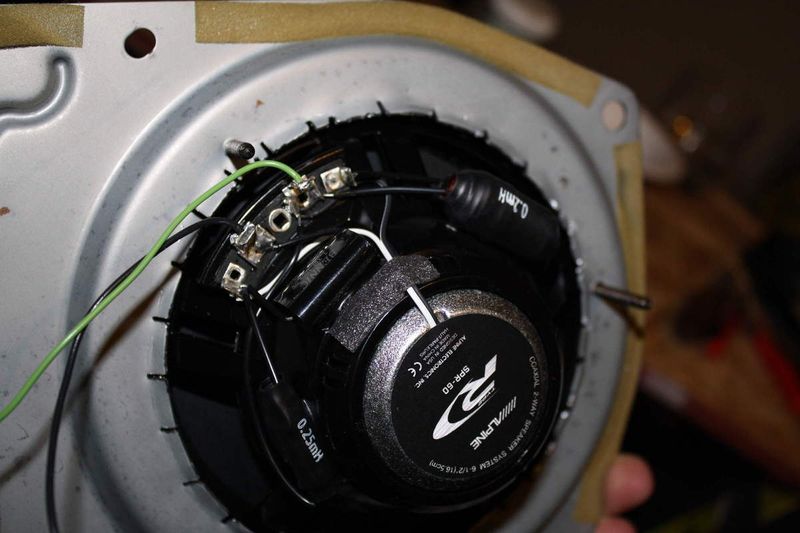
This is what you find after getting the side panels off.
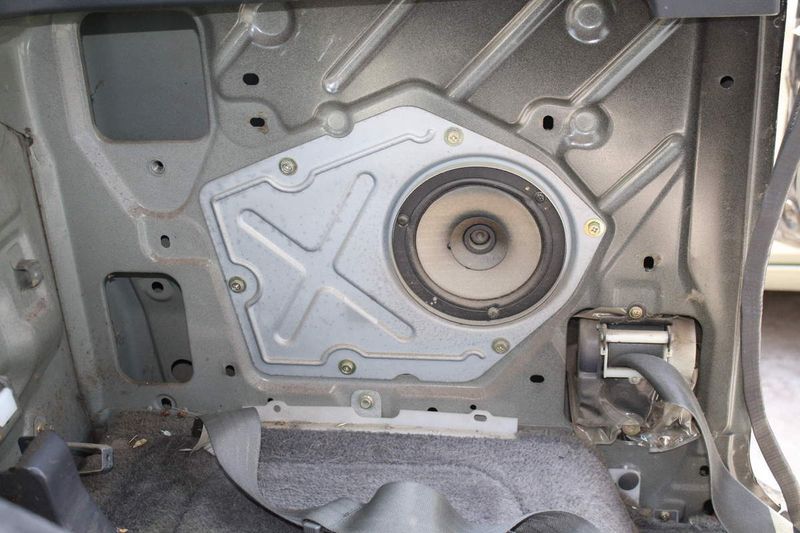
Notice the original wiring harness connects directly to the speaker connector. No lead wires from the speaker. Also how tight the factory speaker fits in the detachable metal panel. Also, notice all the space behind the panel, does anyone think you could put amps in there? Or maybe an enclosure of some type? Just brainstorming.
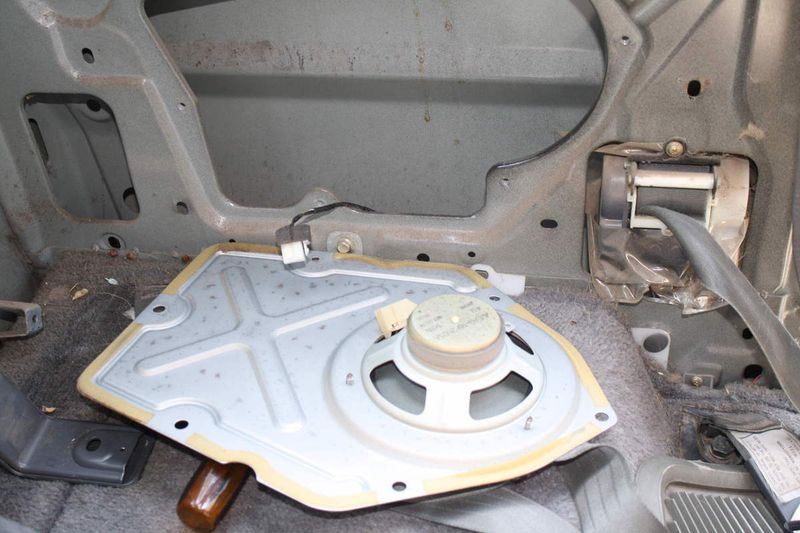
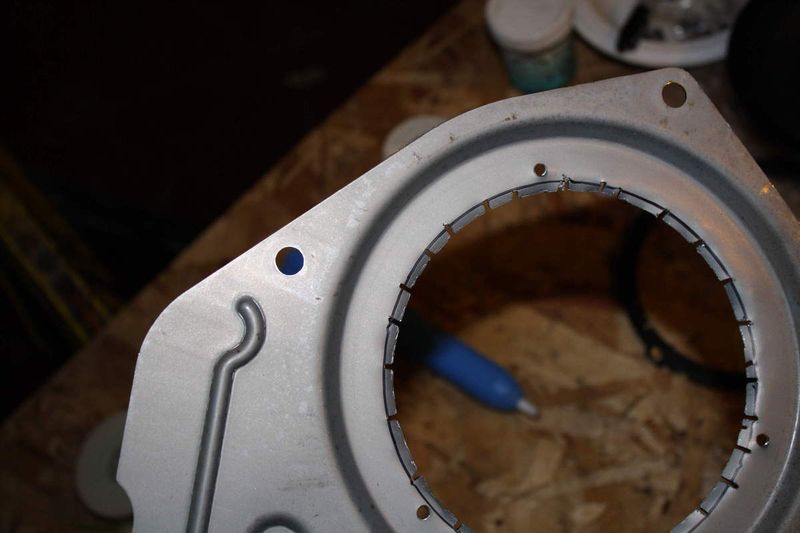
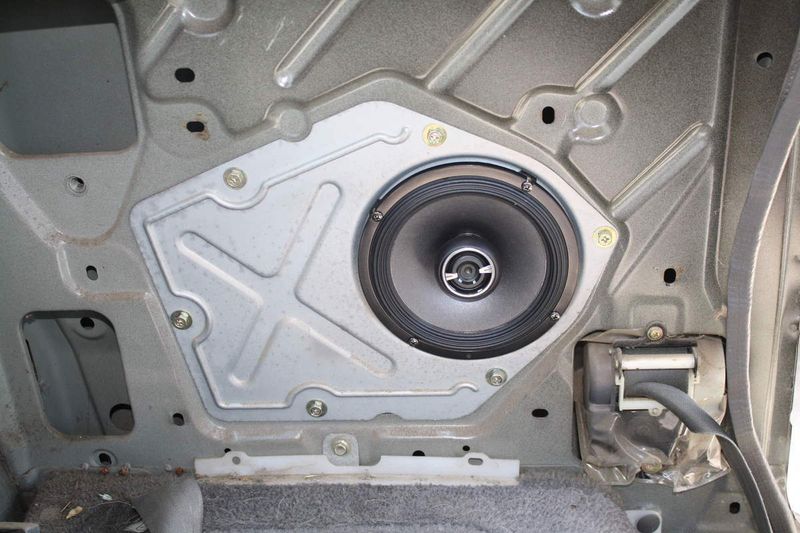
I had to do a little rigging on the detachable metal panel to fit the slightly larger support bars of the Alpine 6 1/2" speakers.
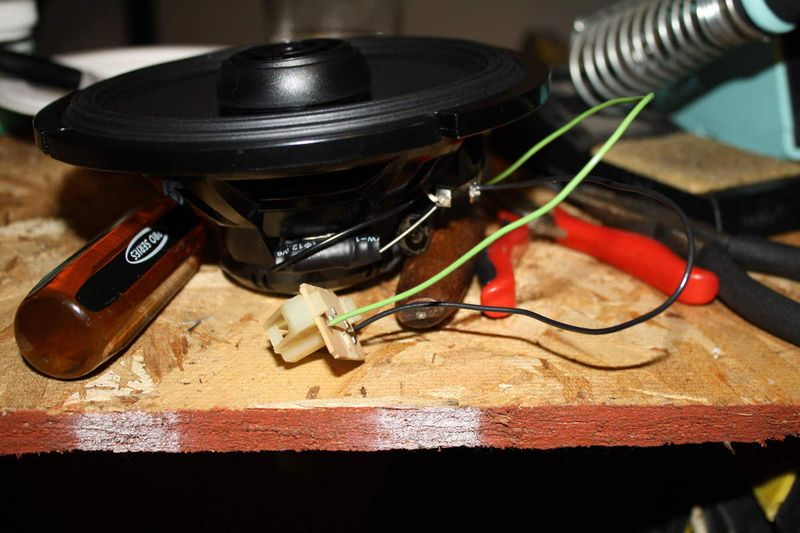
I also pulled the factory connector off the old speakers by drilling out the rivet. Instant free wiring harness. Checked phase with a battery first, afterwards, I think I realized it was marked positive and negative.
Finished install, sounds a shit ton better, angled the Tweeter up towards the dome light as much as possible.
Right now the plan is just get it sounding like something better than old ass cardboard speakers wired by a 4 year old. Will take pics of the front speaker 4" Alpine S series soon. Just forgot about that cause it took all of 5 minutes.
First, pull out the little seat cushions, and the entire middle set of panels/backrests.. This has to be done to get the Side Upper and Lower panels off that cover the rear speakers. I use paper bowls for screws/parts of each stage of disassembly. Then I stack them up, so you just work down to the last bowl when you are putting things back together. Also, as far as that back wall, there are about 12 or so small plastic toggle style screws and 3 or 4 of each type of larger screws that hold the seats and back panel all together.
Taking off the side panels was a PITA. Start with the upper side panels, take out the window, use a pry bar to pry off the things that snap the panel to the wall. Pulling and prying by hand seemed super sketchy and was much safer and easier with the bar. I also unscrewed the door step panel to pry it up to get the rubber door liner out. I didn't fully get the top panel off, just got it off enough to reach the only 4 screws at the top of the lower panel that hold the lower in. **One Note, those hinges that hold the side windows in have really soft screws and are easily stripped without a ton of pressure. I think I ended up only getting the lower hinges actually off. Also take off the top seatbelt connection, just to get that out of your way when your pulling the side plastic panels out.
This is what you find after getting the side panels off.
Notice the original wiring harness connects directly to the speaker connector. No lead wires from the speaker. Also how tight the factory speaker fits in the detachable metal panel. Also, notice all the space behind the panel, does anyone think you could put amps in there? Or maybe an enclosure of some type? Just brainstorming.
I had to do a little rigging on the detachable metal panel to fit the slightly larger support bars of the Alpine 6 1/2" speakers.
I also pulled the factory connector off the old speakers by drilling out the rivet. Instant free wiring harness. Checked phase with a battery first, afterwards, I think I realized it was marked positive and negative.
Finished install, sounds a shit ton better, angled the Tweeter up towards the dome light as much as possible.
Right now the plan is just get it sounding like something better than old ass cardboard speakers wired by a 4 year old. Will take pics of the front speaker 4" Alpine S series soon. Just forgot about that cause it took all of 5 minutes.
T
thenoli
+1y
Just did this on my 1993 B2600i truck this past weekend. Took me 5 hours total to get the job done. It was my first time removing interior panels in the back of my truck (scary!).
Everything went as mentioned, except I didn't have to remove my rear windows to pry the upper side panels out enough to access the screws for the rear side panels. I did break a little piece of the upper side panel on the driver side, but just right by the window, under the lower window support arm, in a spot where no one would even notice.
My wiring harness went straight to the speaker (unlike the pictures of the 1990 model). Of course, the old wiring harness didn't fit my new JBL GTO628 speakers, but I managed to cut it in half in a way where I could just plug the + and - leads into the terminals on my JBL speakers just fine (no soldering needed, unlike my front speakers!).
My JBL speakers used 4 screws, and the OEM speakers used 3 screws, but fortunately, my JBL speakers came with an adapter so that ended up working just fine. My main concern was that the tweeter stood up higher than the rest of the speaker cone, so I wasn't sure if the side panel was going to fit over it, or if it would rattle like hell. Turns out the side panel speaker grill sits right on top of it and it's snug enough that there's no rattle!
On the stock speakers, the cone had ripped away from the side supports on both of them. These new rear JBL speakers are probably best bang-for-the-buck improvement I've made on my truck.
Thanks for posting all the pictures and explanations! It was super helpful, and I probably wouldn't have tried this job myself if I hadn't found this walk through.

Geazer
+1y
Thanks for posting all the pictures and explanations! It was super helpful.
I need precursor steps:
First, pull out the little fold down/up seat cushions, and the entire middle set of panels/backrests. {Need process & tools for rear seat & panels/backrest removal, first with photos.}
Second, this has to be done to get the Side Upper and Lower panels off that cover the rear speakers. {Need process & tools to remove plastic side panels, second with photos.}
~~~~~~~~~~~~~~~~~~~~~~~~
Opines on possible alternate process desired. How about:
Cut plastic interior trim side panel speaker grill with hole smaller than grill rectangle. Continue to make hole bigger only up to size needed to remove OEM 6.5" speaker.
Install new speakers through side panel hole in plastic side panel. Attach grill that came with new speakers.
To what: Inside metal around speaker?
Or make holes in interior plastic trim to attach new grill over hole in plastic trim?
Reason: Reduce estimated 5 hours time to remove all items shown in thread first post.


