Street Source is shutting down April 30th, 2026. Read the announcement
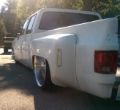
91 crew cab project

onelowoneton
+1y
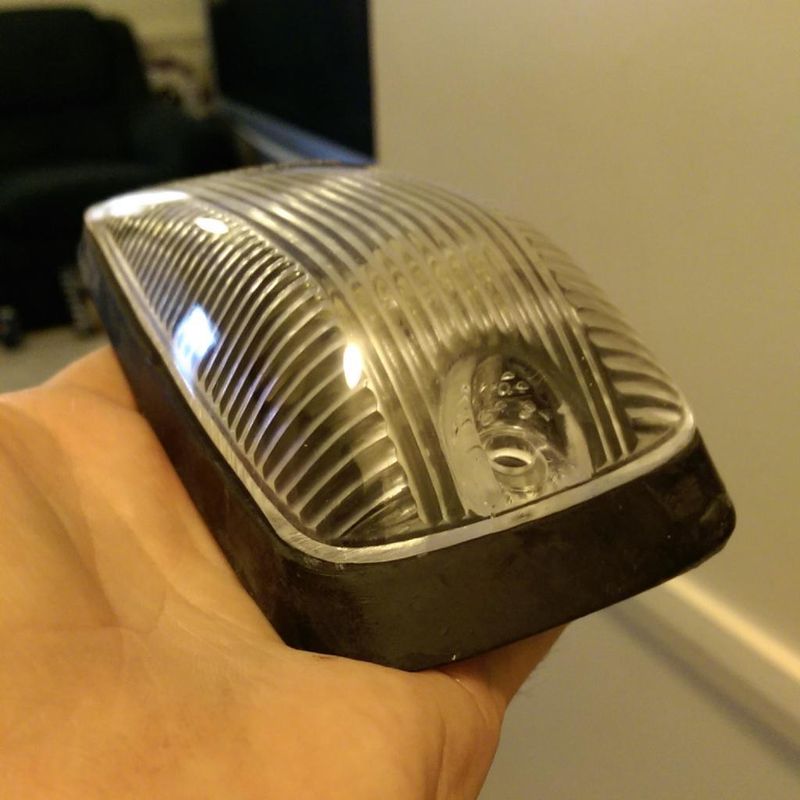
thanks man. yeah the cab lights are the 88-98 style. you have to weld the old screw holes because they arent even close, the newer style lights mount with 2 screws one one the front and one on the back and the factory ones mount with 3 screws around the light. i didnt have to have a pigtail, i just spliced in the new lights in to wiring already there. after filling in the holes you have to mock up all the lights and get them straight to drill the new holes. its a fairly simple process but i do recommend using some kind of silicone to seal the lights to prevent leakage into the cab.
onelowoneton
+1y
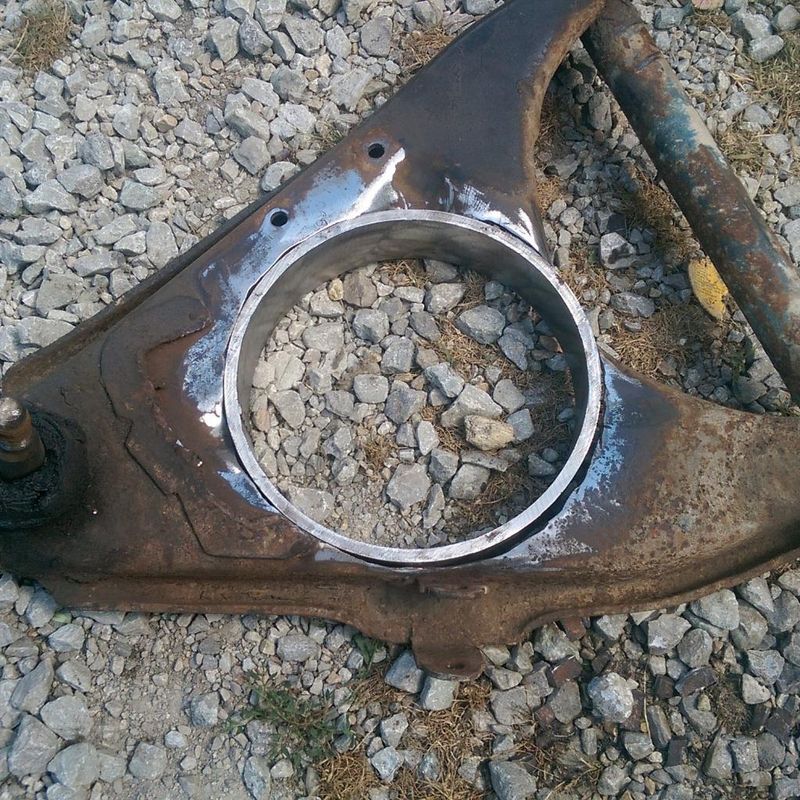
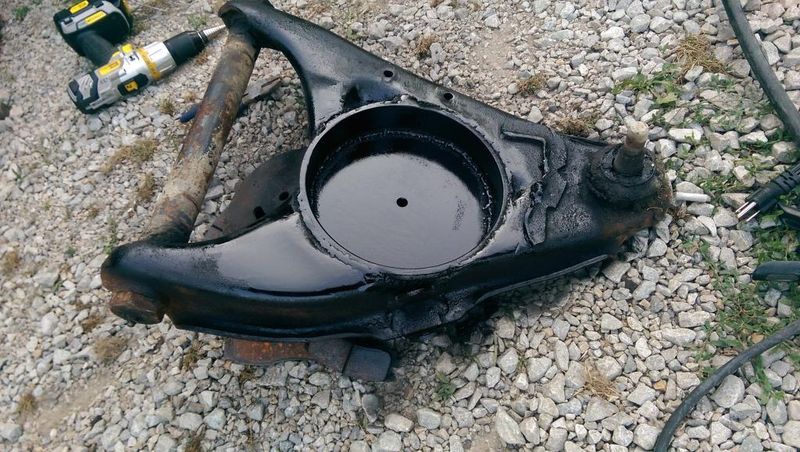
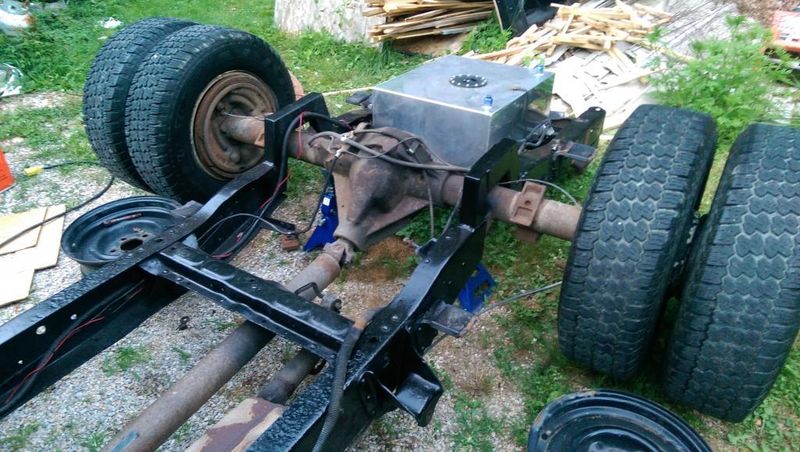
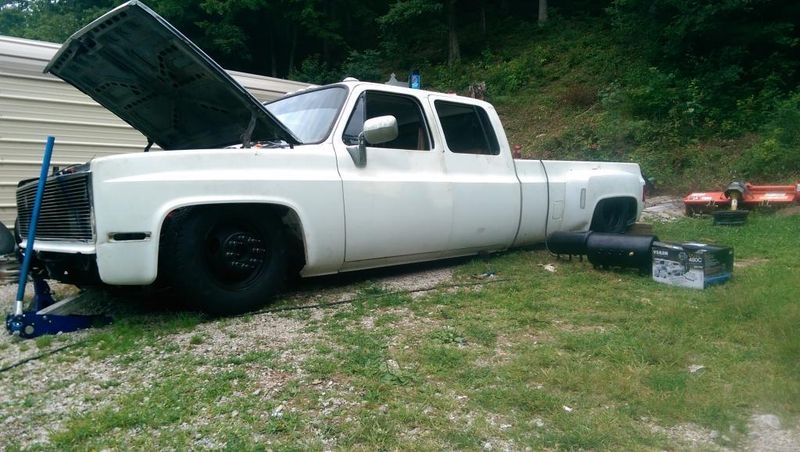
After I got the spindles on, tanks removed, and cell mounted i was ready to start bagging it. I started with the front suspension while I was still thinking on the rear setup and wheels. i am running second gen dominator 2600 bags. after taking everything apart and mocking up the bags and cups i realized that the truck wouldnt lay out and would actually sit higher than it did with the drop spindles on it. then i started looking into modifying the a arms to fit the bags. i talked to several people and got input and help as to a good setup. i ended up getting 8" OD steel pipe cut to 2" in length and a 1/4" steel plate cut to 8" circles for the top plate to cup. i cut out the spring cups in the arms to fit the pipe and welded everything up. essentially making upside down bag cups.
this was the mock up test fitting

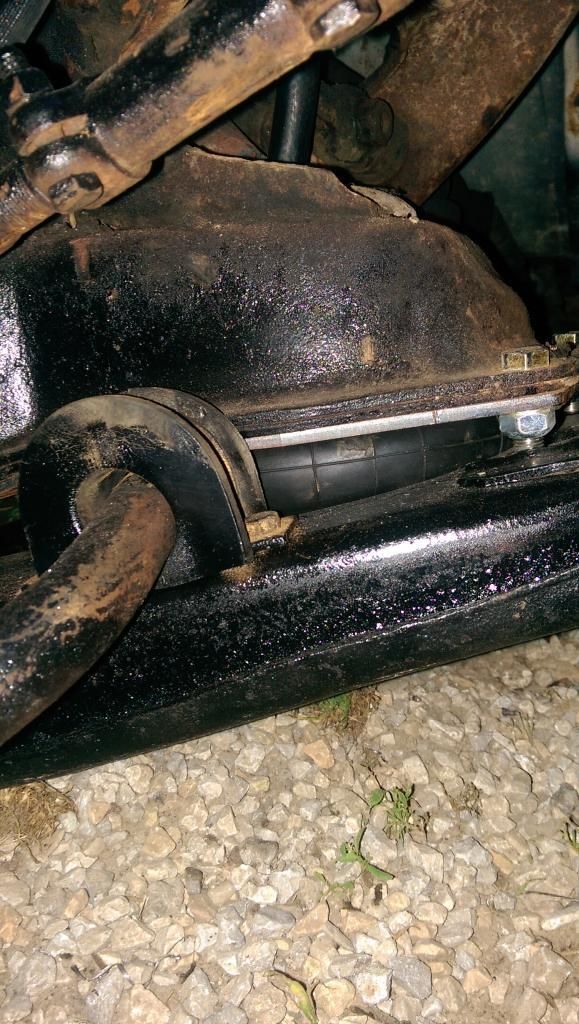
the finished product isnt beautiful or anything but its temporary.
end result
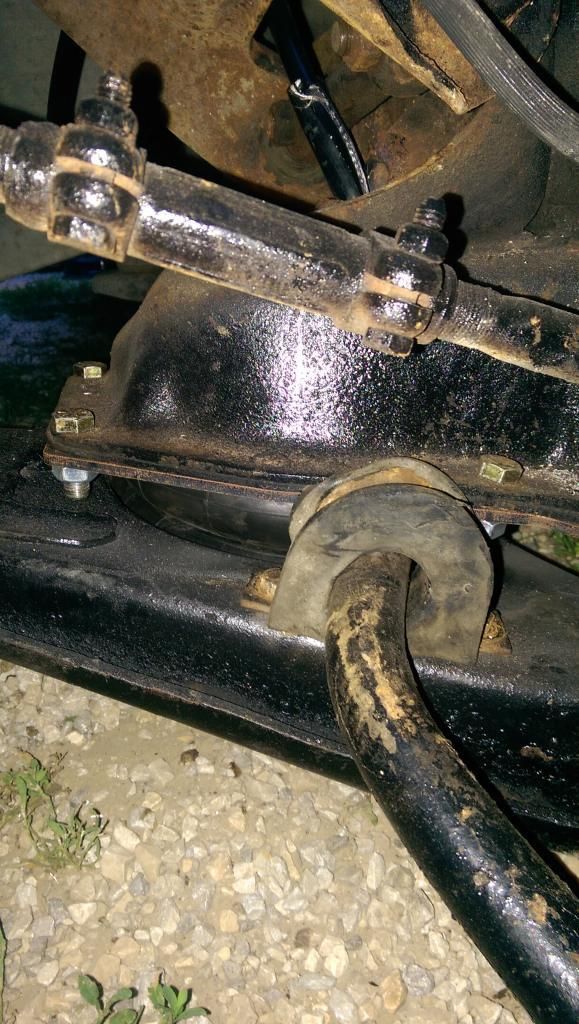
the sway bar had to trimmed a little to keep it from hitting the bag, i didnt get a pic of that but i trimmed it about 3/4" on each side.
this was the mock up test fitting
the finished product isnt beautiful or anything but its temporary.
end result
the sway bar had to trimmed a little to keep it from hitting the bag, i didnt get a pic of that but i trimmed it about 3/4" on each side.
onelowoneton
+1y
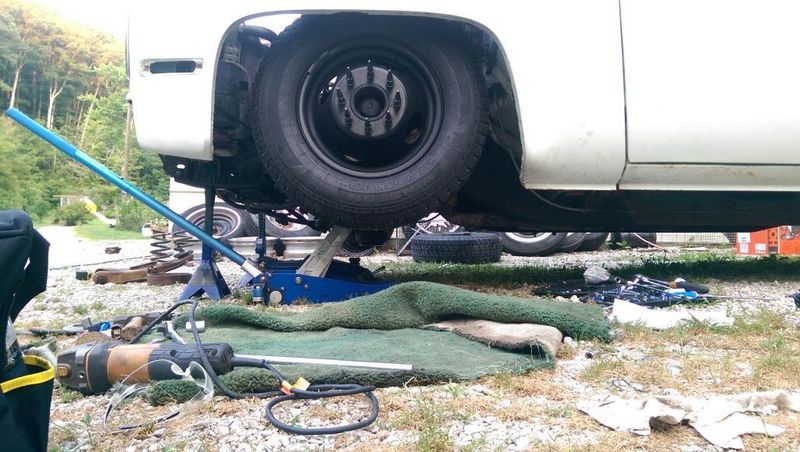
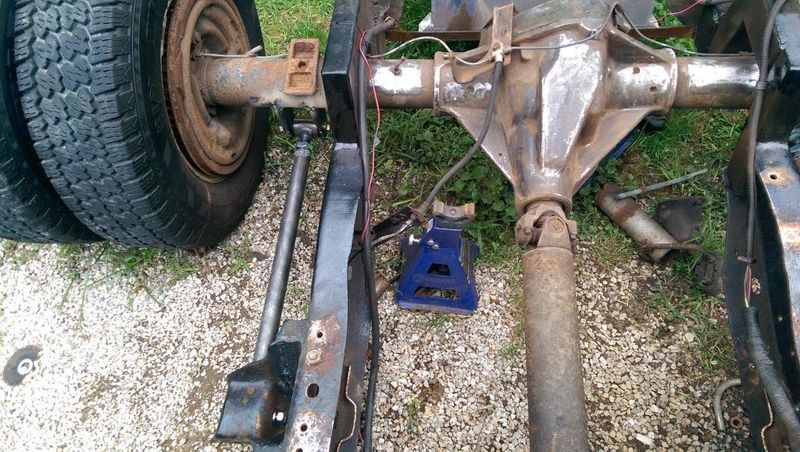
For the rear setup I decided to run a bag on bar setup, truck is going to mostly be for show and i never really haul anything. i cut the axle free and removed the leaf springs to let the frame the rest of the way down to gauge how much clearance would be available in the notch when it is laid out. there is enough room for it to lay out but the notch is actually big enough, if i didnt lay my reece hitch on the ground i would bottom out in the notch.
i planned on using the factory font leaf mounts for the lower bar mounts, but after some measuring and mocking i seen that the bag would not fit with enough space to be able to expand and compress. i need an extra 1.5" to have clearance and line up with the upper bag mount. so i cut and removed the mount and used 1.5" stainless steel spacers and grade 8 bolts to reattach it to the frame, then used 3/16" steel to fill in the gap around the mount. (my welds are definitely not pretty but they hold, Im still learning )
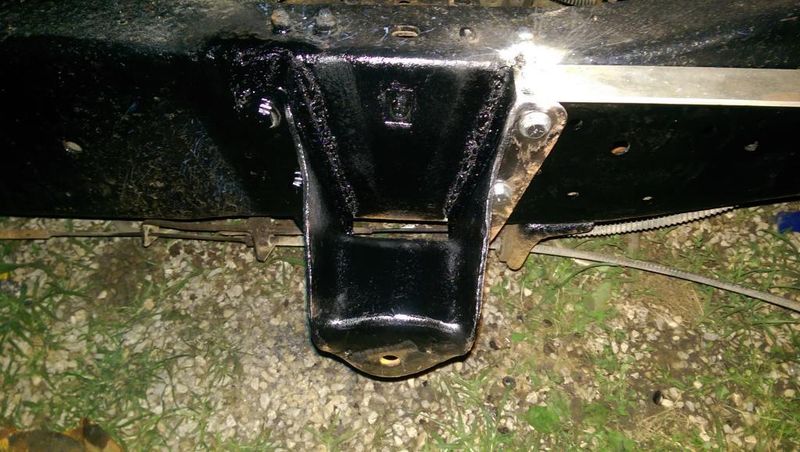
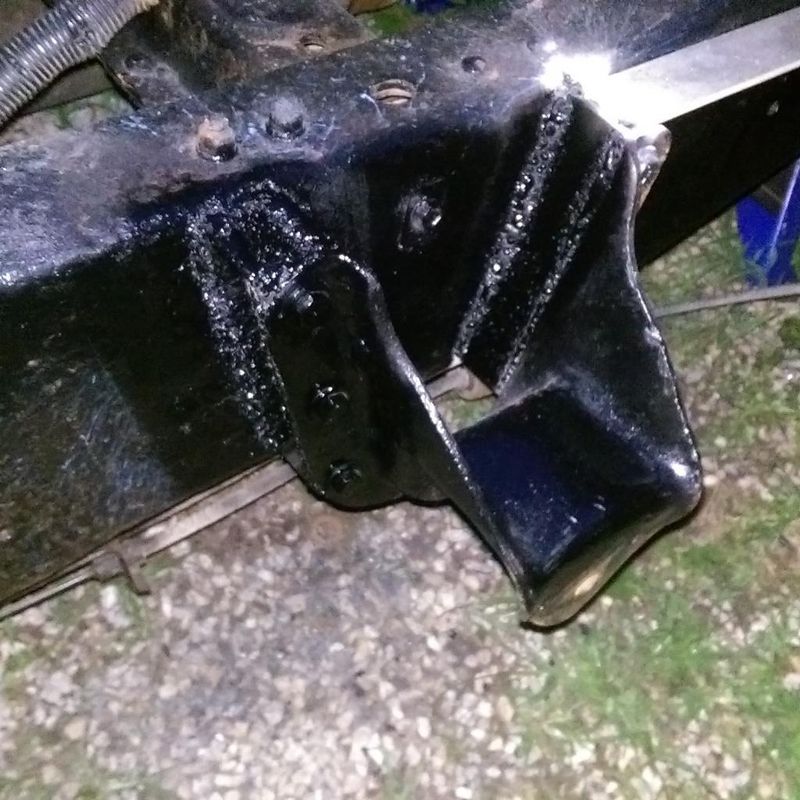
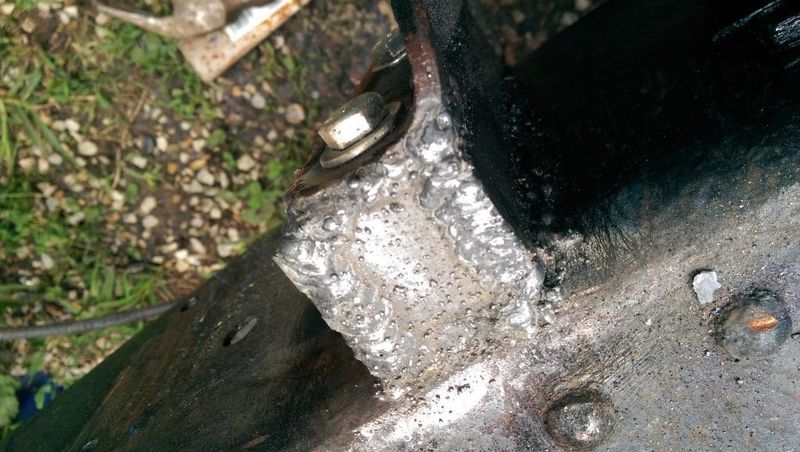
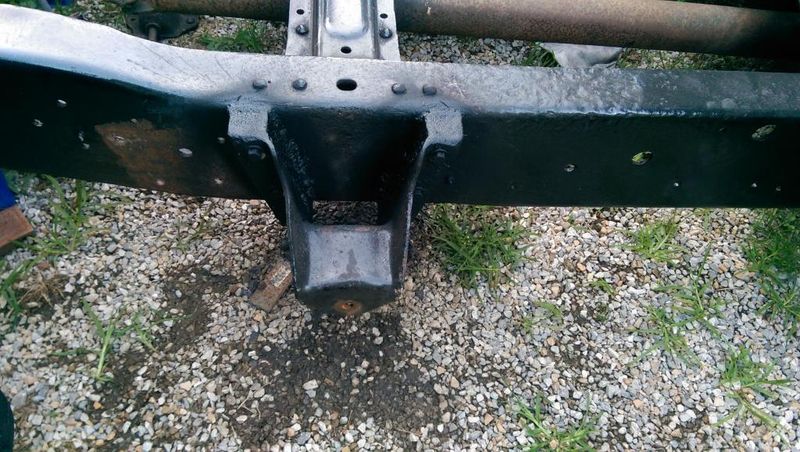
i planned on using the factory font leaf mounts for the lower bar mounts, but after some measuring and mocking i seen that the bag would not fit with enough space to be able to expand and compress. i need an extra 1.5" to have clearance and line up with the upper bag mount. so i cut and removed the mount and used 1.5" stainless steel spacers and grade 8 bolts to reattach it to the frame, then used 3/16" steel to fill in the gap around the mount. (my welds are definitely not pretty but they hold, Im still learning )

luifer76
+1y
looking good man and thanks for the link on the lug nuts, quick tip if your using a small welder preheating the metal before welding helps alot getting strong welds....
luifer76
+1y
are you gonna weld a gusset on the lower links? it will help a lot and you won't taco the bars specially since you're running the bags there.....
onelowoneton
+1y
No problem man glad I could be of assistance. Haven't really thought about putting gussets on there but I will definitely look into man, thanks.
onelowoneton
+1y
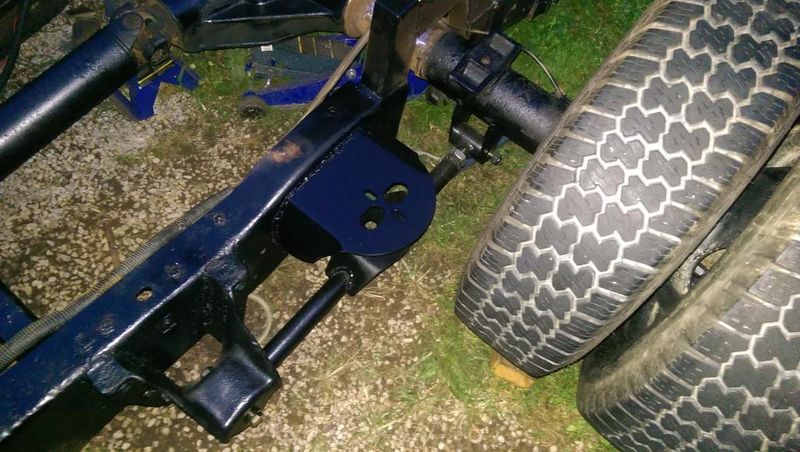
After the lower bars were situated i had to begin the up bars. i decided to run a triangulated setup instead of using a panhard bar. so i had to remove the factory cross member and replace it with a 2x3 tube for mounting the front of the uppers. the cross member isnt the prettiest in the world but is definitely strong. after getting it cleaned up it turned out pretty good
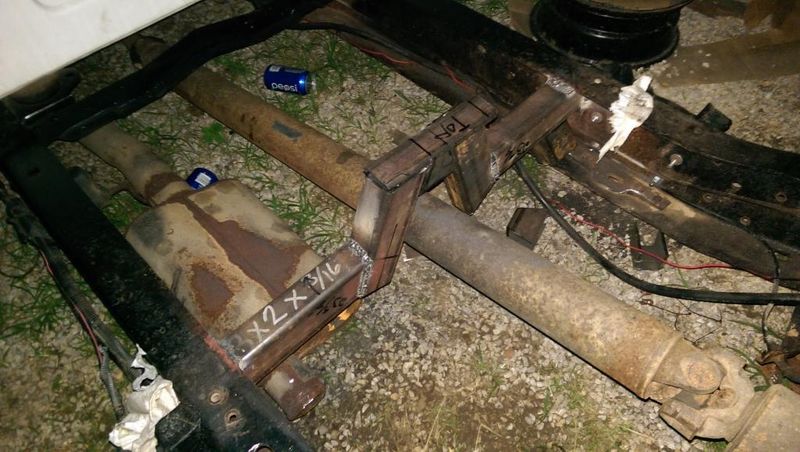
still had a few spots to weld again
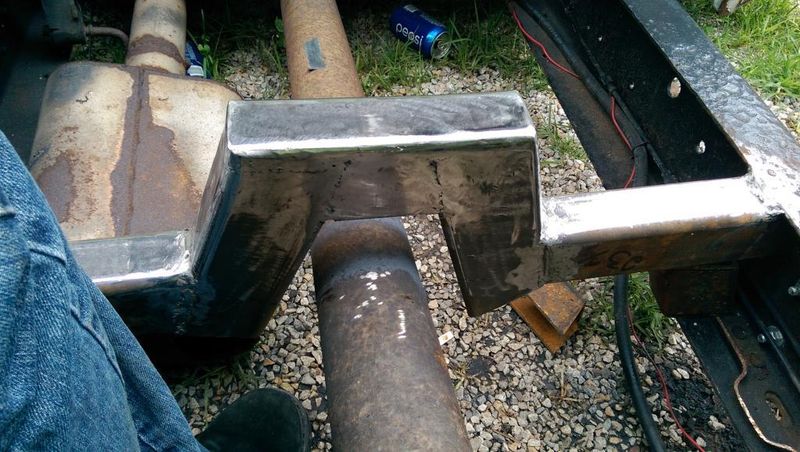

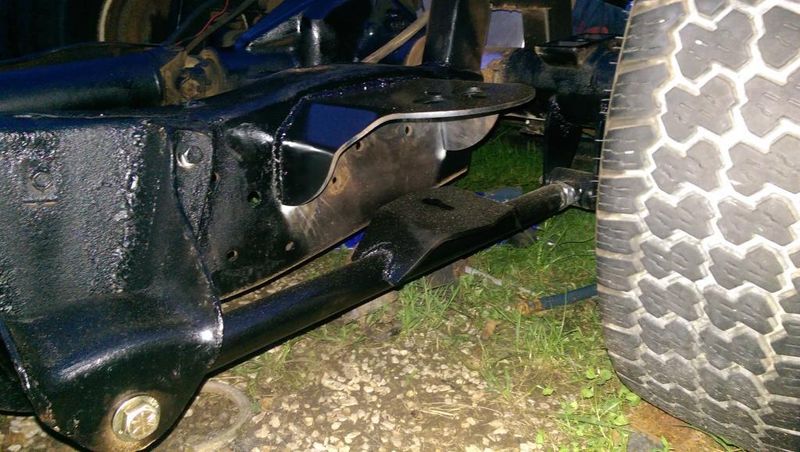
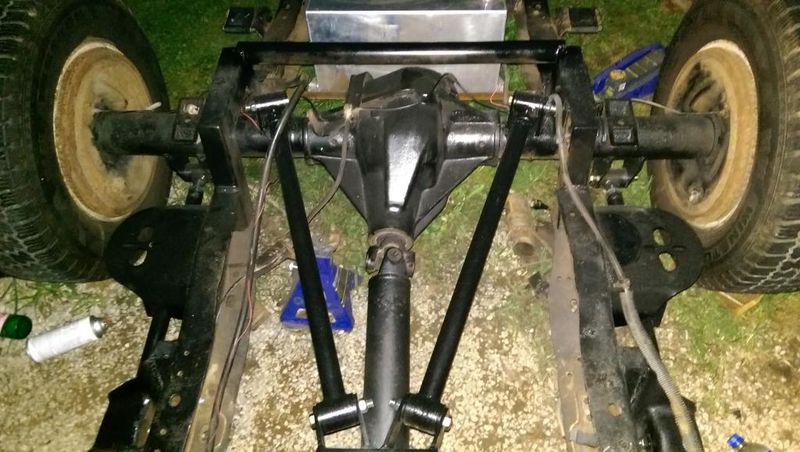
didnt get many pics at this time, after re welding and grinding a few spots i began measuring and mocking up the bars and mounting brackets. got everything welded on and put together
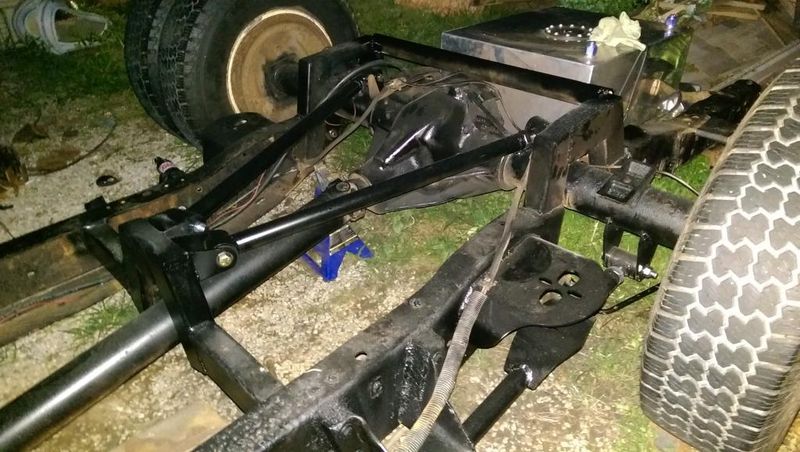
after setting the bed back on there had to be some cuts made to allow for the upper bag mounts and the air line

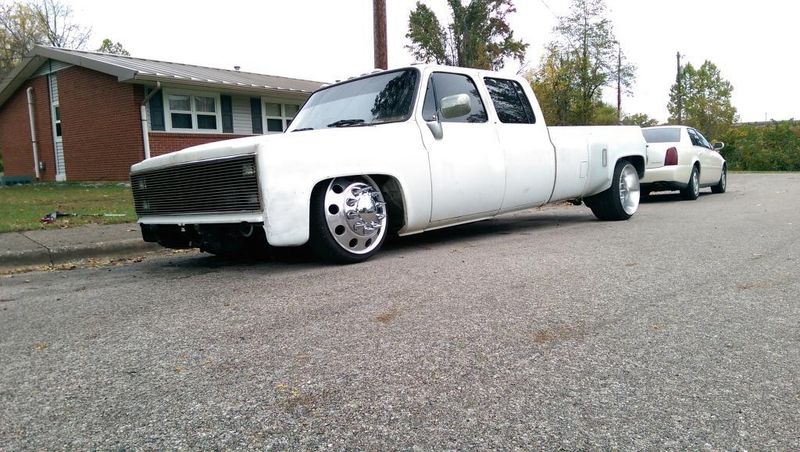
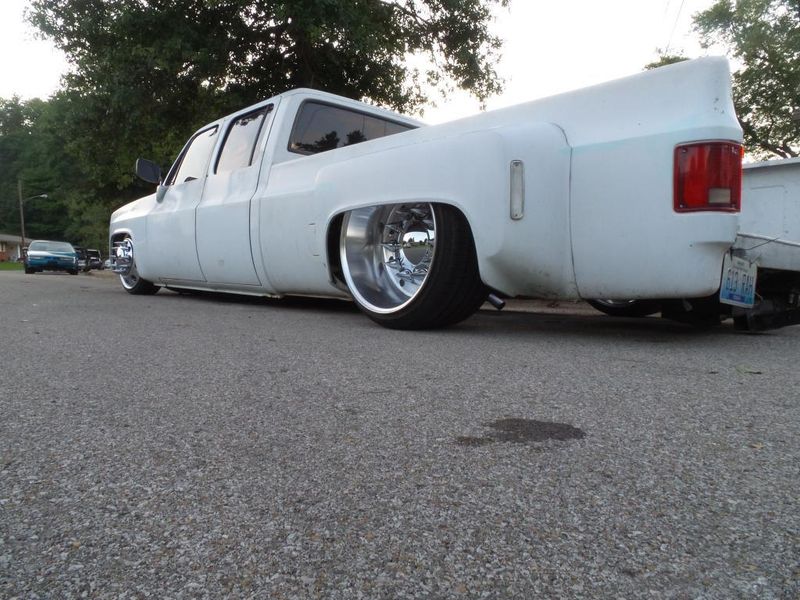
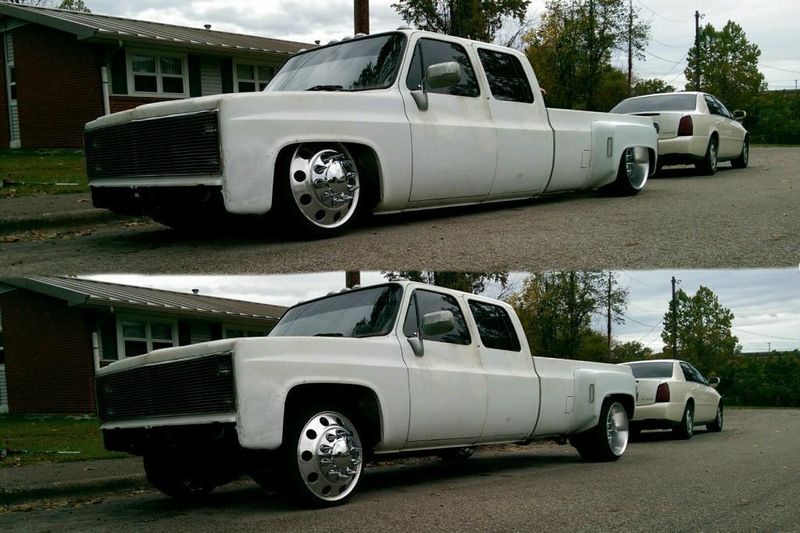
laid out
aired up
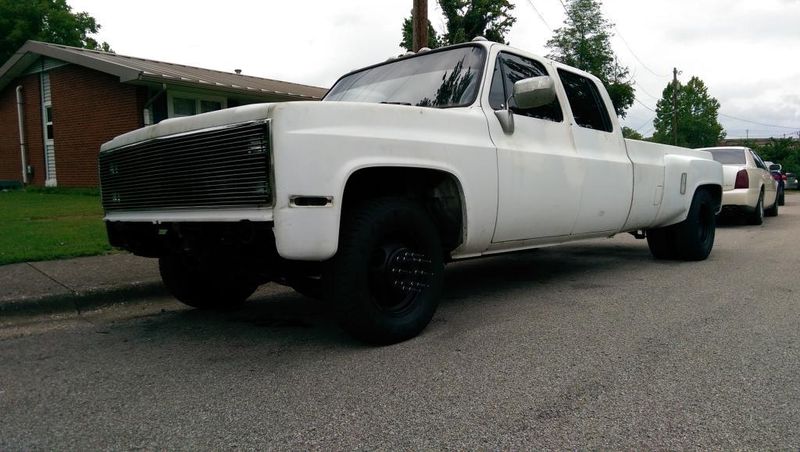
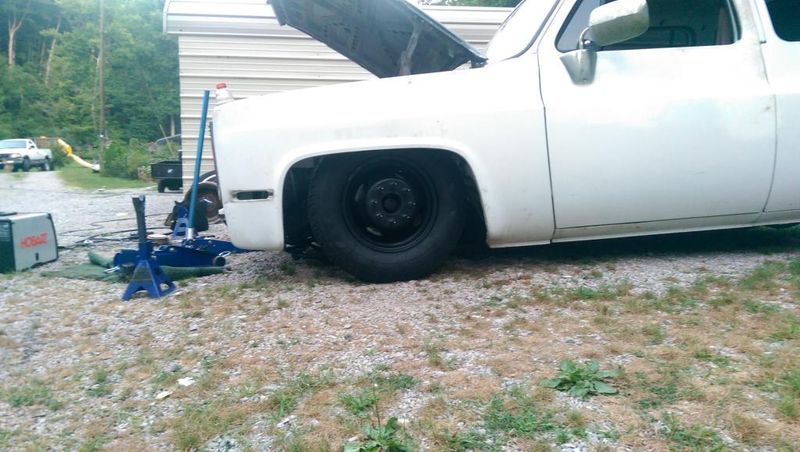
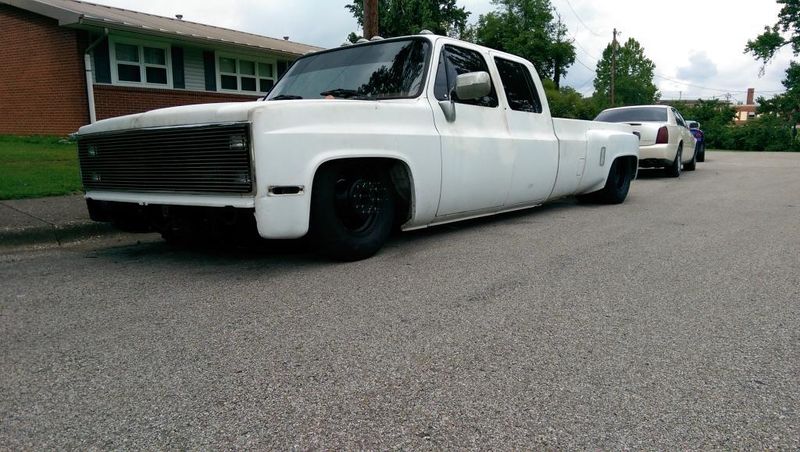
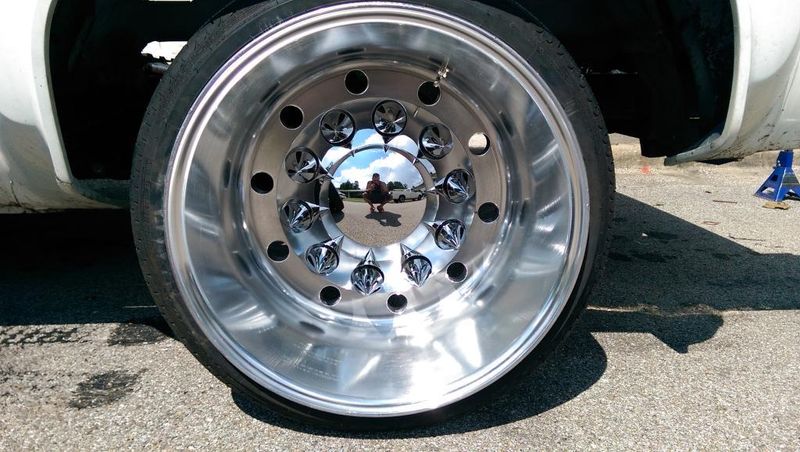
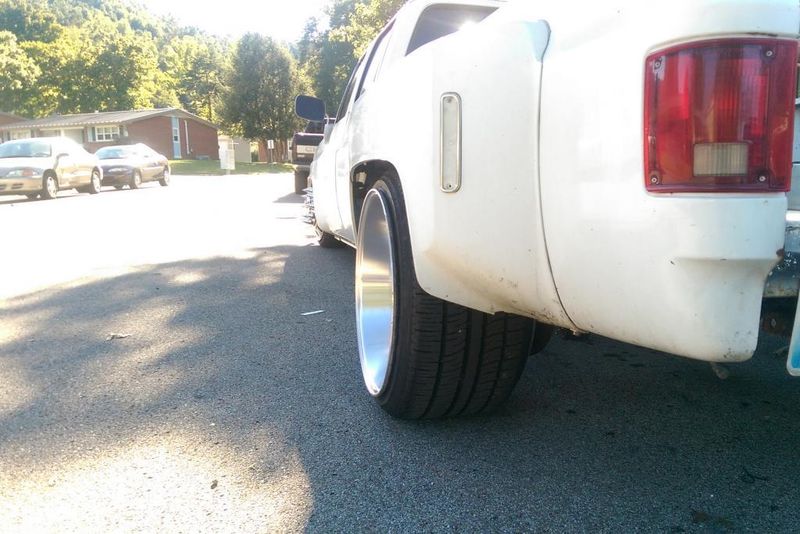
after some searching i found a set of wheels i liked an set the truck off pretty good. they are classic style semi wheels with a super single rear
i also upgraded to Michigan Metal Works control arms. which are awesome arms. allow more travel and angle in the ball joints with less stress

still had a few spots to weld again
didnt get many pics at this time, after re welding and grinding a few spots i began measuring and mocking up the bars and mounting brackets. got everything welded on and put together
after setting the bed back on there had to be some cuts made to allow for the upper bag mounts and the air line
laid out
aired up
after some searching i found a set of wheels i liked an set the truck off pretty good. they are classic style semi wheels with a super single rear
i also upgraded to Michigan Metal Works control arms. which are awesome arms. allow more travel and angle in the ball joints with less stress
luifer76
+1y
truck looks sick with the big rig wheels bro also those arms are sexy, can't go wrong with MMW arms
luifer76
+1y
quick question what's the width of the rear wheel?
onelowoneton
+1y
Yeah i love the arms. They were a little more than most arms but they give me a lot more travel capabilities.
The rear is 14" wide. A actually have the rims for sale right now.
The rear is 14" wide. A actually have the rims for sale right now.
Related Discussions in Dually Projects
Thread
Posts
Last Post
546
A
last post by
Airnewb91 +1y
193

last post by
Airnewb91 +1y