Street Source is shutting down April 30th, 2026. Read the announcement
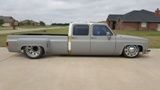
75 Dually Project - 22s and stylin

garagebuilt
+1y
Truck is looking good. I'm running into issues with the wheels I have and I think the 3/4 ton rear may fix it. Is there any way you could measure between the drums on yours? I'm wondering if my link bars are too wide to fit without redoing everything.
W
watahyahknow
+1y
you can go even narrower if you put the dually hubs on the 3/4 ton single wheel diff , you do need to move the flanges of the backingplates for the brakes though , or make a rear diskbrake setup
doing that you basicly making a chassis cab rearend
doing that you basicly making a chassis cab rearend

75dually
+1y
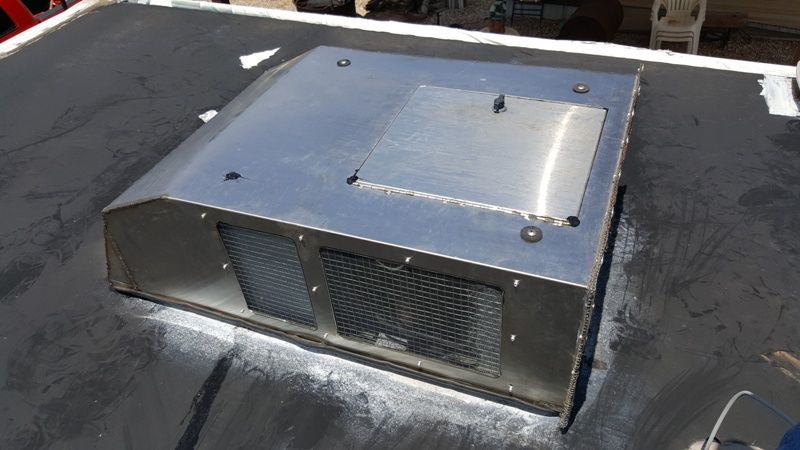
Some weekends we get to work on our tucks and cars. Other weekends are filled with projects like this one. The AC cover on my travel trailer was getting old and beat up. Lot's of west Texas hail storms had done it in. It had done the same damage to my friends trailer also. We both decided that we were going to make new hoods for our respective trailers.
So a while ago I was given a huge piece of stainless steel by a friend of mine. It was a giant vent hood in an industrial kitchen that was being remolded and they were just going to throw it away. We cut it down and made the hoods out of it. A lot of TIG welding, and a lot of fab work, but we got them done today. I am going to use my old square body door seals for the bottom lip that sits against the roof of the trailer. Talk about using things you never thought would go together. The only things we had to buy was the screen mesh on the side for ventilation. Gotta be resourceful now-a-days!
So a while ago I was given a huge piece of stainless steel by a friend of mine. It was a giant vent hood in an industrial kitchen that was being remolded and they were just going to throw it away. We cut it down and made the hoods out of it. A lot of TIG welding, and a lot of fab work, but we got them done today. I am going to use my old square body door seals for the bottom lip that sits against the roof of the trailer. Talk about using things you never thought would go together. The only things we had to buy was the screen mesh on the side for ventilation. Gotta be resourceful now-a-days!

75dually
+1y
Yesterday I spent a good part of the morning before it got super hot installing the new stainless AC cover. I had to use some old screen for the rear of the unit, which was formally used as part of the old plastic covers method of keeping the dirt dobbers (read: mud wasps). Not the prettiest job on the rear of the cover, but hey if it keeps those wasps out I will be happy.
Just for all the truck guys out there, the bottom seal is the door seal out of my donor suburban. It looks like something a factory AC cover would come with. Plus it will last for years, and if it gets all tore up I have a couple more saved for the future... So glad to be a truck guy!
Just for all the truck guys out there, the bottom seal is the door seal out of my donor suburban. It looks like something a factory AC cover would come with. Plus it will last for years, and if it gets all tore up I have a couple more saved for the future... So glad to be a truck guy!

W
watahyahknow
+1y
it prolly helps if you make a strip along the front with a lip that you stick in front of the cover on the roof with some sealant to use as an airdam , i think the rubber seal you have on the cover will lift slightly when you drive through rain the lip will deflect the worst of it around the cover and seal
Post was last edited on Jul 04, 2016 04:53. Edited 1
time.
75dually
+1y
Bed Time!
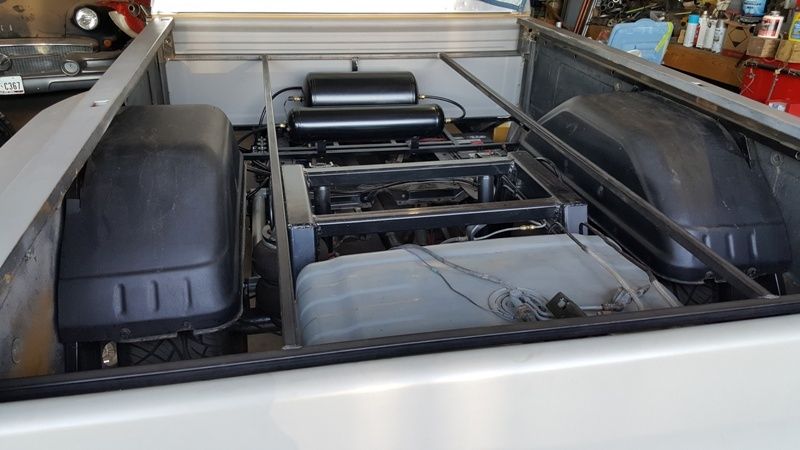
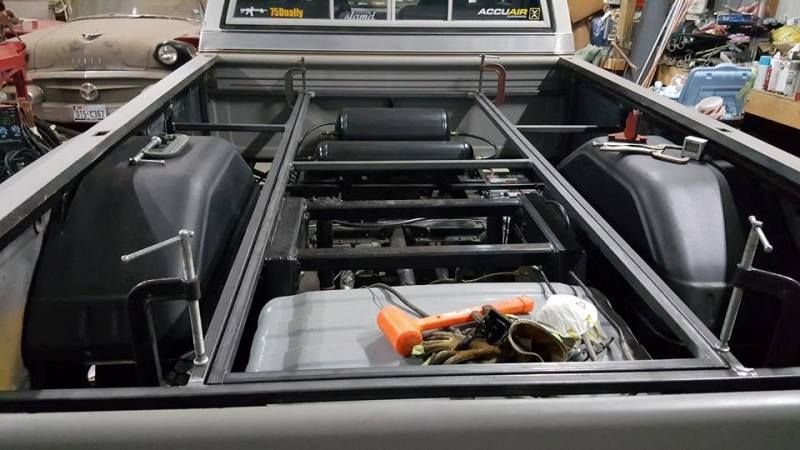
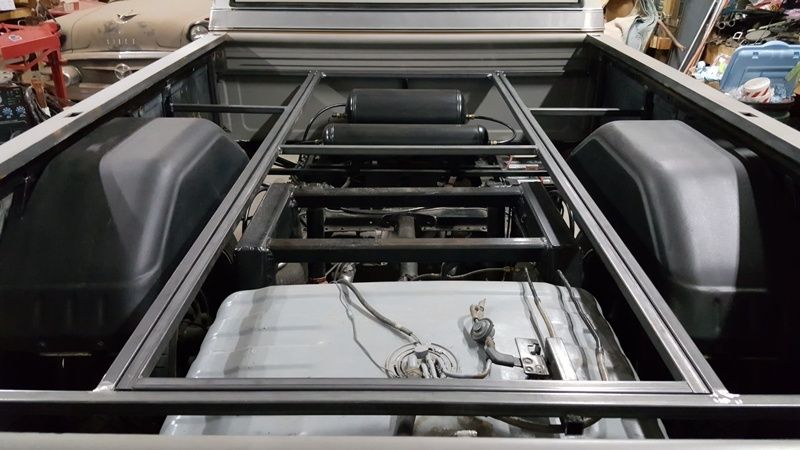
So West Texas has had a string of really hot days. There was just enough breeze today to keep you from melting, so I got busy with the frame work for the sheet metal in the bed. I had to take out several of the old supports on the original frame work to work with what I have planned. I also put the front panel back in too.
So the plan is to have a couple of compartments in the front of the bed for tool storage. There will also be a luggage storage area right in the middle. The center section is going to raise up on gas lift cylinders, and I found an old bear claw latch I've had laying around forever to secure everything.
Stay tuned! This should be interesting...;):lol:
75dually
+1y
Some additional work got done on the bed last night. I finished welding up all the tack welds on the new bed frame pieces, and then I moved on to working on the front. I started the forward storage areas. I only got the basic frame work laid out, but it gave me a good idea as to how much space I had available to work with.
Looks like I'm going to have to use the center section above the drive shaft for a place to put the spare tire. I tried to put it under the gas tank, but that was not going to work (not enough space under there when air'd out). I was originally going to use this large space for a luggage area, but doesn't look like it is going to work out. Ah well live and learn...:lol:
Looks like I'm going to have to use the center section above the drive shaft for a place to put the spare tire. I tried to put it under the gas tank, but that was not going to work (not enough space under there when air'd out). I was originally going to use this large space for a luggage area, but doesn't look like it is going to work out. Ah well live and learn...:lol:
75dually
+1y
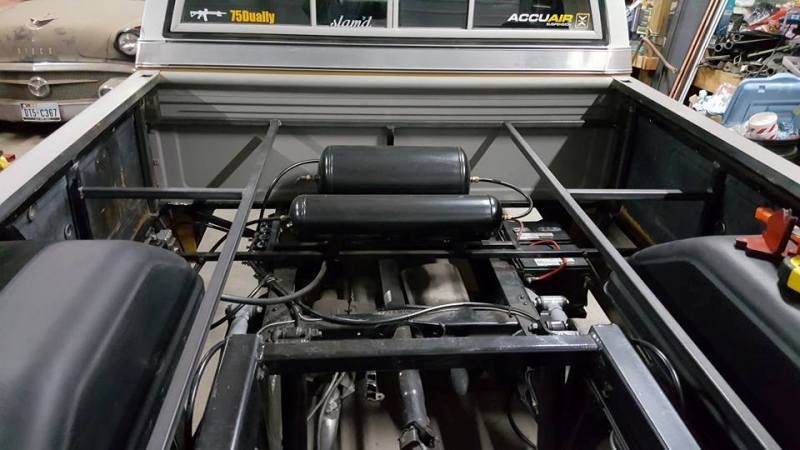
Stayed late in the shop tonight. Got the center section done. Now I need to figure out a hinge system. ;) I have a couple good ideas in mind. I'll post it up when I get it finalized.
75dually
+1y
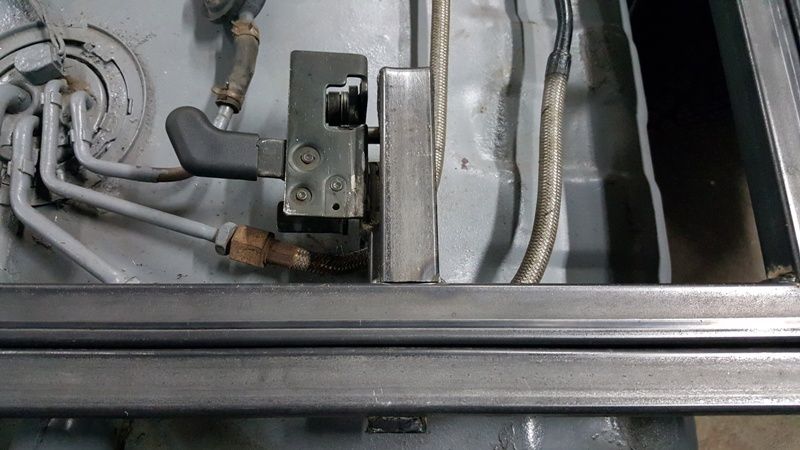
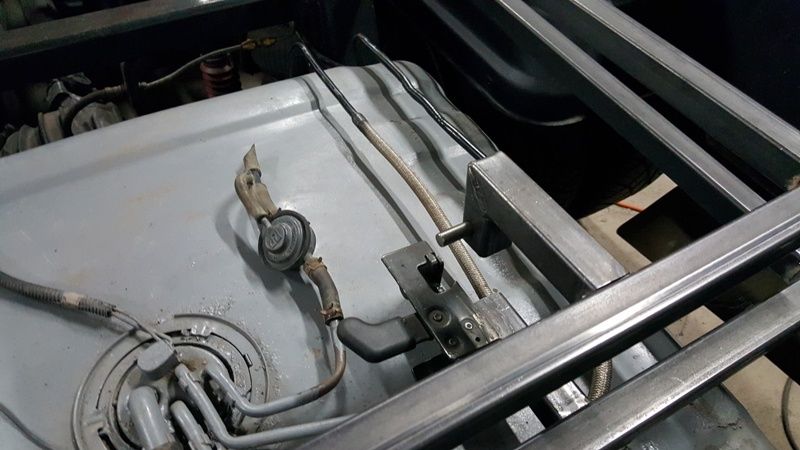
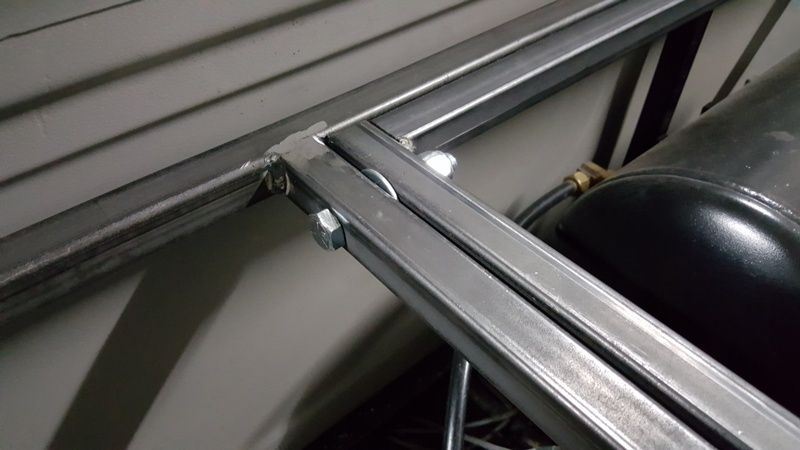
Tonight was interesting. I did the hinge for the center portion, really just 2 - 1/2" bolts drilled through both pieces of bow tubing acting as the pivot point. As you can see in the below pic I still have to modify the washer so that it does not stick above the box tubing, but that should not take long.
The rear latch was a much larger deal. It took a lot of tinkering with location and ability to accommodate the striker pin. In the end I tried to make it as simple of a solution as possible. After I got it all welded in I tested it several times, it closes so nicely with a solid click. Could not ask for better! I will add a rod assembly that will attach to the release knob on the bear claw latch, and the rod will go backwards towards the fuel door. This way I can release the latch without reaching up under the sheet metal every time. I will post pics on it when I get it completed.
So next is the 2 storage boxes up front, and the mount for the spare tire. Then it will be on to skinning the whole bed with 18 gauge sheet metal. Tons of fun!
Stay tuned!
75dually
+1y
more photos
Related Discussions in Dually Projects
Thread
Posts
Last Post
546
A
last post by
Airnewb91 +1y
193

last post by
Airnewb91 +1y