Street Source is shutting down April 30th, 2026. Read the announcement
more progress pics

jumbo
+1y
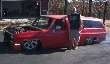
still going slow, but this is the end result of 26 hours this past weekend:
here you can see the hole in the firewall and the upper control arm mounts rotated.
here's a close up of the upper ca mount cap rotated
here's the passenger ca cap rotated and welded back in
a straight on shot of the driver's firewall
here's me holding in the patch piece, Barry spent 3 hours measuring and pie cutting so he could just slide the stock tub up 3" so he only has to piece in the bottom. At the top you can see where the slave cylinder and hood popper cable are relocated.
here's what the inside looks like right now (yikes!)
here's what i did while Barry did all the hard stuff, re plumbed valves with t's w/gauge fittings and installed check valves
installed water traps on all 4 bag ports (and you can't see it, but i took out the air tanks and coated them with por 15 gas tank sealer so they won't rust anymore (figured you'd like that, Seth!))
these last 2 aren't great pics, but i forgot my camera this weekend, i just ran by the shop on my way to work. They show the chopped tranny crossmember. When it was all painted up, it looked stock. Barry basically took off the part that hung below the frame and replaced it with 1/4" plate. And it took me more time to get it out and put it back on than it did for him to make it, i swear he's freaking awesome. It took him about 20 minutes to make it.
so there it is, not a whole lot done, but more progress than the last 5 months combined, i'm starting to get psyched! When i get it back home, time to start putting everything back together.

bodydropped85
+1y
looks good man, what is the purpose of flipping the mouting points around?

smctoy
+1y
Looks sic player...cant wait to see it all done!

BggdNBdyDrppdJunk
+1y
lookin pretty good, keep up that progress man!

LaidNeon
+1y
can't wait to see it finished

mindlissmetalfab
+1y
Why are you flipping the arm mounts?? New one to me.

xinsertnamex
+1y
i was also curious about the rotation maybe to center the wheel in the fender?
jumbo
+1y
here is what we did. measure from the ball joint to a point on the firewall from the stock location. weld a bolt on a piece of metal, stick the bolt through the hole on the cap (make a pivot point), then cut the frame caps off, grind them down, make them look pretty, put them back on using the bolt through the frame hole, rotate them counterclockwise to where some part of the ball joint is the same distance to the point on the firewall, then weld them in. Here is the reason for it: If you notice in the stock location, when your truck lays out, the wheels tuck up and in towards the firewall. With the caps rotated, the wheels will go straight up when layed out. First, it centers the wheels better in the fender, second, you don't have to cut quite as much to make it lay. We did'nt have to cut into the passenger side firewall at all. I was a little nervous about it too, but when we test fit, there was about 1/4" from the wheel to the firewall on the passenger side, and the driver's side had about a full inch of clearance from where we cut. When laid out, the wheels are moved forward 1 to 1 1/2 inches. The only downside is it drops the front of the spindle where the tie rods mount forward just a little bit. But there's enough play in that knuckle to not make much difference.

fatboysS1O
+1y
looks good there mister chubby fingers!! haha point for me. one of these days your gunna cuss me out for all the wise cracks! all jokes aside, looks good and keep it up, shouldnt be too long before your layin on those Mavens.
jumbo
+1y
dude, if you did'nt burn me every freaking chance you got, i'd think you were mad at me, lol.
Related Discussions in Mini Truckin General
Thread
Posts
Last Post