wiki
Wiki Home \ Combination Switch Or Headlight Switch Exposed!

Combination Switch Or Headlight Switch Exposed!

Last Updated: Feb 24, 2015
View Photos

OK........I did a little write up over at MT on the Headlight Switch (HLS) that seems to go bad on our 1986-1993 Mazda trucks. The HLS is mounted to the Combination Switch and when it goes bad, most of your running lights won't turn on when you have the headlights on!

So here is the fix for it.......I pulled my whole CBS out but you may be able to just remove the HLS from the CBS and not have to pull the steering wheel this way.


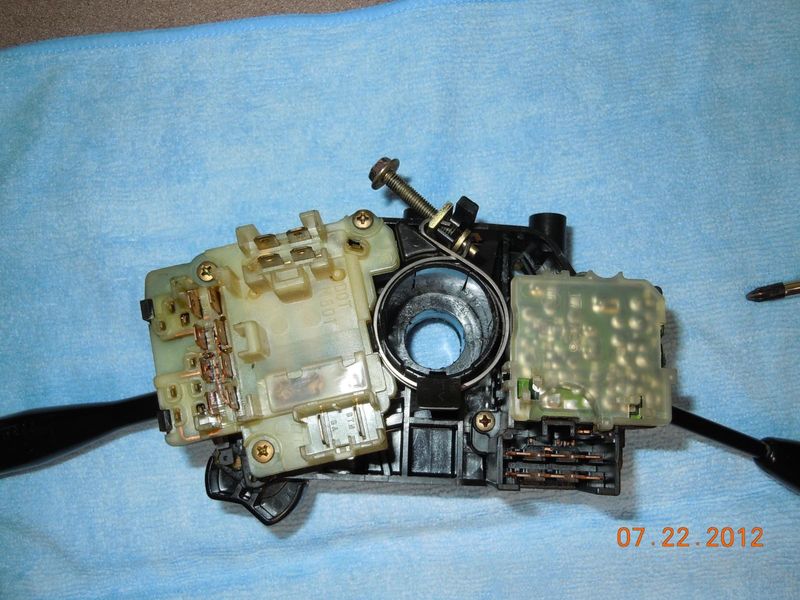
The combination switch (CBS) is the switch that is directly behind the steering wheel on our 86-93 Mazda trucks, and has the turn signal/headlight switch/high & low beam switch lever that sticks out of it on the left side.
Sometimes, something in this area of the switch goes bad and your parking lights, or headlights, or both won't work all of a sudden.
Well, my latest truck had this problem........none of the lights would come on when you rotated the light switch to turn on the parking lamps. The HL would work when they were turned on, but no running lamps nor dash lamps. Luckily I had a spare earlier model switch (this is a 1986 B2000) that had the 4 wire connection as opposed to the 5 wire setup switch.........there are 2 different ones.......and here they are.
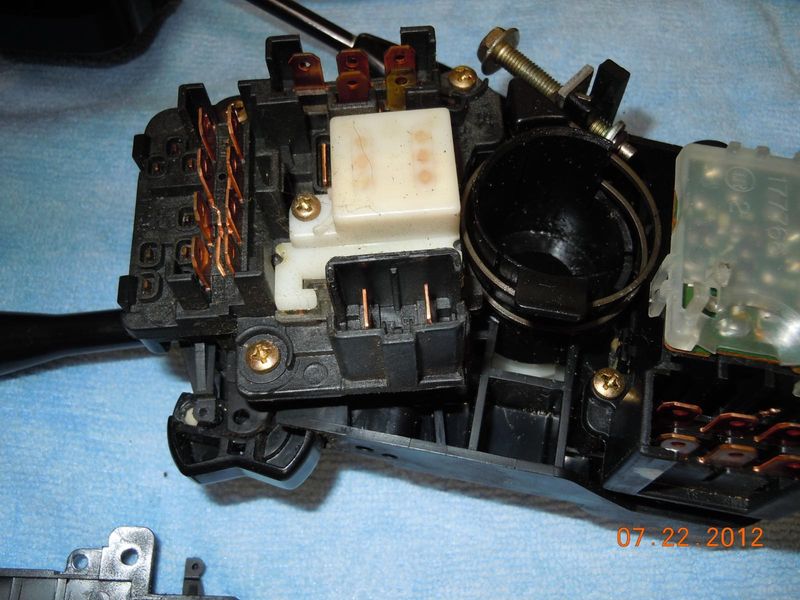
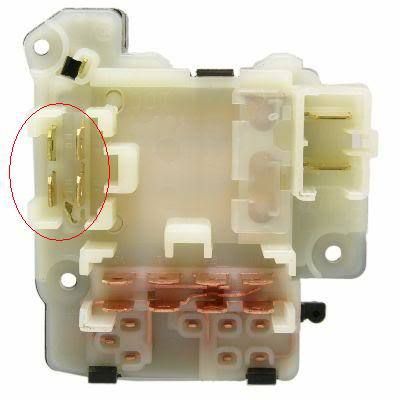
You can see there are 2 different headlight switches with these CBS's.........the 4 wire plug one is usually a white back one and the 5 wire one (it's actually a 6 plug connector, but one is not used) is mainly black on it's backside.

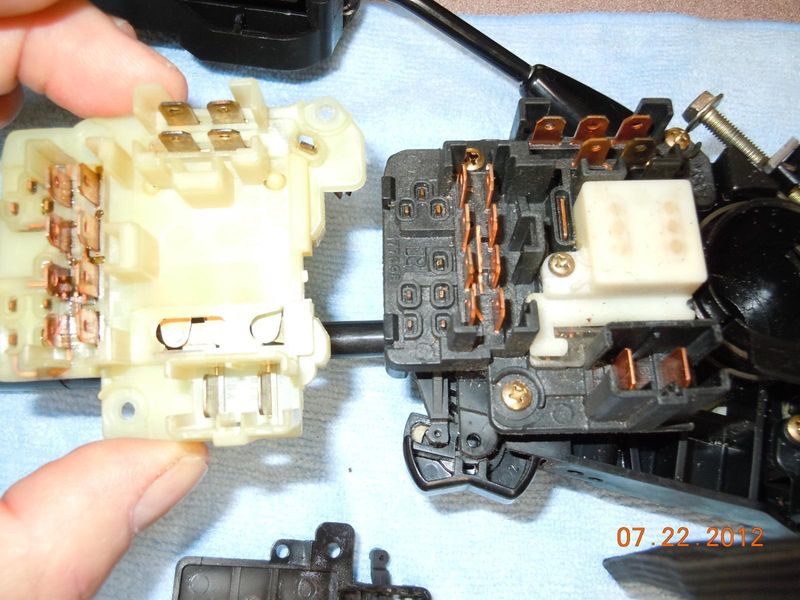
The white 4 terminal one.

thread post photo


The black 5 terminal one.
thread post photo


Holding the white one up to compare it with the black one.....

thread post photo


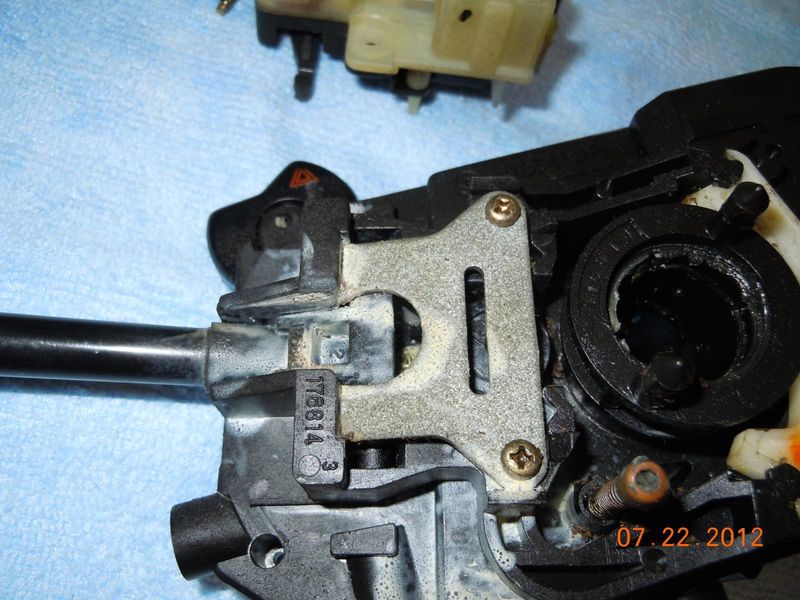
There are 3 screws that mount this HL switch to the combination switch (CBS)......you can see two of them here.....

thread post photo


Switch removed.

thread post photo


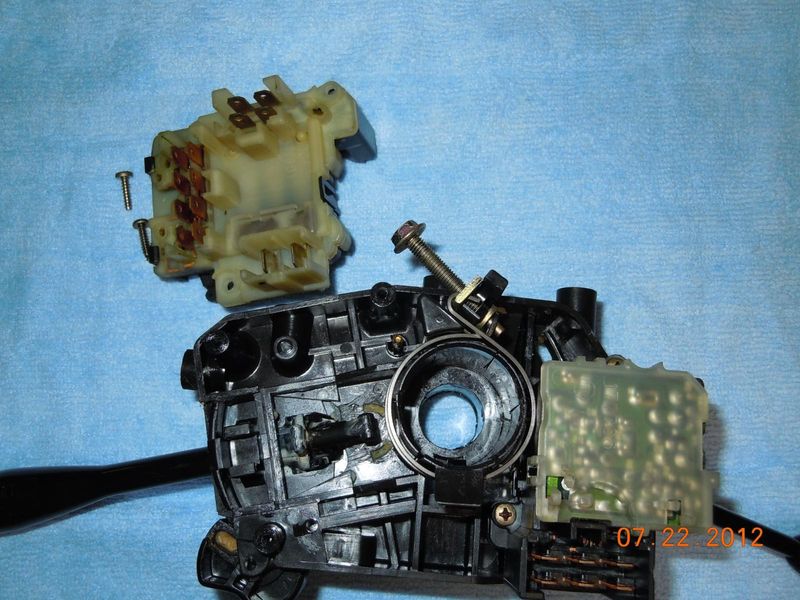
And you can see the end of the turn signal arm and how it has 2 different "ends" that toggle the multiple switches on this HL switch.

thread post photo


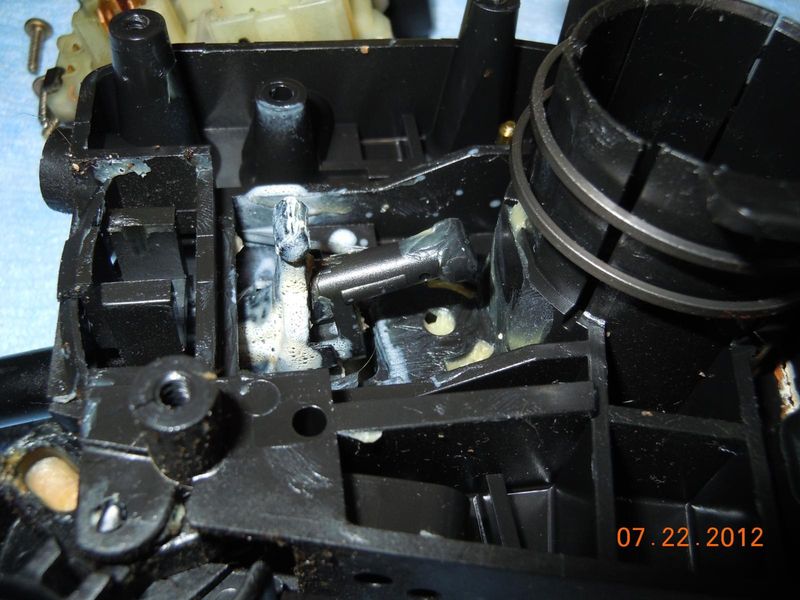
On the steering wheel side of the CBS you can see this plate that helps secure the turn signal arm to the CBS.......these screws have become loose on a B truck I had years ago and was affecting the lights also......I tightened them down back then and it fixed that one......so make sure they are tight also. There is a spring behind that plate so don't loosen it if all is good with it!

thread post photo

Credits

Created By: axel breaker earl

Page 1 of 2
axel breaker earl   +1y
NOW.......to see what makes this HL switch work, I pried the 3 tabs that hold the back of it to the front of it, and here is what I found!

thread post photo


There are 3 "points" in there that allow the parking lamps & dash lamps to turn on, the low beam HL's to turn on, and the high beam HL's to turn on! You can see that they are pretty nasty looking after arcing on and off over the last 27 years!

thread post photo


thread post photo


thread post photo


thread post photo


There is also the switch for the hazard lights too, with some burnt up grease on that as well.....

thread post photo


thread post photo


There are 3 "pins" that rest on the long copper arms of those 3 points when these 2 pieces are snapped together and those hold the 3 sets of points OPENED when the lights are turned off.

thread post photo


Flipping this 'black part' over, there are 2 areas where the ends of the turn signal arm slips into and they control the position of those "pins" to turn the lights on and off.

thread post photo


Ends of the turn signal arm....

thread post photo
axel breaker earl   +1y
When the HL switch is split apart, the black side can then be further taken apart to see how it controls those 3 pins when the lever is rotated or pushed back or forward.

thread post photo


That area where the turn signal lever ends engage, can be slipped off to show the other side of the small plastic pins that push on the points arms to hold the points opened.

thread post photo


thread post photo


thread post photo


These recessed channels lets those plastic pins go down when they land in a recessed area and therefore lets the points close to turn on the headlights, high beams or parking lamps!

thread post photo


That piece can also be slid apart into 2 different pieces because those turn signal lever ends move in different directions to each other.

thread post photo


Here it is just sitting up on the black part of the switch to show how it would lay down in there........except it actually "slides" in from the right side.

thread post photo


thread post photo
axel breaker earl   +1y
Here is the "pin" area of the switch with the pins removed.......

thread post photo


thread post photo


thread post photo


thread post photo

thread post photo


there are no small springs behind the plastic pins because from where they rest on the long copper arms of the points, the copper arms actually keep them spring loaded as the "at rest" position of the points are a closed position.....they are set to have tension on them to stay in a closed position, and the pins actually hold them opened until the switch is operated and it releases one or 2 pins at a time to allow the points to close and therefore the lights to turn on!

It's that simple! LOL, I know it's hard to comprehend all of this, but the bottom line is.......the points get dirty, and probably the tension on the parking light points arm gets weak, and it adds up to the points on the parking light circuit not making good contact........that's it!

AND, the switch is nearly fully repairable and can be cleaned and put back together to give years of service again! I will show how I cleaned it all up and put it back together again......and in the next day or so, I will hook it back up to the truck and make sure it works again, but I am 99.9% sure it is fixed!

A closer look at the points.....

thread post photo


thread post photo


thread post photo


thread post photo
axel breaker earl   +1y
Here you can see which points control which lights...

thread post photo


The points are actually removable and can be cleaned very easily.

You can also see where the pins rest on the copper arms, as they have left an imprint there where they ride.

thread post photo


You can also see that the parking lamp points (far right) have gotten hotter than the HL points........the copper arm has turned color near the end of it where the points are.........probably from resistance (dirty points) or from too much of a load.......but I would think the headlights draw more current than the total amount of the parking lamps that are on when the points are closed.

thread post photo


thread post photo


The 3 sets of points and their copper arms can be removed to clean them good.......

thread post photo


thread post photo


thread post photo


thread post photo


thread post photo
axel breaker earl   +1y
Cleaned and ready to go back together.

thread post photo


thread post photo


thread post photo


thread post photo


Setting the points back in place.

thread post photo


thread post photo


thread post photo


I just slightly bent the parking lamp point arm to help put a tad more pressure onto the other half of it's point so it is guaranteed to make good contact when it is in it's closed position.

Then after you place the pins in their bores, it is just a matter of snapping the 2 halves together and then aligning the turn signal arm ends to the respective areas on the HL switch, and screwing it back in place.

thread post photo


thread post photo


If you remember the brown greasy area for the hazard switch..........on the left in the pic.......

thread post photo


.........when I first unsnapped the 2 halves of the switch, I cleaned that area real good and re-lubed it with Sil-Glyde Brake Lubricant........it doesn't get runny with heat, and I think it is perfect for the lube inside of an electrical switch.
axel breaker earl   +1y
Here's a couple more pics of the switch......as if there ain't enough already! Kinda different angles of it before it gets snapped back together.

thread post photo


It was not done yet in this pic, but the right side of the picture is one area that I used the Sil-Glyde lube.......I put a generous amount on those copper tabs off on the right........NONE on the points arms or tips!

thread post photo


This end of the points arms are actually like the female end of a electric spade style connector.........this end pushes onto the male portion of the spade style connection.......so I crimped the female side just a tad so it was sure to make a good connection.

thread post photo


I should have flipped this over and taken a pic, so you could see what I mean!

thread post photo


So I think the main reason this switch was not working completely, is because of the dirty points on the parking lamp point. I could have just pulled the points, cleaned them, and snapped it back together again and it would work!
sincitylocal   +1y
That's it!!!
I'm putting the house up for sale.
I'm moving to Florida to be best friends with you!
jenko   +1y


Sucks to be you, I'll have called dibs on the choicest couch by the time you get there.
No house to sell, though slightly further to travel...
I'll keep some beers cold and crocodile (or is it alligators?) steaks hot for ya

ABE, you are the best!!!!!!!!!!!!!!
axel breaker earl   +1y
Ha Ha! Come on down SCL! Actually, I built the house next door to me on the north side! 3000 sq.ft. H&C, recessed living room with wet bar, with a 3-car garage and on an 1.2 acre lot! Actually there is a narrow section of property between us.......supposed to be a nice small subdivision one day if the economy ever turns around again. That house used to be my younger sisters house, but her and her husband got divorced about 2 years after finishing the home!! I spent 14 months of my life building that home for free (material cost only of course) for my sister.......needless to say, she owes me now.

Anyway, I think I would love to have a gearhead neighbor like yourself SCL.......you to Jenko!

Thanks guys!
axel breaker earl   +1y
OK......It's official.......the cleaned up Headlight Switch WORKS!!!

I just hooked it back up into the truck it came out of, and all is working as it is supposed to.

So, it was mainly the dirty points on the parking lamps leg that was not letting the parking lights and dash lights come on when the switch was turned on.

The previous owner had even taken a 6" piece of wire and poked it into the low beam side of the headlight connector (under the hood) and then stuck the other end of the wire into the connector for the parking corner lamp that mounts on the grill, to back feed power into the parking lamps when the headlights were switched on, so he would have parking lamps anytime he turned on the headlights! I removed that of course once I saw it when I first got the truck, and that is how I found out the HLS was bad to begin with.

So.......you don't need to buy a new $50.00 headlight switch (aftermarket, not Mazda) if yours is bad........just clean up the Mazda switch on the INSIDE........the points mainly!
Page 1 of 2