Street Source is shutting down April 30th, 2026. Read the announcement

1968 Datsun 521 SFBD - The Shatsun

mindlissmetalfab
+1y
Edited: 2/10/2010 9:03:04 AM by iLLblazer
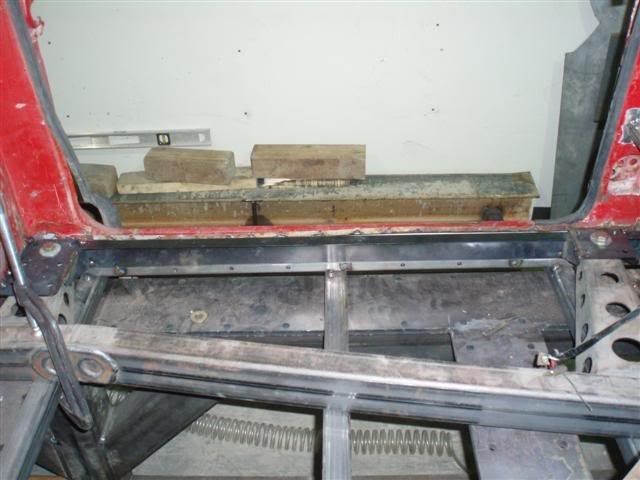
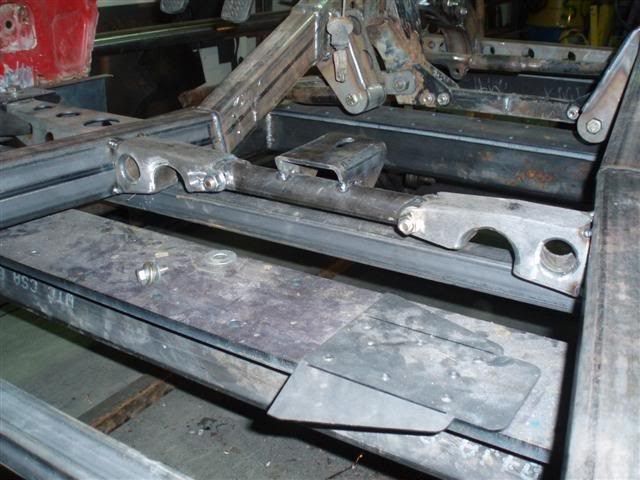
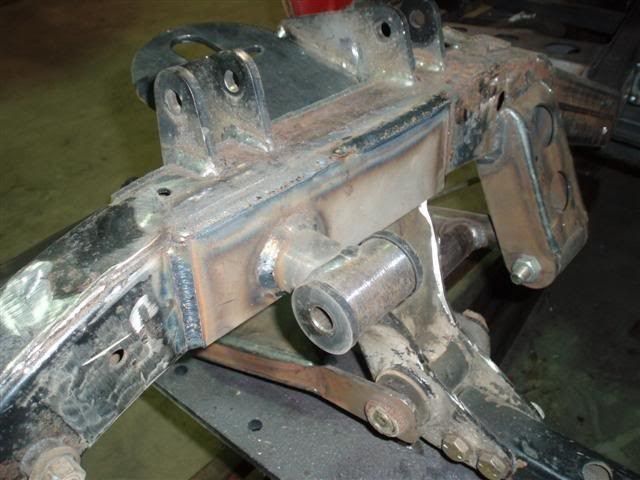
Edited: 2/10/2010 9:01:27 AM by iLLblazerEdited: 2/10/2010 8:55:08 AM by iLLblazerEdited: 2/10/2010 8:54:22 AM by iLLblazerEdited: 2/10/2010 8:46:53 AM by iLLblazerNot sure why I never make build threads on SSM but I figured I'd make one for my current personal project. I picked this truck up April 5th 2009. It doesnt look like much but where I live, I've never actually seen one of these on the road. They are all disentegrated to nothing. The body is rough but rust wise it wasnt too bad so for $500 I jumped on it. I've wanted something old school for awhile, but never thought I'd find one worth saving without going down south. After thinking about the project I decided not to get carried away with the build. I'm 6 years into my blazer project with no end in site because I let plans snowball out of control. I didnt want that to be the case for this build since I miss having a minitruck on the road. The worst rust on the truck was the rockers and a little on the floor pan: I got to work tearing it down as soon as I could. I wanted at least a rolling chassis for it at my clubs show in June 20 2009. So between working full time and customer projects, my time was limited. Someone had 'swapped' the stock 1.3L out for a later model L16. More parts availability which is good, because the truck had been sitting for 7 years. However the swap was questionable at best: After some research into the Datsun suspension, and following Twisted Minis project Ethel Buildup, I opted to go with a toyota front clip and rear end. So I jigged the frame, layed out my body mounts locations, took all my critical measurements and sent the stock frame off to the scrap yard. Next step was narrowing the donor clip for the datsun track width: After a few hours on the computer, I had my chassis designed so I began to lay out the perimeter frame and ordered up my custom link bars from SD. Next, I lasered out the backhalf rail profiles and formed the boxing plates. All 3/16 steel. I got the rear clip and crossmembers in place with my custom 4 link and narrowed toyota housing: Rear axle brackets for bags, shocks and 4 link: After that I started on the front suspension. I built jigs off the stock yota arms, and designed a bag plate/arm mount kit that maintains the stock toyota geometry but looks much better. Fabbed up the cab mounts and front crossmember: Stole my buddies wheels and drop spindles and I had my rolling chassis with time to spare before the show: So I decided I may as well get the body back on too. Everything needed to be shimmed up about 2.25" since the backhalf and front crossmember were designed for more of a BD than just the new frame allowed: Sorry for all the edits. The photo uploader seems to be shitting the bed.
Edited: 2/10/2010 9:01:27 AM by iLLblazerEdited: 2/10/2010 8:55:08 AM by iLLblazerEdited: 2/10/2010 8:54:22 AM by iLLblazerEdited: 2/10/2010 8:46:53 AM by iLLblazerNot sure why I never make build threads on SSM but I figured I'd make one for my current personal project. I picked this truck up April 5th 2009. It doesnt look like much but where I live, I've never actually seen one of these on the road. They are all disentegrated to nothing. The body is rough but rust wise it wasnt too bad so for $500 I jumped on it. I've wanted something old school for awhile, but never thought I'd find one worth saving without going down south. After thinking about the project I decided not to get carried away with the build. I'm 6 years into my blazer project with no end in site because I let plans snowball out of control. I didnt want that to be the case for this build since I miss having a minitruck on the road. The worst rust on the truck was the rockers and a little on the floor pan: I got to work tearing it down as soon as I could. I wanted at least a rolling chassis for it at my clubs show in June 20 2009. So between working full time and customer projects, my time was limited. Someone had 'swapped' the stock 1.3L out for a later model L16. More parts availability which is good, because the truck had been sitting for 7 years. However the swap was questionable at best: After some research into the Datsun suspension, and following Twisted Minis project Ethel Buildup, I opted to go with a toyota front clip and rear end. So I jigged the frame, layed out my body mounts locations, took all my critical measurements and sent the stock frame off to the scrap yard. Next step was narrowing the donor clip for the datsun track width: After a few hours on the computer, I had my chassis designed so I began to lay out the perimeter frame and ordered up my custom link bars from SD. Next, I lasered out the backhalf rail profiles and formed the boxing plates. All 3/16 steel. I got the rear clip and crossmembers in place with my custom 4 link and narrowed toyota housing: Rear axle brackets for bags, shocks and 4 link: After that I started on the front suspension. I built jigs off the stock yota arms, and designed a bag plate/arm mount kit that maintains the stock toyota geometry but looks much better. Fabbed up the cab mounts and front crossmember: Stole my buddies wheels and drop spindles and I had my rolling chassis with time to spare before the show: So I decided I may as well get the body back on too. Everything needed to be shimmed up about 2.25" since the backhalf and front crossmember were designed for more of a BD than just the new frame allowed: Sorry for all the edits. The photo uploader seems to be shitting the bed.

pugz
+1y
LOVE IT. I STILL MISS MY 71.
mindlissmetalfab
+1y
Edited: 2/10/2010 2:05:31 PM by iLLblazer
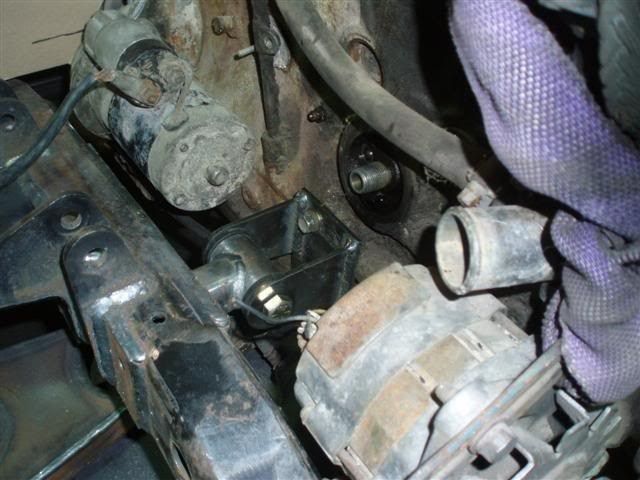
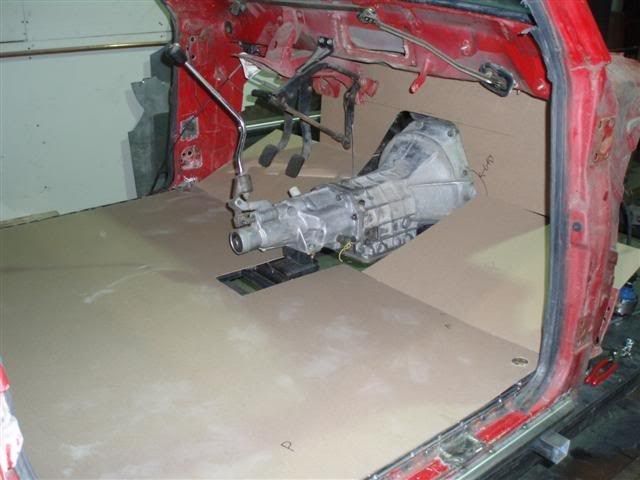
My original plan had been to get the body kinda straight and get the whole thing painted flat purple. However after seeing it at the show with its beat to hell appearance, I decided I liked it as is, so the body was going to stay, minus the stock rockers and floor: I had some new rockers formed to drop the body down the extra 2.25" I had originally planned for: The truck sat in pieces for the next while as I got some customer stuff done, headed to the RA show with the dually project, and tried to save up some parts money for my budget build up...After completing my new chassis table last week I decided to get back to it and start the new floor: New inner rockers and floor mounts for the cab: Next step was to get the motor installed which meant fabbing engine mounts and a trans crossmember: I was hoping to luck out by setting the motor back as far as I could before the front of the oil pan hit the crossmember. However it still slightly interferes with my steering linkage.So I need to build a new crossmember and move the mounts on the frame back a bit. However I need to free up my chassis table which means the floor has to get done first. Started on my templates: Aside from cutting the blanks for my firewall and floor pans, this is where I'm at now. Hoping to have the trans tunnel parts formed by thursday and make some progress on the floor over the long weekend.
My original plan had been to get the body kinda straight and get the whole thing painted flat purple. However after seeing it at the show with its beat to hell appearance, I decided I liked it as is, so the body was going to stay, minus the stock rockers and floor: I had some new rockers formed to drop the body down the extra 2.25" I had originally planned for: The truck sat in pieces for the next while as I got some customer stuff done, headed to the RA show with the dually project, and tried to save up some parts money for my budget build up...After completing my new chassis table last week I decided to get back to it and start the new floor: New inner rockers and floor mounts for the cab: Next step was to get the motor installed which meant fabbing engine mounts and a trans crossmember: I was hoping to luck out by setting the motor back as far as I could before the front of the oil pan hit the crossmember. However it still slightly interferes with my steering linkage.So I need to build a new crossmember and move the mounts on the frame back a bit. However I need to free up my chassis table which means the floor has to get done first. Started on my templates: Aside from cutting the blanks for my firewall and floor pans, this is where I'm at now. Hoping to have the trans tunnel parts formed by thursday and make some progress on the floor over the long weekend.


tre5
+1y
That frame is really nice!
mindlissmetalfab
+1y
I have a pretty decent parts pile ready including RCD/Bilstein Shocks for all 4 corners, Speedway steering column and aluminum fuel cell, 41 chevy tail lights and buckets, weber carb kit, (2) 3 gallon aluminum air tanks, Viair 444 Dual Pack, and Asco 3/8 Valves. Major purchases left are new axles, universal wiring harness, and gauges if I decide not to use the factory panel in the new dash. Plus all the little stuff...steering u joints, new brakes/wheel bearings, blah blah $$$$$ is running out quick LOL. Changes coming will be a new engine crossmember to allow the motor to come back another 1/2", I still need to add shock mounts all around, and I hate the rear bag mounts so that whole crossmember is coming out for something a little nicer.

stlowburban
+1y
Great build. What are the dimensions on that frame table. I'm planning to build one in a month or so and yours looks like exactly what I need.

1low68c10
+1y
wow that is insane joel btw i love the tabs ya made me this is vinnie from jersey if ya didnt know keep up the good work its insane
mindlissmetalfab
+1y
Thanks guys. The table is 56 x 198 with the top plates installed.

90yota
+1y
looks awesome Joel!!

foxkid
+1y
It's looking good man
Related Discussions in Build-Ups
Thread
Posts
Last Post
32

last post by
baha 5 mo
0
V
last post by
Vic 9 mo

168

last post by
truck action +1y