Street Source is shutting down April 30th, 2026. Read the announcement
how to : mono leaf and lowering block install
Last Updated: Feb 24, 2015
this write up is for people that may not know how to do this.this give around a 5" to 6" drop in the rear
legal stuff:
randy
west richland washington
flyinlow minis
works on almost anything with rear leaf springs
this is a mono leaf that i have run for years on many minis works great and have never broke a spring
it requires moving the overload spring from the bottom of the leaf pack to the top
on the top it help stiffen the flimsy main leaf
gives another 3/8 of drop
helps control axle wrap
but doesnt affect ride quality
PARTS NEEDED
3" LOWERING BLOCK KIT WITH THE ROUNDED TOP U-BOLTS
2-1 1/2 INCH LONG ALLEN HEAD BOLTS GRADE 8 OR BETTER W/ WASHERS AND LOCK NUTS MAKE SURE THE THREADS GO ALL THE WAY TO THE HEAD OF THE BOLT
WD-40 OR SOME SORT OF RUST BUSTING LUBE
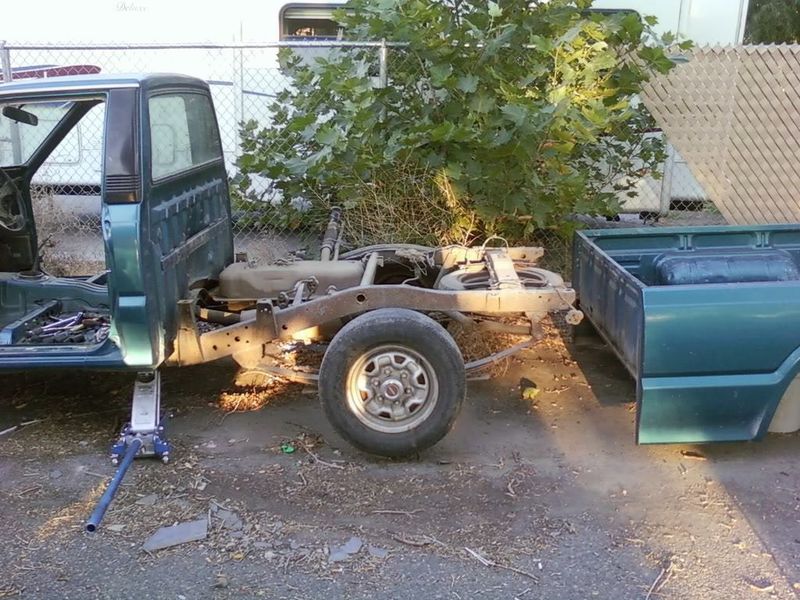
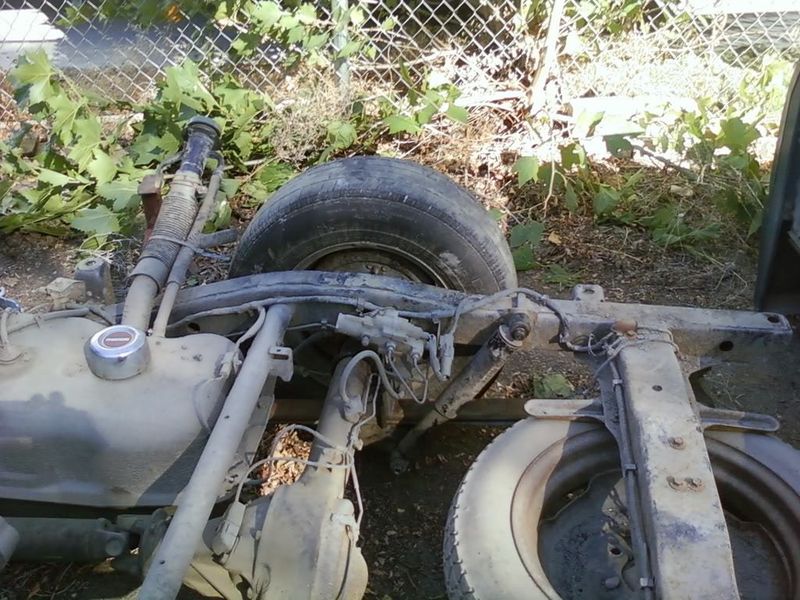
ok first up i did this with my bed removed..it is much easier to do and take photo's
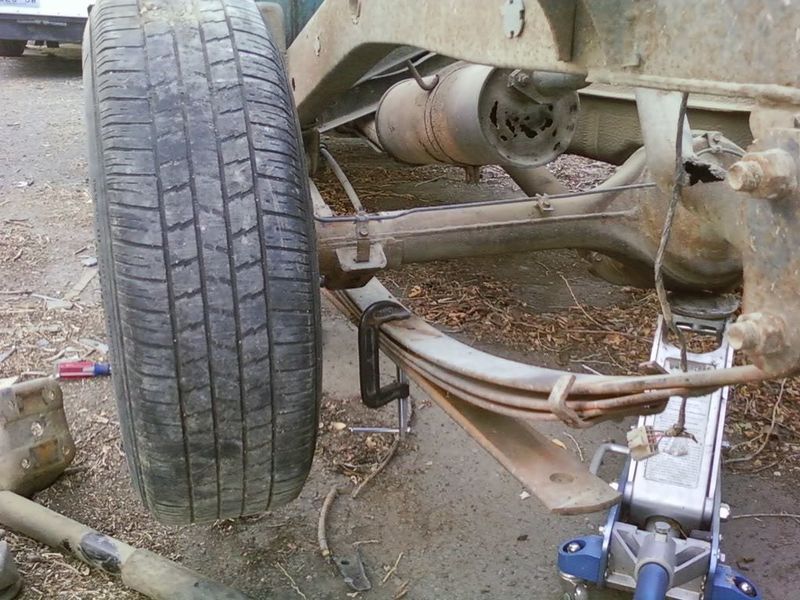
ok first thing is jack the vehicle up and place jackstands under the frame
it is very important to make sure it wont move or rock around it must be solid and the rear end must "hang with no spring tension
spray all bolts and nuts you are going to remove with wd-40
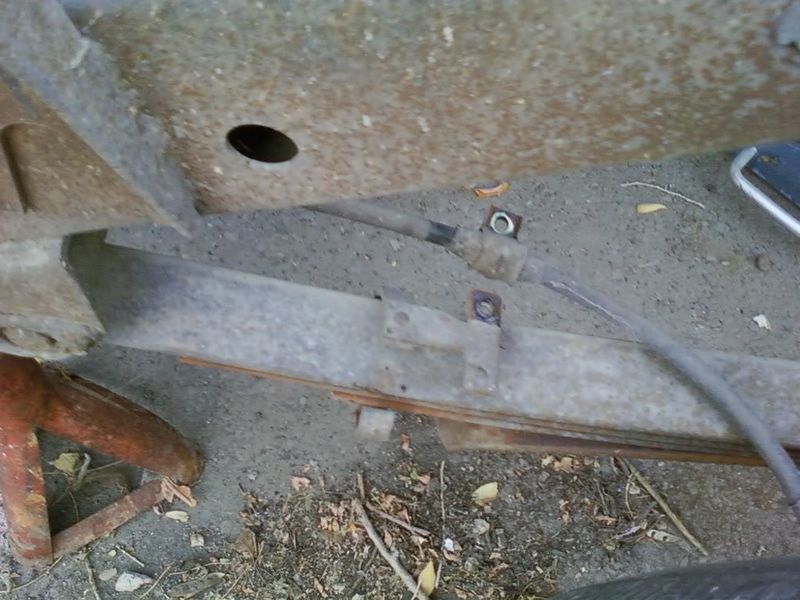
next remove the two bolts that are holding the e-brake cables on the leafs
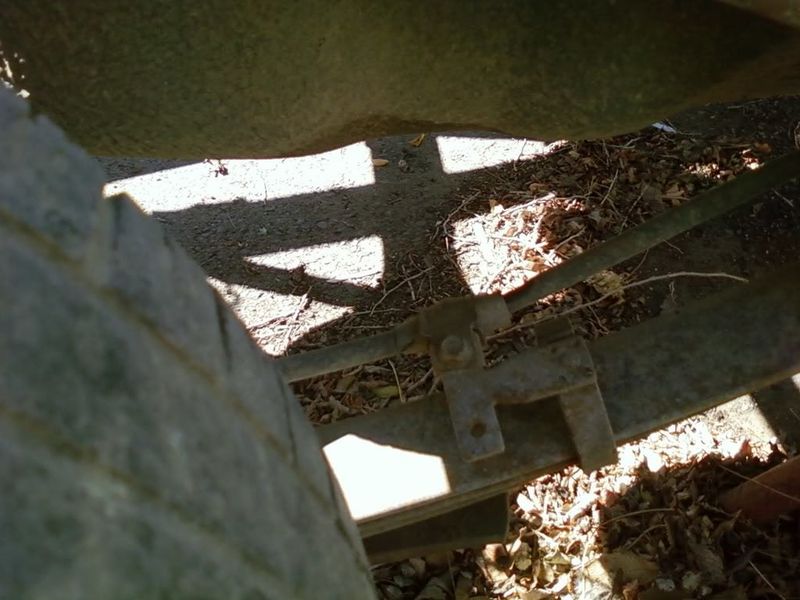
ok next thing there are two wrap around clampps on each leaf spring
take a large flat blade screw driver and bend them so they open up.
place a jack under the rear end and lift until it just barely makes contact
jack up the rear end just a tiny bit (maybe a 1/4")this keeps the rear end from falling when you remove the shocks
remove the rear shocks
release pressure from the jack so it just barely touches again
remove the u-bolts nuts on both sides
tap the plates down and they will fall off at this point
the rear end will roll forward at this point more times than not
do not worry about that right now
remove u-bolts and rubber snubbers
now jack the rear end up about 2 inches (it may only go up on one side at a time )
i left my wheels on for this no real need to it might be easier to do without them
NOW THIS IS THE REALLY IMPORTANT STEP
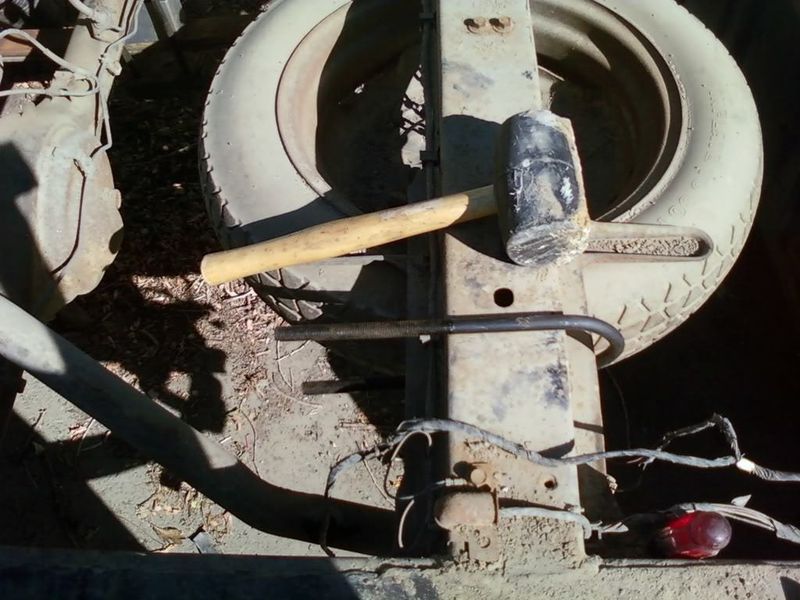
USE A C-CLAMP ON THE LEAF SPINGS TO HOLD THEM TOGETHER IN THE PACK
FAILURE TO DO THIS WILL RESULT IN INJURY.......
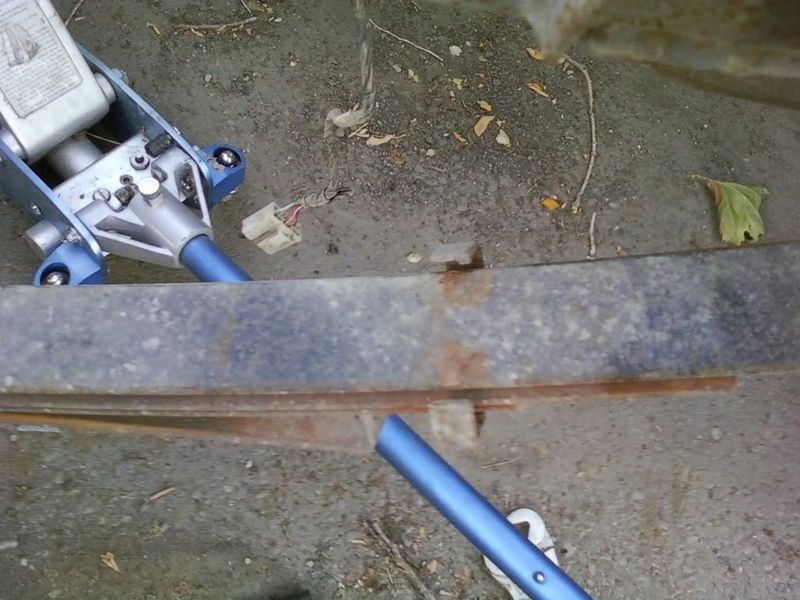
carefully remove the leaf spring pin
vise grips on the top will help alot
with the pin out you can slowly release the c clamp
DO NOT REMOVE THE CLAMP UNTIL ALL THE PRESSURE IS OFF THE SPRINGS
carefully drop the three leaf springs from the pack
the thicker of the three is the overload spring place it back on top of the main leaf still on the vehicle.
ok now the tricky part
place the c- clamp back on the sprins on the vehicle and place a large screwdriver into the holes for the pin line up the springs as you tighten the two springs together
a hammer might be neccasary to tap them around
make sure the holes are lines up
tighten them until they are tight together
DO NOT TRY AND REUSE THE OLD LEAF SPRING PIN IT WILL NOT WORK!!
you will need a new socket head cap screw(allen head bolt)make sure it is threaded all the way up and a grade of 8 or higher
place into the hole socket head up
use a lock washer and A NUT THAT IS THE SAME GRADE AS THE BOLT
tighten the bolt
be careful not to overtighten it will snap off
ONLY NOW DO YOU TAKE THE C-CLAMP PRESSURE OFF
REPEAT THIS PROCESS FOR BOTH SIDES
ok now for the easy stuff
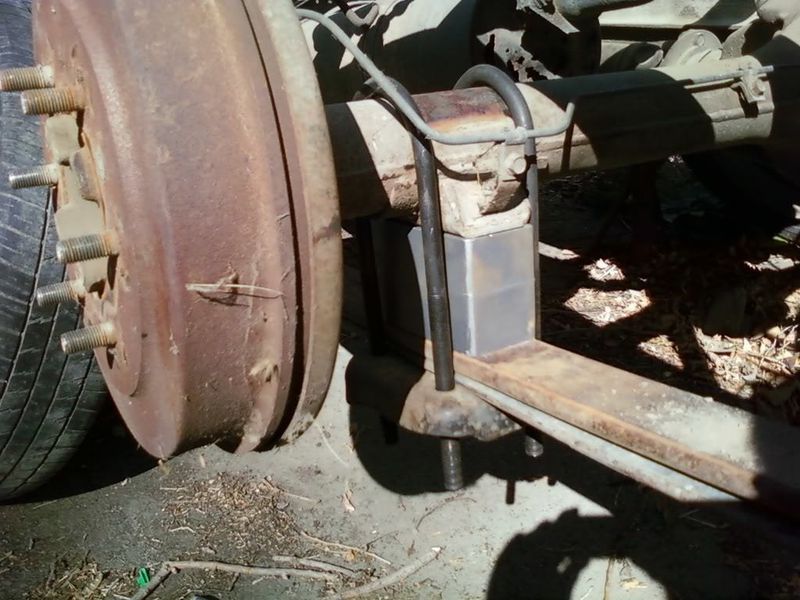
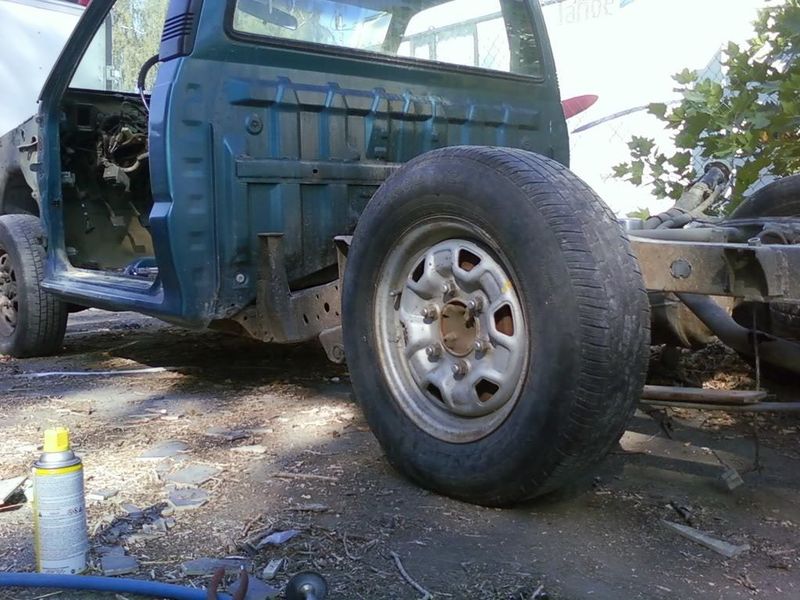
take the 3" blocks place them on the springs(do one side at a time and make sure the pins are lined up)
place the rear end on the blocks.
a jack under the pinion helps to keep it from rolling
now this is a little secret
check your u bolts and see how far off the bottom leaf spring plate they are
usually they are about 1/4 to 1/2 inch off from lining up to the holes
if they are to far apart
place the u-bolts on the rear cross member like so
and give them a slight whack with a rubber mallet DO NOT USE A REGULAR HAMMER YOU WILL THRASH THE U-BOLTS
this will tweak them just slightly so they will drop right in
place the u-bolts over the axle i left my snubbers out you can put them back in if you want but you will have to cut them so much they will be useless
place the lower plate back under the springs
MAKE SURE THE SPRING MOUNTS ARE GOING THE RIGHT WAY
run the u-bolts through the plate put the washer and the nuts on and tighten them
you may have to trim the u-bolts after you tighten them a bit because they will bottom out most sockets
i removed about 1 inch from the bottom of each u-bolt and finished tightening check a manual for proper torque specs
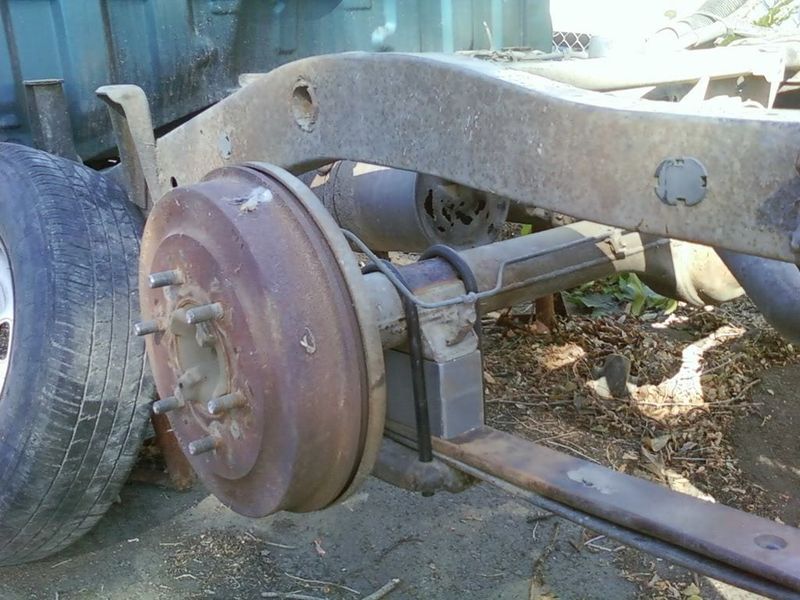
replace the shocks
go back through and make sure everything is tight and make sure nothing is going to rub
place wheels back on if you took them off
torque the wheels
jack the truck up and remove jack stands
lower truck to the ground and admire your work
before
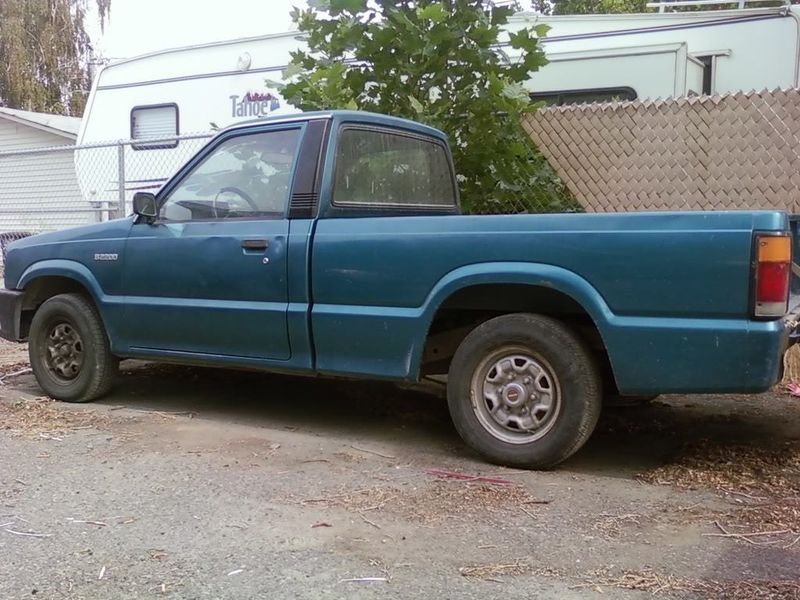
after
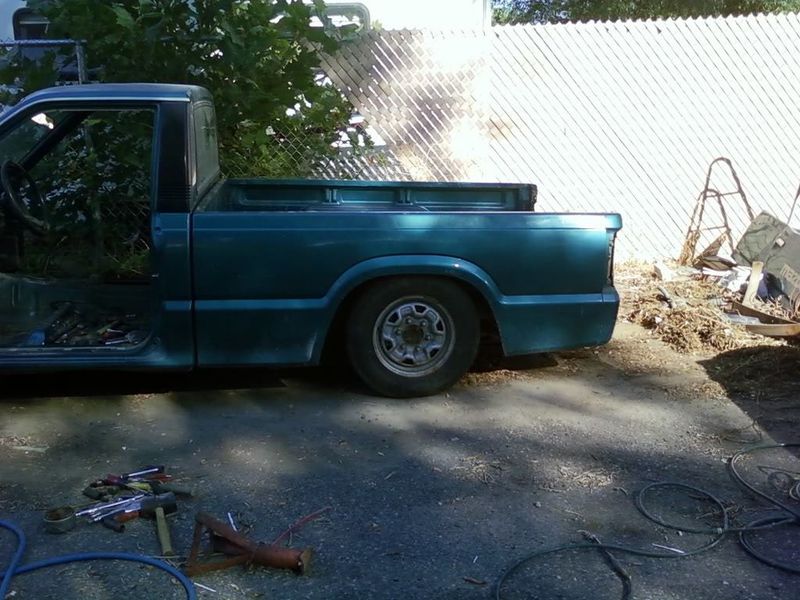
i think that about covers it
if i left a step out i will edit
Credits
Created By: uglybaby
Related Articles
How to: custom shifter boot
I thought i would make a thread about the shifter boot i made but although its really easy i wanted ...

How To: Chevy 105amp 3wire Alternator Swap
A.J. "SpaceMonkee" Demiar Bay Area, California 1992 B2200 (2.2 EFI) Standard Cab As t...

How To Tighten Up Loose "Tow Mirrors"
This fix is for the members that have the "tow mirrors" or "large mirrors" on yo...

Suicide Hood Hinge How To, with complete captioned photos
Chris Frye and I decided to make a tech how to out of our hood hinge install day and we chose to ha...