Street Source is shutting down April 30th, 2026. Read the announcement
my 42" toyota project

burnzya
+1y
i have this build on several forums, so this is a copy/paste of it.
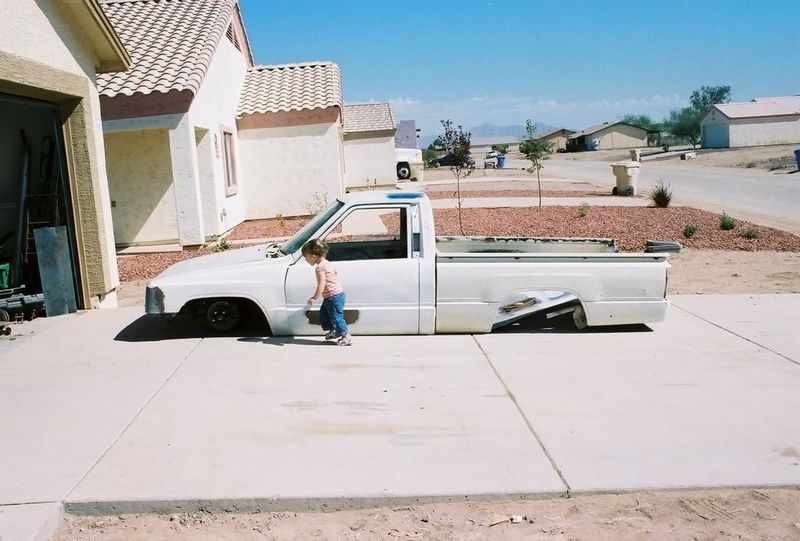
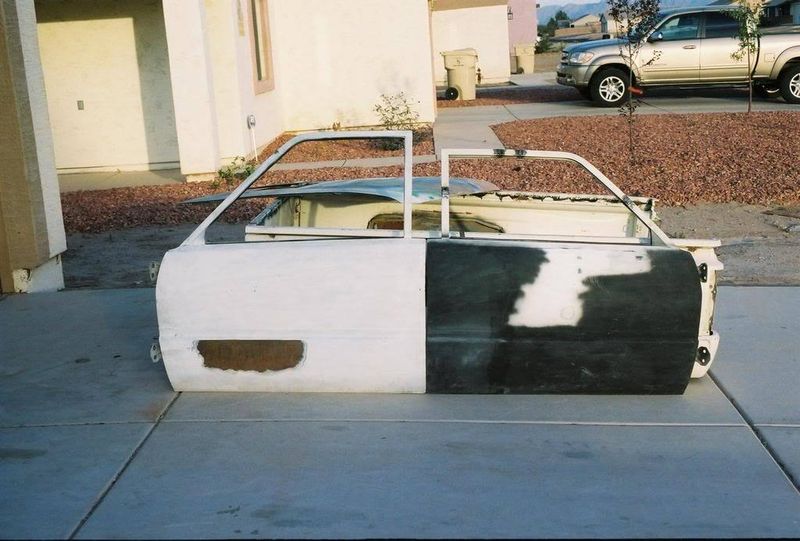
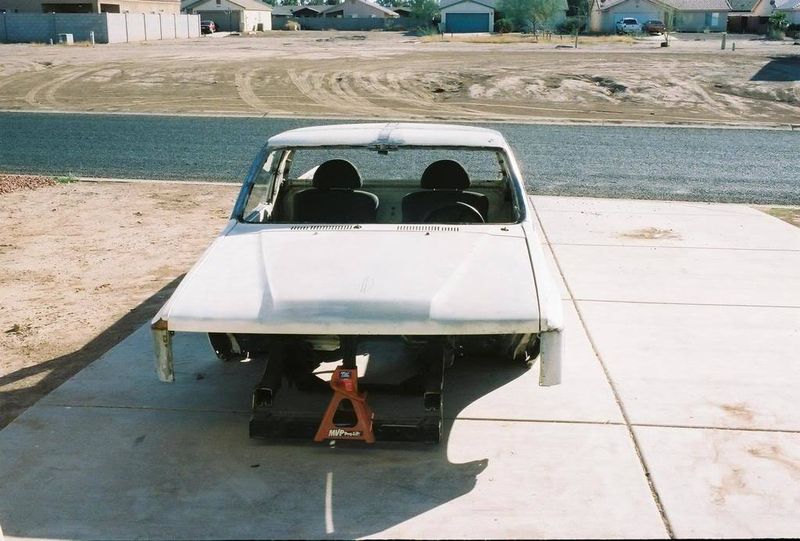
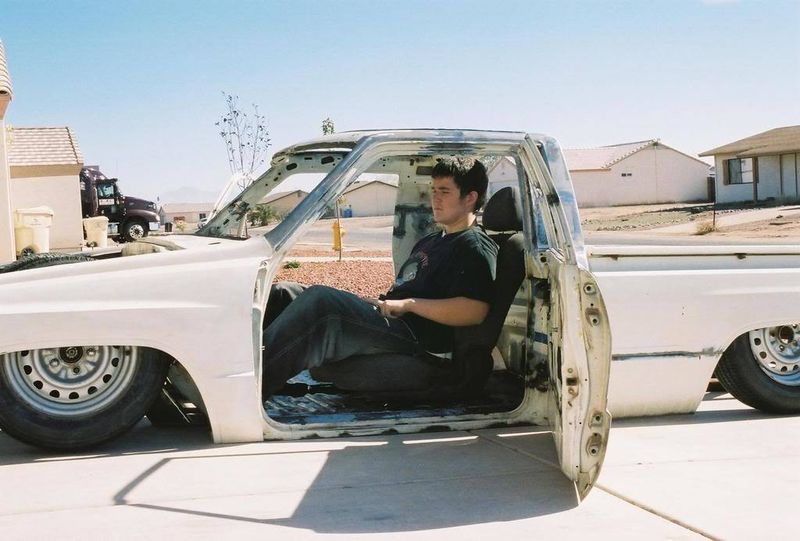
i bought this 86 toyota pickup from a neighbor down the street. it had been sitting for almost a year, and the first time i seen the owner i jumped on it. he said "it runs and i want $500". i bought it without even looking it over.
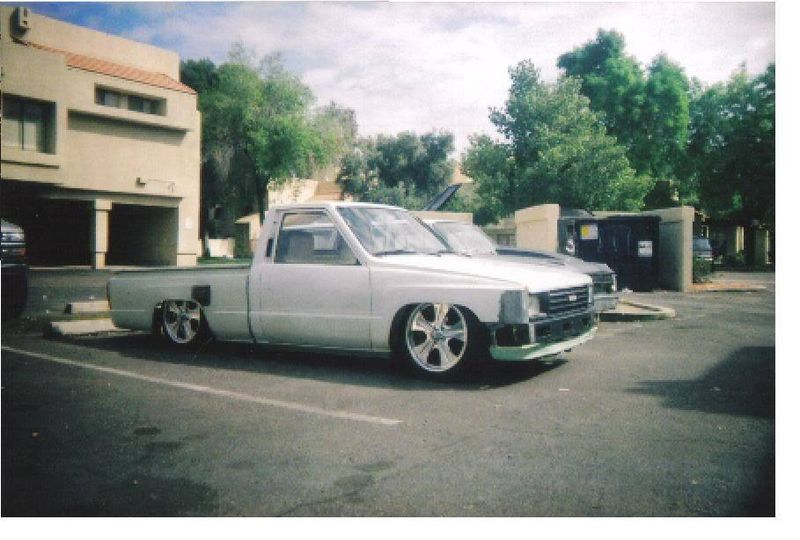
i brought it home and played with the switches for a few minutes, then tore it apart. it had a homemade notch and was monoleafed! i had a simple plan for it: clean it up, back half, and give it to my little brother as high school transportation. but things went wrong .
needless to say i couldn't let him drive around in something that was so unsafe. so we started throwing ideas around and made a list of to-do's
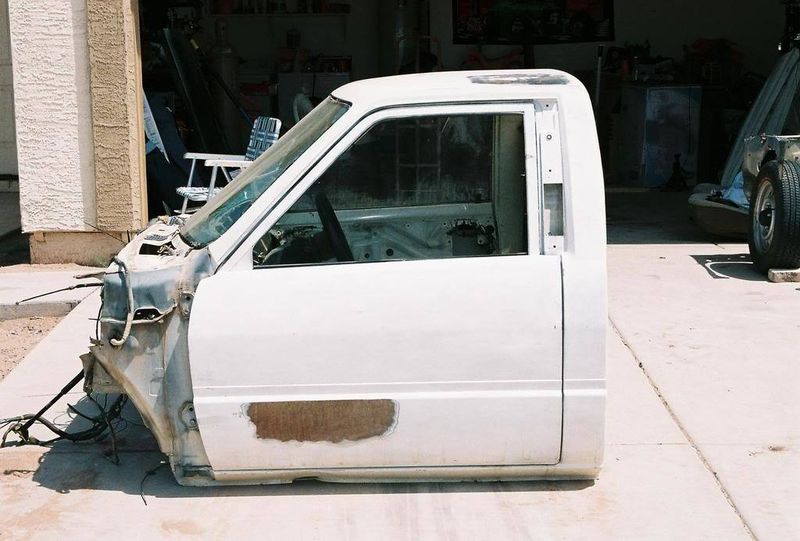
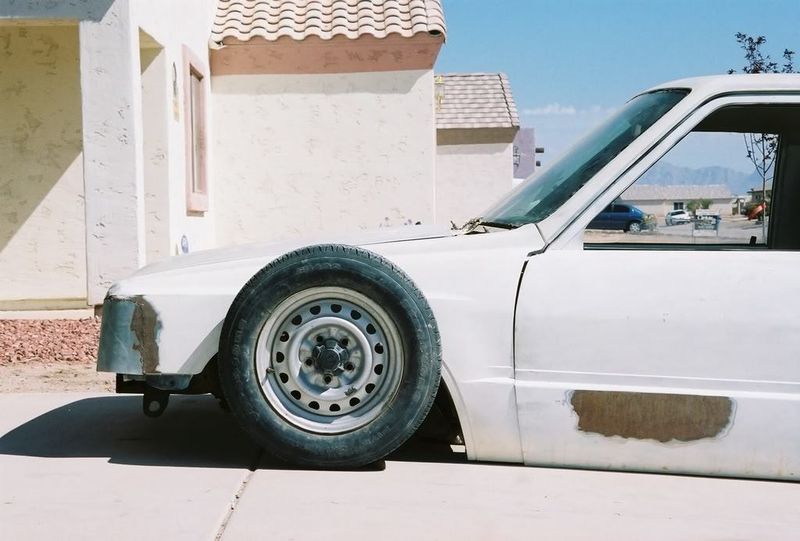
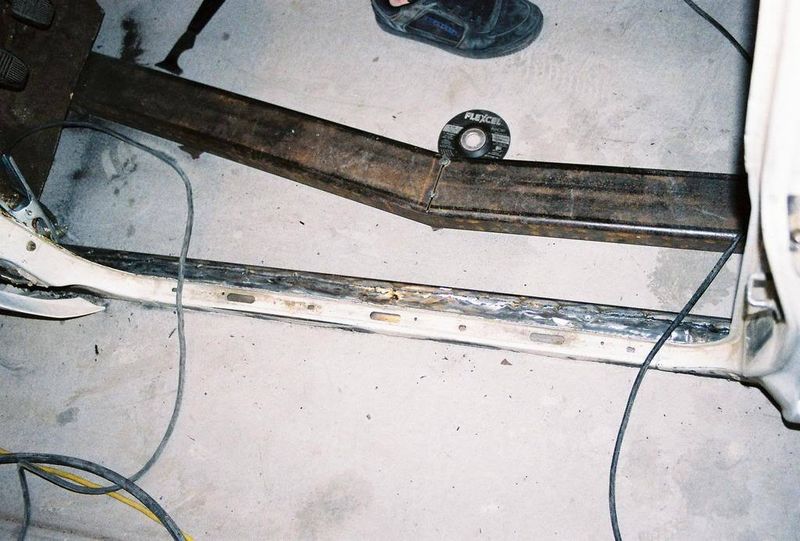
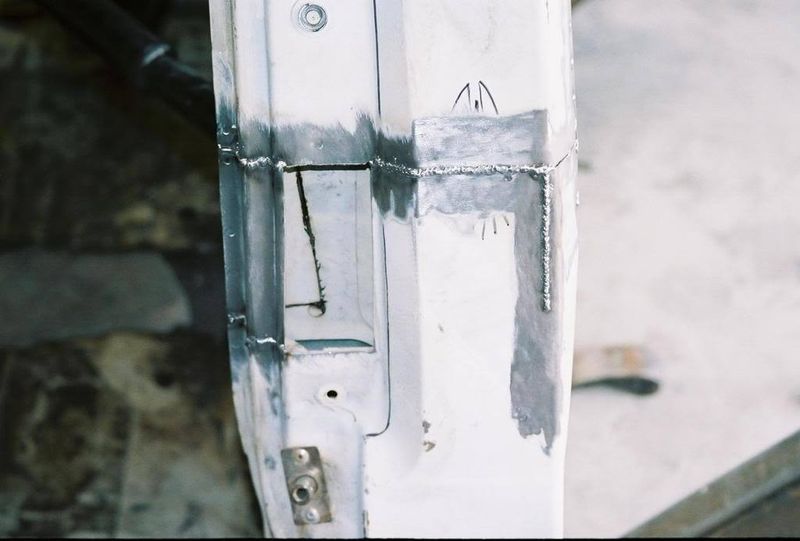
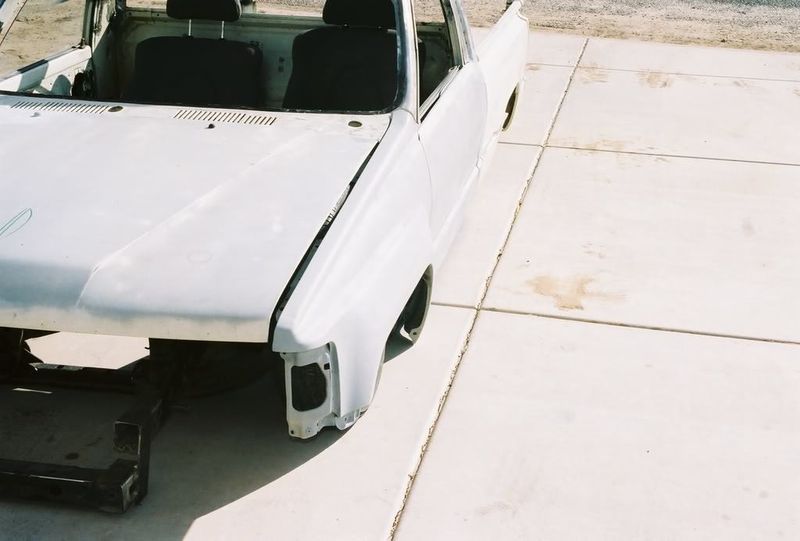
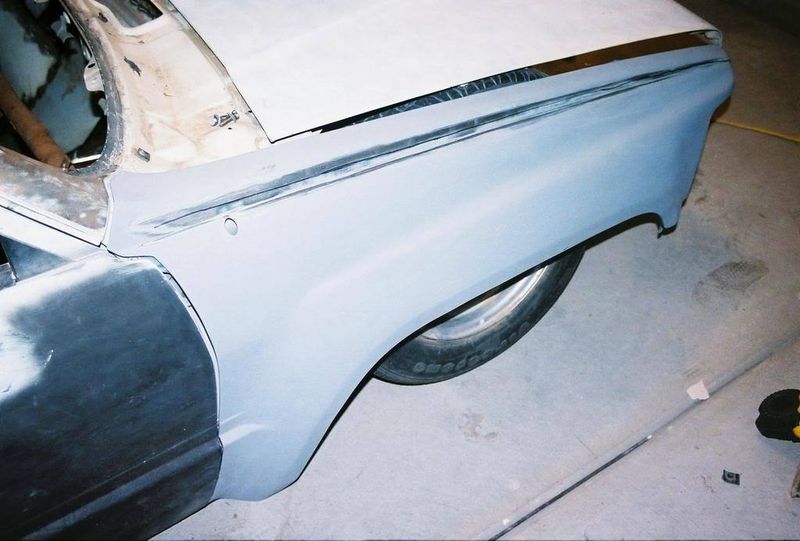
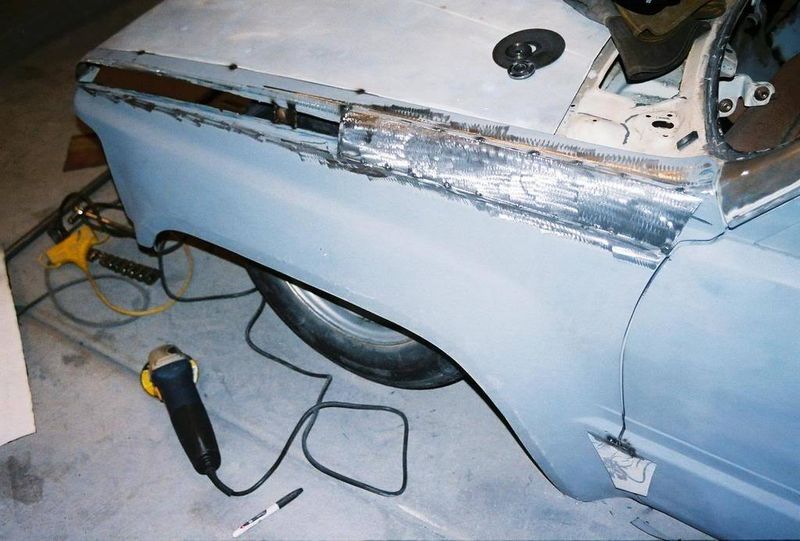
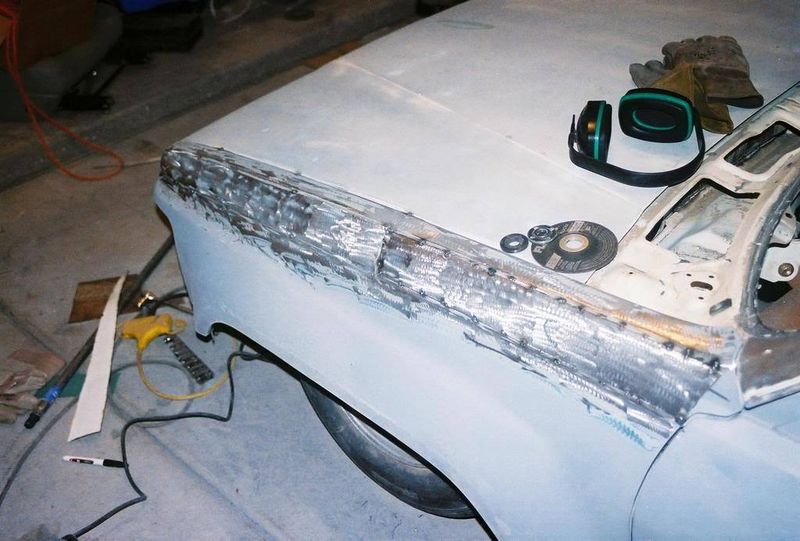
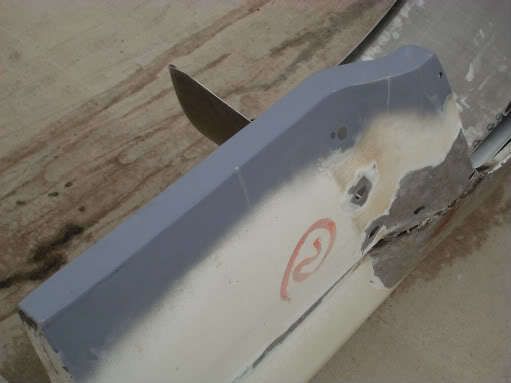
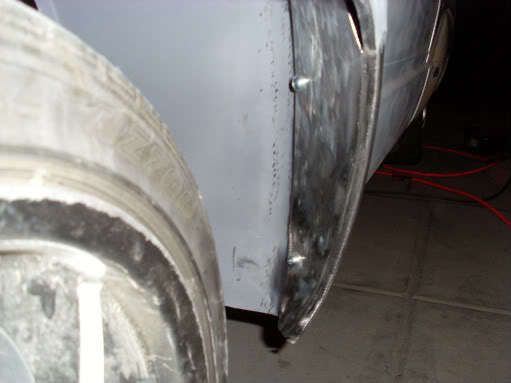
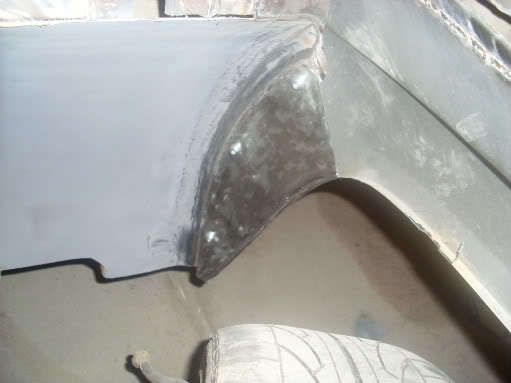
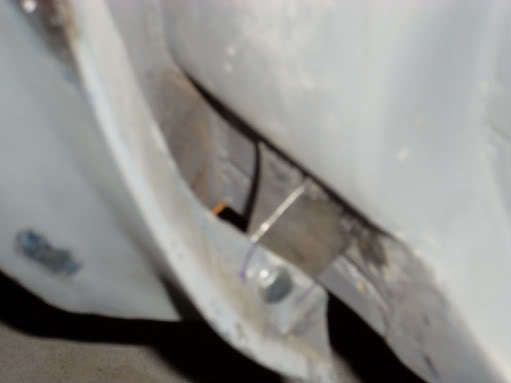
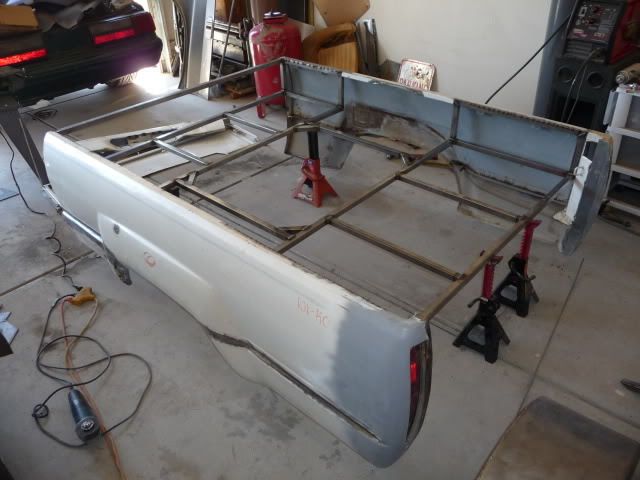
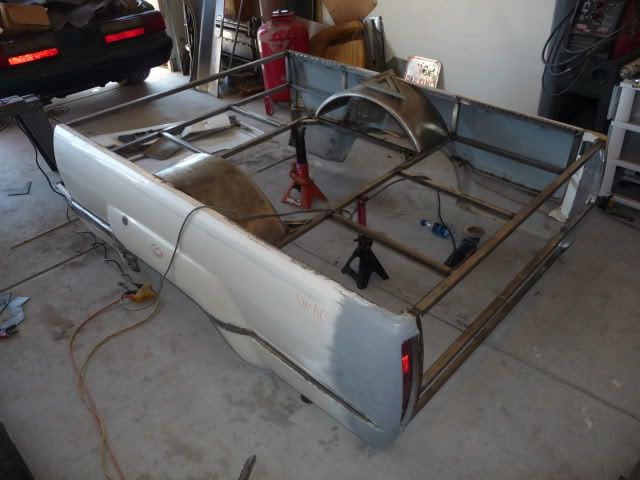
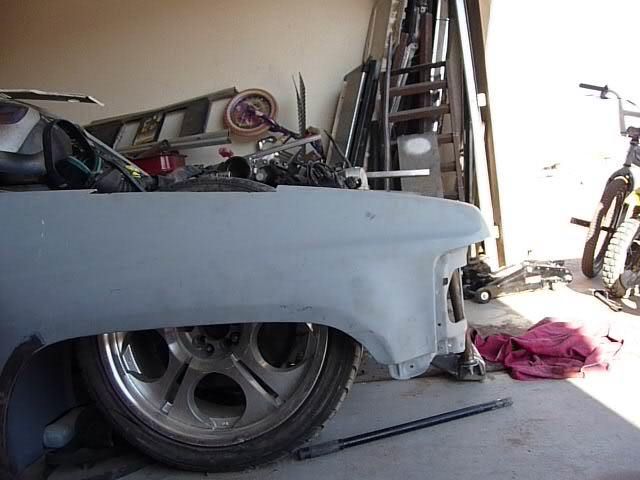
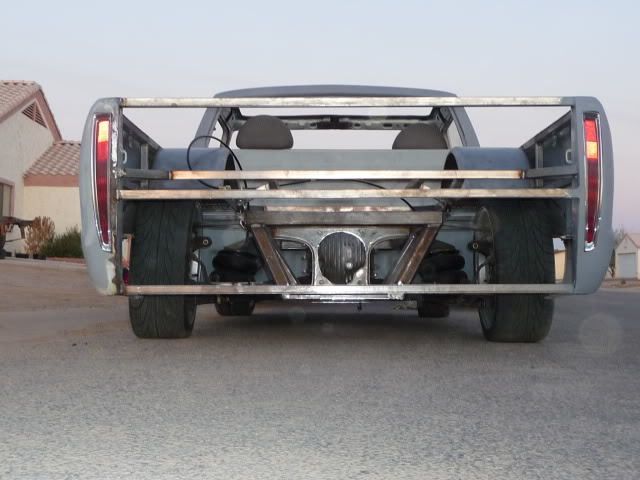
we decided that we wanted to body drop it. and and just to be a little more extreme we wanted to go to the doors. basically for the lowest truck competition at the shows. we cut the rockers off and replaced them with 1x3x1/8" rec. tubing.
before

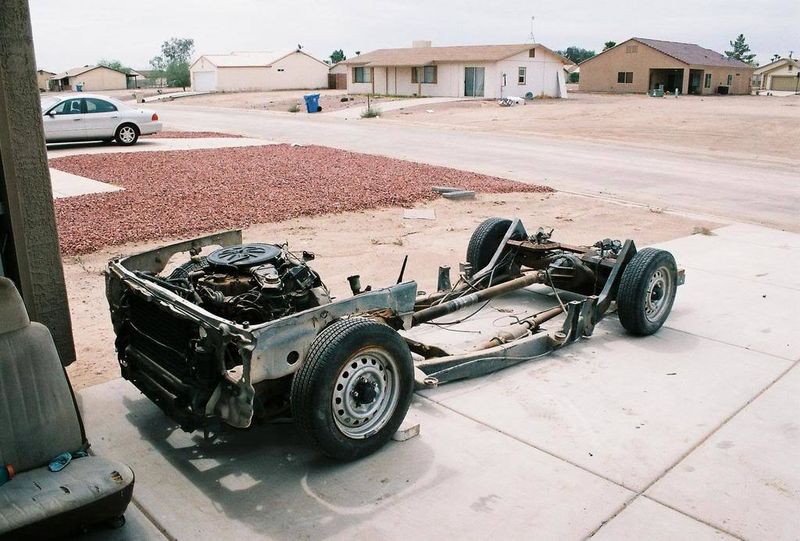
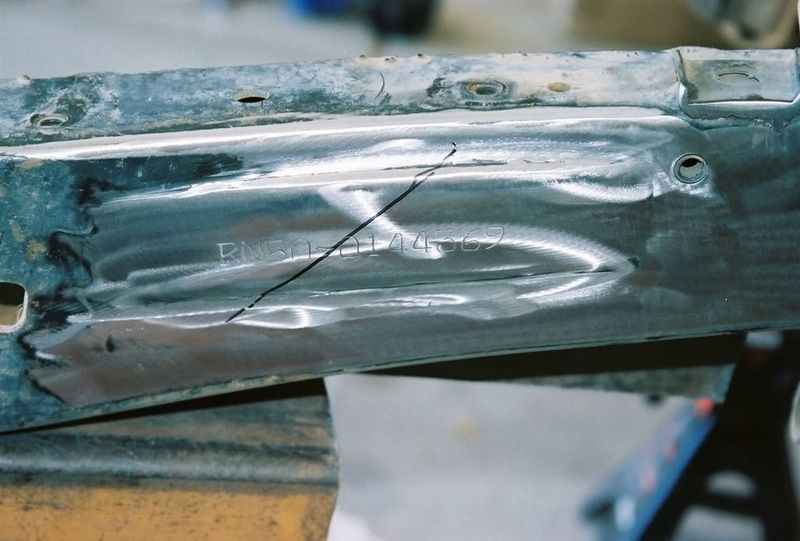
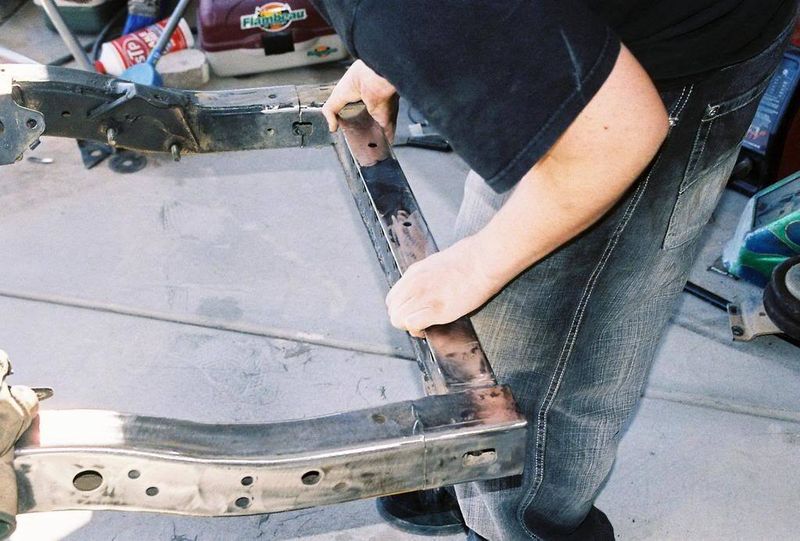
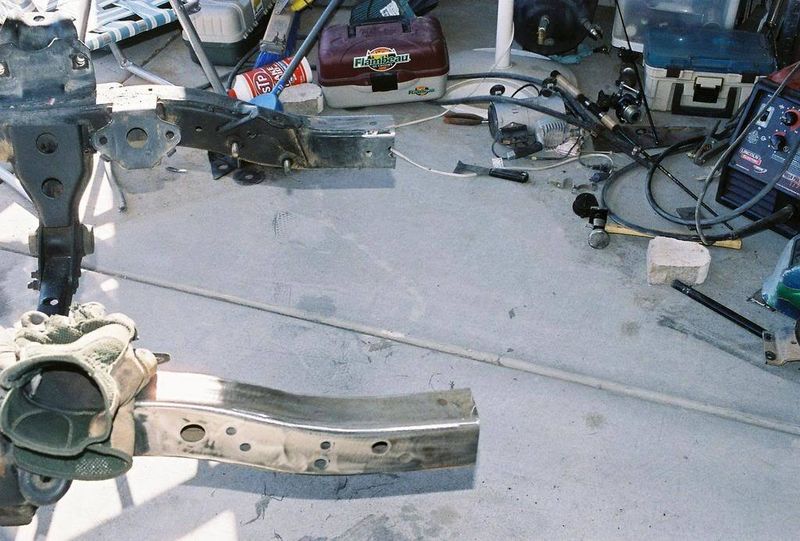
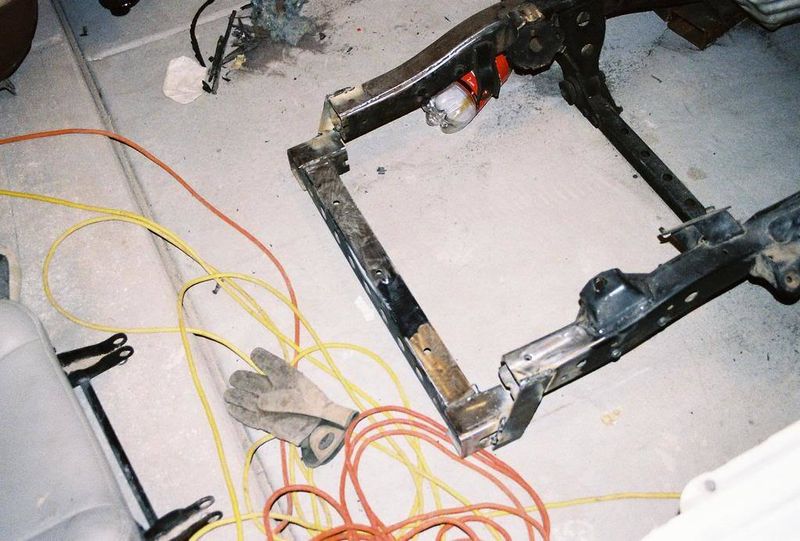
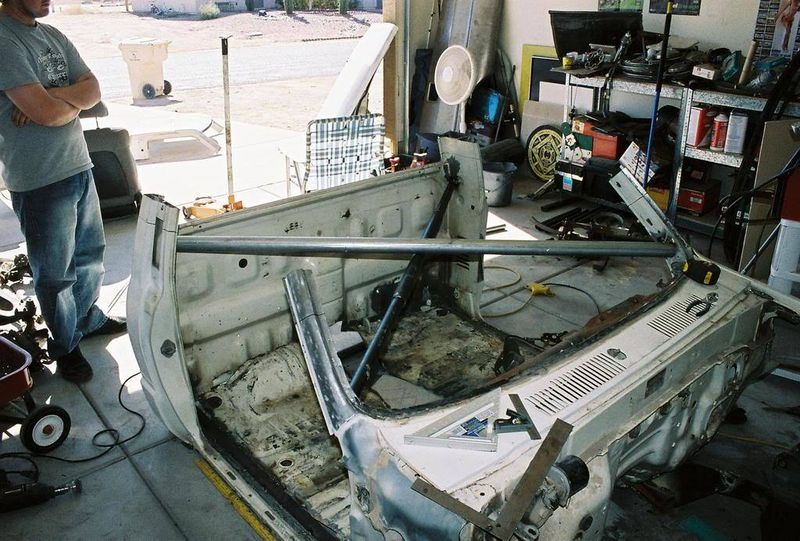
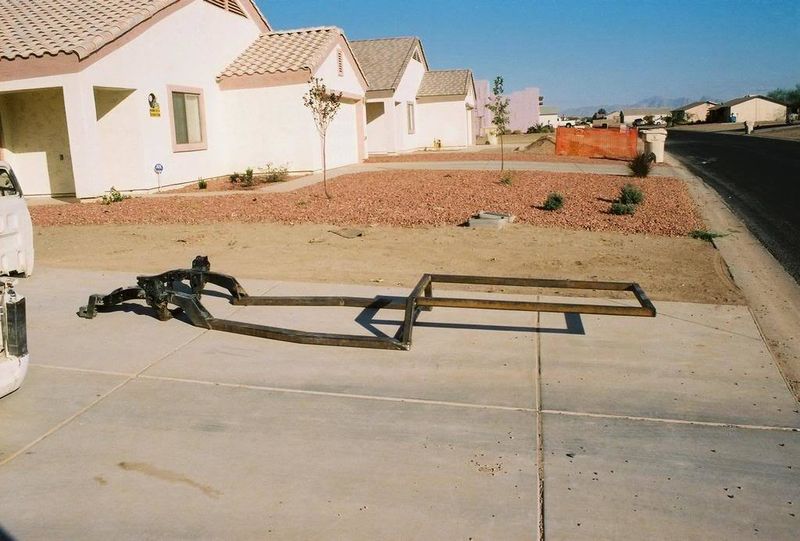
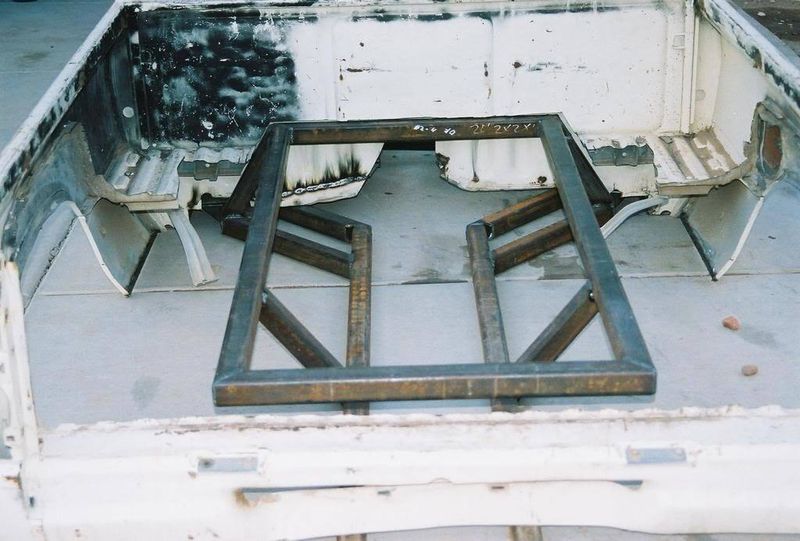
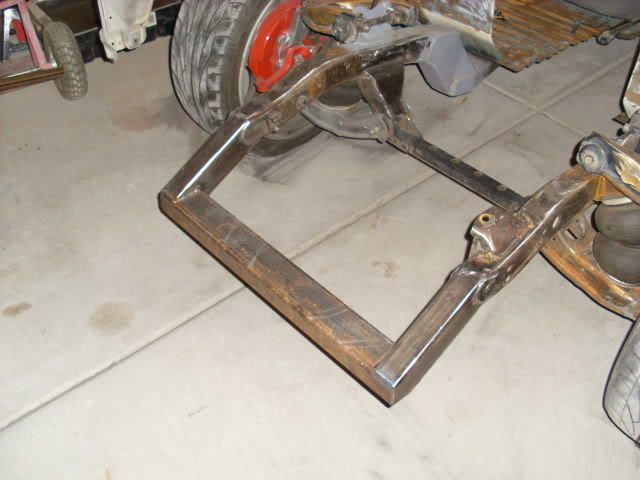
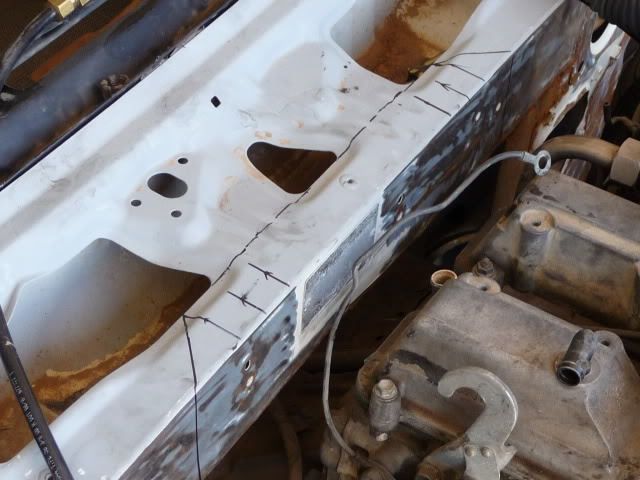
so now it was laying rocker like it should have been factory , so we started on the frame. to properly lay out a toyota you have to z the frame. i decided to build a frame from the firewall back to keep as much headroom as possible, and incorporate the z at the same time.
some of the previous work was a little scary, like the rear bag mounts. no cutting required to remove them, just a quick hit with a claw hammer :shocked: . i scraped most of the original frame.
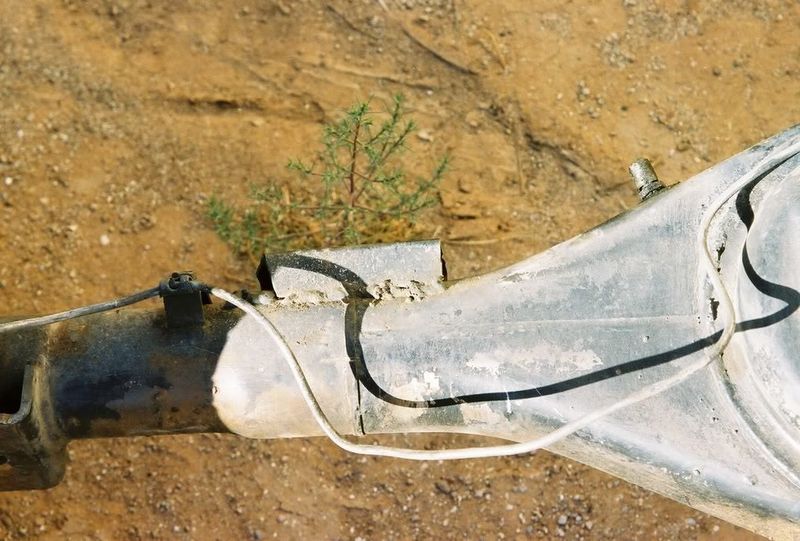

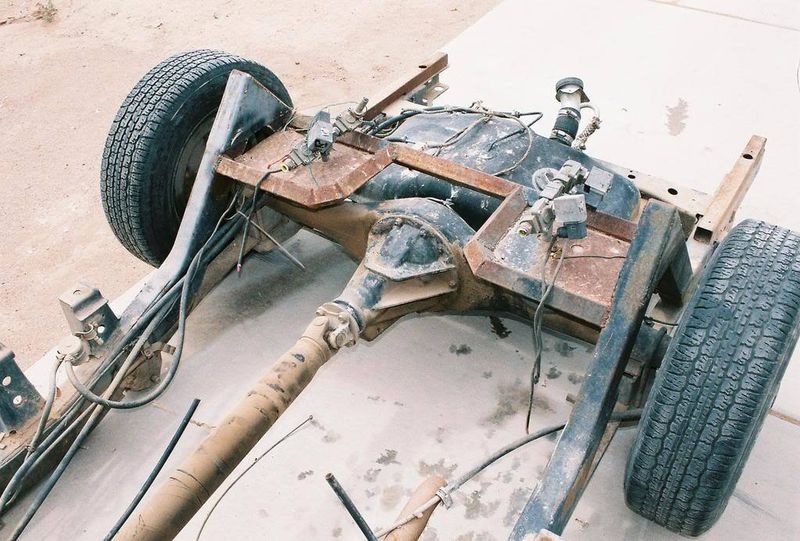
i had planned on using the stock live axle, so i bucked up the frame to clear it.
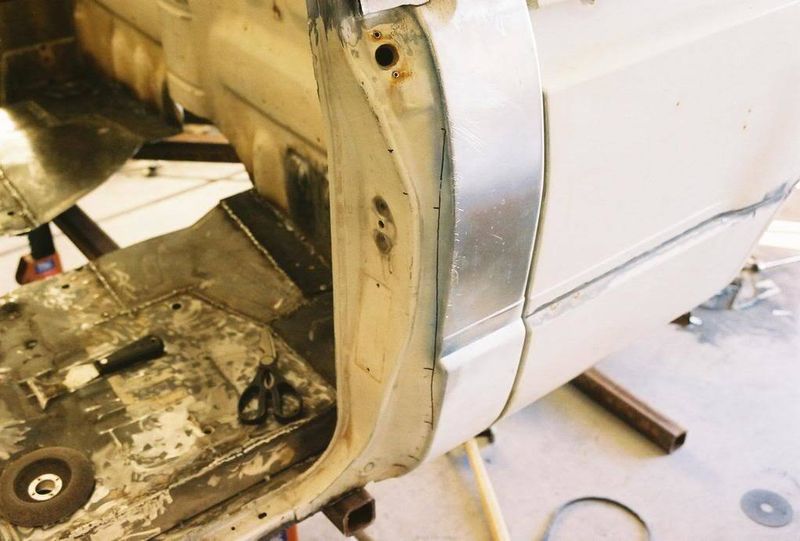
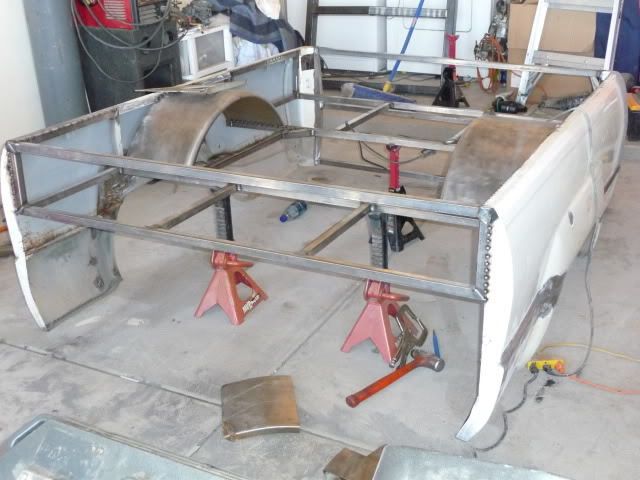
we cleaned up the rockers and started putting the floor back in. with the new frame i only had to raise the floor 1 1/4". it was sweet since it was bodydropped to the doors and still had 5" of headroom! we also started dropping the front of the frame.

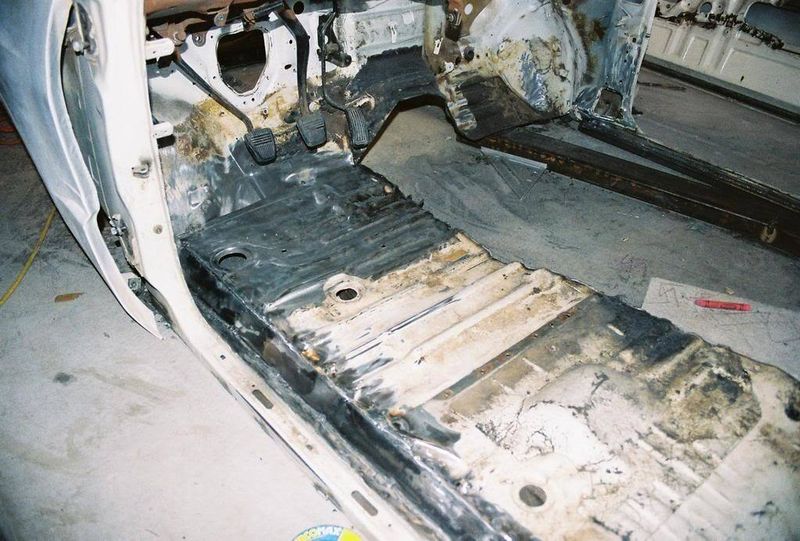
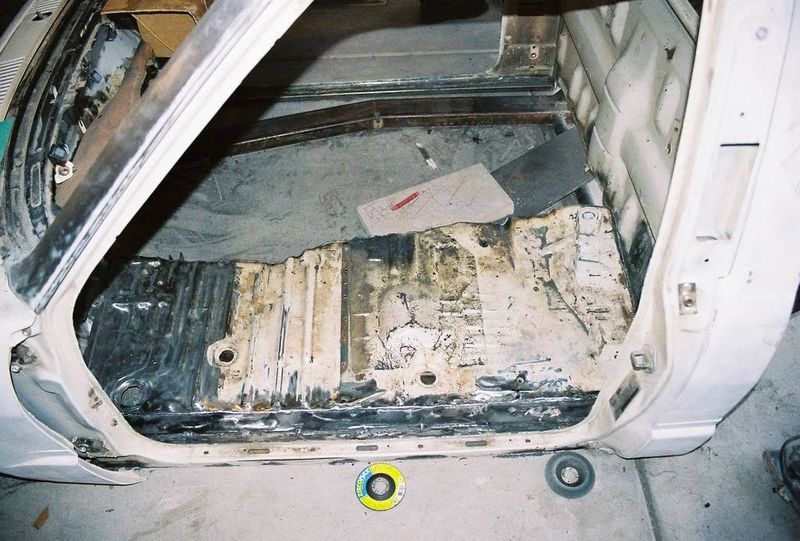
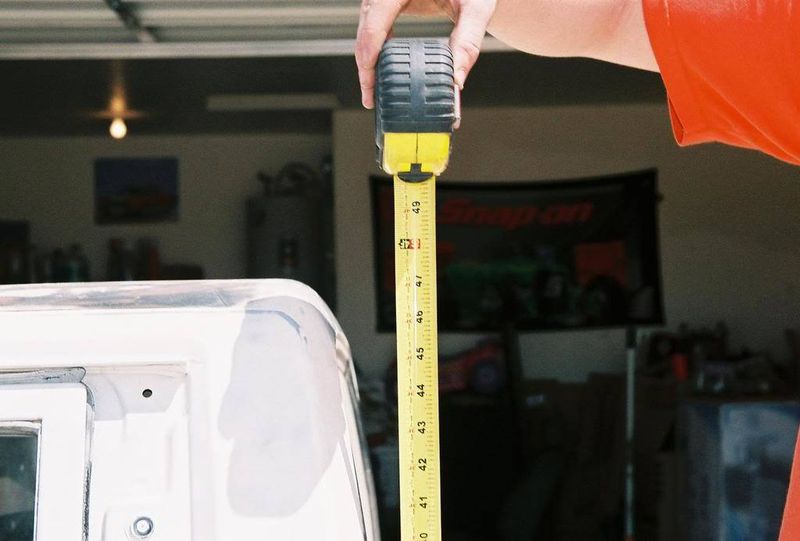
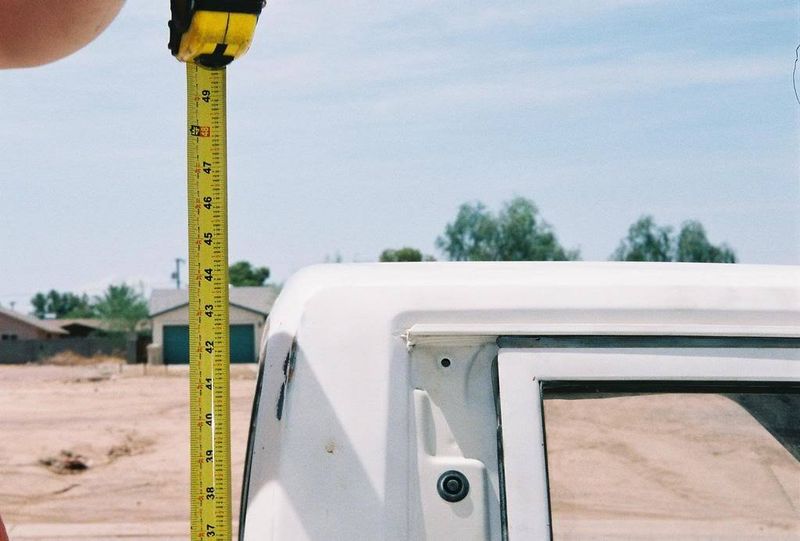
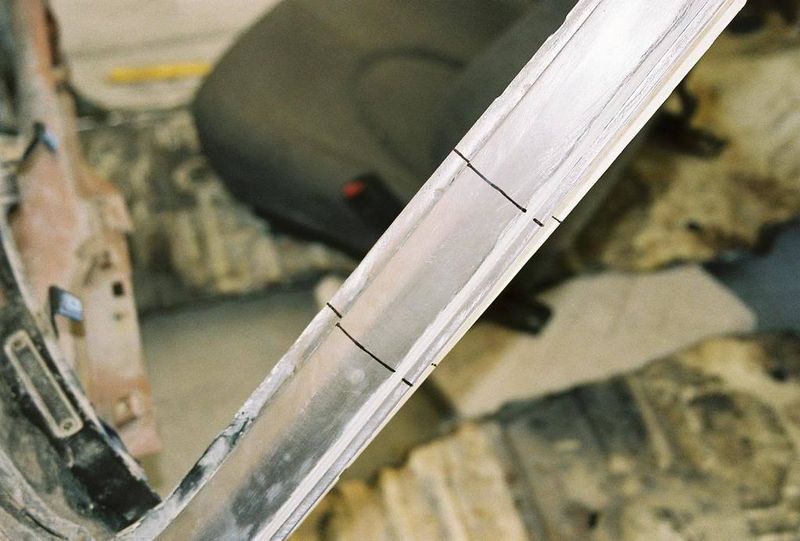
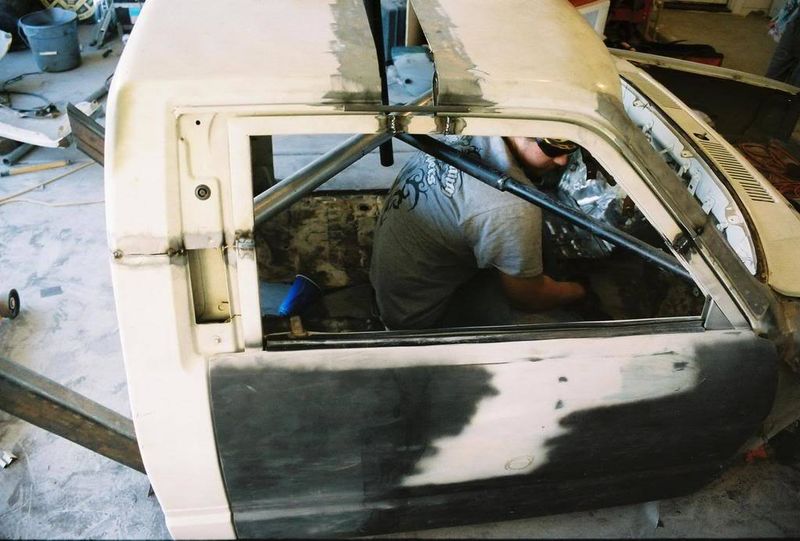
after putting the floor pieces in and still having headroom, we decided it was time to bring the height down some more. So... a 3" chop was next in line.
i spent a couple weeks figuring out exactly where i could remove the 3" and have the metal line up the best.
also, you should brace the cab before removing the roof.
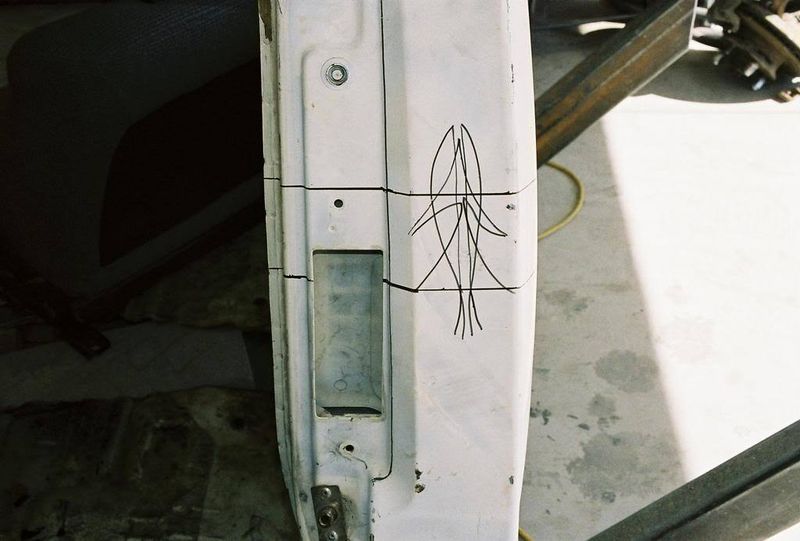
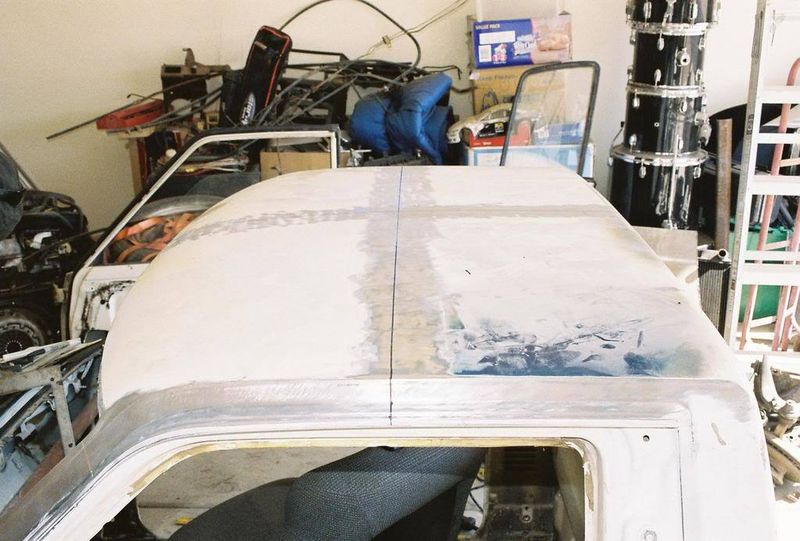
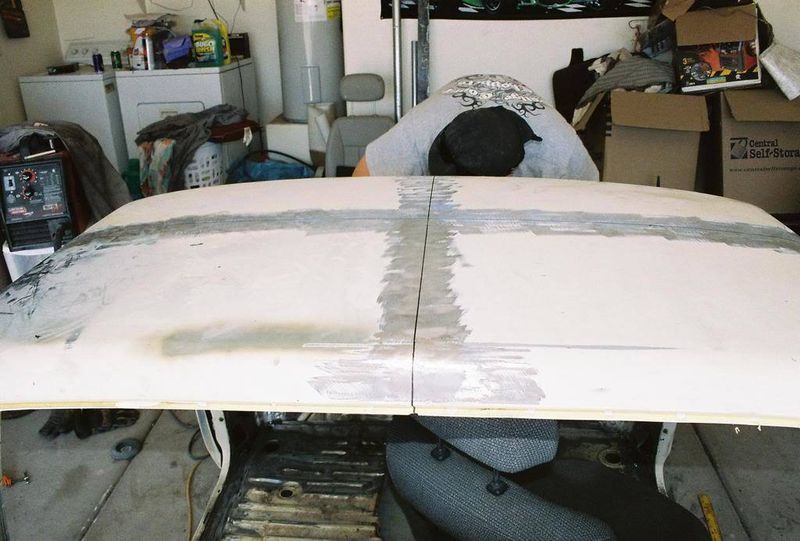
once the cab was marked and braced it took about 3 minutes to remove the roof, and about 2 hours of goofing off to line it up and tack weld it.

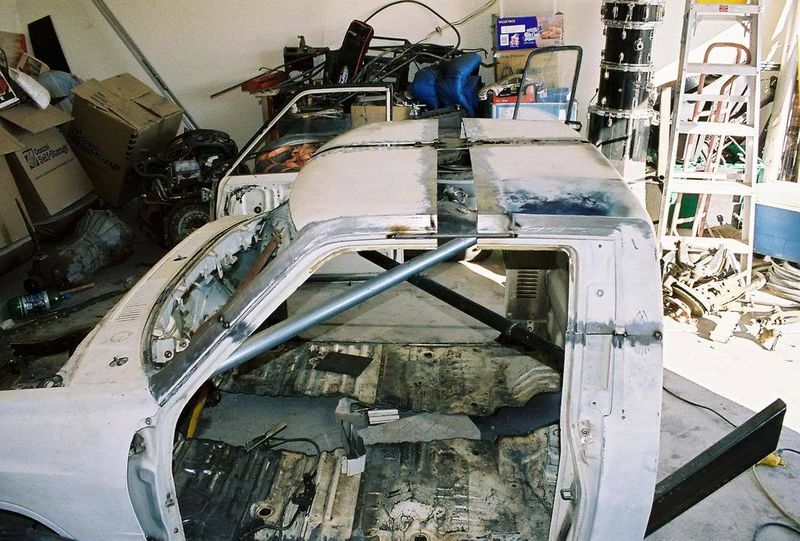
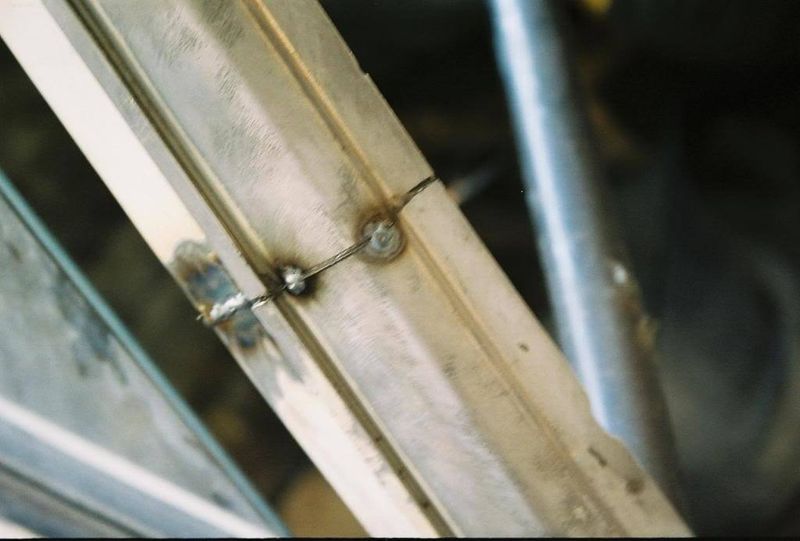
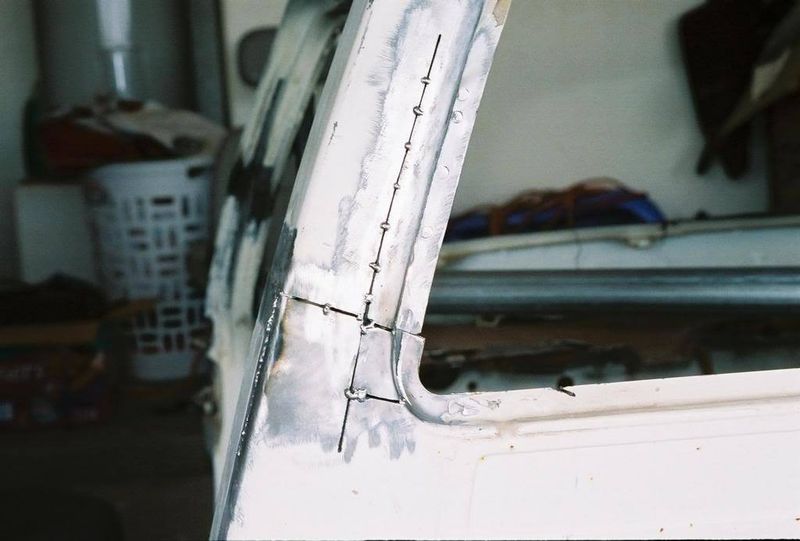
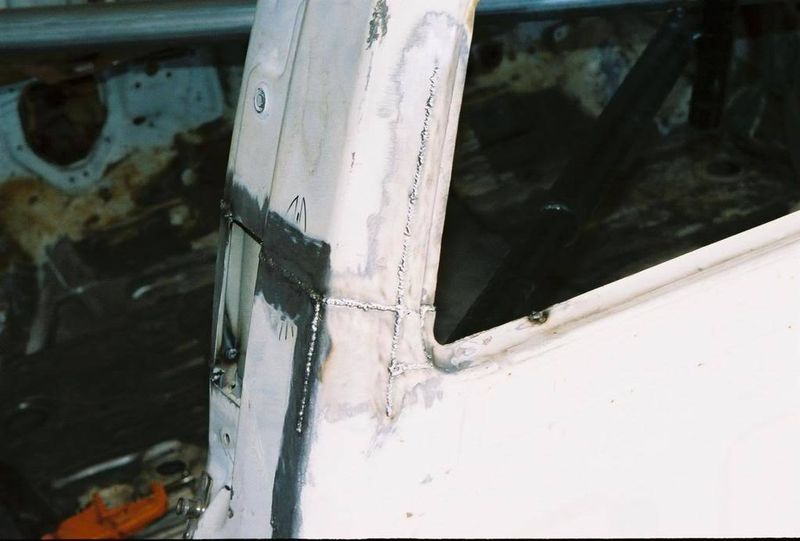
the fronts lined up perfect, but the rears required a little work.
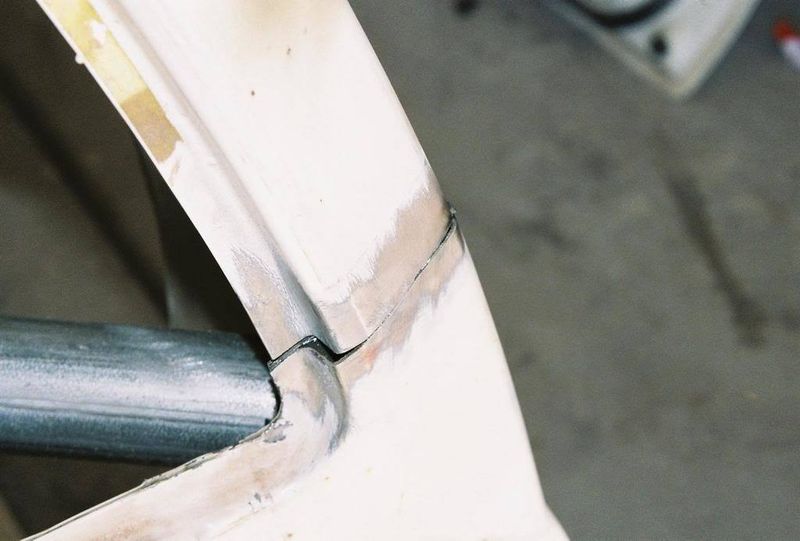
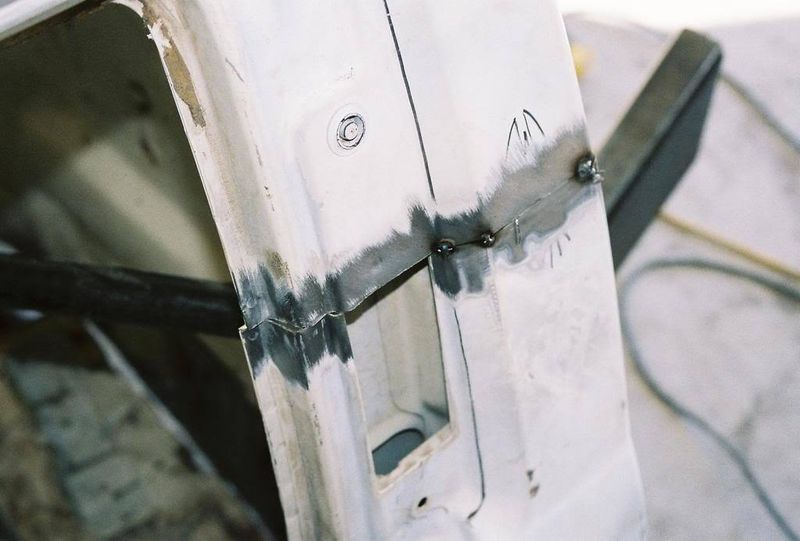

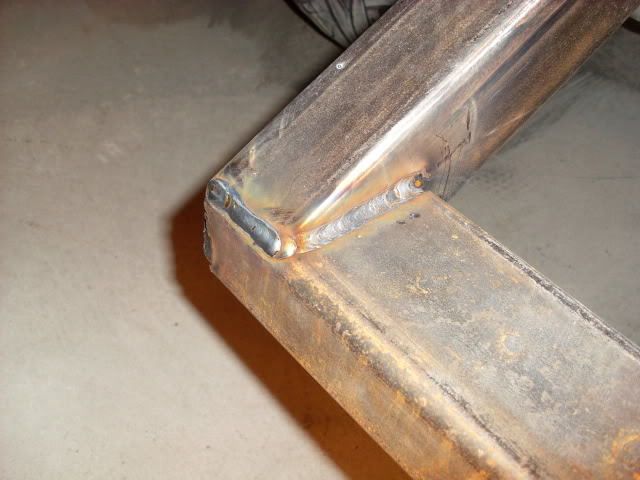
i made some relief cuts and started filling in the gaps. it's a slow and aggravating process.
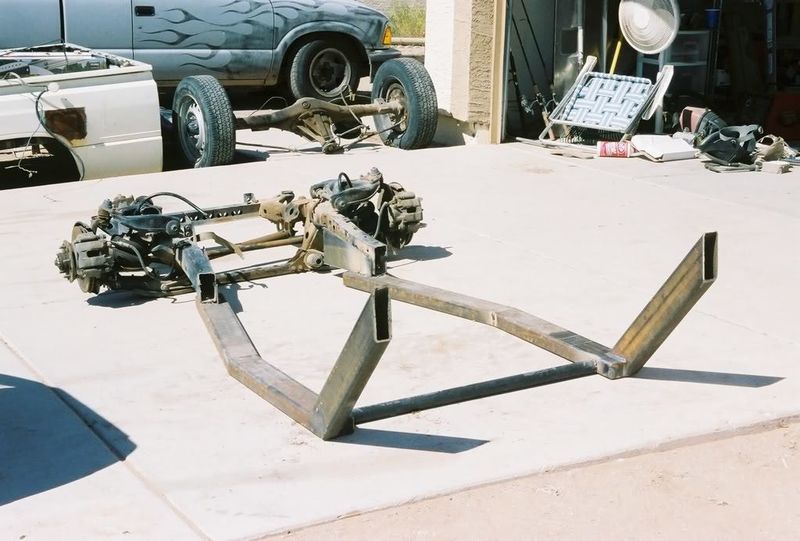
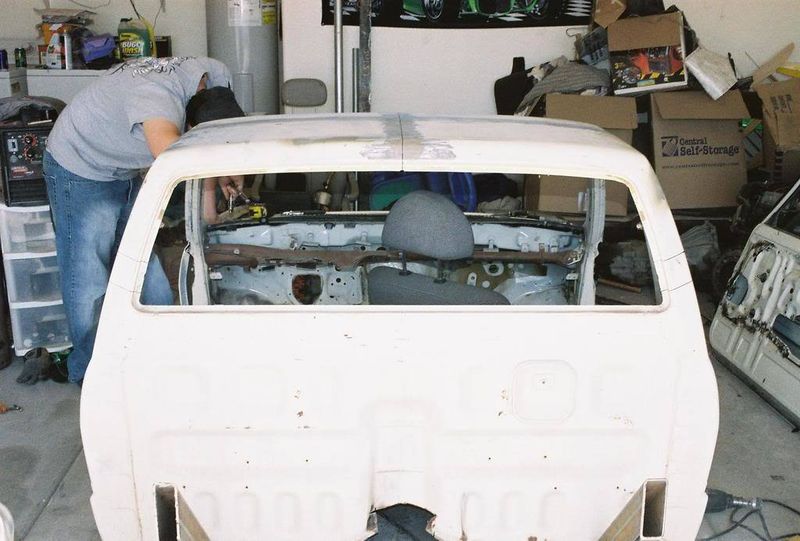
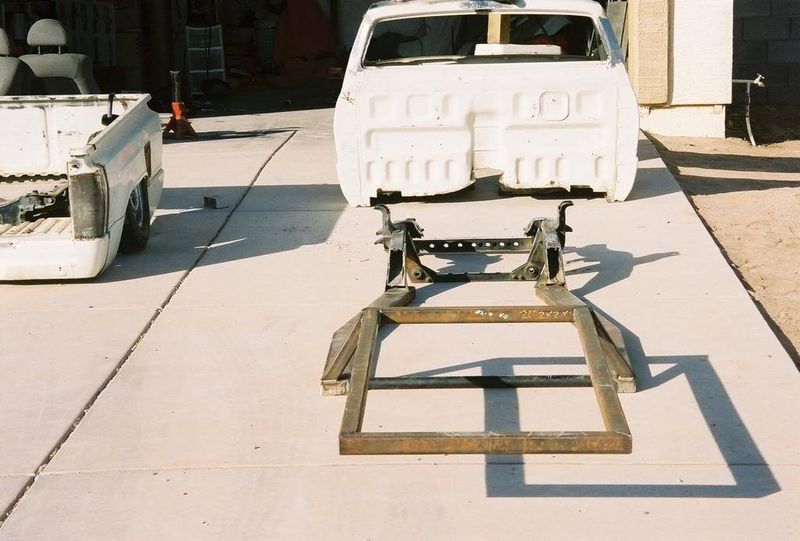
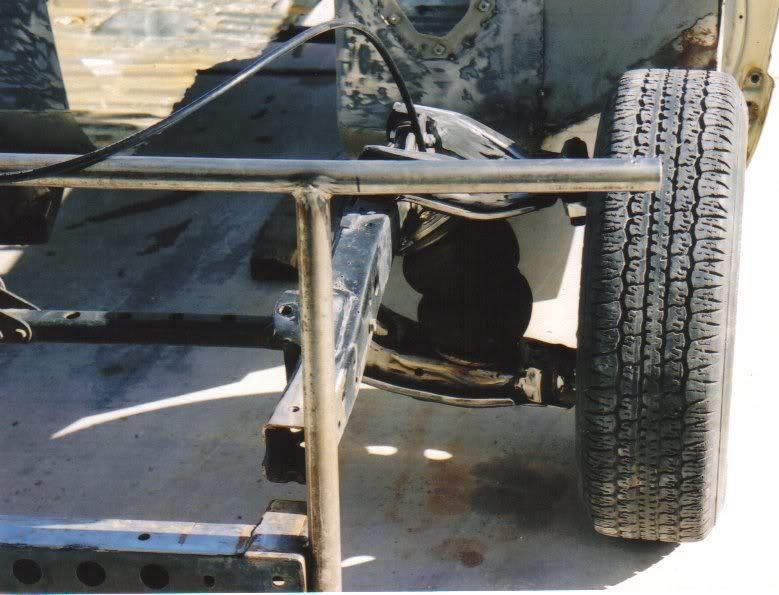
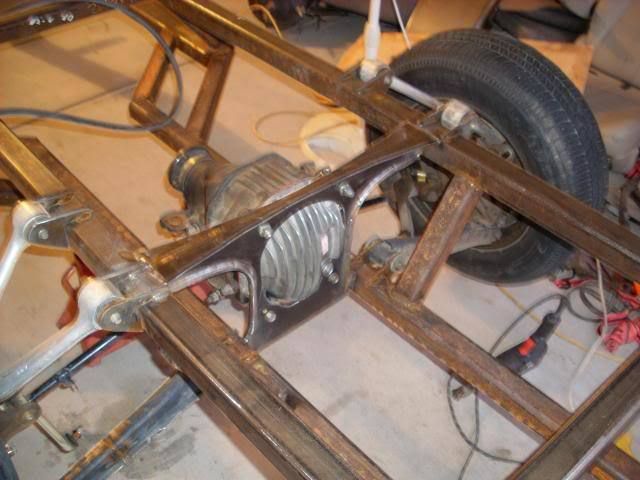
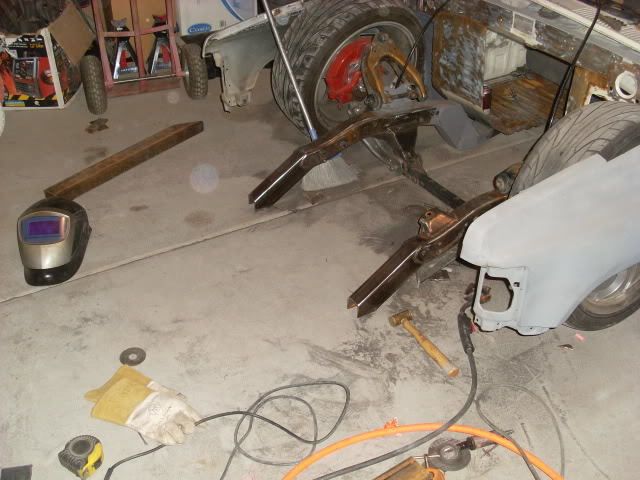
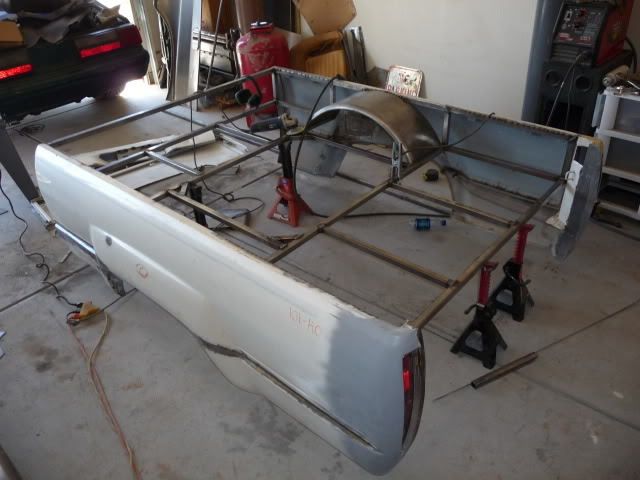
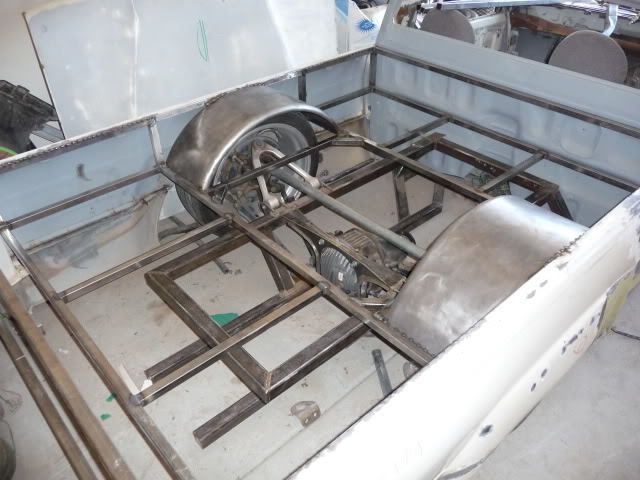
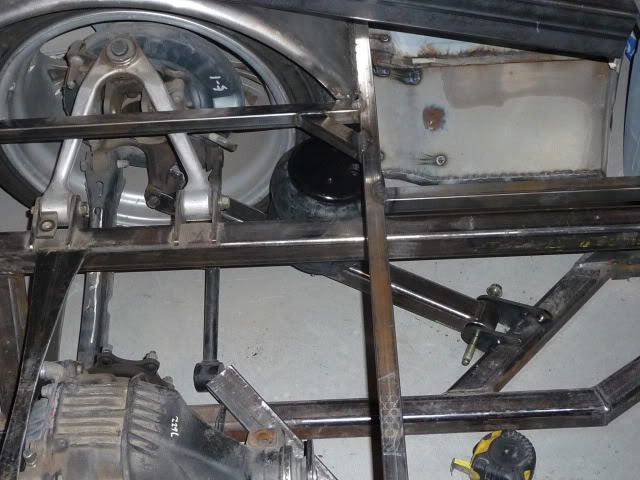
to fit the i.r.s. i changed the back of the frame up.
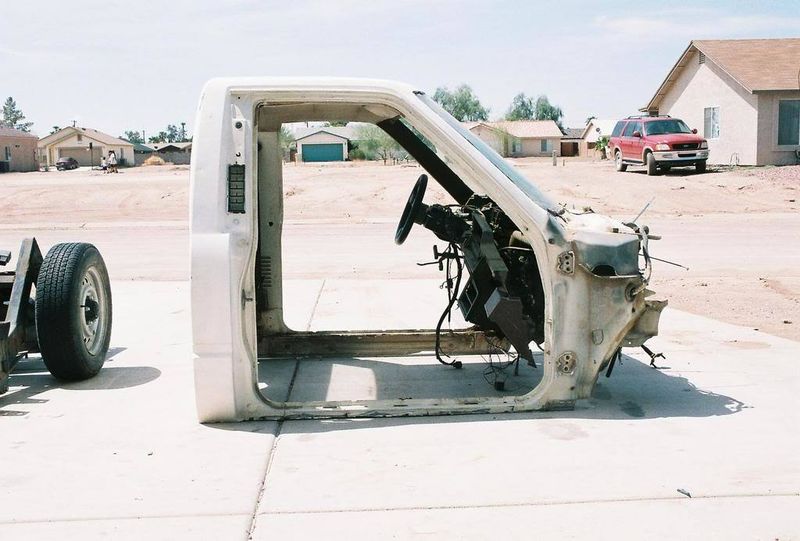
since i can't stay on one thing for very long, i jumped back to the cab. i started suiciding the doors.
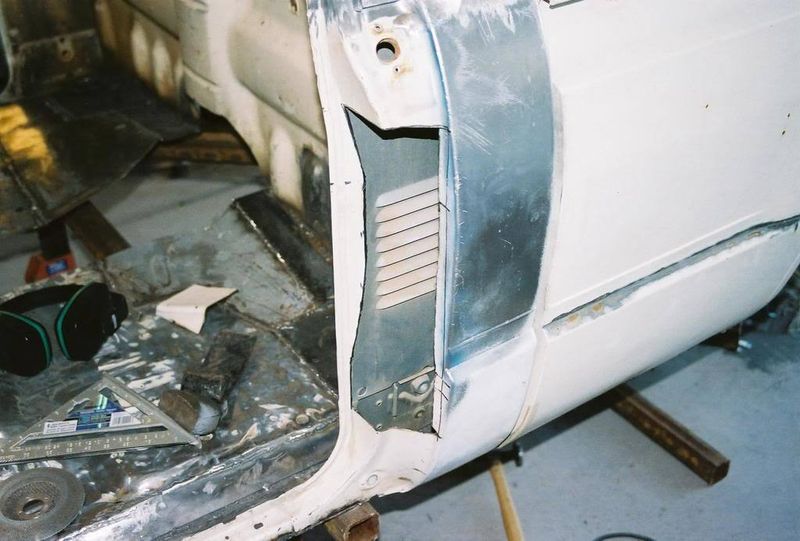
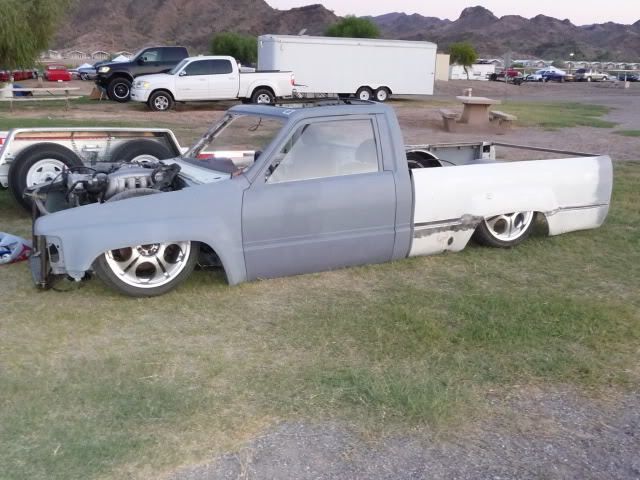
i found some 4x4 fenders on craigslist for $50. so on they went.
i raised them 1 1/2" to clear the tires. again a mod that was a waste of time.
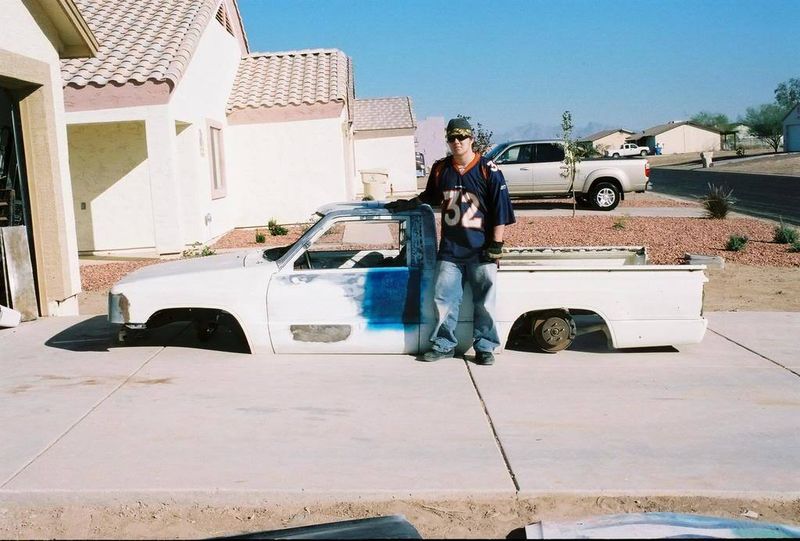
next i found a 4x4 bed in decent shape.

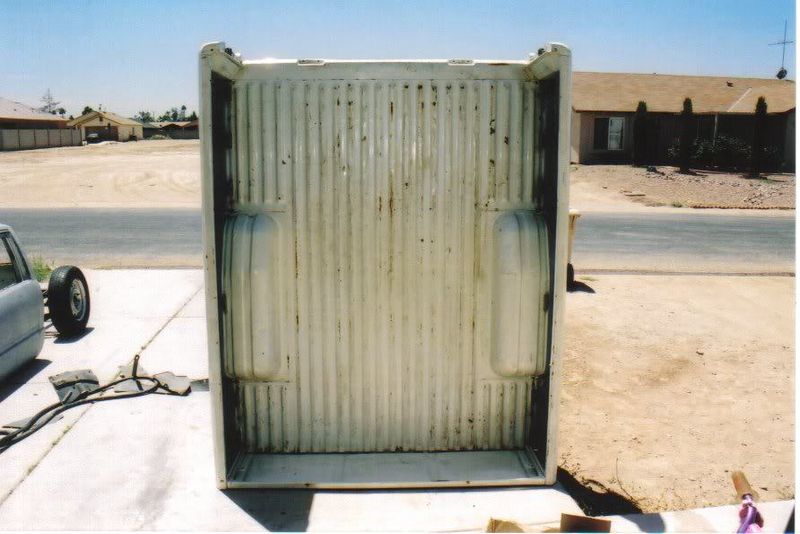
with the 4x4 bed the supra suspension caused the wheels to rub. so i had to narrow it 4"

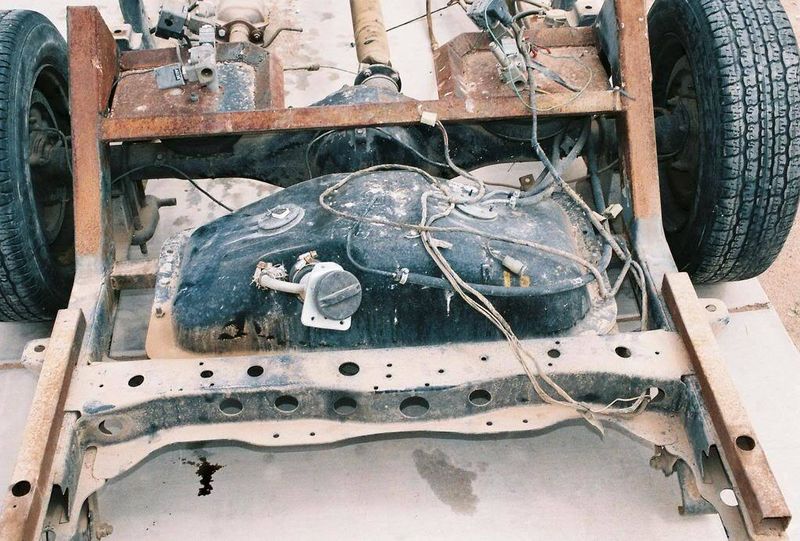
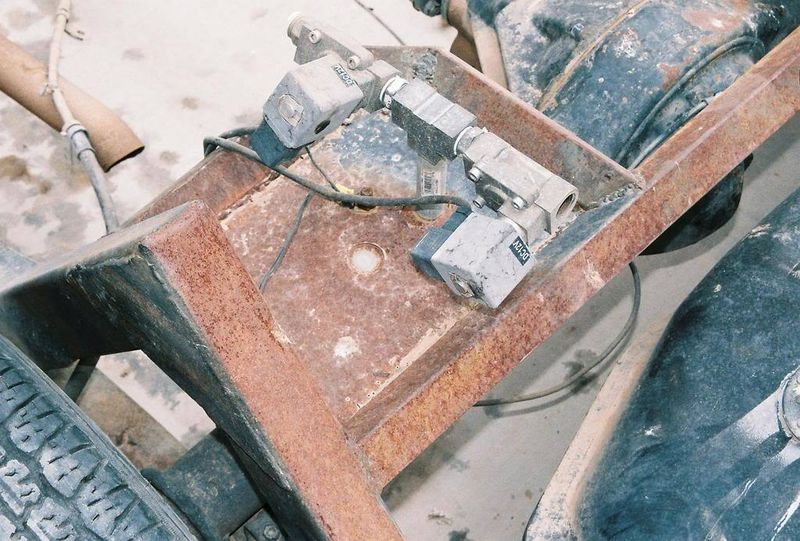
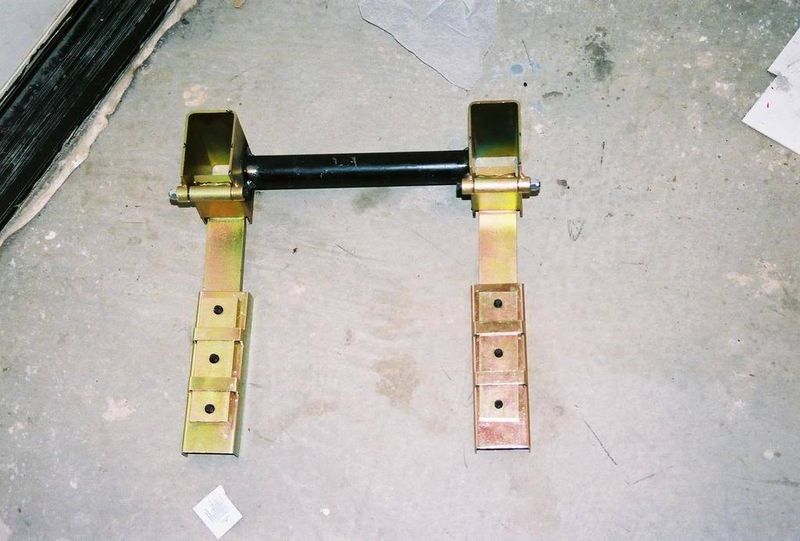
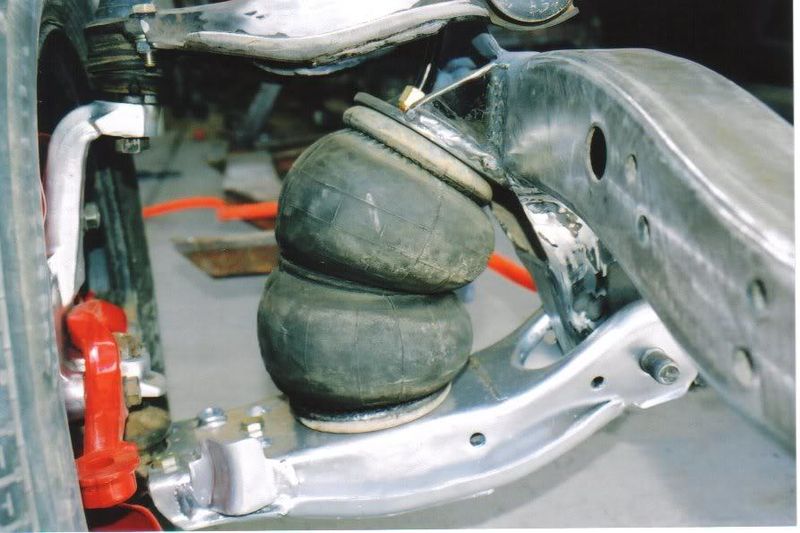
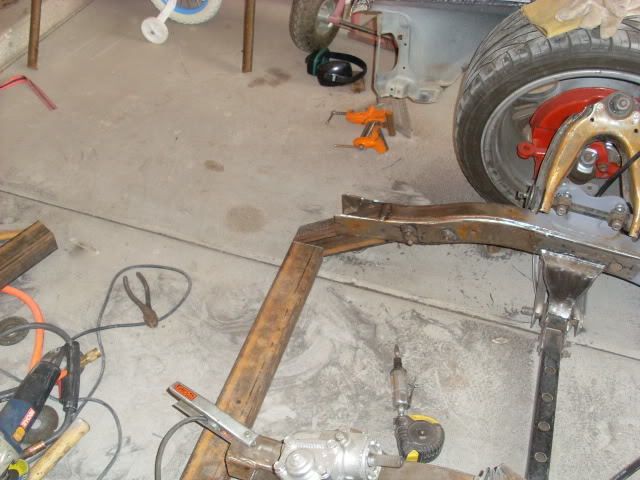
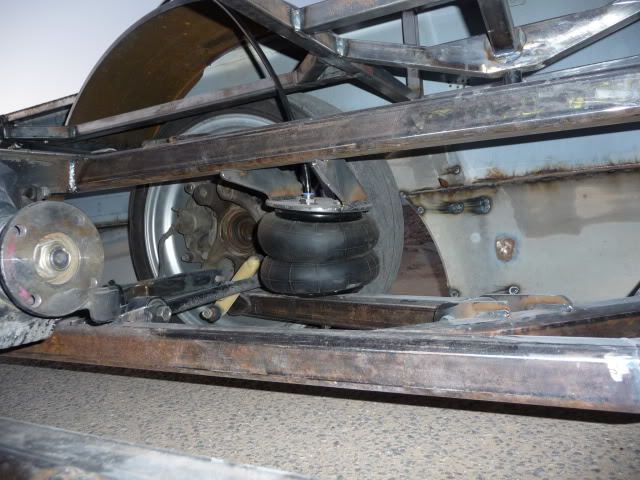
then i set up the front. i cut most of the stock stuff off and made my own brackets. i plated the lower arms to let the bags set flat.


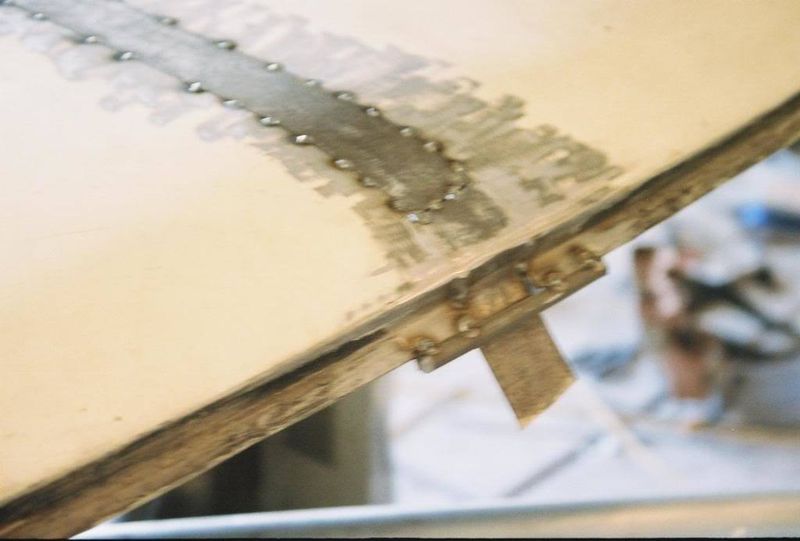
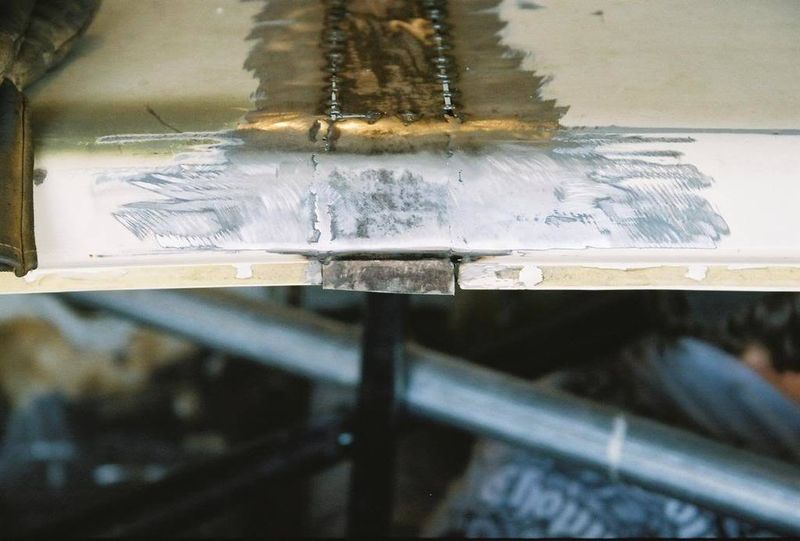
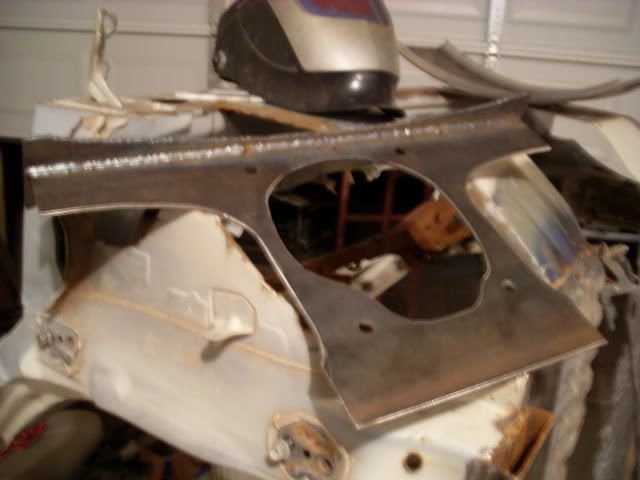
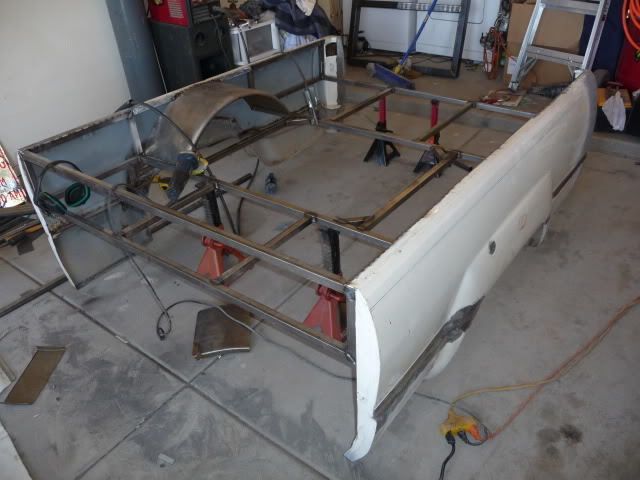
so after i got the 4x4 bed i cut the floor out, got some trailer fenders, installed '99 caddy lights upside down, and flipped side to side. i made my own taillight fillers that eliminated the body line so the lights sit flush, and so i can make a smooth cali combo, made plates for the front where i cut the rocker off, shaved the gas door and my little brother welded up the seams for me.
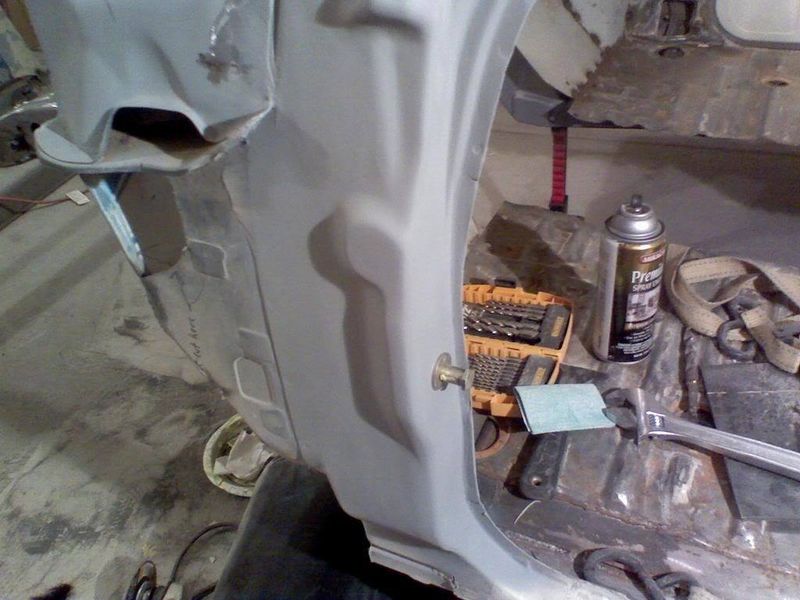
i also welded in fenders for the firewall tubs, and made some plates to connect the fenders to the tubs.
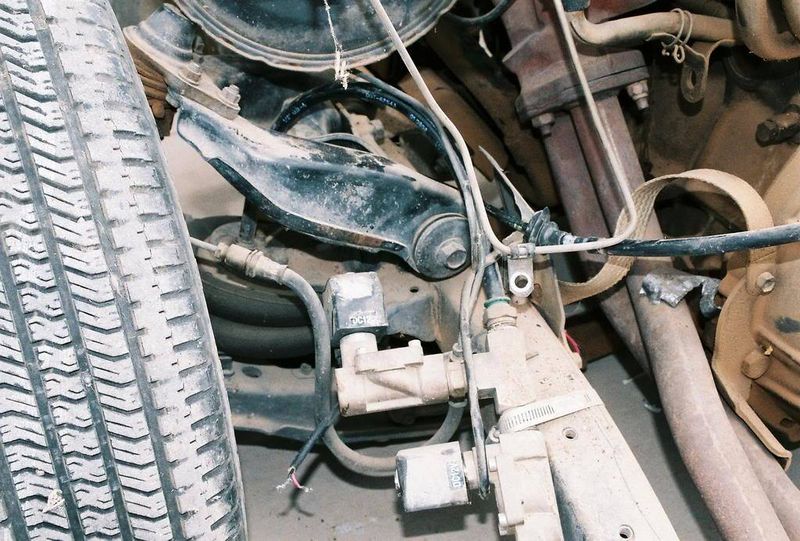
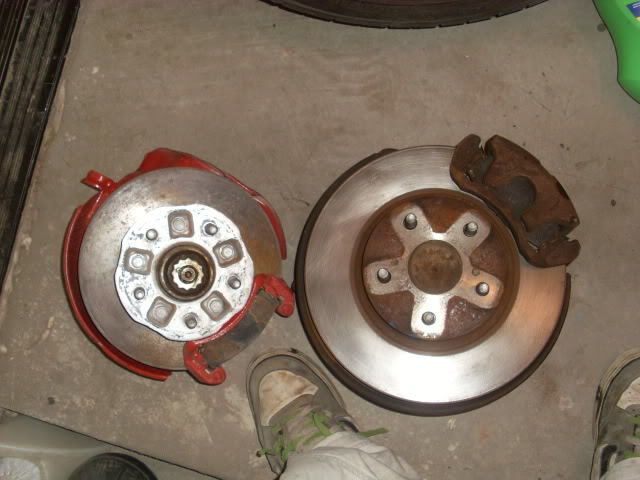
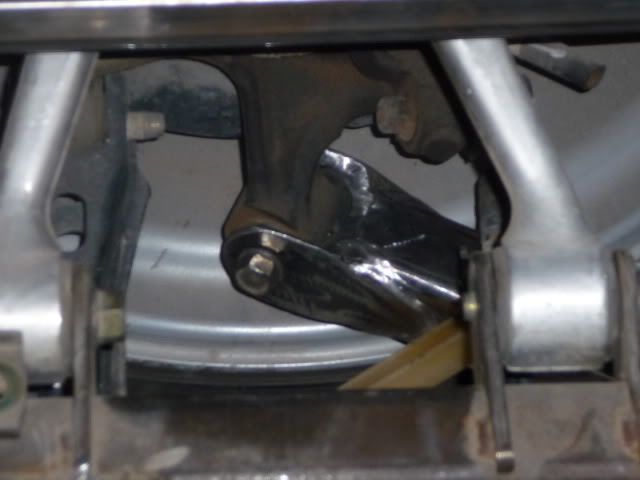
i also picked up some 87 toyota supra front brakes. they are almost bolt on, and work as a 1.5" drop spindle. pretty big difference over stock!
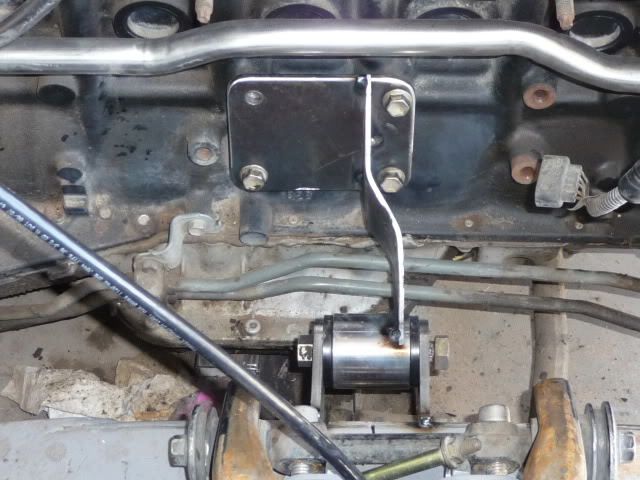
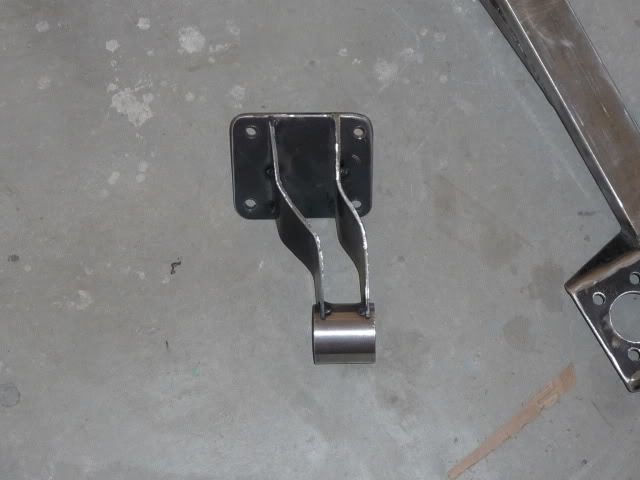
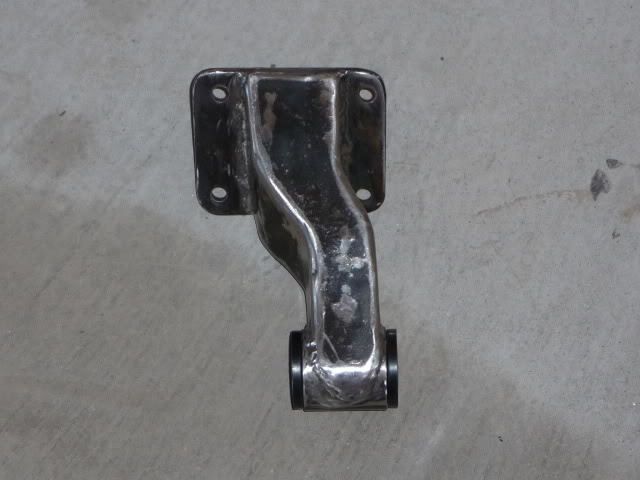
i also fabricated a bracket to hold the supra i.r.s.

and i wasn't happy with the front of the frame so i re did it.
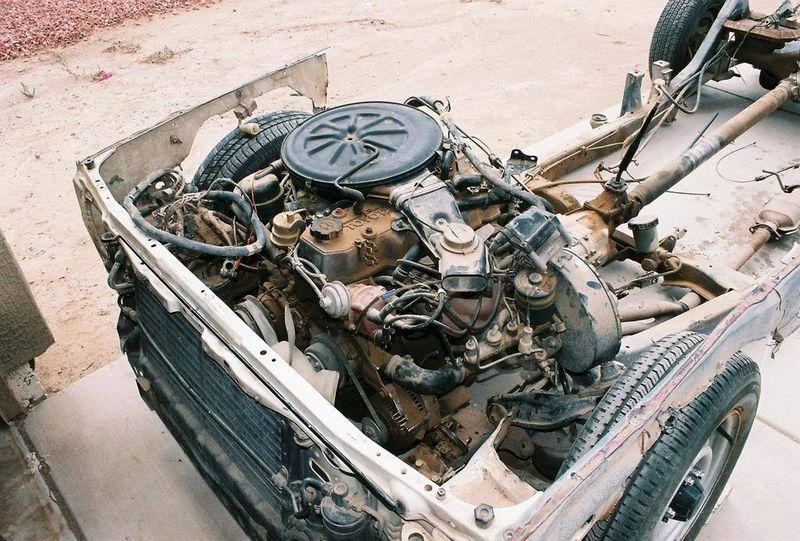
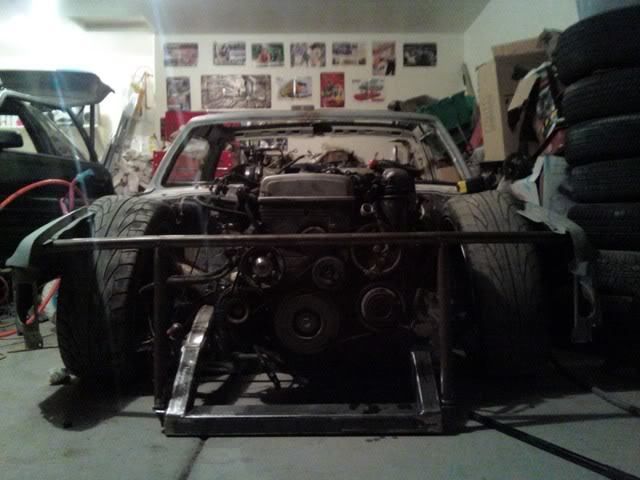
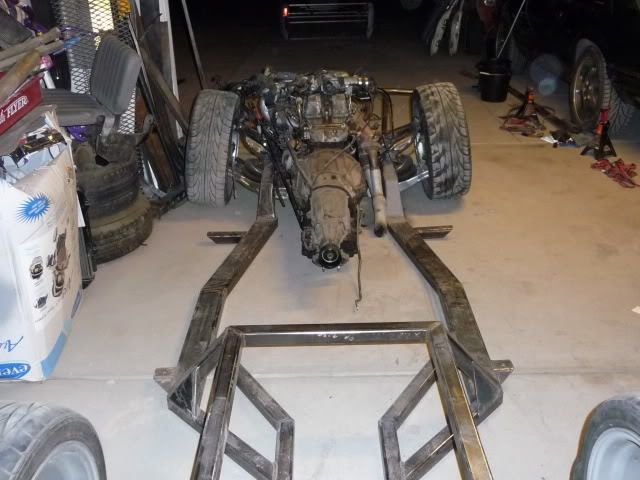
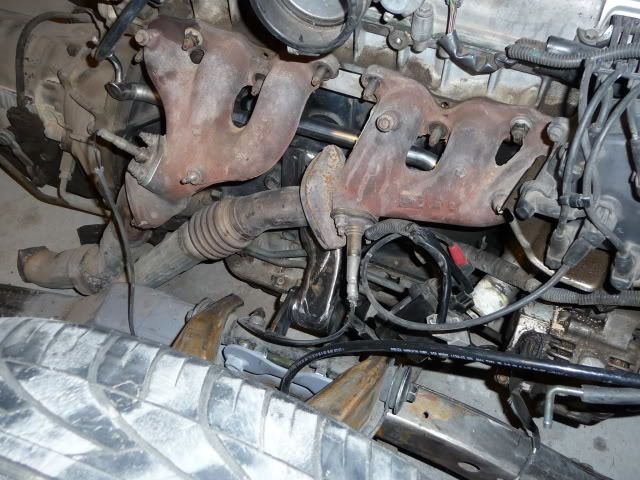
i went to a junkyard and picked up a new motor (i had sold the 22r since it had a rod knockin). one of my favorite engines.


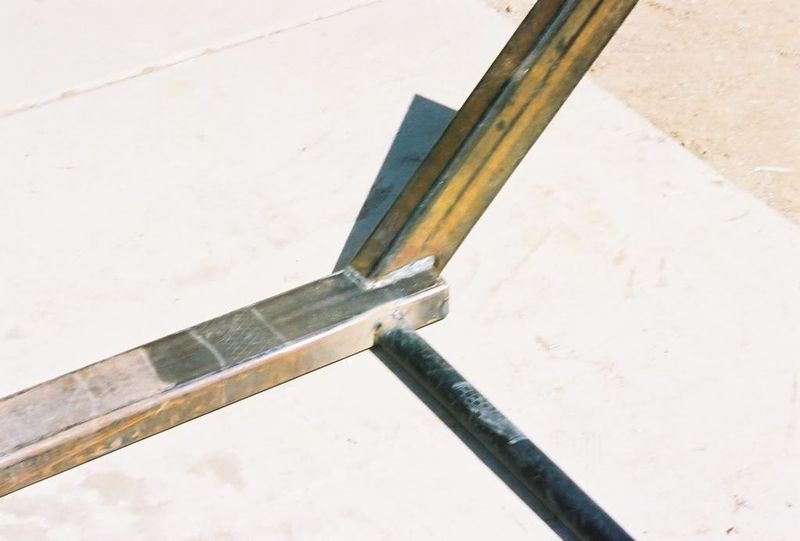
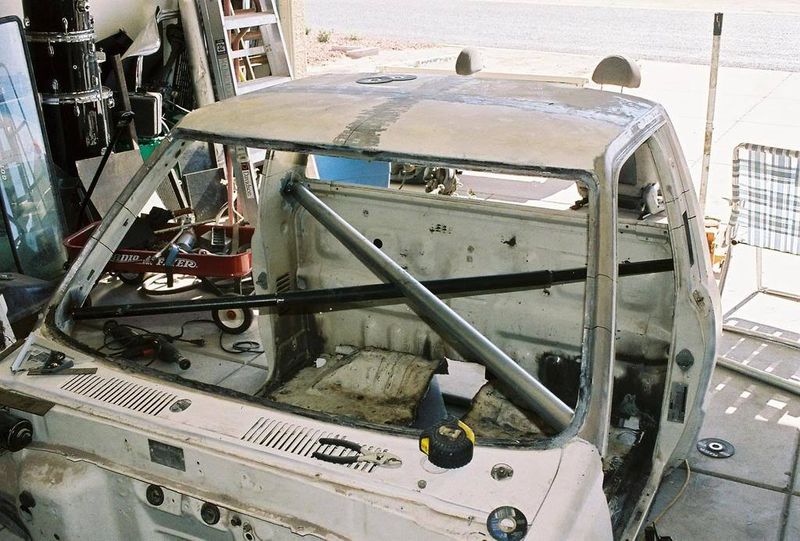
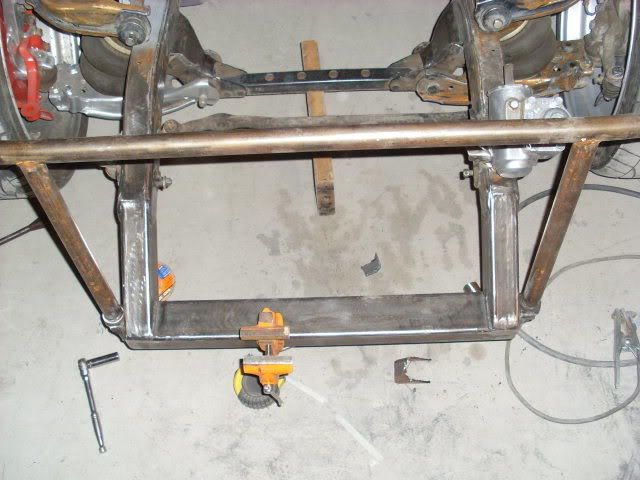
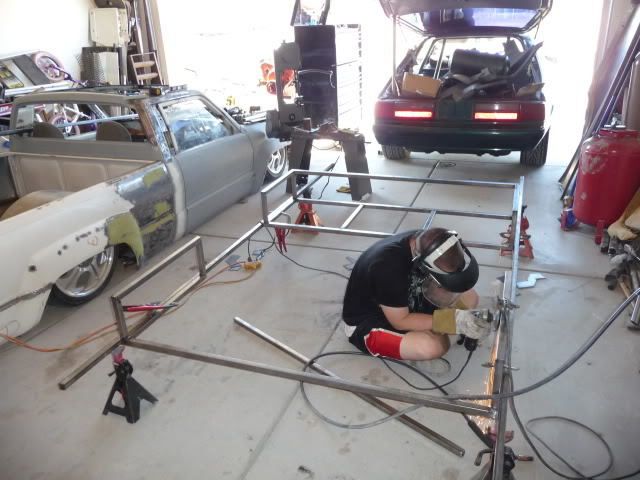
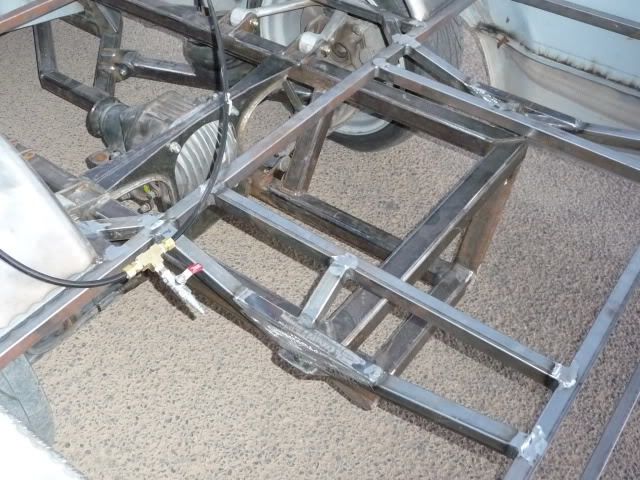
we picked up some tubing about 3 weeks ago and finally got around to doing something with it.
we set it up and leveled it. my bro was preppin some weld here.
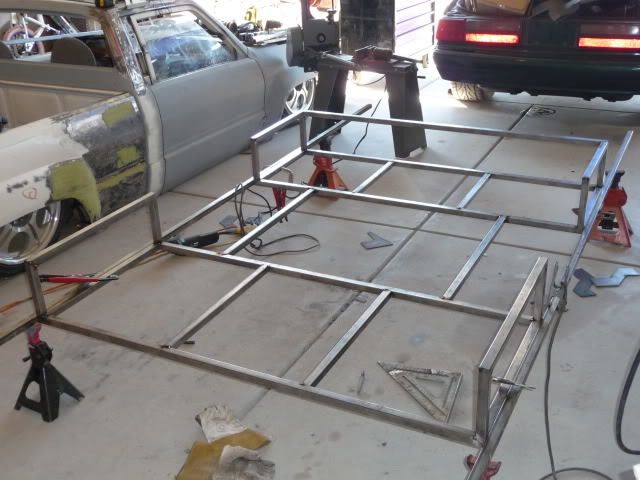
got some more bars in. we still have a little braces to cut and install.
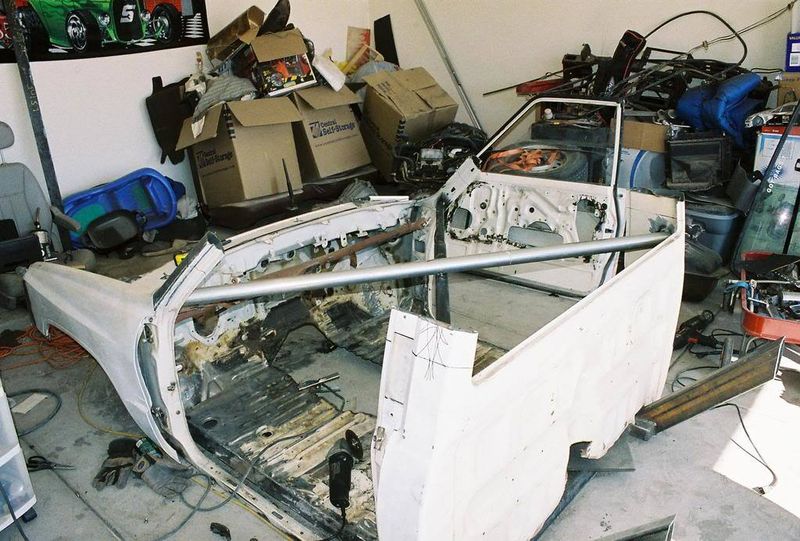
cut and hung the bedsides
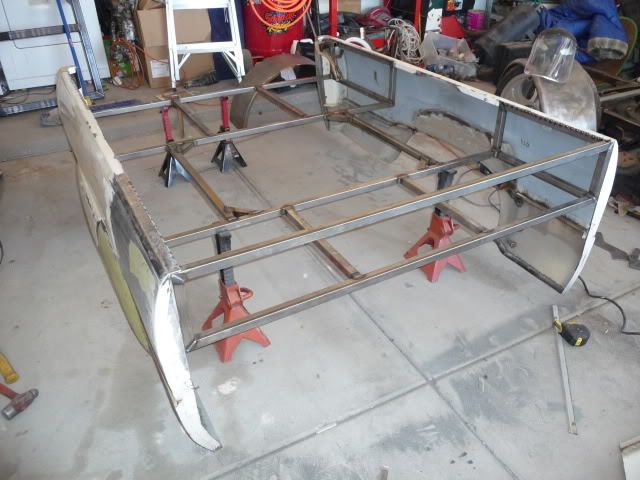
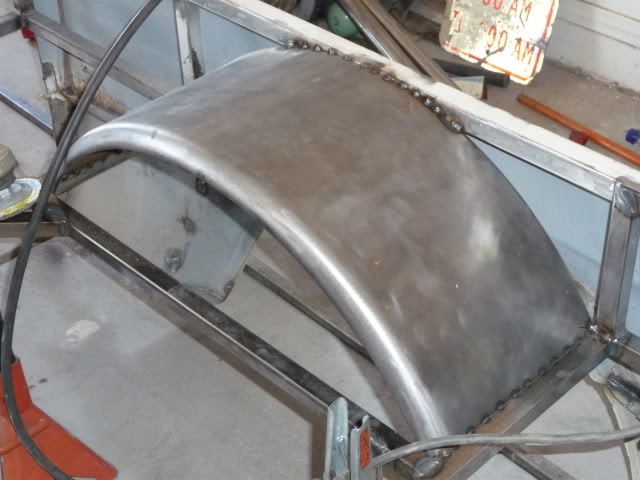
shortened and tacked in the trailer fender.
put in the other fender, and welded the 3 braces in the rear
done for today
and sitting in place. the middle is gunna be plexiglass so you can see the irs, and part of the fuel cell i'm gunna make.
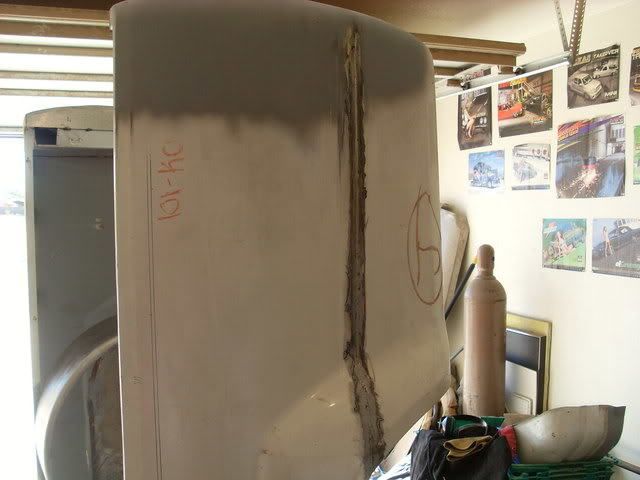
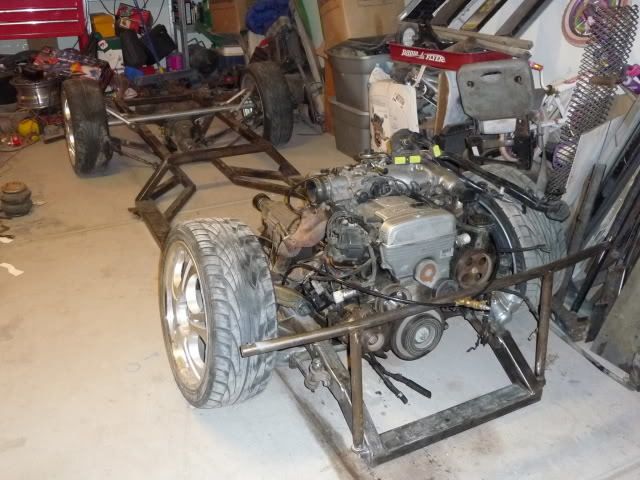
so today i got the cowl cut back in an attempt to get the motor lower, as well as making room for the radiator. i ended up cutting right about 2" into the cowl, and i brought the motor way down.
here's how much it stuck up before. (i don't have a side shot)
here's is where i cut it (still has to be welded, but the motors too damn heavy to move by myself)
and where it will be mounted.
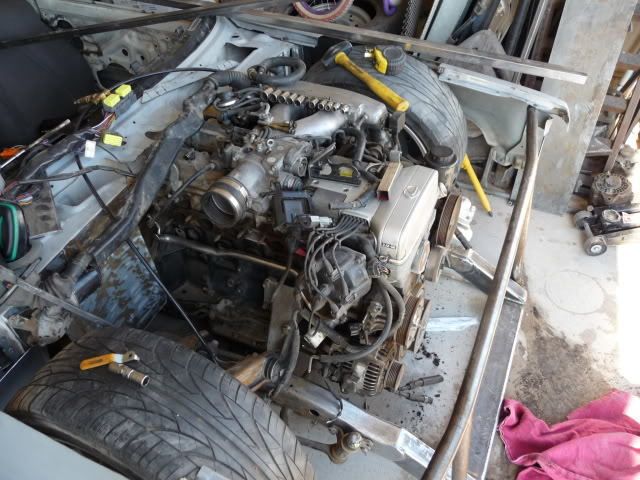
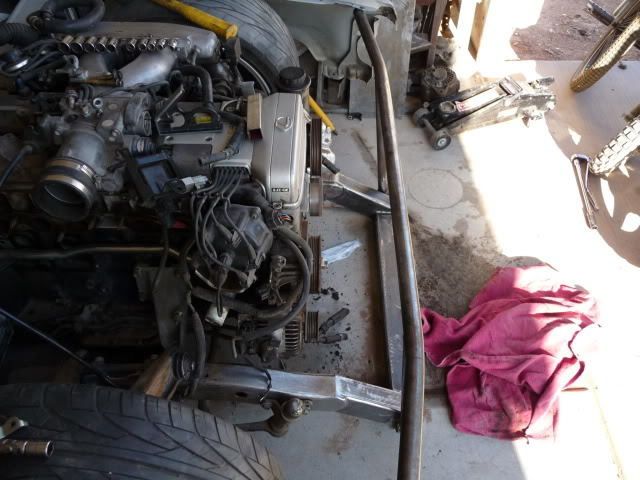
i had to remove the a/c compressor. it pushed the motor 1" out of center because it hit the steering box. no biggie since there isn't any a/c ducting in the cab, and i'll just need to get a slightly shorter belt. tomorrow i'll fab up the mounts and get her set. then fab up a transmember and air it up for the first time in 9 months..... 1 month and a day till west coast nationals!!!!!!


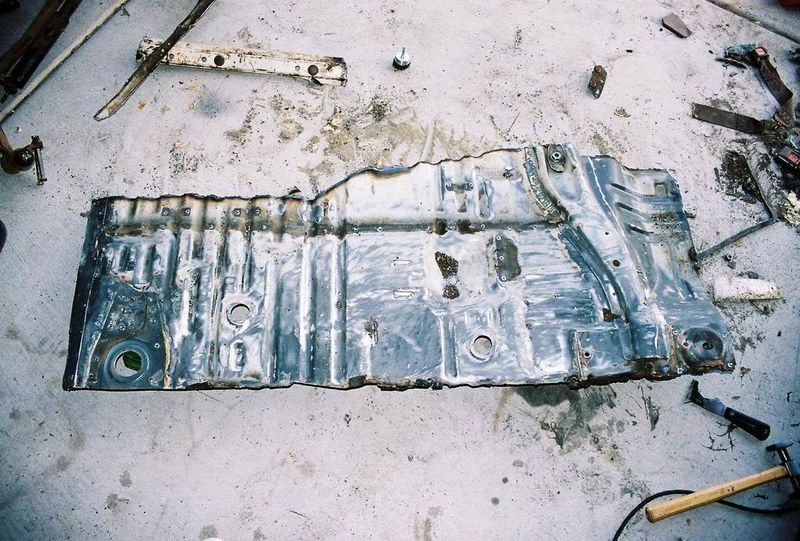
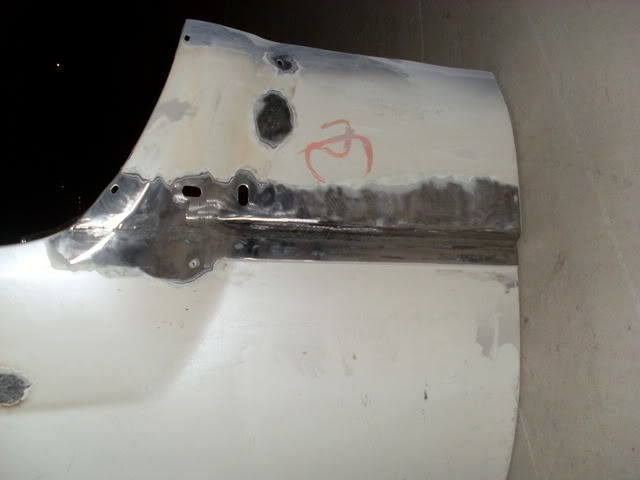
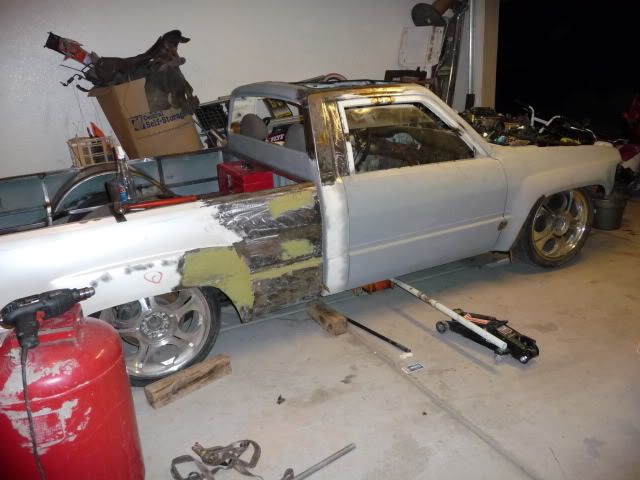
not a very productive weekend. we tore the whole truck apart (that always sucks...). i fabbed up the 2nd motor mount, and officially got the motor mounted. welded the bed sides to the bed frame, finished the section of the firewall i trimmed to move the motor back, and cut out the little bit of firewall we had. we decided to get all new sheetmetal so that it looks professional, as well as remove the remainder of the factory floor and frame and sheetmetal it...
bed welded
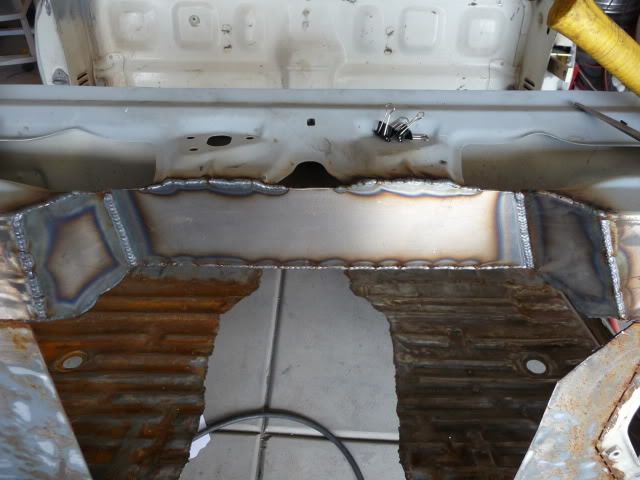
and the firewall section before and after.
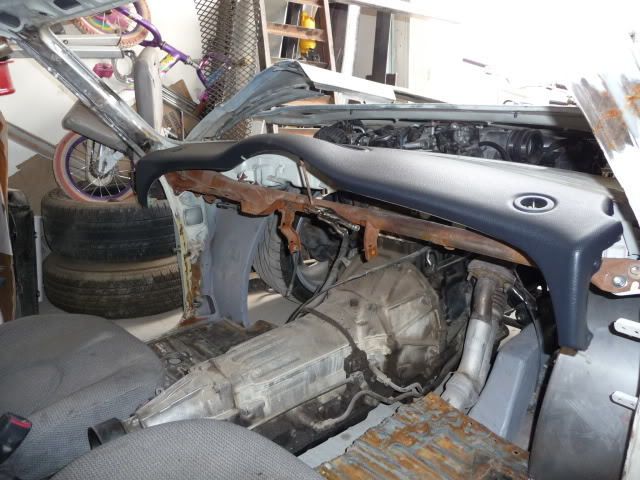
here is the dash we are using. it's from a 2003 mini cooper.
the lower bag bar
and mounted
both sides are built but it was a pain to get pics of the passenger side... now i need to get the upper brackets built, as well as weld the cirlce plates to the bottom bar for support.
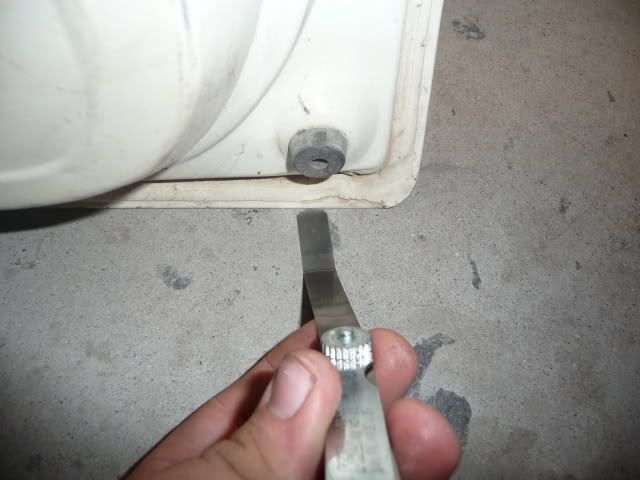
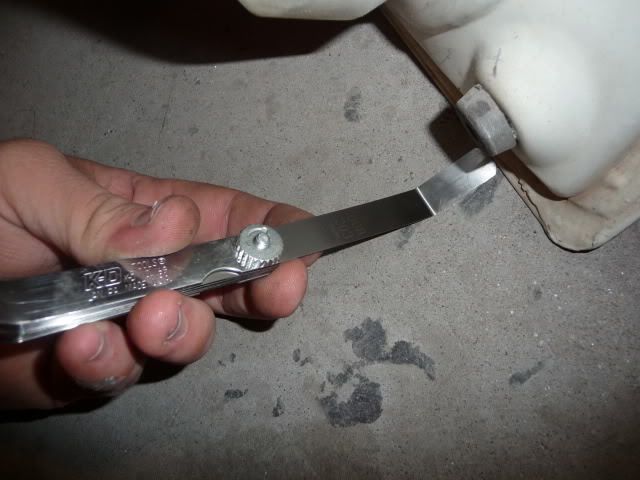
took these tonight while i was screwin around in the garage.... the feeler is .008"... it didn't fit.
here is a little update. this weekend is my last chance to have any help before the show, so there should be more pics by sunday night.
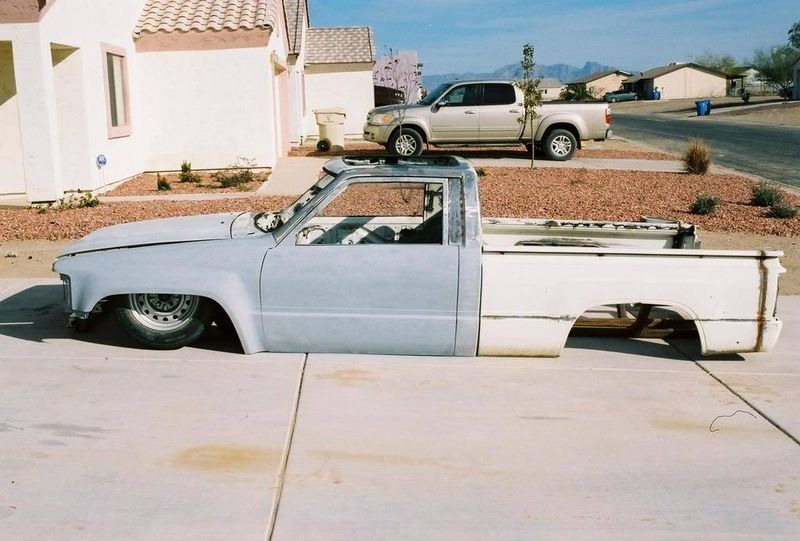
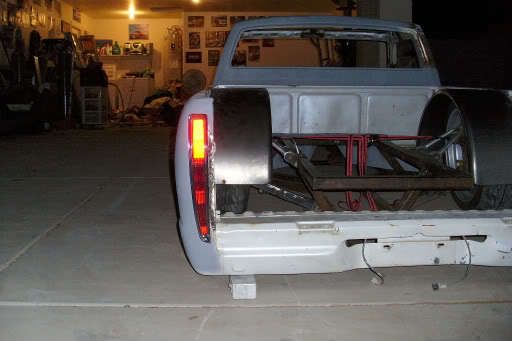
here is a super rare pic of the truck not flat on the ground
and this is the beginning of the steering column. it's from a 1966 ford f-100. i had thought that the toyota steering spline and the ford were the same but i was wrong. the ford uses 40 splines, and the toyota uses 36. so i robbed the steering wheel and adapter out of my 66 mustang just until we get back from west coast nationals. my neighbor didn't believe me that the steering column was a stock f-100 column...

shortened the column and made up a mount for the pillow block bearing.
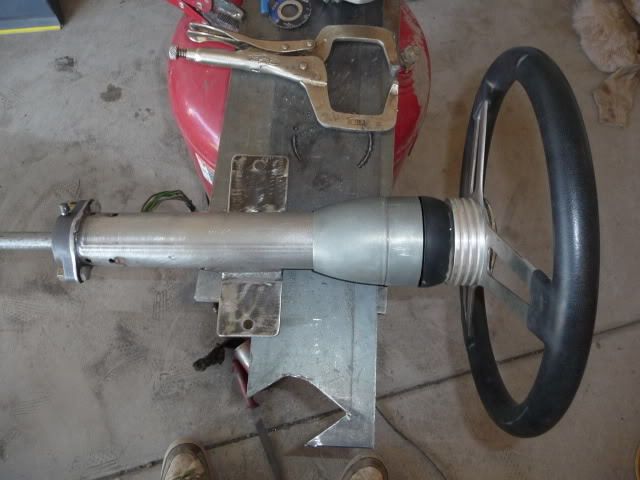
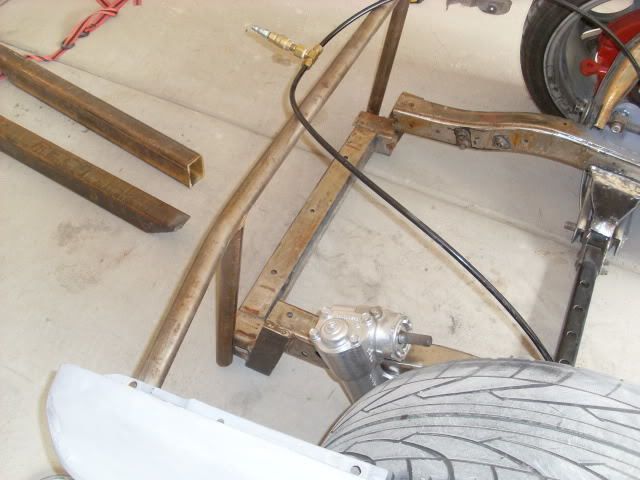
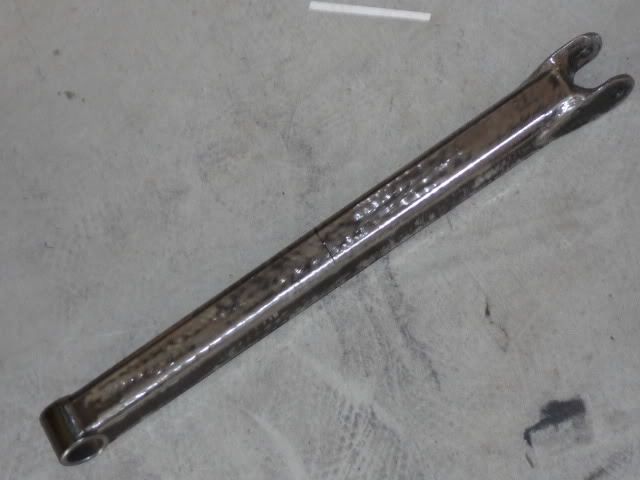
a trip to the junkyard should provide all the joints i need to make the steering work.
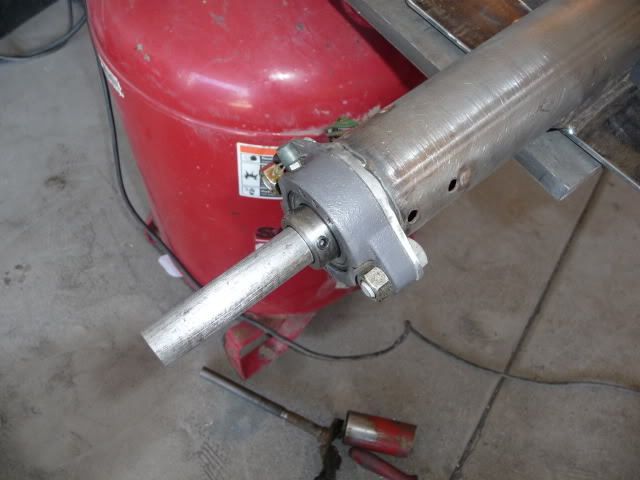
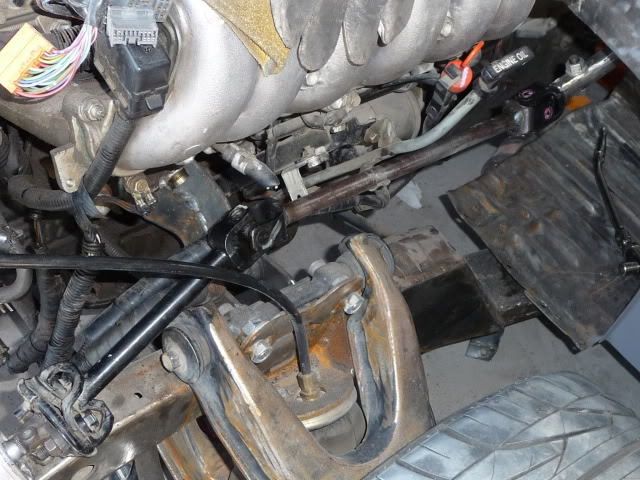
here is how i made my steering. a body drop to the doors makes things really tight, so i had to get creative.
i used two sector shafts from fox body mustangs.
i fabbed up and end for my column shaft that would accept the stock mustang steering shaft.
the 2nd mustang shaft actually bolted the the splined toyota piece that attaches to the gear box. i used the mustang rag joint as well.
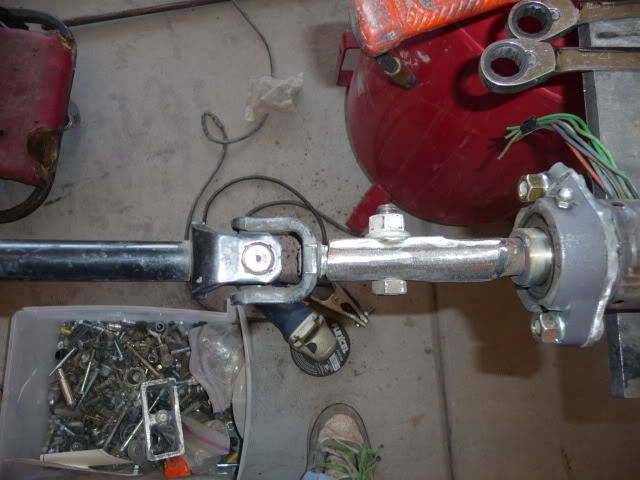
then i measured and cut a piece of solid 3/4" shaft, and welded it the the universal joints. steering is super smooth!
little late on these.... we worked from about 5am to 5pm friday getting the truck ready to go to west coast nats. it's nice to have the truck rolling, and steering again.
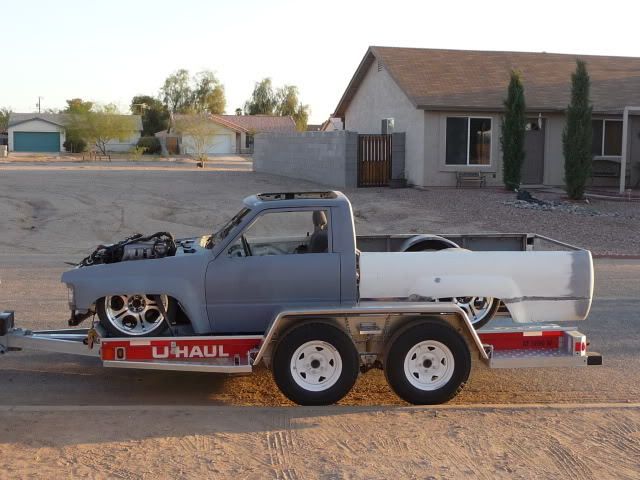
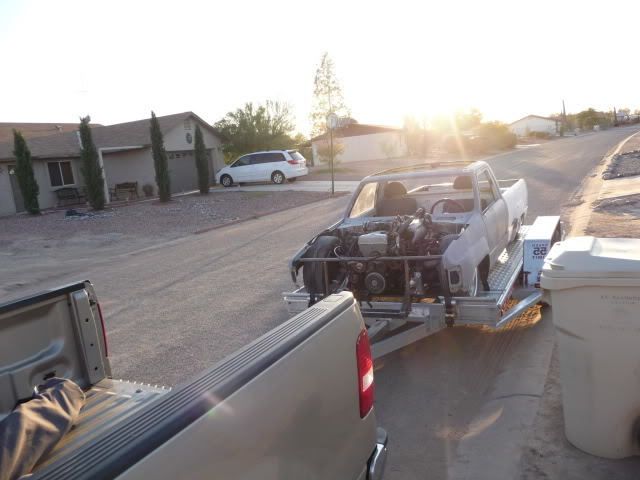
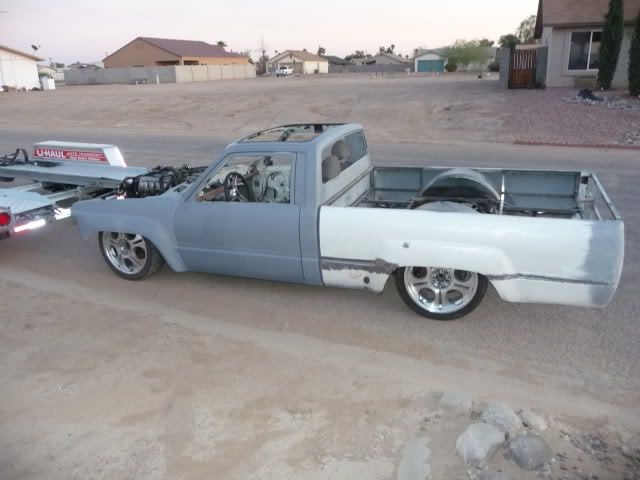
here it is at the show
i bought this 86 toyota pickup from a neighbor down the street. it had been sitting for almost a year, and the first time i seen the owner i jumped on it. he said "it runs and i want $500". i bought it without even looking it over.
i brought it home and played with the switches for a few minutes, then tore it apart. it had a homemade notch and was monoleafed! i had a simple plan for it: clean it up, back half, and give it to my little brother as high school transportation. but things went wrong .
needless to say i couldn't let him drive around in something that was so unsafe. so we started throwing ideas around and made a list of to-do's
we decided that we wanted to body drop it. and and just to be a little more extreme we wanted to go to the doors. basically for the lowest truck competition at the shows. we cut the rockers off and replaced them with 1x3x1/8" rec. tubing.
before
so now it was laying rocker like it should have been factory , so we started on the frame. to properly lay out a toyota you have to z the frame. i decided to build a frame from the firewall back to keep as much headroom as possible, and incorporate the z at the same time.
some of the previous work was a little scary, like the rear bag mounts. no cutting required to remove them, just a quick hit with a claw hammer :shocked: . i scraped most of the original frame.
i had planned on using the stock live axle, so i bucked up the frame to clear it.
we cleaned up the rockers and started putting the floor back in. with the new frame i only had to raise the floor 1 1/4". it was sweet since it was bodydropped to the doors and still had 5" of headroom! we also started dropping the front of the frame.
after putting the floor pieces in and still having headroom, we decided it was time to bring the height down some more. So... a 3" chop was next in line.
i spent a couple weeks figuring out exactly where i could remove the 3" and have the metal line up the best.
also, you should brace the cab before removing the roof.
once the cab was marked and braced it took about 3 minutes to remove the roof, and about 2 hours of goofing off to line it up and tack weld it.
the fronts lined up perfect, but the rears required a little work.
i made some relief cuts and started filling in the gaps. it's a slow and aggravating process.
to fit the i.r.s. i changed the back of the frame up.
since i can't stay on one thing for very long, i jumped back to the cab. i started suiciding the doors.
i found some 4x4 fenders on craigslist for $50. so on they went.
i raised them 1 1/2" to clear the tires. again a mod that was a waste of time.
next i found a 4x4 bed in decent shape.
with the 4x4 bed the supra suspension caused the wheels to rub. so i had to narrow it 4"
then i set up the front. i cut most of the stock stuff off and made my own brackets. i plated the lower arms to let the bags set flat.
so after i got the 4x4 bed i cut the floor out, got some trailer fenders, installed '99 caddy lights upside down, and flipped side to side. i made my own taillight fillers that eliminated the body line so the lights sit flush, and so i can make a smooth cali combo, made plates for the front where i cut the rocker off, shaved the gas door and my little brother welded up the seams for me.
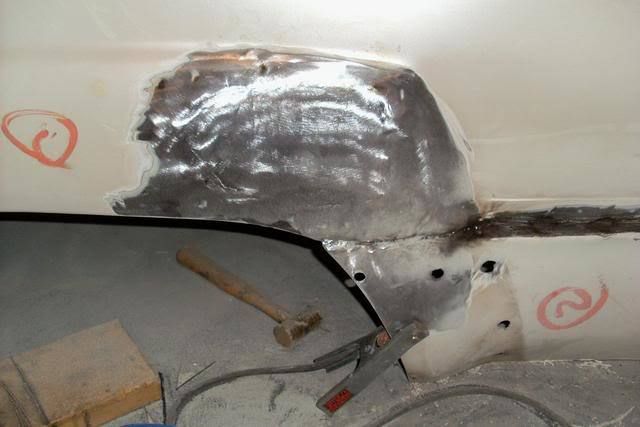
i also welded in fenders for the firewall tubs, and made some plates to connect the fenders to the tubs.
i also picked up some 87 toyota supra front brakes. they are almost bolt on, and work as a 1.5" drop spindle. pretty big difference over stock!
i also fabricated a bracket to hold the supra i.r.s.
and i wasn't happy with the front of the frame so i re did it.
i went to a junkyard and picked up a new motor (i had sold the 22r since it had a rod knockin). one of my favorite engines.
we picked up some tubing about 3 weeks ago and finally got around to doing something with it.
we set it up and leveled it. my bro was preppin some weld here.
got some more bars in. we still have a little braces to cut and install.
cut and hung the bedsides
shortened and tacked in the trailer fender.
put in the other fender, and welded the 3 braces in the rear
done for today
and sitting in place. the middle is gunna be plexiglass so you can see the irs, and part of the fuel cell i'm gunna make.
so today i got the cowl cut back in an attempt to get the motor lower, as well as making room for the radiator. i ended up cutting right about 2" into the cowl, and i brought the motor way down.
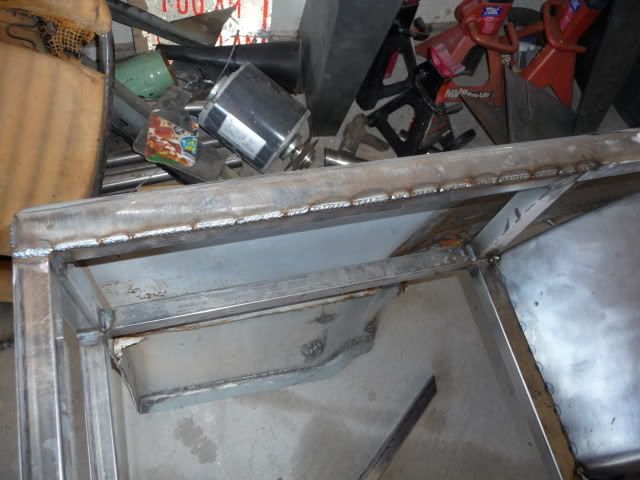
here's how much it stuck up before. (i don't have a side shot)
here's is where i cut it (still has to be welded, but the motors too damn heavy to move by myself)
and where it will be mounted.
i had to remove the a/c compressor. it pushed the motor 1" out of center because it hit the steering box. no biggie since there isn't any a/c ducting in the cab, and i'll just need to get a slightly shorter belt. tomorrow i'll fab up the mounts and get her set. then fab up a transmember and air it up for the first time in 9 months..... 1 month and a day till west coast nationals!!!!!!
not a very productive weekend. we tore the whole truck apart (that always sucks...). i fabbed up the 2nd motor mount, and officially got the motor mounted. welded the bed sides to the bed frame, finished the section of the firewall i trimmed to move the motor back, and cut out the little bit of firewall we had. we decided to get all new sheetmetal so that it looks professional, as well as remove the remainder of the factory floor and frame and sheetmetal it...
bed welded
and the firewall section before and after.
here is the dash we are using. it's from a 2003 mini cooper.
the lower bag bar
and mounted
both sides are built but it was a pain to get pics of the passenger side... now i need to get the upper brackets built, as well as weld the cirlce plates to the bottom bar for support.
took these tonight while i was screwin around in the garage.... the feeler is .008"... it didn't fit.
here is a little update. this weekend is my last chance to have any help before the show, so there should be more pics by sunday night.
here is a super rare pic of the truck not flat on the ground
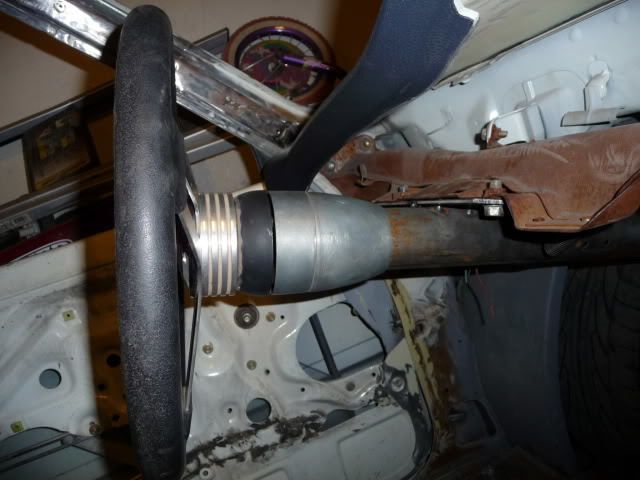
and this is the beginning of the steering column. it's from a 1966 ford f-100. i had thought that the toyota steering spline and the ford were the same but i was wrong. the ford uses 40 splines, and the toyota uses 36. so i robbed the steering wheel and adapter out of my 66 mustang just until we get back from west coast nationals. my neighbor didn't believe me that the steering column was a stock f-100 column...
shortened the column and made up a mount for the pillow block bearing.
a trip to the junkyard should provide all the joints i need to make the steering work.
here is how i made my steering. a body drop to the doors makes things really tight, so i had to get creative.
i used two sector shafts from fox body mustangs.
i fabbed up and end for my column shaft that would accept the stock mustang steering shaft.
the 2nd mustang shaft actually bolted the the splined toyota piece that attaches to the gear box. i used the mustang rag joint as well.
then i measured and cut a piece of solid 3/4" shaft, and welded it the the universal joints. steering is super smooth!
little late on these.... we worked from about 5am to 5pm friday getting the truck ready to go to west coast nats. it's nice to have the truck rolling, and steering again.
here it is at the show

n2bnlow
+1y
Somehow I missed this truck at West Coast Nationals, and dont know how. But to add insult to injury, the black Tundra and car hauler in the background of your last pick are mine. And that was the Xtreme Lowz camp. How'd I miss it? Oh yeah. I brought out two 30pks of Budlight. And came home with an empty cooler. Great run.

layed521
+1y
SICK SICK SICK! I missed it at WCN too somehow, hmmm... oh well guess I'll have to keep an extra eye out at Bring the Noize?

slammedcivicsi
+1y
looks great, I wish I had a better chance to see it at WCN, but I only walked up that way during the day light hours once.
Oh and N2BNlow, your new interior looks slick btw, When I saw it at WCN its the first time I was able to see your truck, and it is definatly prestine.
-Brad
Oh and N2BNlow, your new interior looks slick btw, When I saw it at WCN its the first time I was able to see your truck, and it is definatly prestine.
-Brad

vegasyota94
+1y
that thing is sick!

truck action
+1y
Looks very good,keep on building!!
burnzya
+1y
thanks for the good workd fella's!
one guy stumbled up (he was wasted!, even gave me a bro hug before he left.. lol) late saturday at wcn. he said he was wondering why we had a empty trailer. as he got closer he realized the truck was blocked from view by the trailer.
one guy stumbled up (he was wasted!, even gave me a bro hug before he left.. lol) late saturday at wcn. he said he was wondering why we had a empty trailer. as he got closer he realized the truck was blocked from view by the trailer.
vegasyota94
+1y
Any updates on this?

stll2hi
+1y
Damn....that's all there is to say. Nice!
burnzya
+1y
no updates on this other then a healthy layer of surface rust on all the bare metal
i've been busy with the hilux. my little bro will be back from the army in oct., might see some progress then.
Related Discussions in Toyota Pickup Projects
Thread
Posts
Last Post