Street Source is shutting down April 30th, 2026. Read the announcement
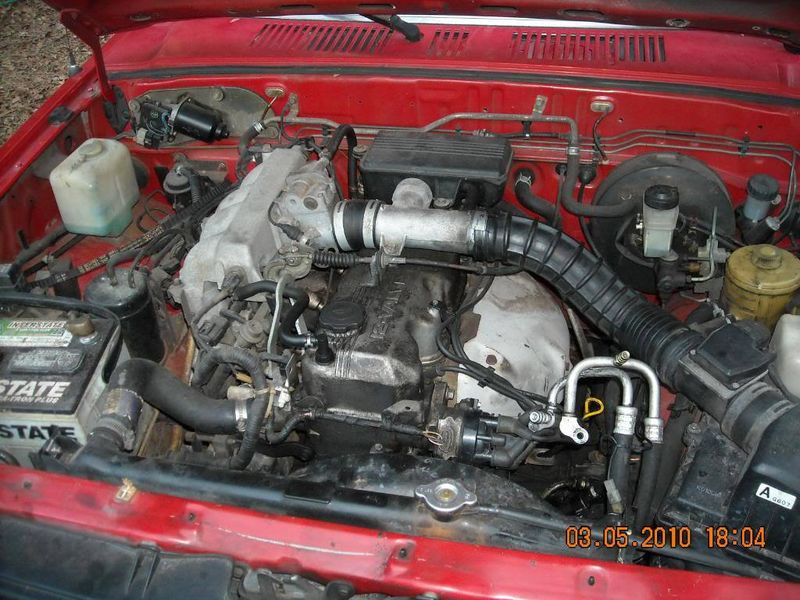
My Other B2600i 2WD Truck

axel breaker earl
+1y
I have another 1991 B2600i 5-speed that I am fixing up for a good friend of mine......he actually works for me a lot.....he's retired but just helps me in my construction business when I need an extra hand. He has a big Chevy like mine also, except his is a diesel and he's getting tired of paying through the nose for fuel costs, so after all the ribbing and hard times he's giving me over the years for "messing with Mazda's when I could be working on some of my classics" I am fixing one of my trucks up for HIM!
He has it made, doesn't he!
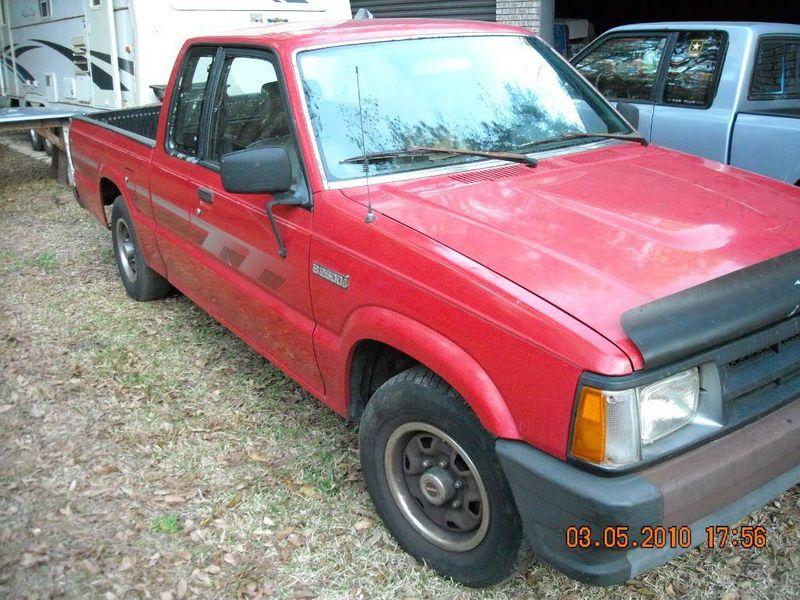
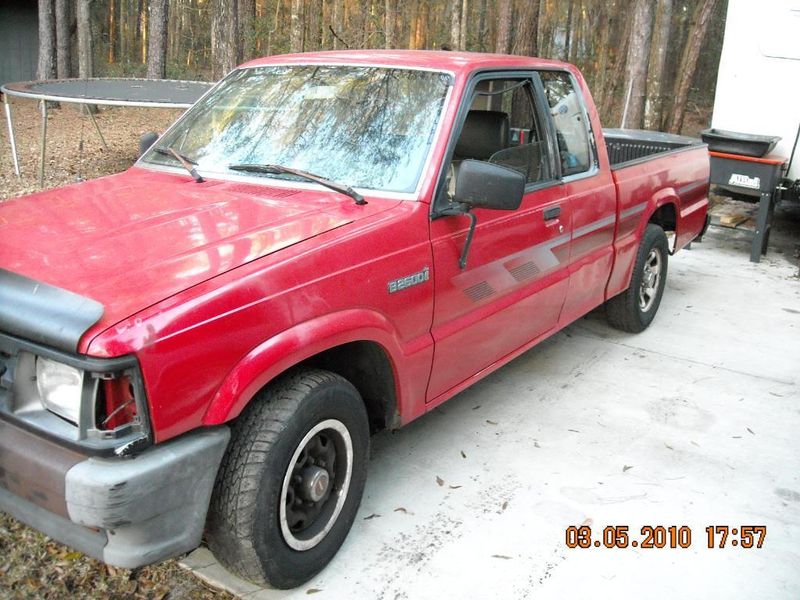
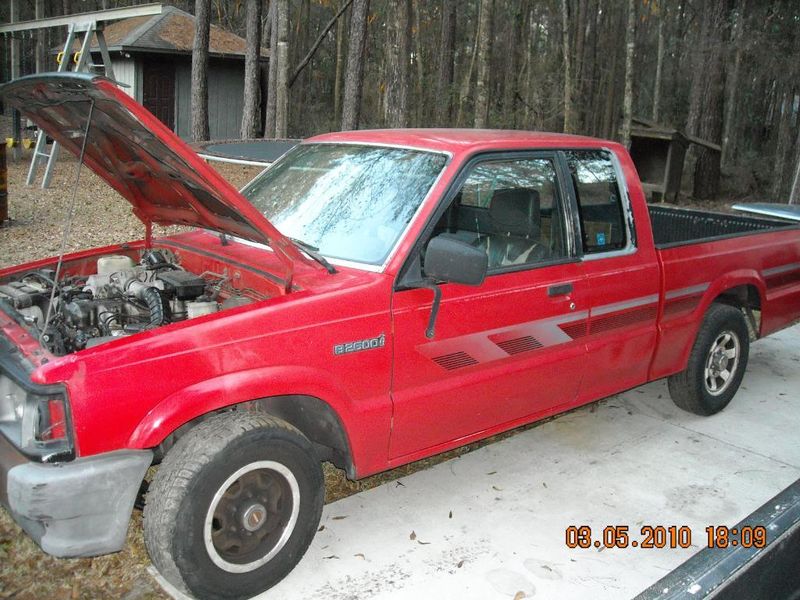
Here is the truck...
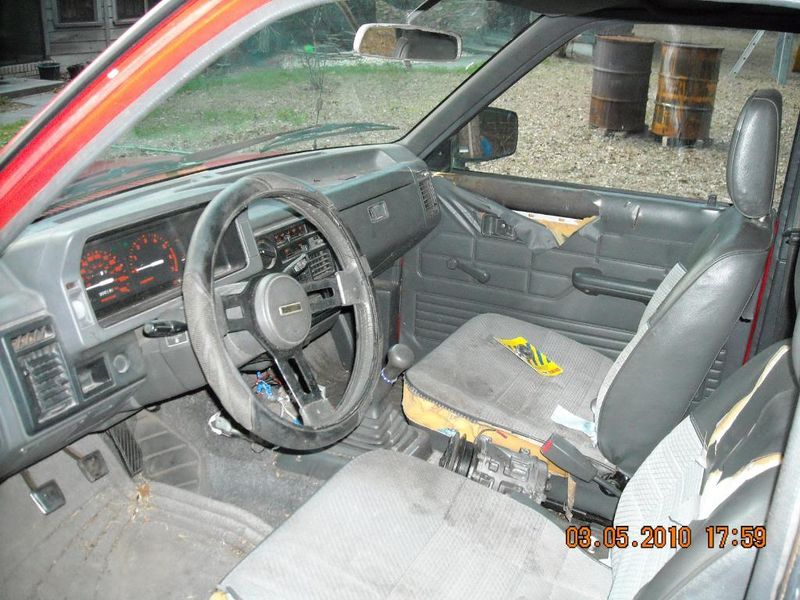
Seats are SHOT!
We are going to get some better ones this weekend......going JYing!
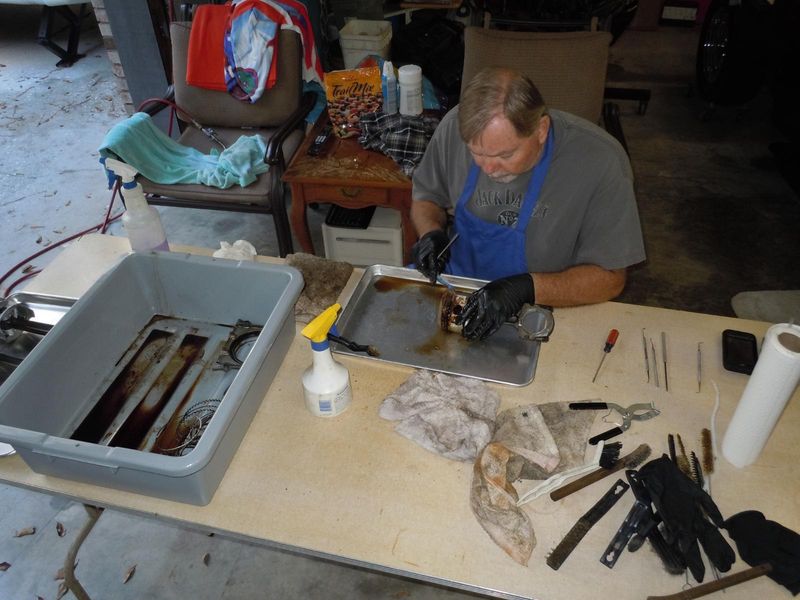
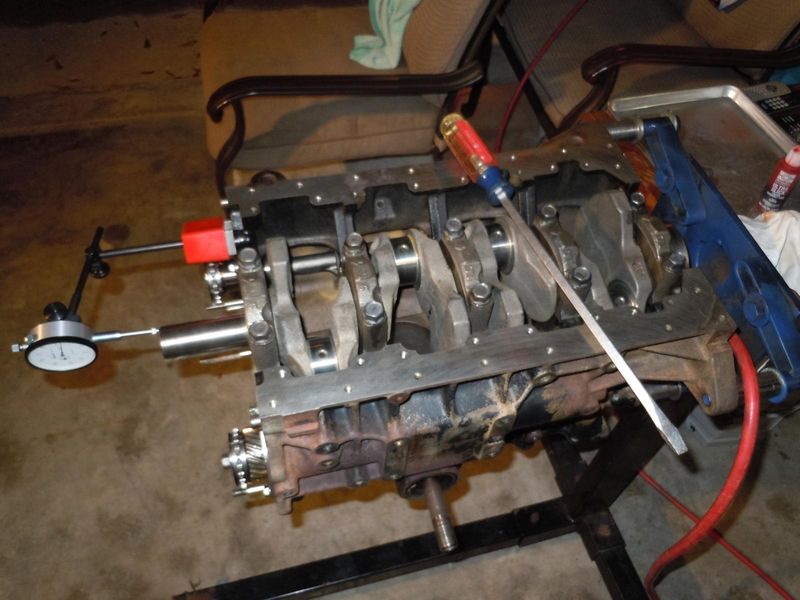
I pulled the engine and disassembled it, then put him to work cleaning parts!

Not sure if the head was cracked or not, but I got a new one anyway....there was water getting into the oil but didn't realize this until after I got it home....only paid $700.00 though.
Here's the eventual new owner, putting in his sweat equity!
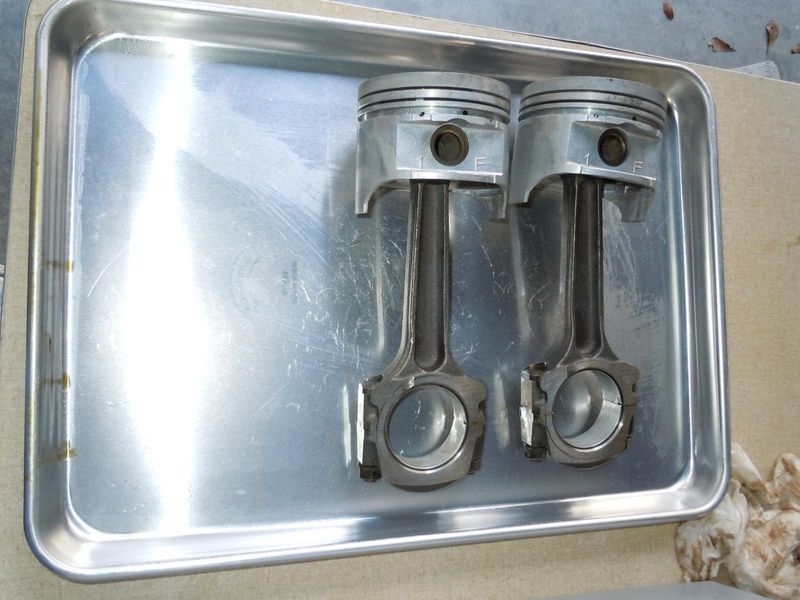
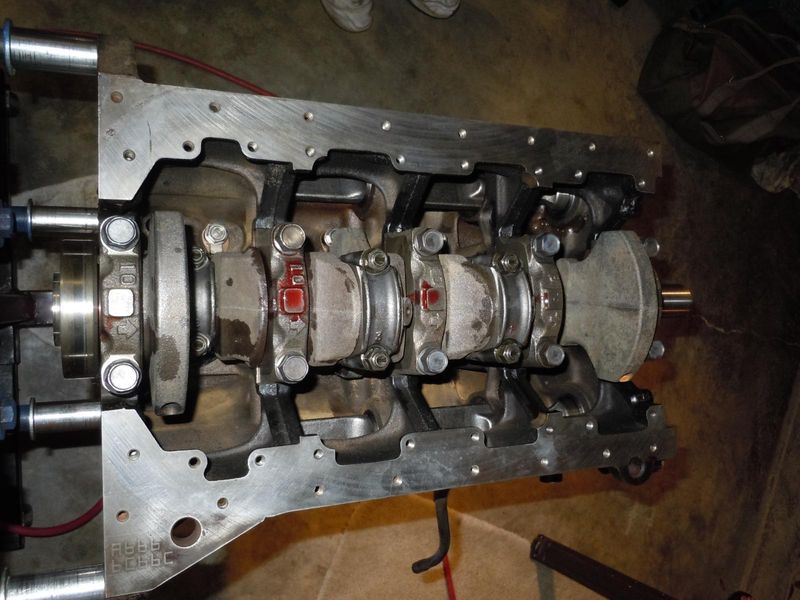
I'm re-using the stock pistons and re-ringing them....basically just rings and bearings and gaskets.......it will be an extra truck for him so we wanted to keep the cost down...didn't want to bore it and use new pistons.
Any of you that have worked on these Mazda engines know that if they are halfway taken care of (engine wise) the block has minimal wear on it, even after 230,000 miles. The piston to wall clearance on this engine is less than .003" so it will give him tons more miles, and the stock pistons are way better than most of the ones you can buy at a decent price anyway.
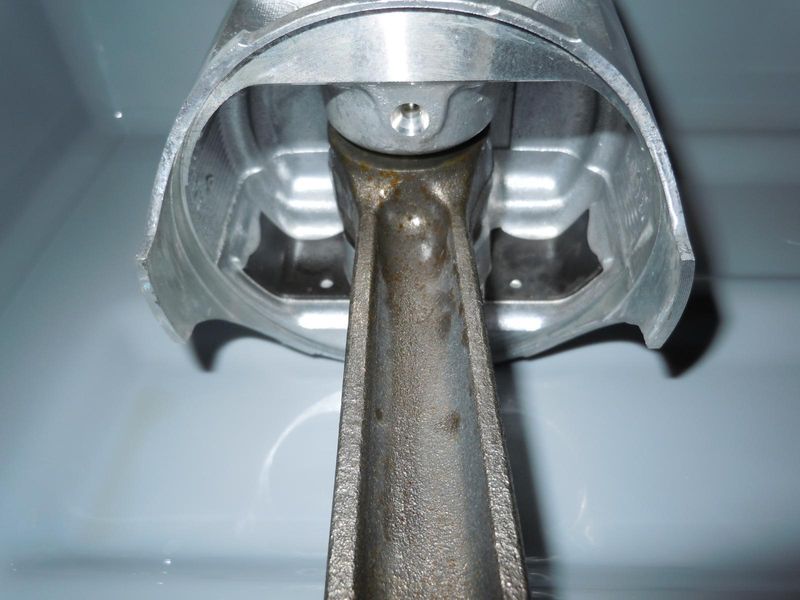
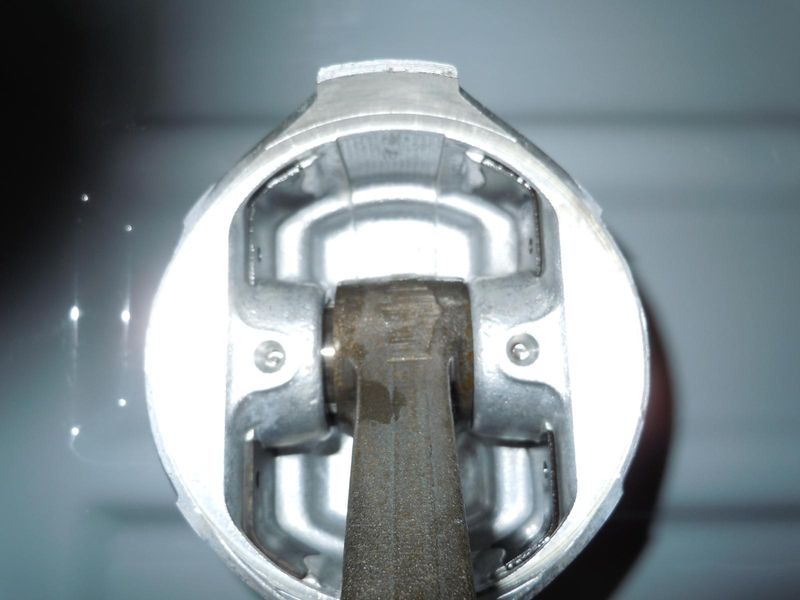
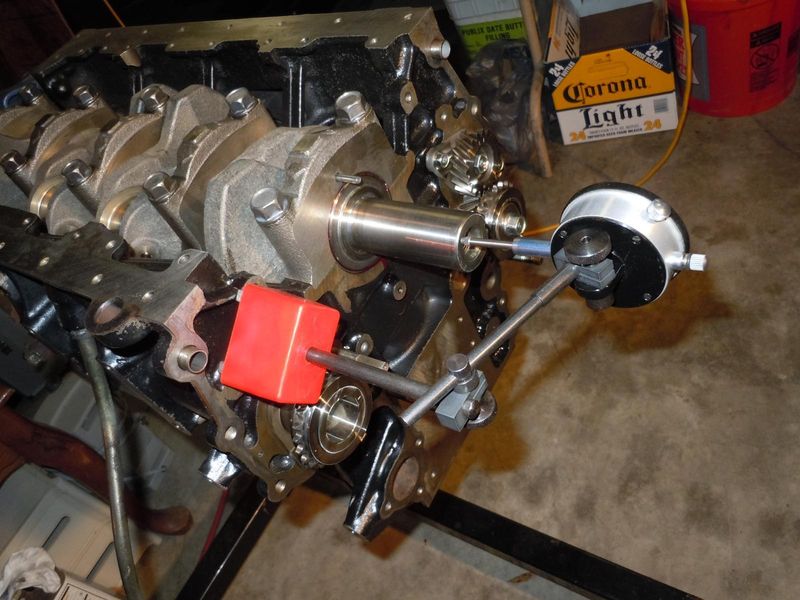
A G6 engine has "oil squirters" as I call them......they are aimed at the wrist pin and underside of the piston and help cool the piston as well I would think.
I have some more pics I need to get off the camera, so I'll load them soon!
He has it made, doesn't he!
Here is the truck...
Seats are SHOT!
We are going to get some better ones this weekend......going JYing!
I pulled the engine and disassembled it, then put him to work cleaning parts!
Not sure if the head was cracked or not, but I got a new one anyway....there was water getting into the oil but didn't realize this until after I got it home....only paid $700.00 though.
Here's the eventual new owner, putting in his sweat equity!
I'm re-using the stock pistons and re-ringing them....basically just rings and bearings and gaskets.......it will be an extra truck for him so we wanted to keep the cost down...didn't want to bore it and use new pistons.
Any of you that have worked on these Mazda engines know that if they are halfway taken care of (engine wise) the block has minimal wear on it, even after 230,000 miles. The piston to wall clearance on this engine is less than .003" so it will give him tons more miles, and the stock pistons are way better than most of the ones you can buy at a decent price anyway.
A G6 engine has "oil squirters" as I call them......they are aimed at the wrist pin and underside of the piston and help cool the piston as well I would think.
I have some more pics I need to get off the camera, so I'll load them soon!
Post was last edited on Feb 26, 2012 09:17. Edited 1
time.
axel breaker earl
+1y
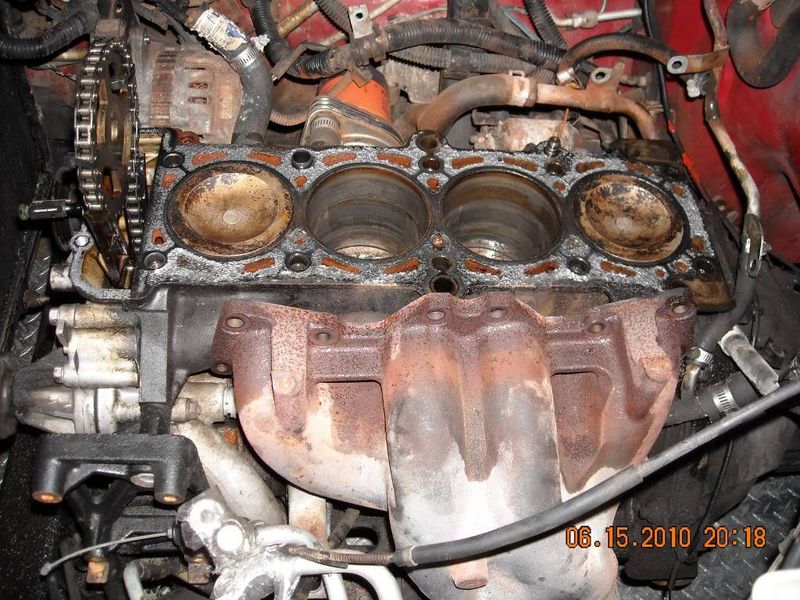
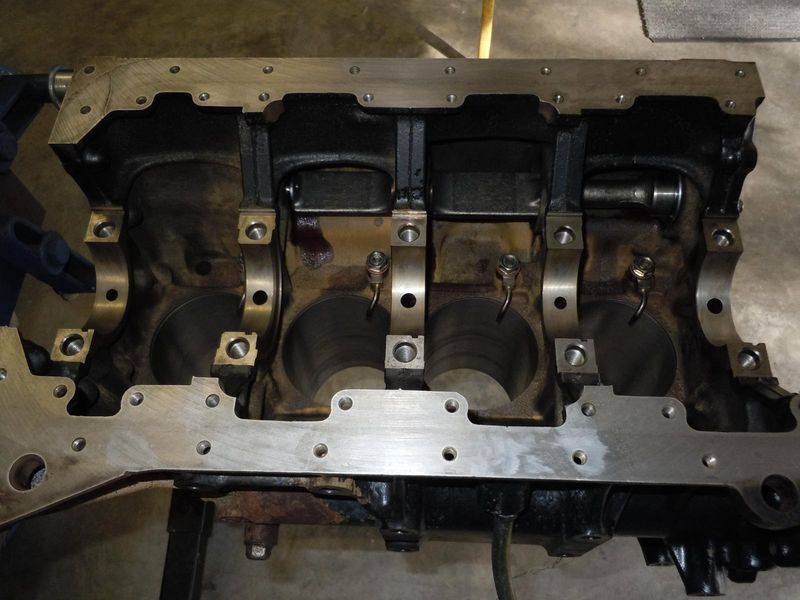
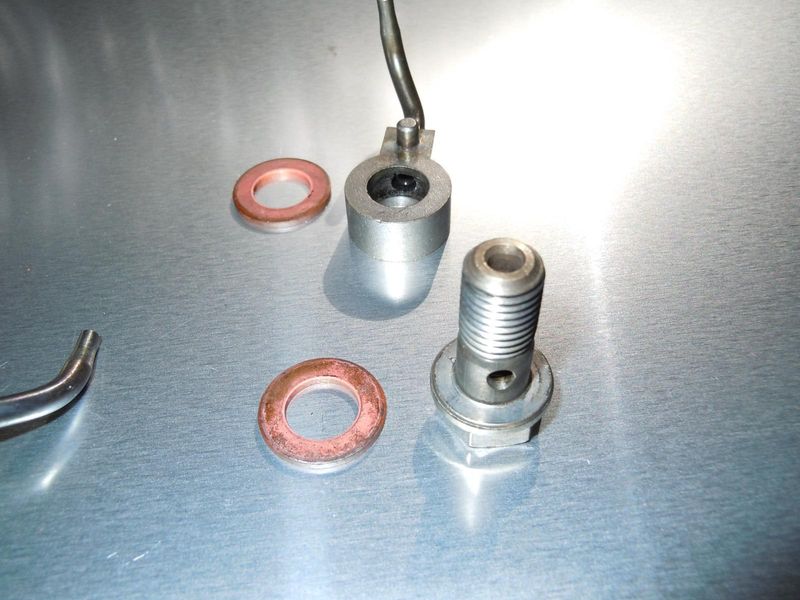
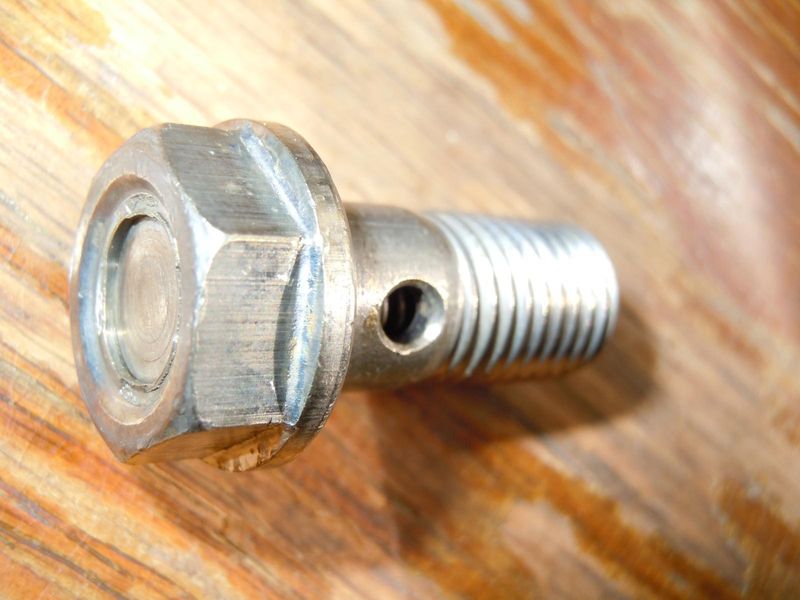
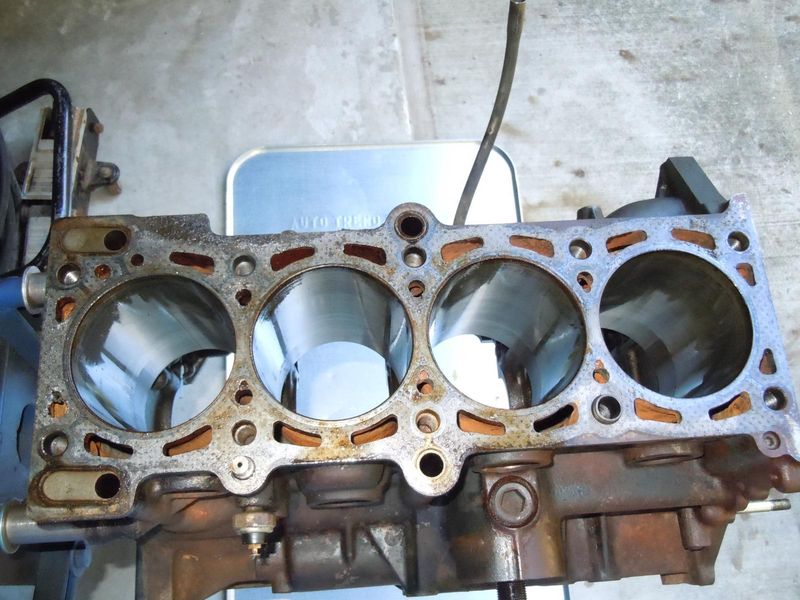
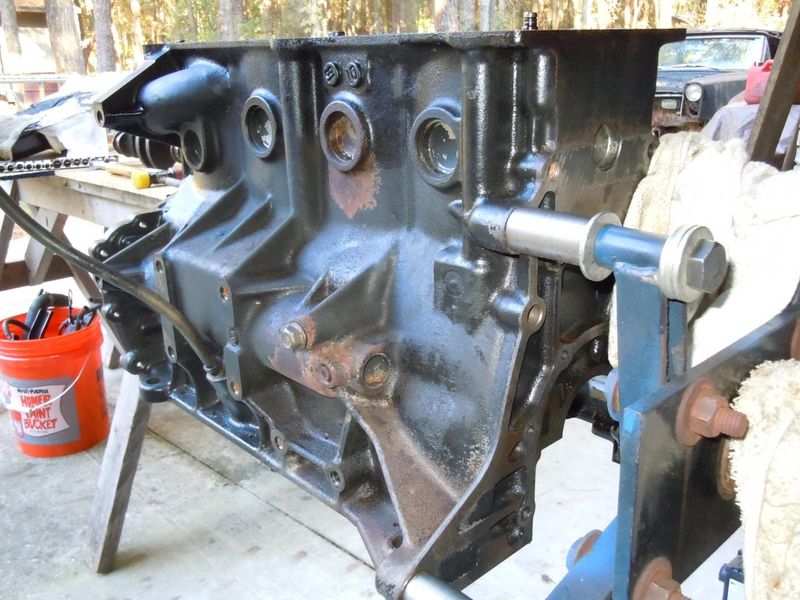
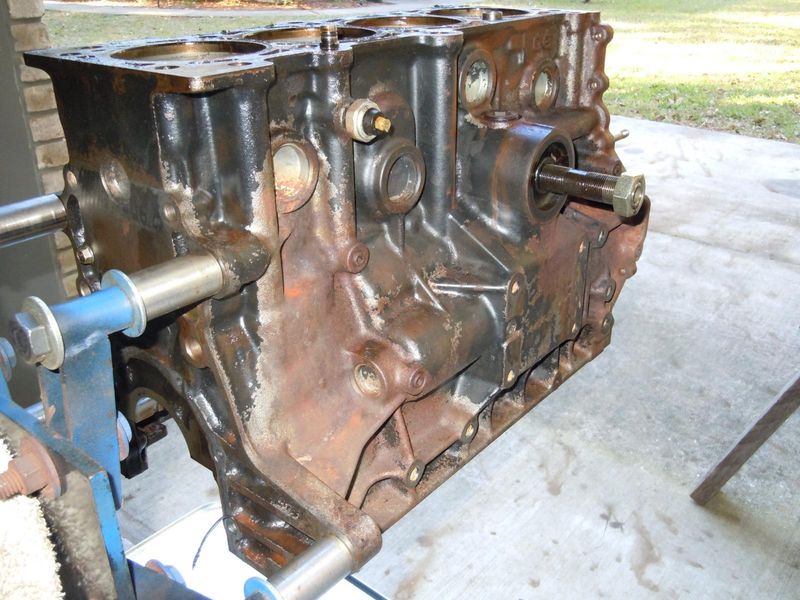
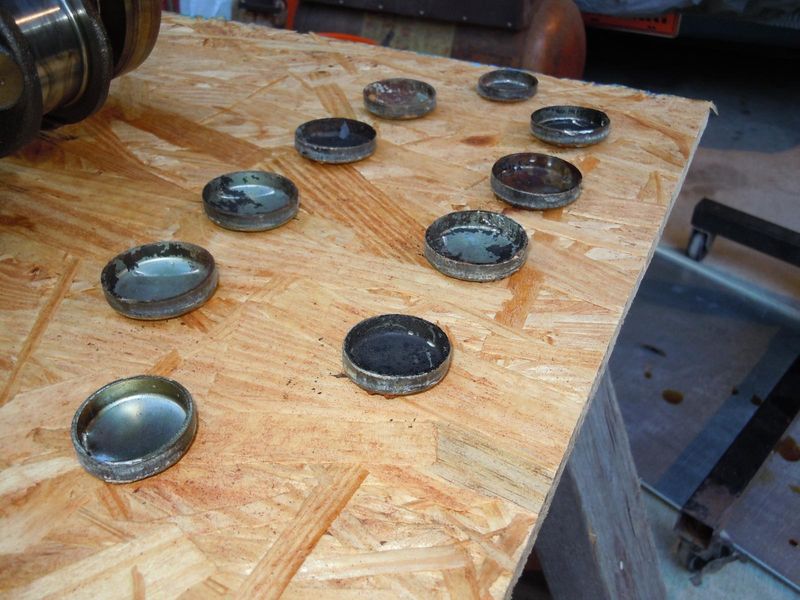
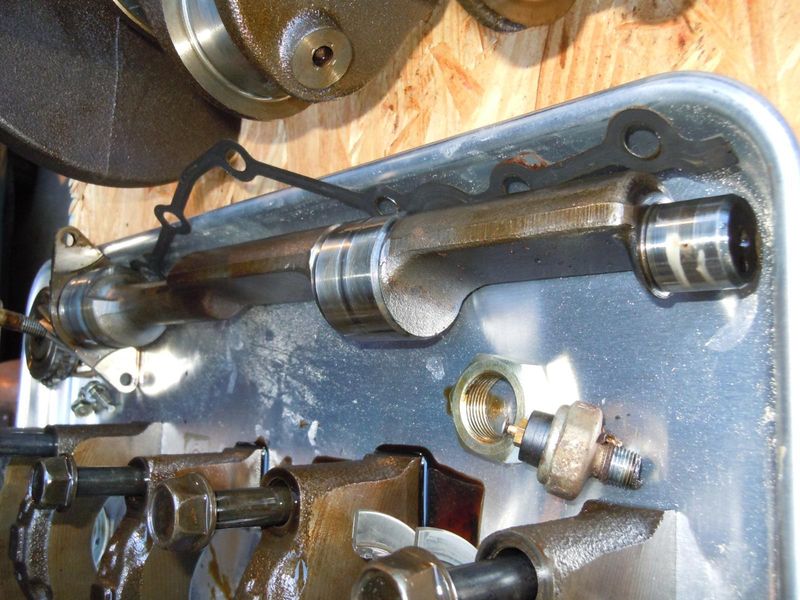
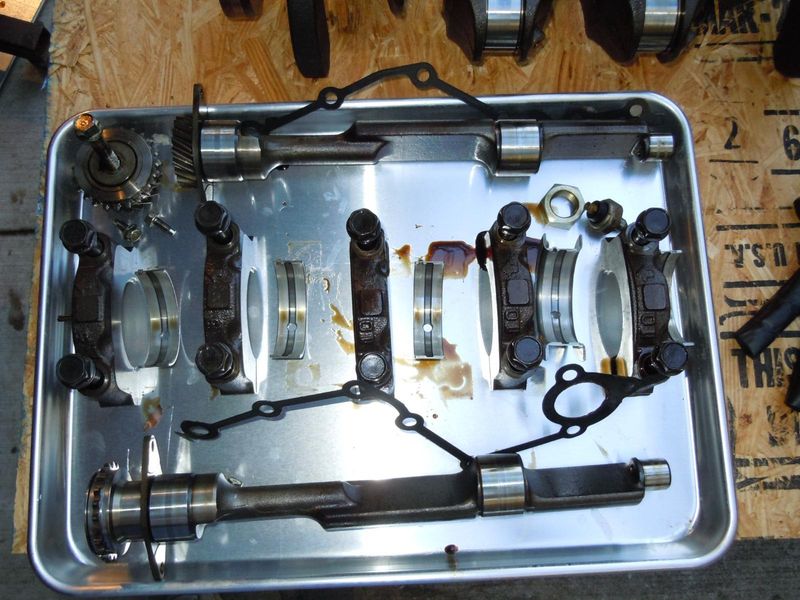
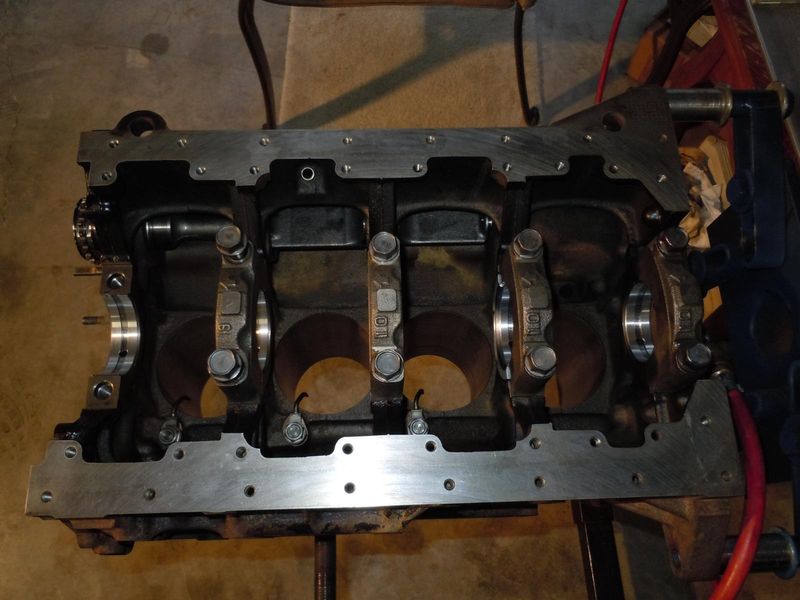
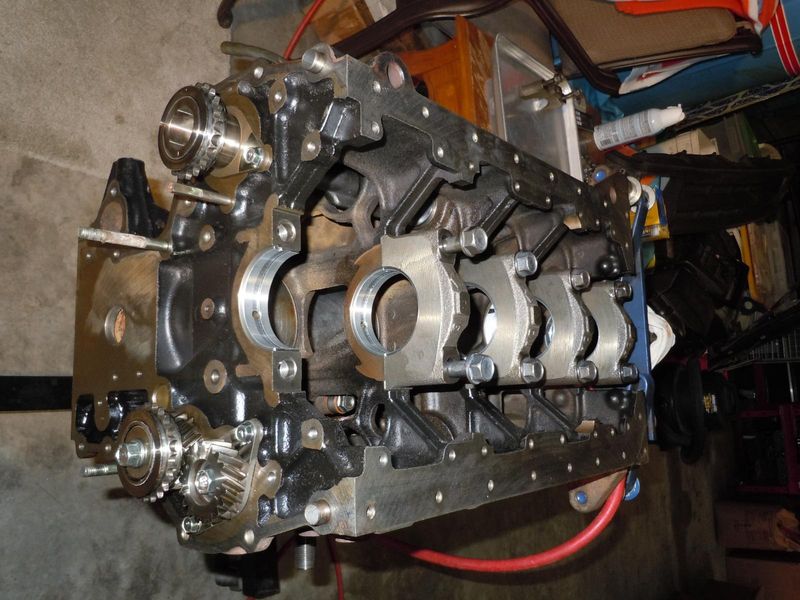
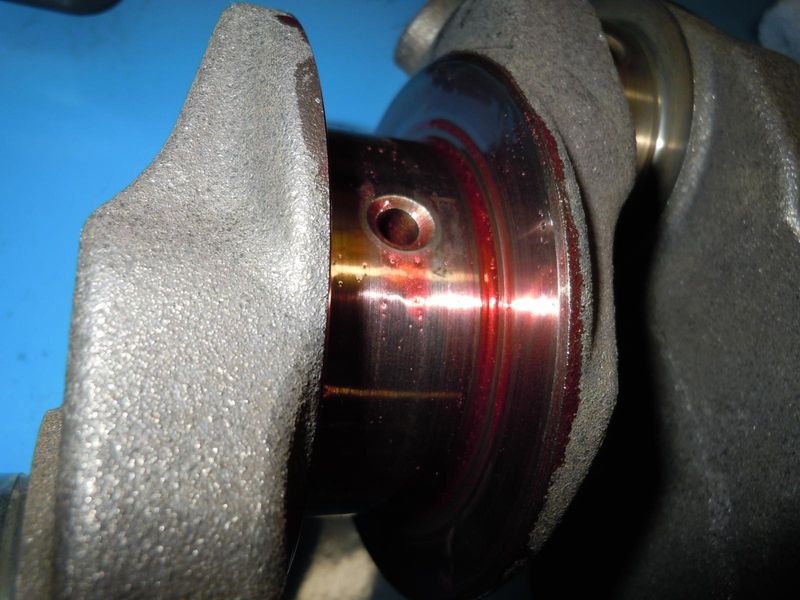
The block.
Check out the rusty freeze plugs.
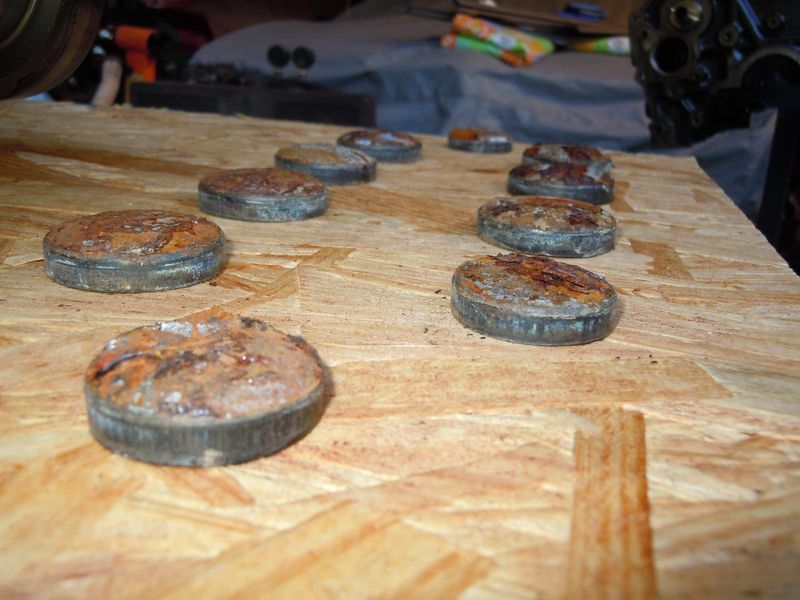
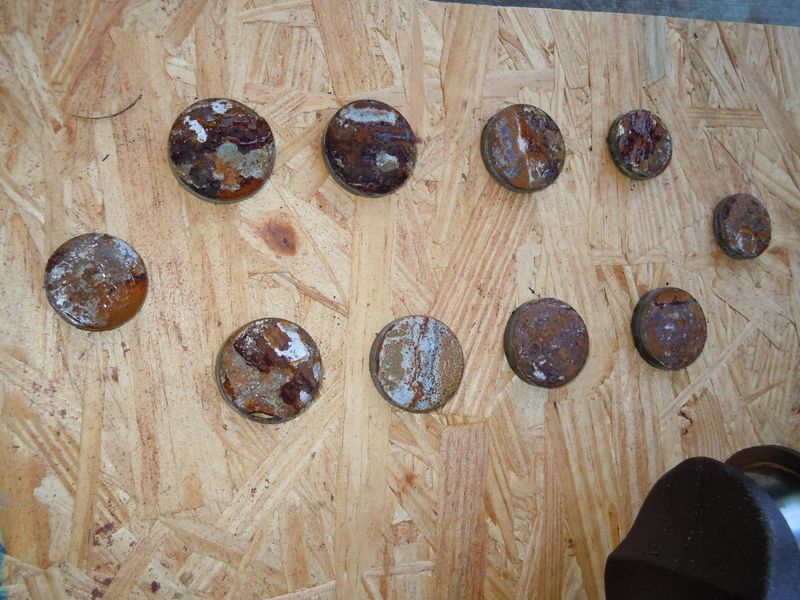
We have brass ones to go back in it.
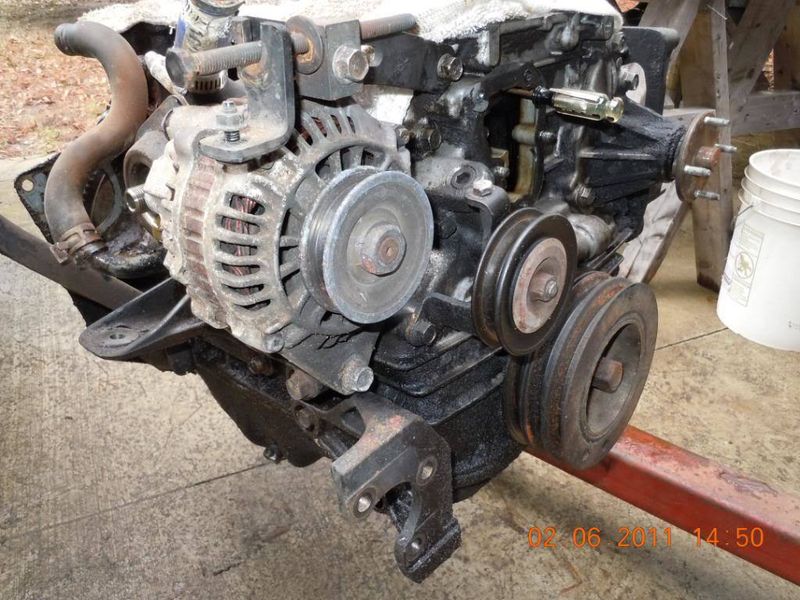
Here it is after I pulled it out of the truck.
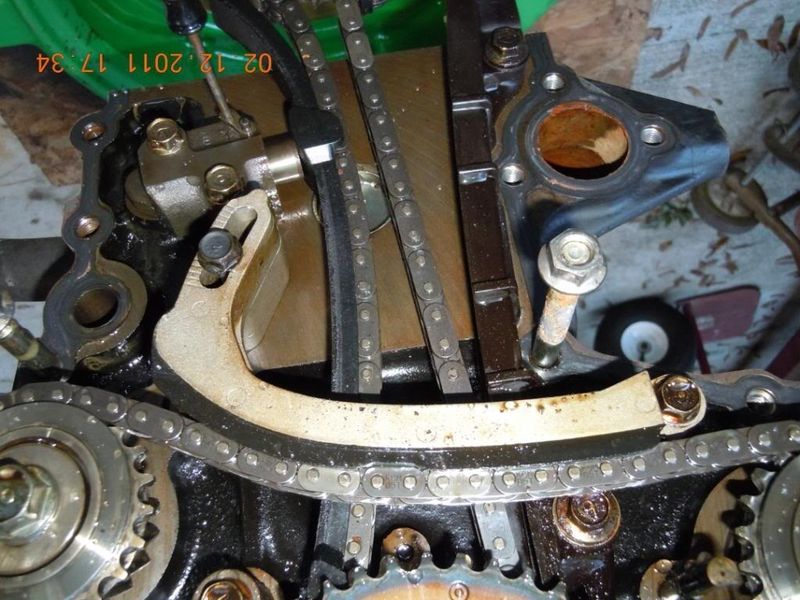
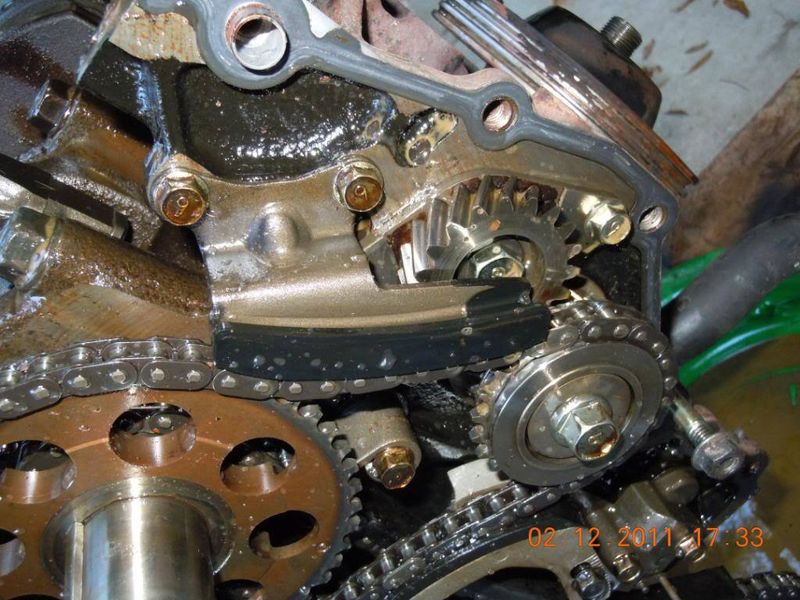
Look at all those chains!
245,000 miles and the bearings didn't look bad at all.

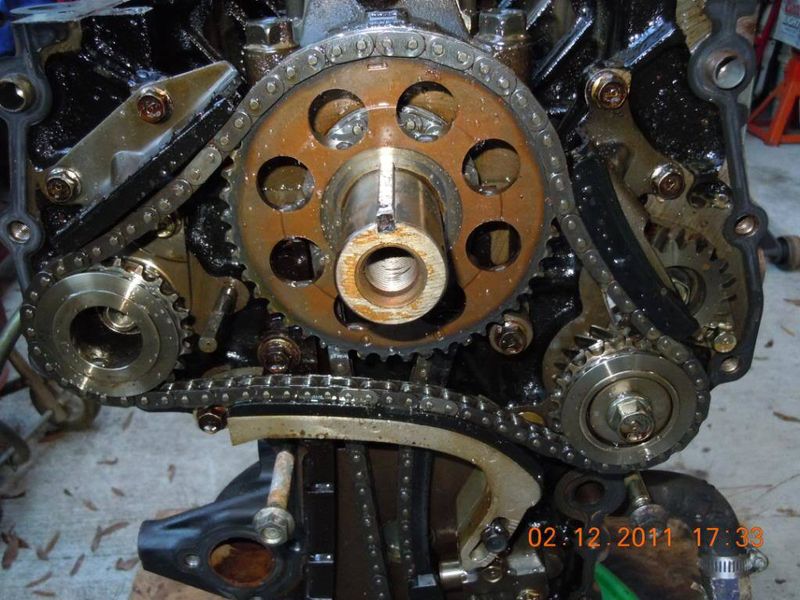
Twin balance shafts.
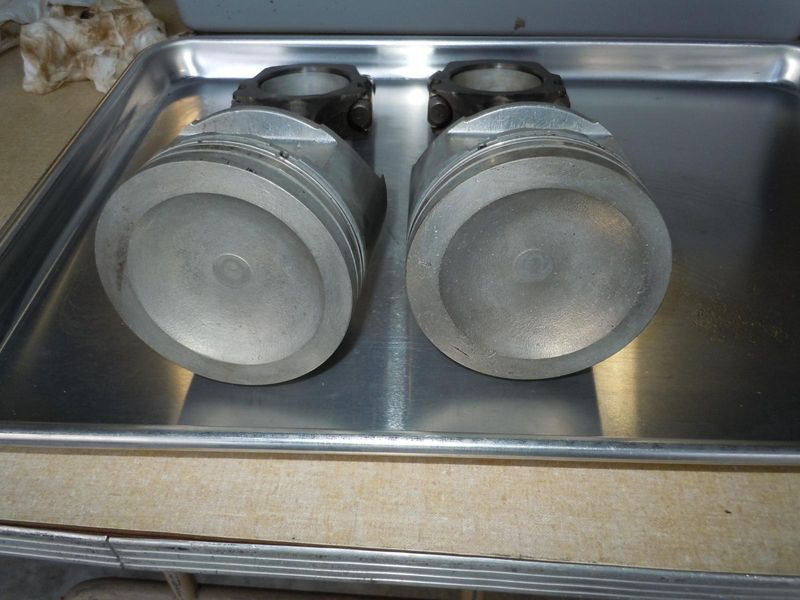
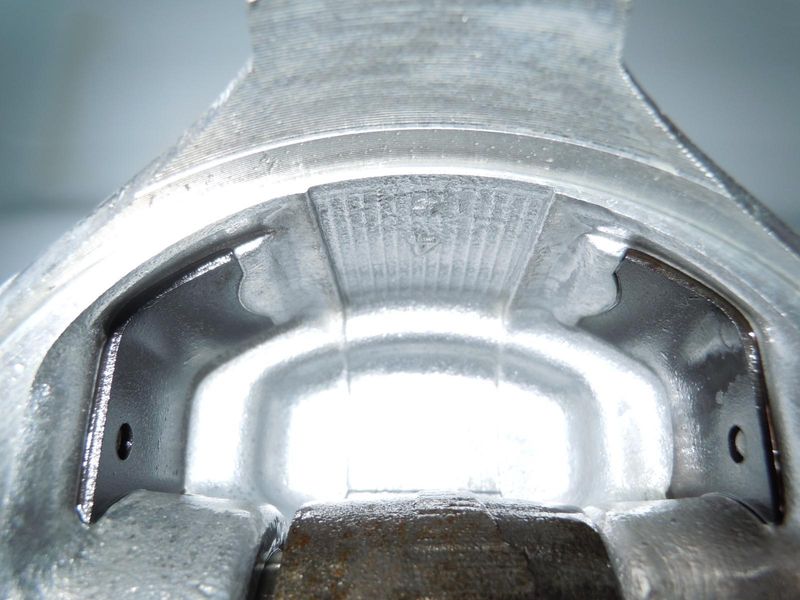
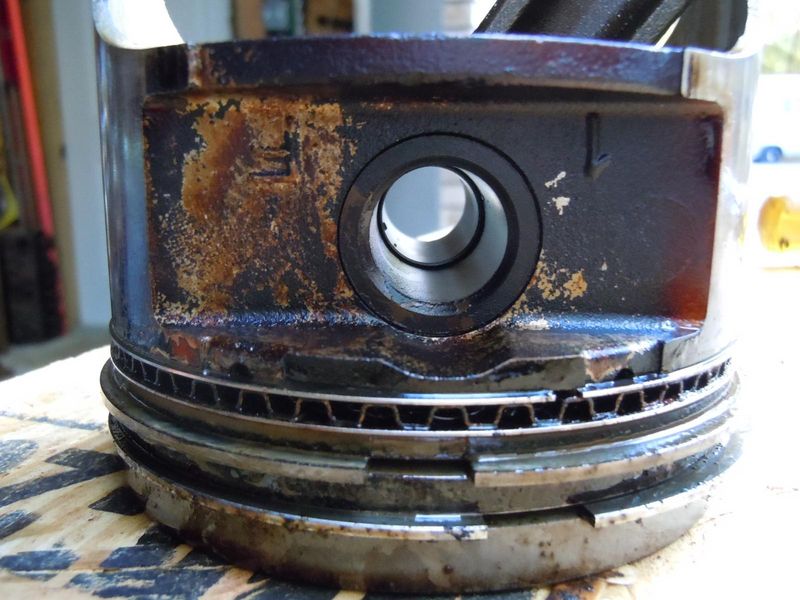
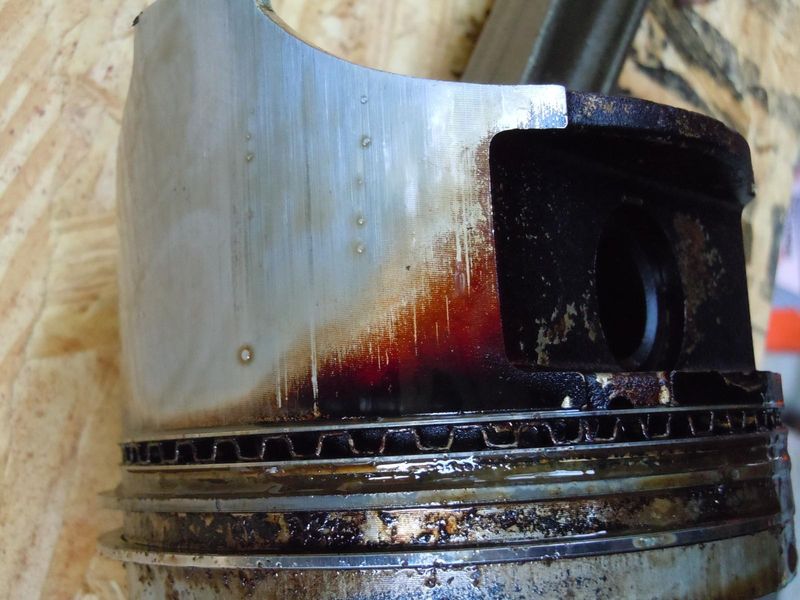
Pistons weren't scuffed too bad considering the miles.
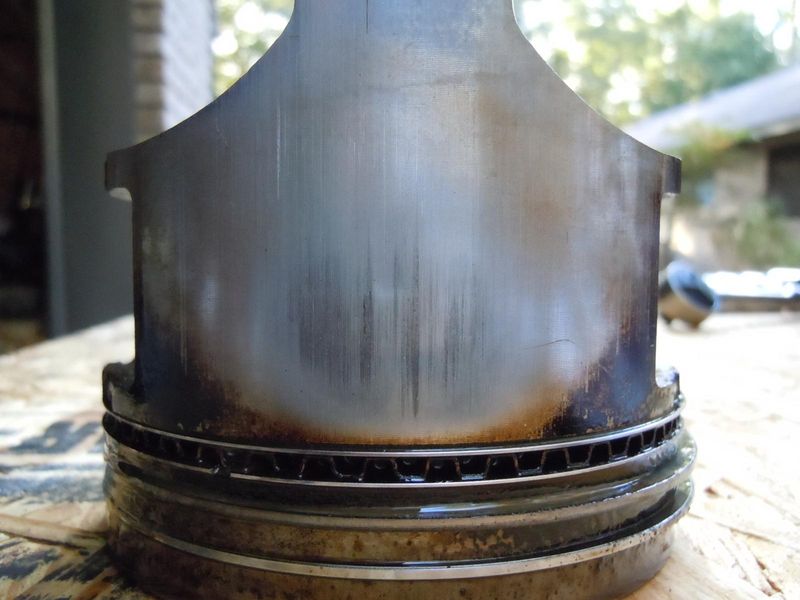
But they were a bit oil stained.
And the cool cat that hangs out by the garage!

Check out the rusty freeze plugs.
We have brass ones to go back in it.
Here it is after I pulled it out of the truck.
Look at all those chains!
245,000 miles and the bearings didn't look bad at all.
Twin balance shafts.
Pistons weren't scuffed too bad considering the miles.
But they were a bit oil stained.
And the cool cat that hangs out by the garage!

cherokeed
+1y
Nice engine build thread, I may do the same to my truck instead of letting someone else rebuild it, are you going to leave the rest of it stock,I'm will too, most on here ends up bagging or body dropping theirs

Cusser
+1y
I want to be next on Earl's B2600i list !!!
I'll supply the cassette stereo.
I'll supply the cassette stereo.
axel breaker earl
+1y
Yeah, it will be left stock. We're old farts and it would be too hard to get in and out of a slammed truck.....plus, how do you work in construction with a lowered truck? It kinda takes away the ability to use it as it was intended in my opinion.
You can do it yourself if your the least bit mechanically inclined, not hard really, and you can have a machine shop do all your measuring for you if you don't have the micrometers and such yourself.
You can do it yourself if your the least bit mechanically inclined, not hard really, and you can have a machine shop do all your measuring for you if you don't have the micrometers and such yourself.
axel breaker earl
+1y
LOL, hey if I find a decent one around here, I might call ya!

midnightmike
+1y
right on! take lots of pics, im in the middle of rebuilding my G6 engine, and i havent pulled the balance shafts out yet, im worried i wont get them in properly, a few other things im nervous to touch
axel breaker earl
+1y
Well, if your not going to change the balance shaft bearings, there's no need to pull them really, but if you do (to clean the block up good) just leave the gears on them, that will tell you which goes where. I'm not putting new BS bearings in this one.....the engine sounded fine, had lots of power and was quiet running....just had water in the oil, so I think it will be just fine for what we're going to use it for.
Get some micrometers and measure everything to see what you've got, and go from there......this one is not bad at all....I'll post all the clearances on it as I have it all recorded in a notebook as I'm putting it together.
The biggest wear area is the ring end gaps......when you use the new rings in the worn bores, just the slightest amount of cylinder wall wear will increase the ring end gap quickly, but it's not that bad really. You'll lose a couple of points/PSI in compression......maybe 3-4 PSI at the most compared to if they were right on where they should be, but it won't smoke nor use any oil.......I've done this too many times, and they work perfectly and last another 100,000 miles to boot.
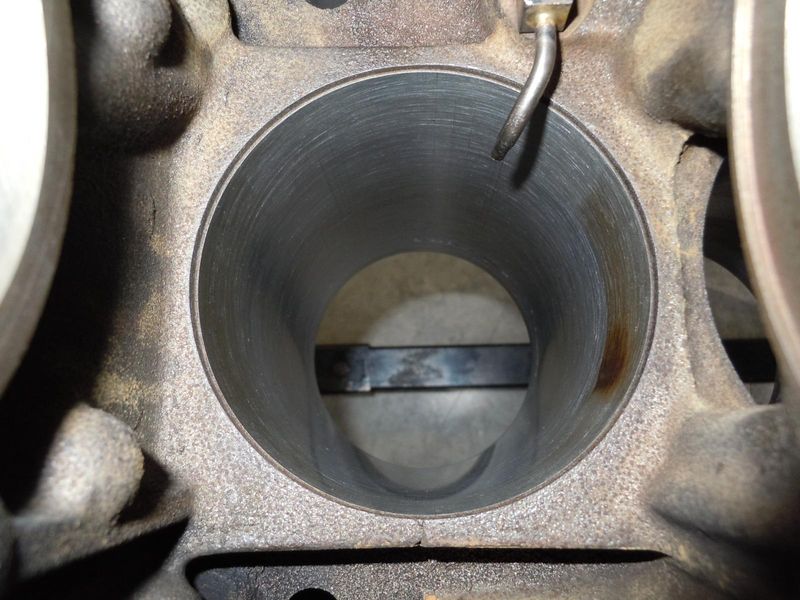
Look at the top of your cylinders, where the upper compression ring reaches the top of it's stroke, if you have a noticeable ridge there, then you will want to have it bored and buy new pistons to match. It's my experience that these Mazda blocks are damn good metal and they don't wear like some other blocks will.
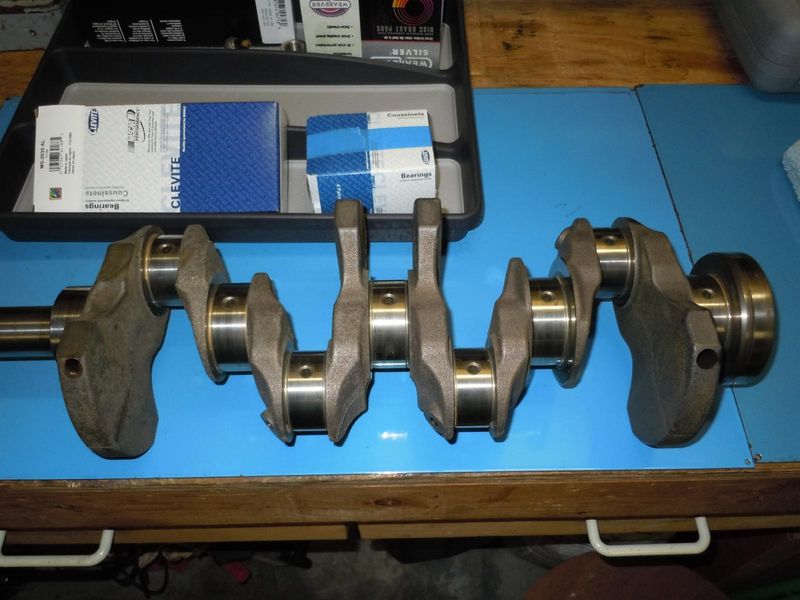
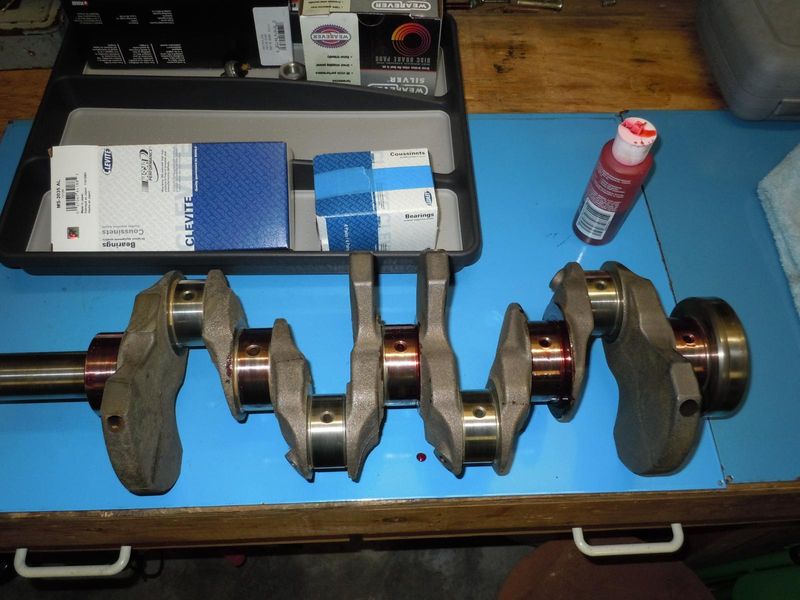
Here's a few more pics!
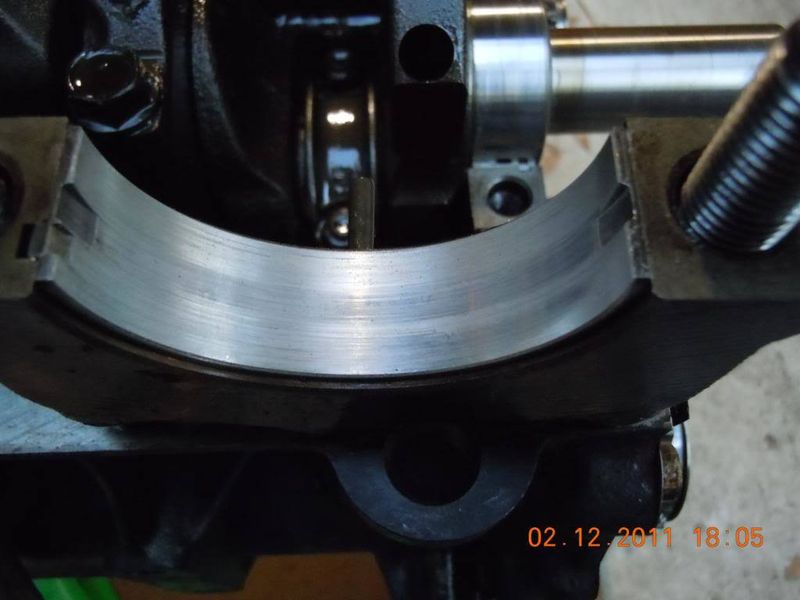
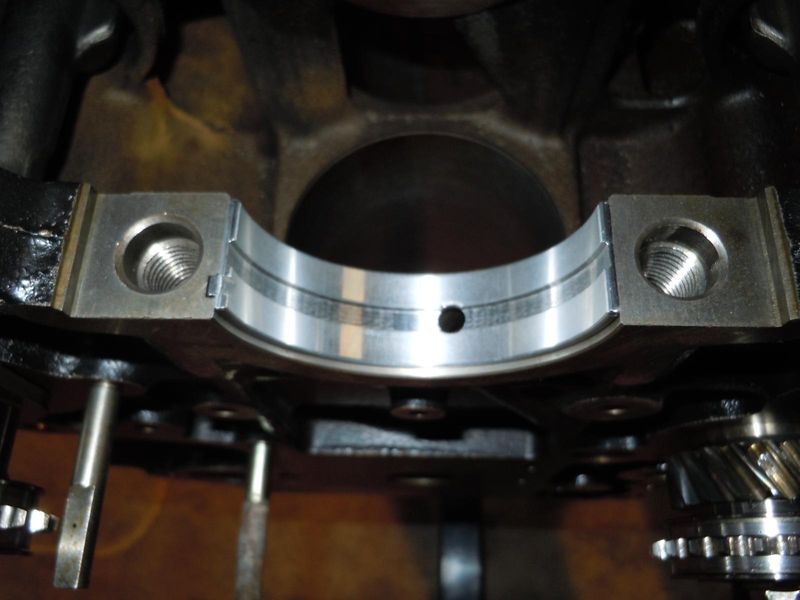
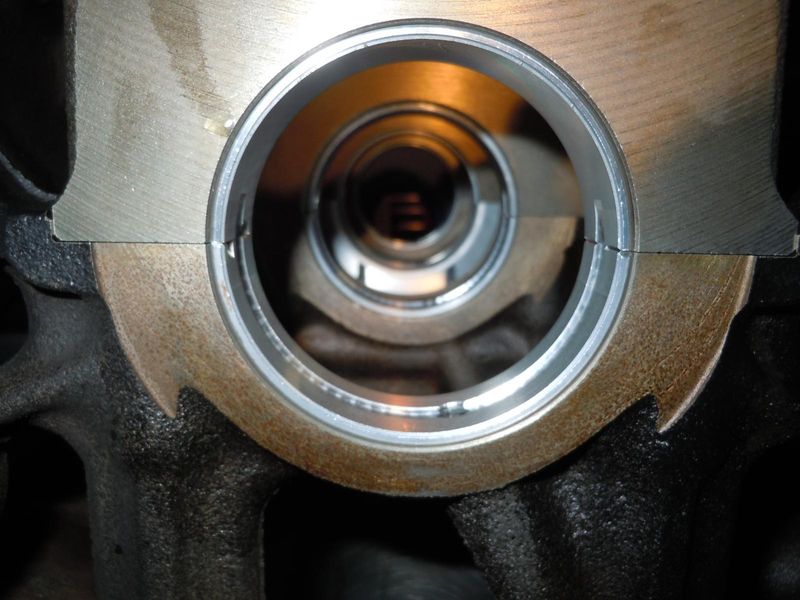
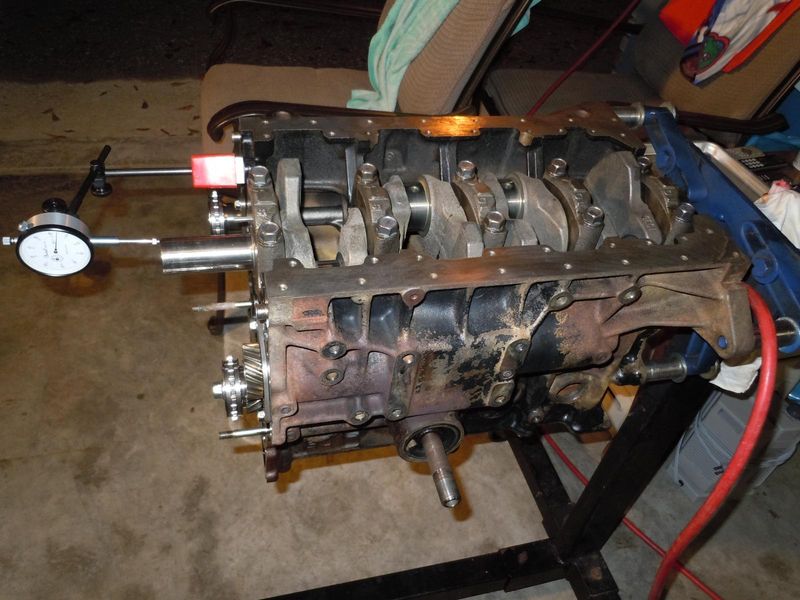
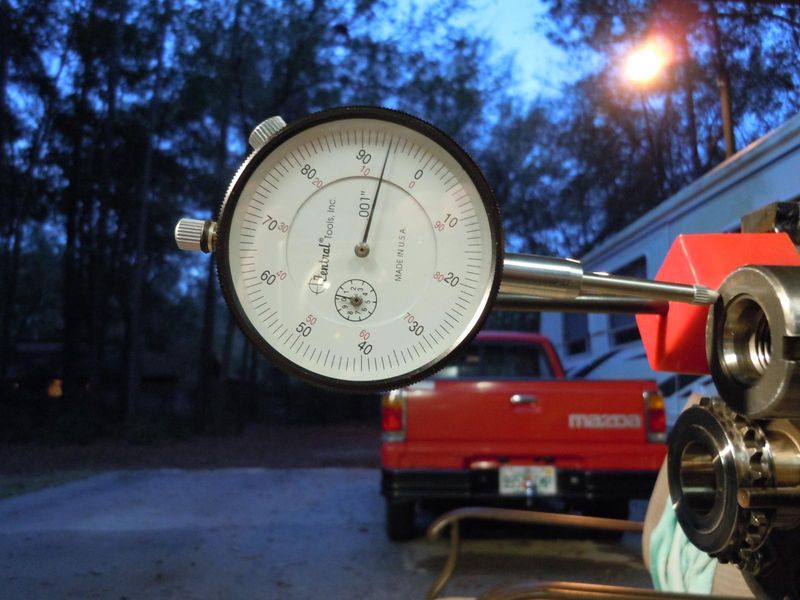
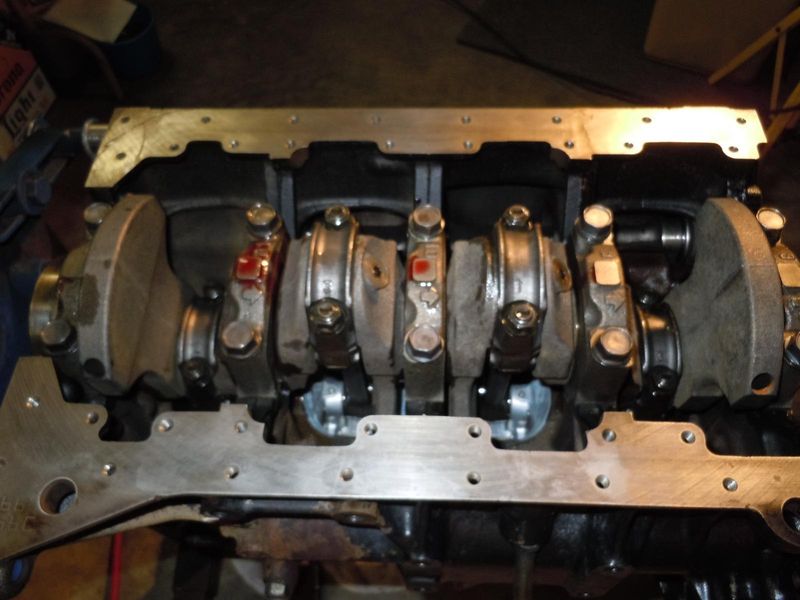
Checking the oil clearance on the mains.
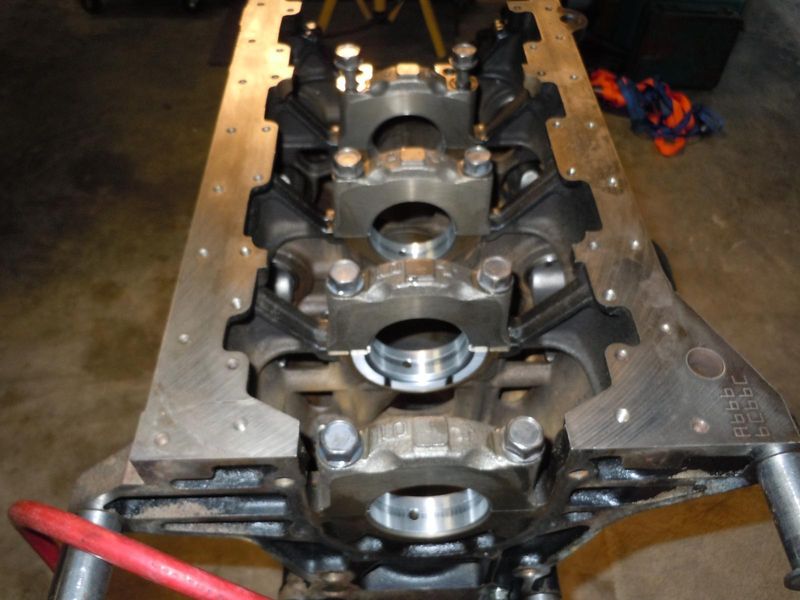
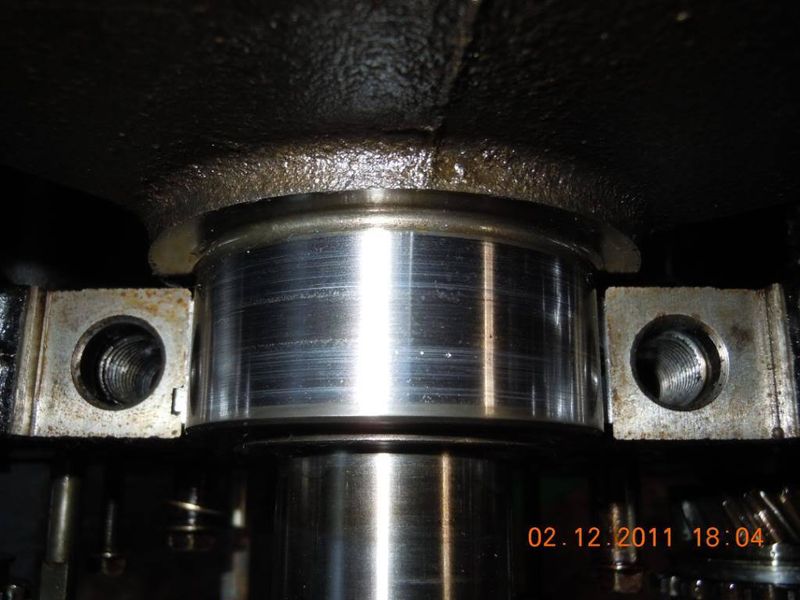
Getting ready to drop the crank in.
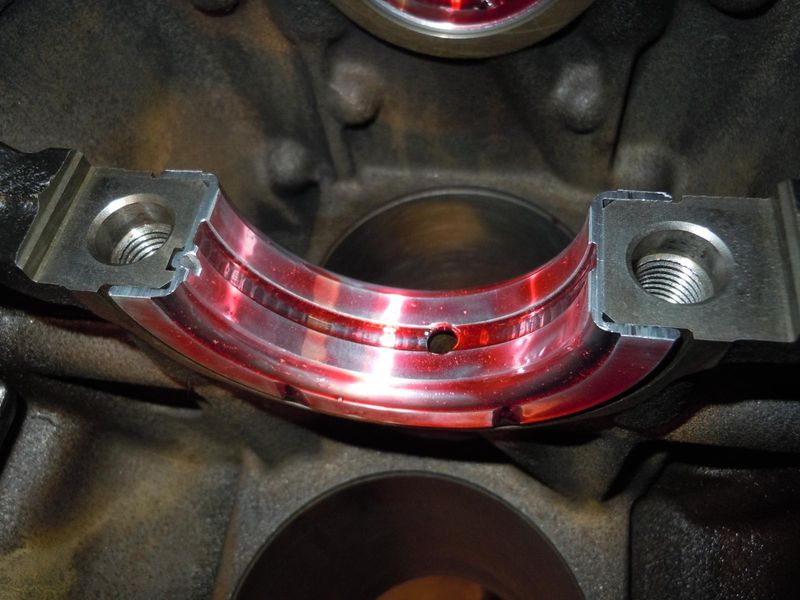
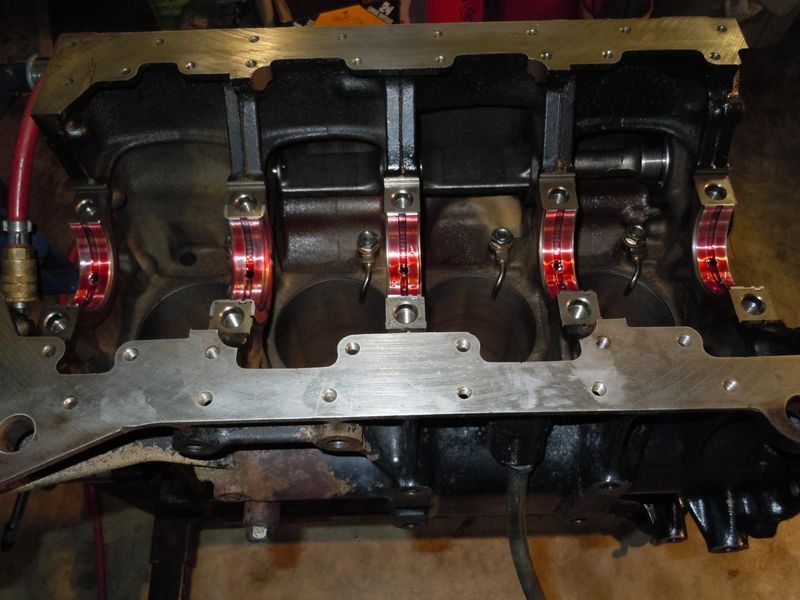
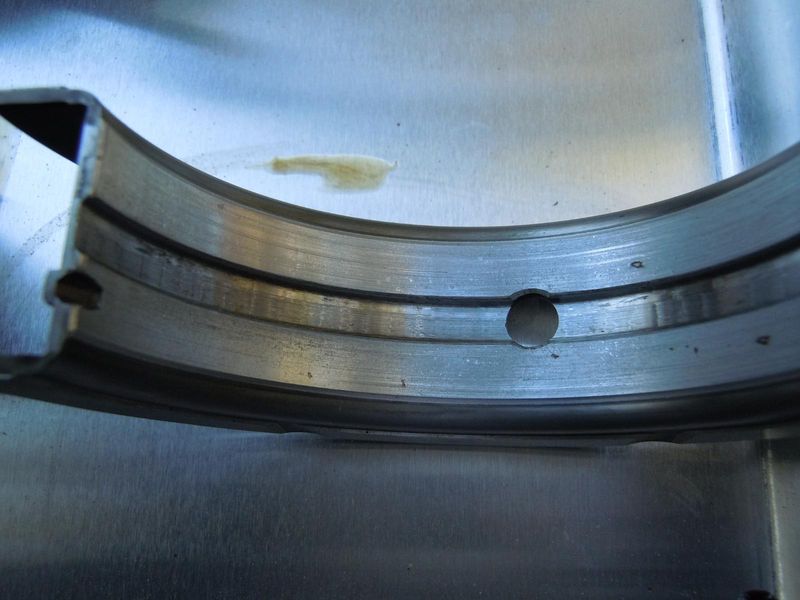
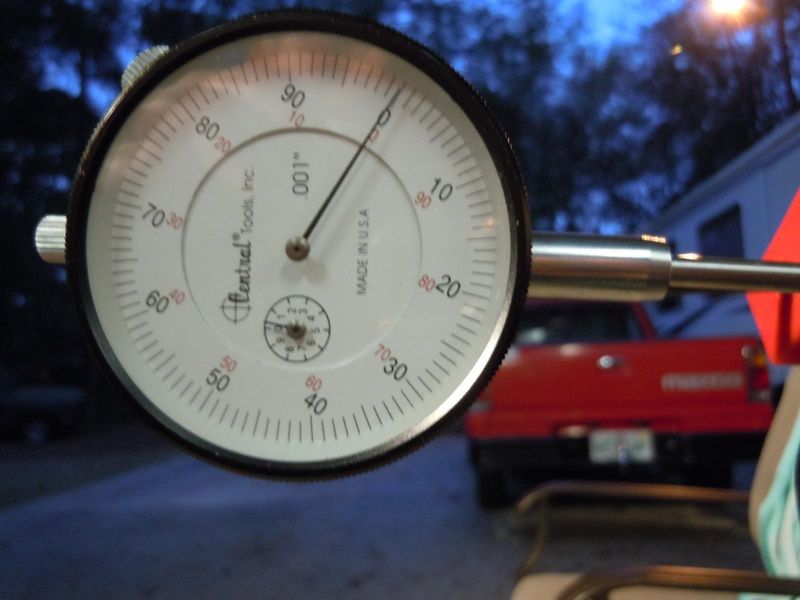
Got the mains torqued down and checking the crank end play.
It was .006" so all is good there......should be .0031" to .0071 if I remember correctly.
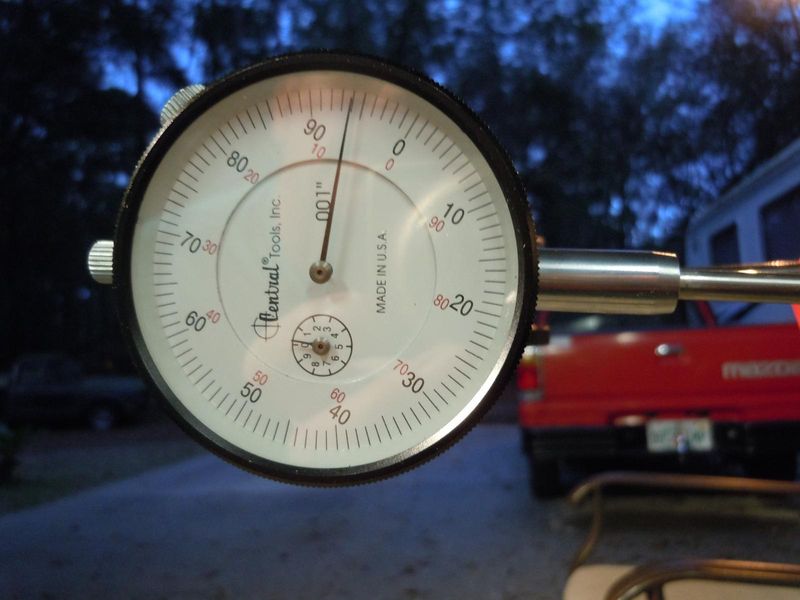
And no, it didn't go all the way around to .094"......I just set it up where it was zeroed at the forward most position and then shifted the crank to the rear most position.
MMMMMM Beer!
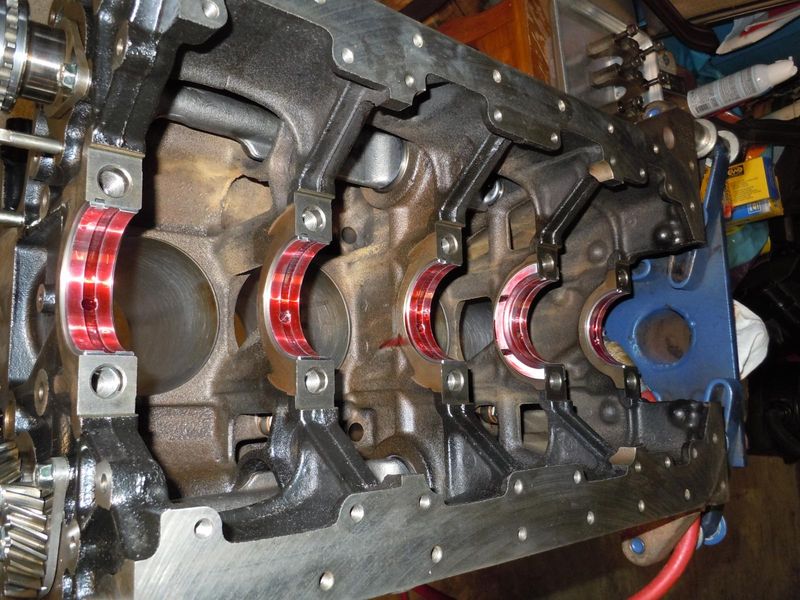
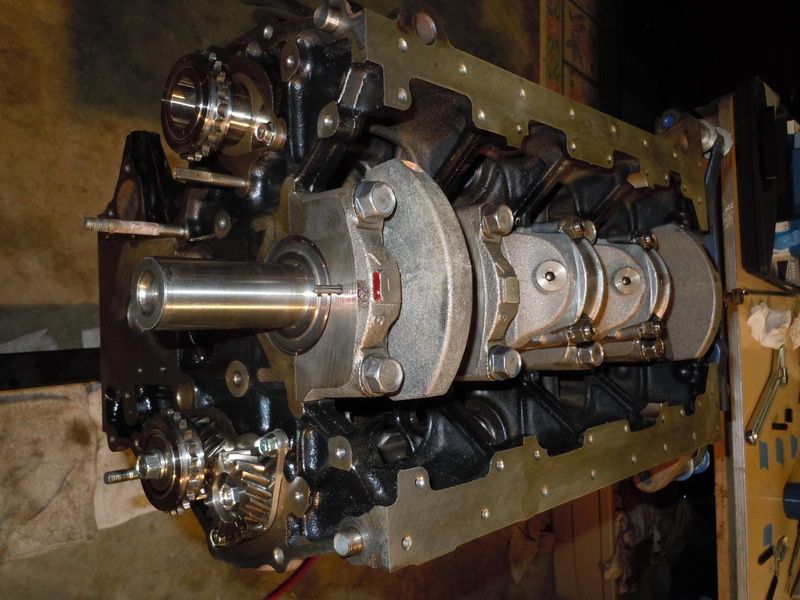
And just like that......all the pistons were in!
I was explaining to my buddy and he was helping me install the pistons and I forgot to stop and take pics! Plus we were getting hungry and trying to get it done so we could go across the street to the pub for a big ole hamburger and a couple more BEERS!

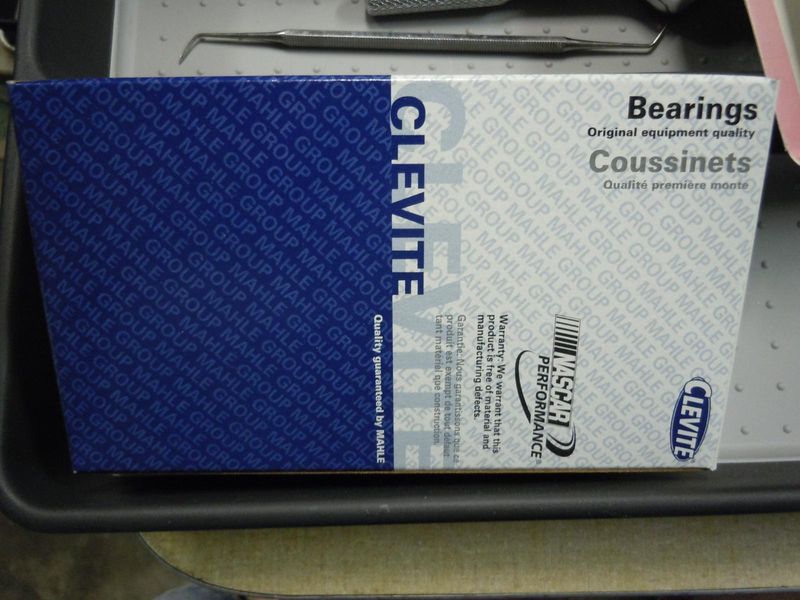
And we were using.......
Get some micrometers and measure everything to see what you've got, and go from there......this one is not bad at all....I'll post all the clearances on it as I have it all recorded in a notebook as I'm putting it together.
The biggest wear area is the ring end gaps......when you use the new rings in the worn bores, just the slightest amount of cylinder wall wear will increase the ring end gap quickly, but it's not that bad really. You'll lose a couple of points/PSI in compression......maybe 3-4 PSI at the most compared to if they were right on where they should be, but it won't smoke nor use any oil.......I've done this too many times, and they work perfectly and last another 100,000 miles to boot.
Look at the top of your cylinders, where the upper compression ring reaches the top of it's stroke, if you have a noticeable ridge there, then you will want to have it bored and buy new pistons to match. It's my experience that these Mazda blocks are damn good metal and they don't wear like some other blocks will.
Here's a few more pics!
Checking the oil clearance on the mains.
Getting ready to drop the crank in.
Got the mains torqued down and checking the crank end play.
It was .006" so all is good there......should be .0031" to .0071 if I remember correctly.
And no, it didn't go all the way around to .094"......I just set it up where it was zeroed at the forward most position and then shifted the crank to the rear most position.
MMMMMM Beer!
And just like that......all the pistons were in!
I was explaining to my buddy and he was helping me install the pistons and I forgot to stop and take pics! Plus we were getting hungry and trying to get it done so we could go across the street to the pub for a big ole hamburger and a couple more BEERS!
And we were using.......
C
cab+rider
+1y
Hey Axel since Cusser is next can I be after him. Nice photos must be the blue Formica bench top
That is real friendship there!!
That is real friendship there!!
axel breaker earl
+1y
LOL, yep! Get in line Cab+Rider!
Those blue panels on the workbench are porcelain coated steel panels from an older pay telephone booth I think. I've had them for years and I keep them laying on the workbench since they are real easy to keep perfectly clean.......they work great for prepping the crankshaft to drop in!
