Street Source is shutting down April 30th, 2026. Read the announcement
S
WELDING TECHNIQUES
9
92yota
+1y
for anyone else that is learning to weld, i thought it would be a good idea for those experienced welders to post advice or pics of their welds or techniques.
how do you get the stack of dimes effect?
what kind of motion do you make when laying a bead?
when do you push or pull the weld?
what settings need to be changed to do certain types of welds like overhead, vertical, etc?
how fast do you move the gun and when you should change speeds?
what are some good tips and tricks to know?
also, feel free to add to these questions if anyone wants to know something else. I hope this will be informative, and possibly sticky'd so people can keep adding to it.

onehot69stepside
+1y
this would be a good sticky if someone adds to it.

one_low_sixty8
+1y
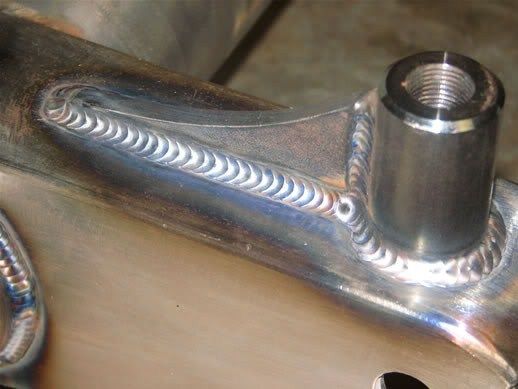
they key to a bitchin weld is consistency consistency consistency. the more consistent you are, the better your 'dimes' will look. things from holding the trigger the exact amount of time each weld, to moving at a constant speed, it all comes into play. change one thing, and it will come out looking different. i TIG weld most of my stuff, just because of the overall appearance of it when its done.
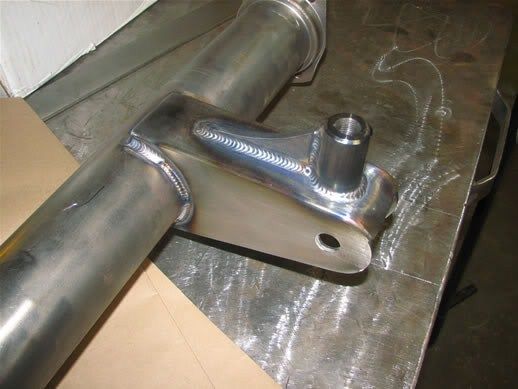
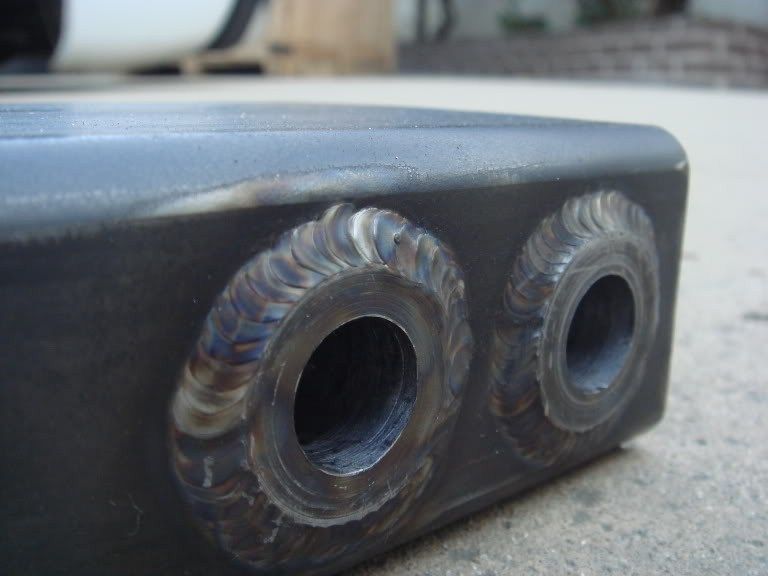
heres my axle for my 68 c10. triangulated 4 bar, with link mounted bags. the pics are of the lower parallel links, with a bung tapped for a 5/8" bolt for my lower shock mount. note the welds...
heres my axle for my 68 c10. triangulated 4 bar, with link mounted bags. the pics are of the lower parallel links, with a bung tapped for a 5/8" bolt for my lower shock mount. note the welds...
9
92yota
+1y
Edited: 11/27/2007 10:53:14 PM by 92yota
WOW...that looks awesome. do you move at one constant speed, or move the weld then pause then move then pause, etc? do you move the gun in "c" shapes or circles or what? because my welds are consistent and penetrate well, but they look like one solid bead and not stacked beads like yours above. i know a MIG weld won't look as clean as that, but still.
WOW...that looks awesome. do you move at one constant speed, or move the weld then pause then move then pause, etc? do you move the gun in "c" shapes or circles or what? because my welds are consistent and penetrate well, but they look like one solid bead and not stacked beads like yours above. i know a MIG weld won't look as clean as that, but still.
one_low_sixty8
+1y
i just a whole thing typed up, clicked post, and its nowhere to be found... hold on, ill retype.
thanks for the 'wow'
thanks for the 'wow'
one_low_sixty8
+1y
speed... i get my puddle going, then once its the right size, i add my rod, and then 'hop' to where the next puddle is going to be. this 'hop' is important because it needs to be the same distance each time or the weld wont look consistent. as far as the topics you mentioned earlier, theres no set answer as far as how to lay down a perfect bead. everything is taken into consideration, metal thickness, metal temperature, fill rod size, amperage, etc. the 'stack of dimes' is from consistency. adding the same amount of fill rod each time, moving the same speed, staying in one spot for the exact amount of time over and over. heres some more pics
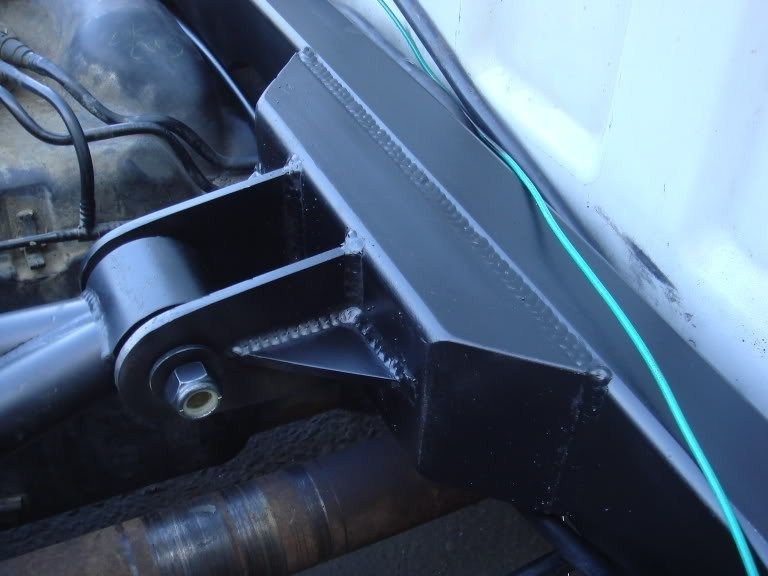
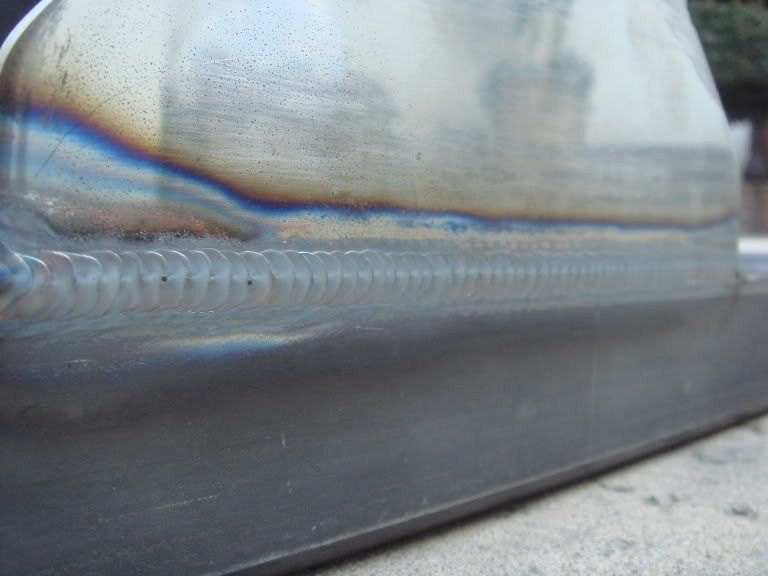
heres a crossmember, MIG welded.
same crossmember, before paint, a little closer
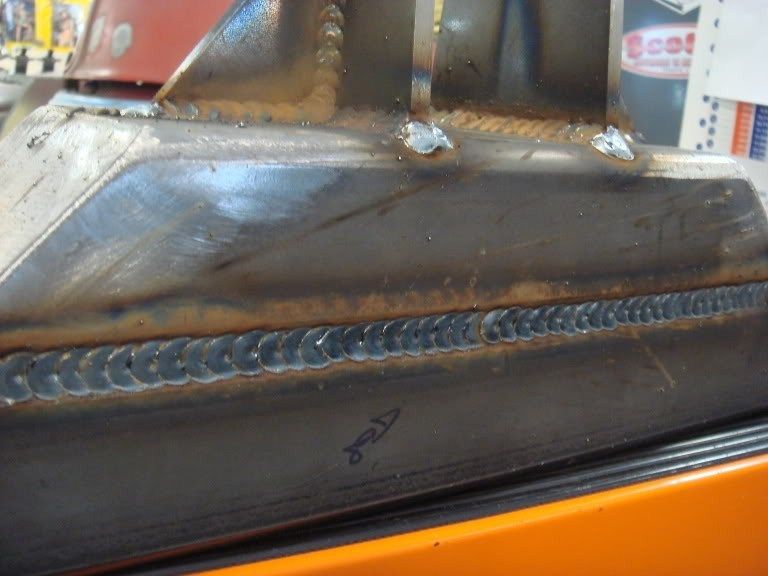
here, the round stock (1 1/8" diameter) was protruding 1/8" out of the 2x4. not much to weld to. used .045 tig rod and tried not to melt away the corner of the round stock
here, kinda wavy because of all the fill rod added due to welding on the round corner of the 2x4.
heres a crossmember, MIG welded.
same crossmember, before paint, a little closer
here, the round stock (1 1/8" diameter) was protruding 1/8" out of the 2x4. not much to weld to. used .045 tig rod and tried not to melt away the corner of the round stock
here, kinda wavy because of all the fill rod added due to welding on the round corner of the 2x4.

junior
+1y
thats some nice ass welds...Ive seen guys that have been welding for yrs that cant throw a bead down like dat

Low_SST
+1y
If I am trying to get the stacked dimes look I usually hold the gun between 30-60* and basically draw the letter e over and over like this
e
e
e
e
e
I always sweep my puddle from the heavier gauge steel to the thinner stuff. I also make sure my metal is chamfered as well as my speed set accordingly for the heat range and material.
Those are pretty much my tips.
e
e
e
e
e
I always sweep my puddle from the heavier gauge steel to the thinner stuff. I also make sure my metal is chamfered as well as my speed set accordingly for the heat range and material.
Those are pretty much my tips.
Low_SST
+1y
My other tip is try to avoid welding out of position when possible. If you can move the part into more of a natural position it will be easier to make a consistent weld.

TwistedMinis
+1y
If you are making a "cosmetic" weld, and you want it to look like a TIG weld, you can do what is called stitching. Which is basically a tack tack tack method. If I am doing this, I turn the heat up more, make a circle, stop, then make another circle. It turns out like the MIG welds posted above. I only really use this on something that isn't going to see a lot of load. And I generally stay away from this on framework as much as I can. Its mostly sheetmetal, floors and stuff I do this with.
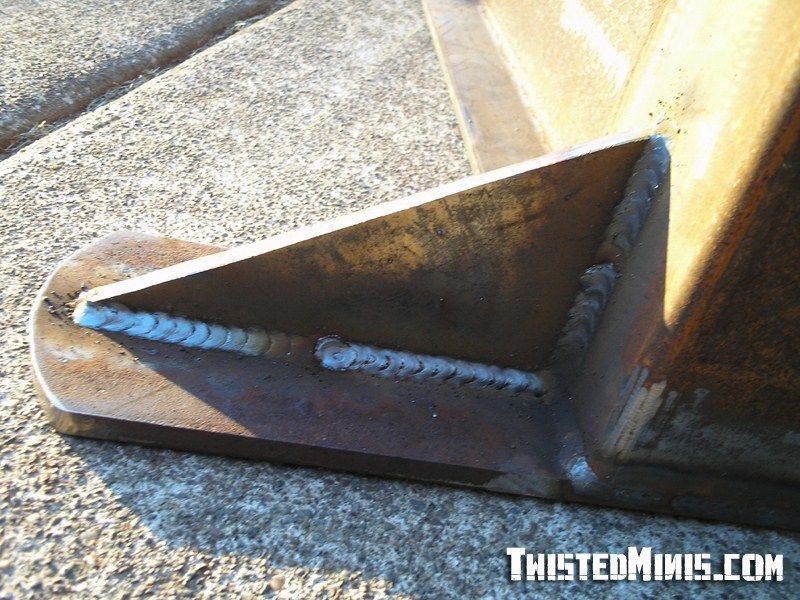
Recently I played with the effects of different techniques on one piece. Look at this picture.The vertical weld is the traditional C pattern. Although vertical, it looks more like a lower case "n".
The next weld, going from the vert weld to the center of the gusset is the circle pattern. I was moving to the left, and rotating the tip counter clockwise.
The last weld that extends to the end of the gusset, is also the circle pattern. However, I was rotation the tip clockwise, while moving to the left. This is my favorite pattern. With a little practice you can simulate dime like beads. The general rule of thumb for this, is when moving to the left, clockwise rotation. When moving to the right, counterclockwise rotation. Making circles, and overlapping them generally looks something like an "e" like stated above.
Related Discussions in Mini Truckin General
Thread
Posts
Last Post