Street Source is shutting down April 30th, 2026. Read the announcement
Windshield replacement proceedure.
Last Updated: Feb 24, 2015
Windshield replacement proceedure.
Tech how to . . . what I did . . . and maybe what not to do.
'86-'93 B-series trucks all use the same-shaped windscreen. Some of them are tinted, and some of them are clear. Because the glass is very thin, age of these vehicles, or other factors, it is likely you will need to replace one at some point. A cracked windshield is an open invitation for police to pull you over for a roadside chat and invite you to Court. Consider yourself warned.
A little history might help. In my case, since 1991, when I acquired the MF "Millenium Falcon" (what were you thinking "MF" means, you naughty person you), I have had to replace the glass three times. The first glass was tinted, and was already cracked when I got the truck due to a previous owner collision with a fixed object.
Because I didn't know what proceedure was (materials and time) it was easier the first two times to let others handle this chore. But with the advances in technology, knowledge, and the advent of self-pull yards, the materials and costs have become pretty reasonable. This latest windshield was a tinted unit, which cost about $32.00, with the tax. So I figured that if I broke it this time around, I'm really not into it too deeply, other than my time.
More history. The first screen was used, clear, $75.00, pitted from what looked like sandstorm damage, but was cheaper than the surrounding yards which were charging $125-150 because they could. It cost an additional $75.00 to install. This was before the pullaparts existed in the Atlanta area. And due to the scarcity of the trucks in the yards with good glass, I figured letting someone else pull two, and install one, with the materials, was a fairly good value for the money. I wasn't so impressed when the windshield spontaneously cracked about a month later, maybe from road flex. No warrantees where glass is involved.
Two years or so later, I try this adventure again, this time with a new installer. Again the glass is a non-tinted unit, with an installation charge this time of $60.00. I think this time the glass lasts about two weeks before some looney tune moon rock moon walks and bounces up off the road and whams the glass between the cowl and the wipers. That resulted in a crack that travelled down, then started to creep up, until I used a spring punch to poink the glass at the existing crack end. That made the crack travel in a new direction, parallel to the wipers, insread of straight up. So that glass stayed in the truck until last week. I found a suitable donor.
After seeing how others have removed widshields, the tools they used and etc., I had bought a urethane cutter at Harbor Freight Tools. Maybe $8.00, with a handle for the blade, a pulling handle attached with a cable, and a right-angle carbide blade.
Looks wicked . . . the thing is about useless other than for poking a hole between the glass and the frame through the urethane. It is a draw knife, and maybe it works, but it wasn't working well enough for me. So I poked a hole through the urethane after popping the windshield trim. A lot of trim clips can be saved if you start in the middle of the top molding and work towards the edges. A putty knife is thin enough and wide enough to spread pressure evenly at the frame stud.
The trim is held on with plastic clips that clamp on the sides in four places and on the top in six. The bottom unit is screwed in place and the screws are inaccessible until you remove the cowl. To do that you must pull the wipers.
The wipers are held with a 12mm nut that pressures them against a tapered, serrated mount. The nuts are hidden under plastic flip ups which flip up / pivot and then can be removed and set aside. The wiper itself, once the nut is loosened slightly, then needs to be pivoted up to remove side loading from the spring pressure, and then tapped a little to break it loose from the mount. Once that is done, the hood is opened and propped.
The cowl has a rubber strip the has plastic anchor screws and push pins. Sliding a screwdriver under the metal of the cowl at the pushpins allows them to exit, but the screws go into spread type anchors so they must be gently unscrewed far enough to release pressure from the anchor. That allows the strip to be removed and set aside, and then the cowl lifts at the front, pulls forward far enough to release the back at the windshield, then lifted up at the rear and pulled away from the hood.
A phillips #2 or 3 removes the screws along the base of the winshield surround.
Before you close the hood, use a wire cutter and cut the hood release cable at the release. You are going to need a cable to cut the urethane if the knife you have works about as poorly as mine did. Once the cable is cut, go around to the driver's side and pull the hood release handle to extract the cable. Or bring old guitar strings / piano wire with you to the yard if you are squeamish about cracking eggs to make omelets. If you feel that cutting a hood release cable on a perfectly good junk B truck is sacrilege, maybe a junk vehicle next to the donor truck will serve your nefarious ends.
Sawing the urethane is work. It's a lot easier if you have help. I didn't, and it takes a lot of time and patience, because the last thing you want is to have to start the process all over again due to cracking the glass during removal.
Localized heat will crack the glass. The cable will get hot from the friction. Cool it with the handy dandy windshield solvent in the resevoir.
The wrong direction of pull will put the wrong pressure on the glass. Think about that when you get to corners . . . there are FOUR of them.
The side pillar covers get in the way and you might saw into them which will slow you down a lot if you don't have help paying attention to those sort of details. It didn't occur to me to pop them loose prior to sawing away.
If you are in a yard pulling your own windshild, the hood cable handle provides something to hold onto at the one end. I used a removed wiper arm to run the other end of the cable into to secure it so I had a longer reaching pull handle while I was sawing the longer horizontal parts of the glass. Help would have been really helpful here.
Once you have safely removed the glass . . . it weighs about 60 pounds by the way . . . it is kind of hard to lift away from the truck . . . no surprises here . . . you get it to where it is to be prepared . . . and carefully remove all previous bonding agents.
Getting my cracked windshield out was a lot easier. It is already damaged, so pent up rage was channelled into removal glee. Remember what I said earlier about heat will crack the glass? Propane heat is a good thing where old two-layer safety glass is involved. That and plastic safety glasses and gloves to protect hands and eyes. The heat cracks the windshield glass where applied, and loosens the bonding glue. A prybar levers out the soon to be forgotten history . . . and this is where I discover lack of previous prep work resulted in non-bonding areas from the LAST installation . . . now I know why I had WATER coming into the cab . . .
Now, what to use to install the new (used) TINTED (HoRaY!) with the extra added anti-glare reflective band that someone paid extra for, prior to junking the truck DOUBLE HOO_RAY glass?
I ask around. I search THIS forum. Really, a dearth of information. Maybe that is part of the reason for THIS information being provided.
What to use . . . choices . . . 3M makes a roll of butyl caulk that would probably work . . . in 15 foot pliable choices of 1/4". 5/16", 3/8" . . . or tubes of "windo-weld" which has a working time of 15 mimutes . . . which is not a realistic amount of time for me, an installation virgin / newbieite . . . if I go either of those routes, auto parts store get about $15.00 for the box of caulk and / or $18.00 - $22.00 for the uber goober glue.
It occurs to me to ask people who do this kind of work exclusively and professionally. The worst that can happen is someone tells me to get lost. That doesn't happen. God gives me favor, and the guy I end up talking to at a shop is patient and free with information. This particular shop has been doing this kind of work for 42 years, so I guess the information has reliability. Oh ye of little faith . . .
I admit my lack of expertise, and explain the problem. From the descriptions I provide, I am told that the sealant is probably urethane, rather than butyl (rope caulk), and that there are differences in the urethane. As far as the surface preparation, he tells me that denatured alcohol is what is used to allow the sealant to adhere . . . and that without proper surface preparation, the sealant will not bond to metal or glass properly . . so that is a big piece of education. It also explains why I had water leaks.
Additionally, he lets me in on another trade secret . . . there are two urethanes that this particular company will use. One sets up in 15 minutes, and the other sets up in 6 hours . . . one is used where a vehicle is needed the same day . . . like at a dealership . . . or at a mobile location . . . and the other . . . like MINE . . .where the vehicle does not have to be operated immediately. And that material also costs less . . . much less . . . $10.00 a tube. . . do you see where this is going . . . with my lack of expertise?
I buy TWO tubes of the turtle set super uber goober glue, manufactured by AMERICAN industry at the DOW plant in Midland, Michigan. If you hold your right hand and look at the palm, near the center would be Midland. The part number is "U-428 PLUS".
I end up at Home Depot buying a quart of denatured alcohol, since I am smart enough to follow directions of experts and not second guess them . . . because in this case . . . I want to maximize the possibility of minimizing doitoveritis due to failure to follow instructions. I know no-one other than me in this forum has ever experienced this phenomenon.
If you want to experience the success of experts, you do what they suggest. It is a simple process, really . . . faith . . . followed by works . . . with signs and wonders following.
. . .
After geting home with the newly acquired treasure, I get to work, finishing up the mundane and somewhat tedious frame cleanout and kind of aggravating stud straightening where previous installations and removals have bent them.
I also glue the loose mounting blocks back into the lower surround. Those little rubber blocks are crucial to correct window placement.
At 3:00 a neighbor arrives for the express purpose of helping place the windshield into position. There is no way I will ever suggest installing a windshield solo. You need someone there to admire the work and take credit for the successful installation.
Just before installing the glass, the surround was wiped once more with the alcohol and allowed to dry, as was the window where it will contact the sealant.
The sealant, which has been sitting in a pot of hot water to soften it, is used with a caulk gun and a bead of 3/8" is run around the window frame on the truck.
The window is walked up over the closed hood and crept around the antenna (!) and settled against the frame.
The window is slid up a little and the lower support (with the blocks) is attached with the screws.
The windshield is then slid back down to make aupported contact with the blocks.
Verify side to side centering. Press down gently on glass to level seams, then run a finger or popsicle stick around edge of glass to remove excess sealant.
Thank neighbor profusely for taking time to help you as a volunteer.
Talk about how great it was to get it installed just before it started raining. (This may not apply to you.)
Leave everything alone so urethane will cure properly.
Take pictures to post so others can see what goes into MF maintenance and repair.
If you have a problem with this write up, take it up with Chewbacca.
Credits
Created By: mazdatweaker
Related Articles

Sanden 708 on-truck AC clutch or clutch bearing replacement
My 1988 B2200 developed a bad AC clutch bearing. A shop would typically just replace the entire com...
Easy Peasy Lemon Squeezy Distributor Replacement NO TIMING N
Alright Gentlemen, Here's how to replace *MOST* of your distributor, I did this with my truck toda...
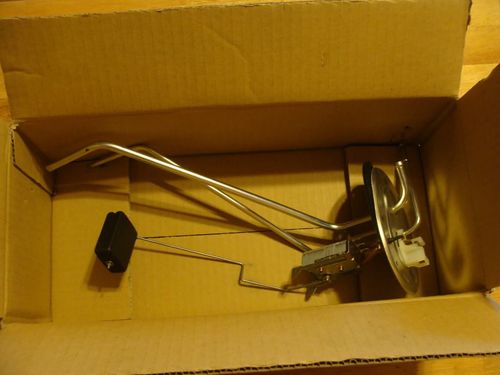
B2200 fuel sender replacement
OK, this is my fuel sender replacement thread. I cleaned/bent mine a few years to restore its operat...
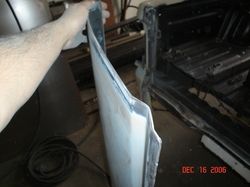
tailgate skin/roll pan and quarter panel replacement
Hi everyone, this is my write up on molding my tailgate/rollpan to the bed and replacing the passeng...