Street Source is shutting down April 30th, 2026. Read the announcement
How To: Mazda Front Bag Setup
Last Updated: Feb 24, 2015
Okay, so the site has had a good amount of people joining that are new to the scene as well as 'bagging a Mazda. There has also been a good amount of requests for a How To: Bag a Mazda, because of this I am doing the following Tech Write-Up.
**I am not responsible for any actions following this Tech, this is just a Write-Up that I have put together for your viewing pleasure. There are many ways this could be done, but this is how I see it!
Name: DevB22 (Devon)
Location: Pacific Northwest
Year: '89 B2200 Standard Cab
HOW TO: MAZDA FRONT BAG SETUP
Since most of you are going to be using stock Upper/Lower Control Arms, this Tech will be based of that principal.
Obviously we will start by taking off the wheels and putting the front of the truck on jack stands. How high you might ask, as high as you can SAFELY get it.
You will then need to unbolt the shock, and proceed to cut out every bump stop. This would also be a good time to remove the torsion bar setup and sway bar, just unbolt them and remove. Then unbolt the whole caliper/rotor assembly and rotate it out of the way, but DO NOT keep tension on the rubber brake line.
Now you will want to remove the Upper Arm, there are two bolts on the back side. Set it to the side for later use, now that we have everything out of the way we can begin cutting!
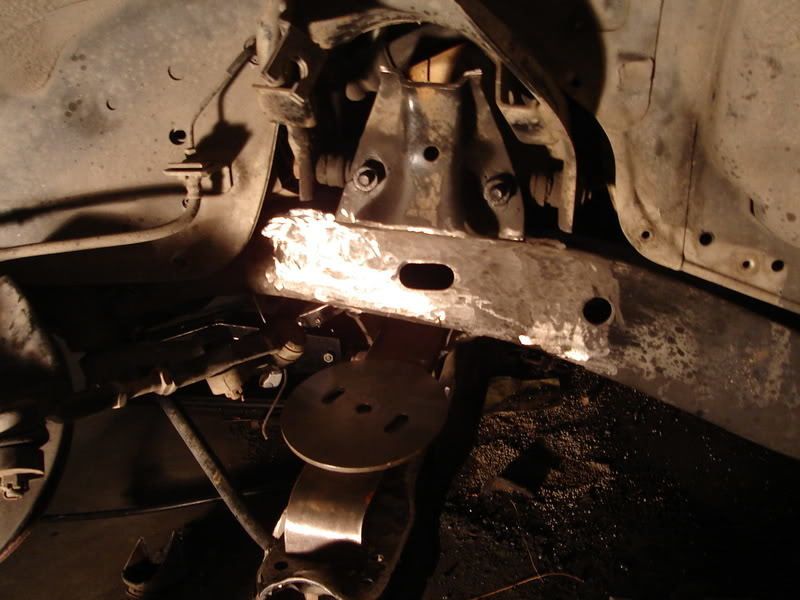
You will have something that looks like this:
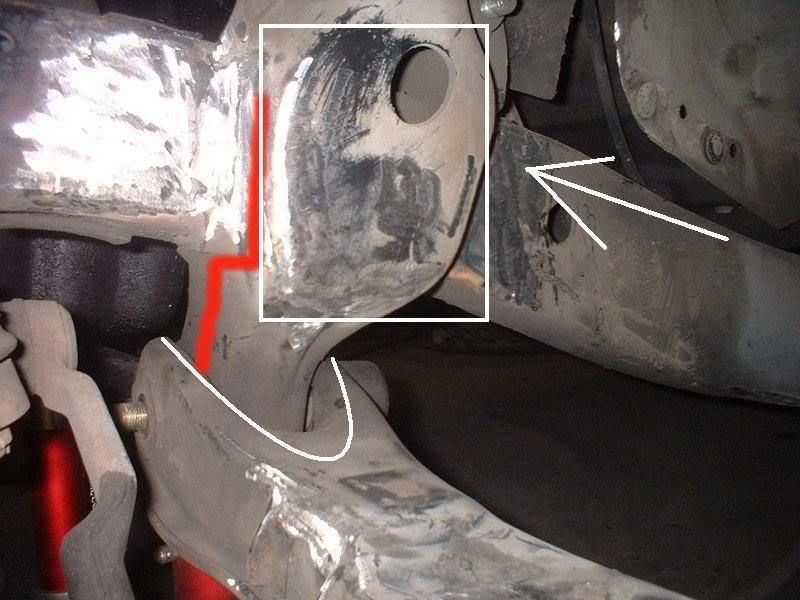
Now, referring to the above picture. Everything within the white square will need to be cut out flush with the frame. DO NOT cut into the frame, just flush/parallel. You will want to plate it back up for strength. The white cut-out on the Lower Arm will need to be cut out, so it does not hit the frame during travel.
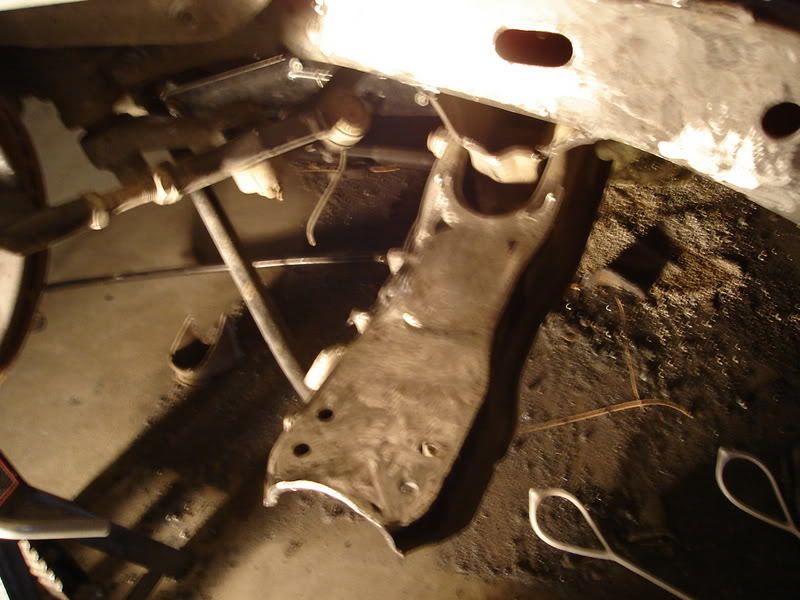
After you cut that out it should resemble something close to this:
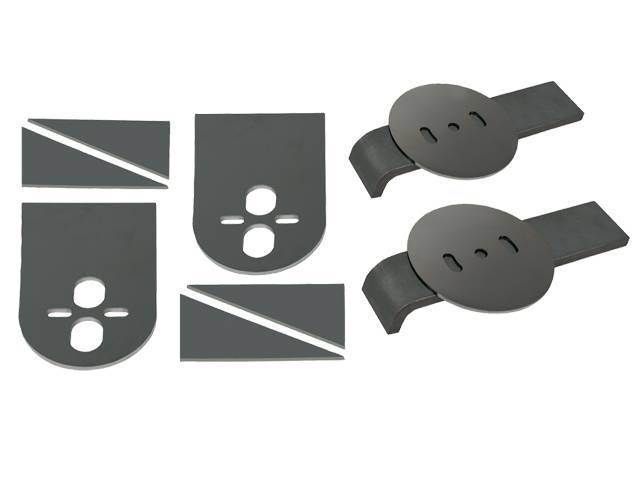
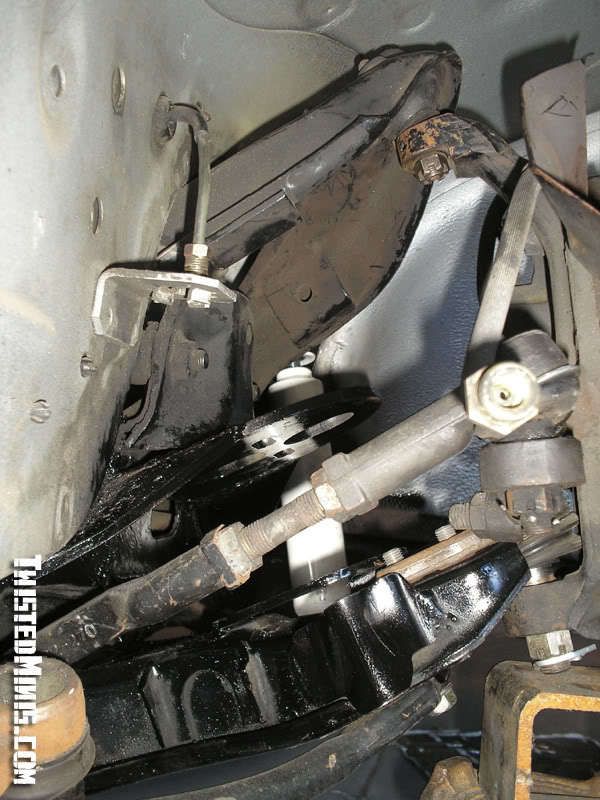
Now we are ready to place the bag bracket. We are using a Front Torsion Bag Bracket Kit. They look something like this:
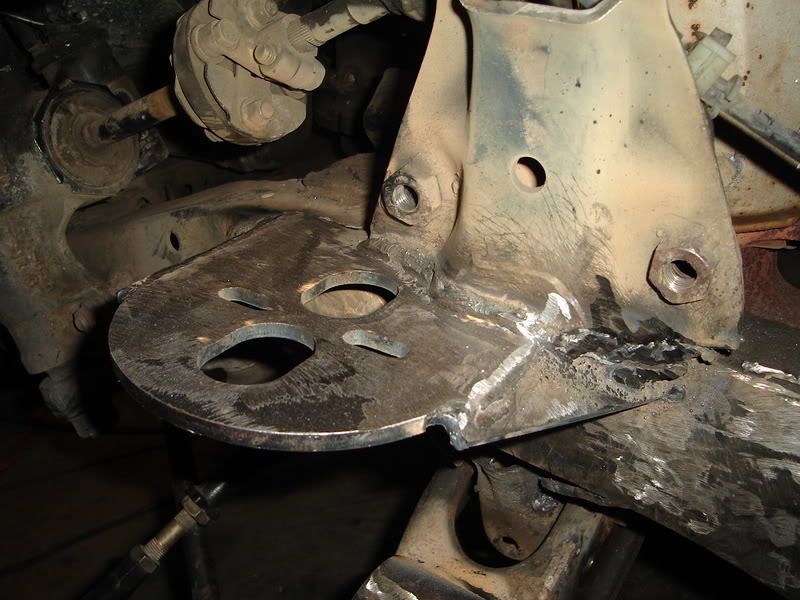
You will use the upper bag mount with the two gussets provided for this next step.You want to get you bracket as high as you can with the frame, and also level. You also want to make it so the bag is as close to the frame as possible without rubbing. There isn't much detail to go into here as so many ppl will do it a different way. The end result should look something like this:

The bottom bracket is just the same. There are so many ways to do this, it all depends on the builder. You can use the flat stap with a curve at the end and the round plate similiar to this:
OR you can just use the bottom plate which would look similar to this:
However you do it, make sure that you mock up the bag with it so that it does not rub on either the upper/lower brackets.
Now is also a crucial time to decide if you are going to run Flipped Ball Joints or not. Reason being that you will have to make some modifications to the Lower Arm.
[url=:1kponrk7]How-To Flip Ball Joints
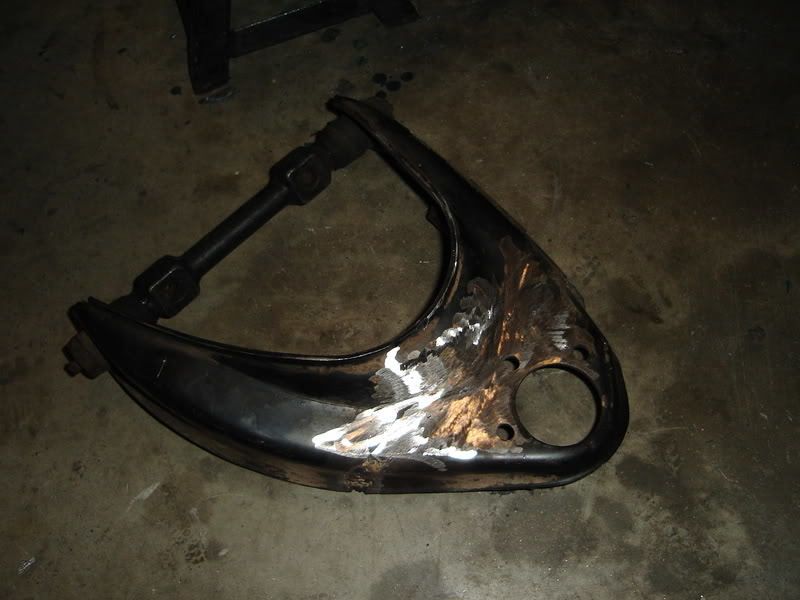
There is also another modification that you can do to the Upper Arm that will allow you to get a little more travel and stop the balljoints from binding up.
Take your Upper Arm and cut it as follows:

Make sure you leave at least 1/4" uncut on the bottom...
Put it back on the truck, and let your truck down slowly. This will bend the Upper Arm, and when the truck is all the way down put a couple tack welds on the cut to hold the bend. Take your arm back off and weld it back up solid.
Here is a semi-finished product:
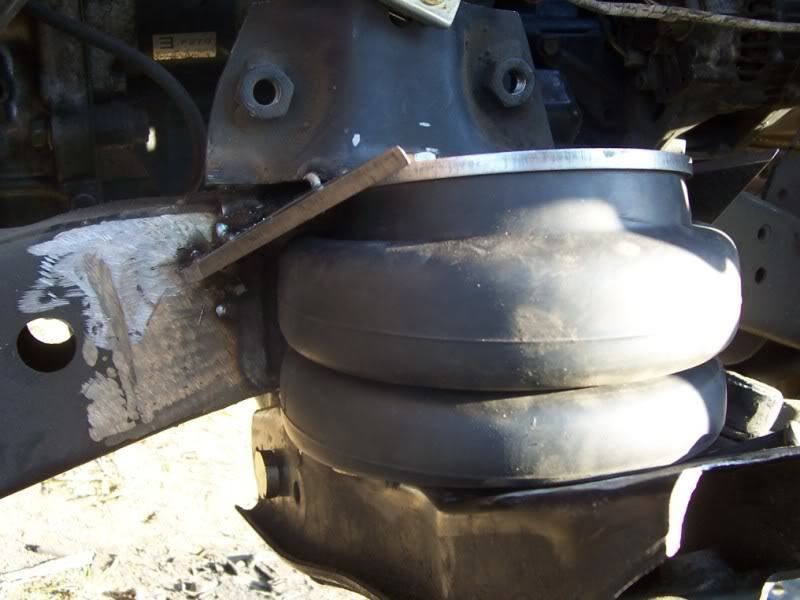
So now you are ready to put the bag in and finish her up. You will want to run the bag through its cycles and make sure that it does not rub on the frame or the brackets.
Here is a picture that resembles what you don't want:
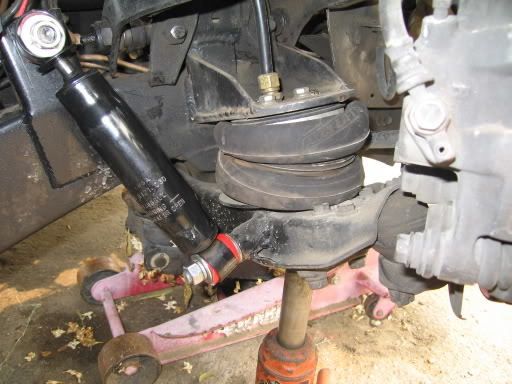
This is similar to what you would want your bag to look like, in this picture it shows that the bag is straight, folding on itself and not to the side.
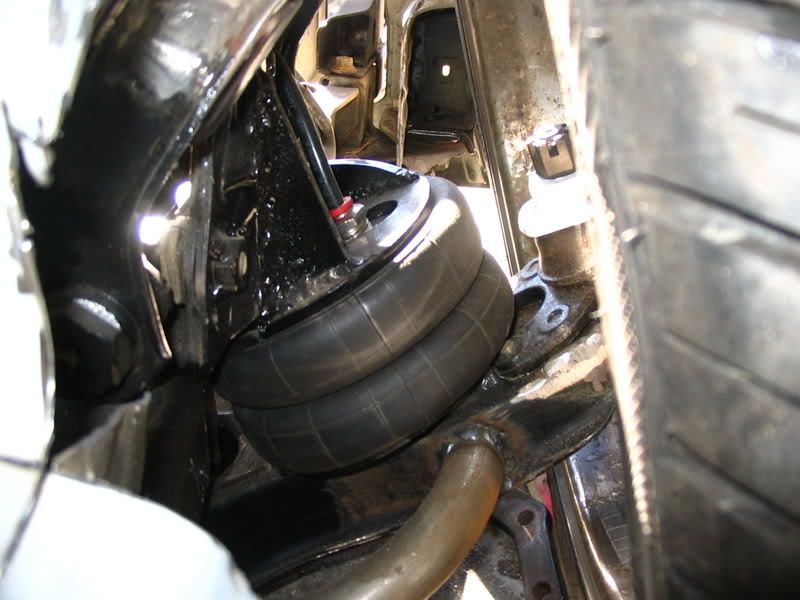
Also you will want to watch out for your Air Line clearance during the range of travel. I have found that running a straight swivel fitting with the airline through the Upper Arm keeps it out of harms way throughout the range of travel.
I hope that this Tech will bring some insight to those of you that need it!
Also if you see anything that I am missing please let me know so I can edit it in. Or if you think something should be touched on more, let me know and I will try and help you out!
Keep in mind that this can be accomplished in many ways, and by no means am I the master of 'bagging the front of a Mazda.
Well there you have it, a short and sweet tech on How To: Mazda Front Bag Setup
Dev
***Some of the pictures posted weren't mine, so if the owners of these pictures aren't cool with it, then let me know asap and I will get them off!
Credits
Created By: devb22
Related Articles
How to: custom shifter boot
I thought i would make a thread about the shifter boot i made but although its really easy i wanted ...

How To: Chevy 105amp 3wire Alternator Swap
A.J. "SpaceMonkee" Demiar Bay Area, California 1992 B2200 (2.2 EFI) Standard Cab As t...

How To Tighten Up Loose "Tow Mirrors"
This fix is for the members that have the "tow mirrors" or "large mirrors" on yo...

Suicide Hood Hinge How To, with complete captioned photos
Chris Frye and I decided to make a tech how to out of our hood hinge install day and we chose to ha...