Street Source is shutting down April 30th, 2026. Read the announcement
'99 Ford Ranger Build

markmnotdead
+1y
I've been building my Ranger over a year now and I thought I would start a thread to show the progress of the build. I bought the truck in June or July 2010. Since I've had the truck it's gone from stock, static drop, wrecked, rebuilt, bagged and eventually it'll be sfbd with a 5.0 motor swap. This entire truck so far has been built by me along with some help from my father and friends. All the work has been done with a 110 Lincoln welder and an angle grinder, haha. I am proud to say that this truck is 100% drive way built. Anyway this is how far I've come and I still have so much further to go.
After I put 5 inch drop on the rear.
Primed the whole truck out like a jackass and smoked the tail lights, I don't know what I was thinking at the time, I guess I thought I was cool haha.
C notched and added 4 inch blocks to the rear to give it a 9 inch drop total.
Cut my coil springs in the front to drop it about 4-5 inches. 5-9 drop total.
Roll pan installed, tail gate shaved. Rear view before I shaved my tail lights.
Tail light fillers tacked in
Decided to go ahead and shave my mirrors as well. My welding has improved since then.
Body work on the mirrors.
Finished body work on the tail lights and made cuts for my '32 Ford tear drops. Also shaved the holes on the top of the bed.
Re-primed the whole truck gray before a local show for some reason. Repainted my rims and got brand new tires. Added smaller mirrors and smoothed out my wiper cowl.
On December 3, 2010 a jeep slammed into me as I was crossing the highway on my way to work. Came out of no where. The result. By this point I extended my shifter and put a set of chopped Acura seats in the truck.
Another shot of the damage. This all happened right down the street from my house. My grandpa drug my truck off the highway and to my drive way with his suburban, haha.
The 'damage' on the jeep that hit me. I also got a ticket for failure to yield exiting a driveway. I found out later that his insurance company totaled out his jeep and he got a brand new one.. Must be nice.
Since my truck was wrecked there were only two things to really do with it: scrap it or rebuild the cab and bag it. I chose to rebuild the cab and bag it the only obvious choice really. I got to work pulling the drivers side door off and cutting out he wrecked section.
Wrecked section cut out. Oh check out those "speaker mounts" on the frame rail. Apparently the previous owner thought it'd be cool to mount some speakers under the truck. Haha.
With the truck being laid up I decided to pull the rear glass shave the rear of the cab, third break light and the upper cab 'seams' I guess you could call them.
I went to the local junkyard and got them to cut out a section of a cab for me to use. Picked up a new set of doors too. Got it all fitted and bolted in with self tapping screws so I could test fit my door and all.
Test fitted the door and it lines up perfectly with the body lines.
New cab section all welded in.
New fender and door all bolted up. Lines up awesome.
Better shot of the lines
Pulled the dash before I replaced the cab section and painted it whenever I was finished with the cab. Result.
I bought a new rim and new djm lower control arms and put those on and reassembled the front end
Finished the body work on the rear cab, third break light and cab seams. Got it all primed up and the rear glass back in and replaced the front windshield.
Frame step notched with an 8 inch notch. Cut out the spear tire thing and capped off the end of the frame. Made the tank mounts.
Welded in a bridge bar and got my upper 4 link mounts tacked in place and bolted the bars in. Eventually I welded them and I got the lower bars mounted. I moved the truck from the garage to the drive way and in that process I ended up bending the cross member the 4 link was welded too. So I cut the old one out and made a new one that clears the drive shaft too.
New 4 link cross member
Rear section with the new cross member welded in and the 4 link all bolted up.
Rear section, different angle.
The rangers don't lay true frame with the stock tranny cross member. I found out that Illusive Design does make a low profile tranny cross member that allows the rangers to lay true frame. So I ordered one and installed it.
Illusive Design cross memeber
Officially laying frame.
Fabbed up a fuel cell mount
Fuel cell mount all welded up
Before the fuel cell was bolted down
Ran some temp air lines and relocated the battery to the rear
Shot of the battery placement during the wiring process
I took the truck out a few times around the neighborhood before I was able to get a bed back on it. Here's a shot after her first run with all the air hooked up.
I had to cut the bed out to make room for the air tank, notch, and fuel cell. Pretty much the entire floor was cut out. Ignore the horrible cuts. They will be fixed one day when I sheet metal the bed. They were done with a sawzall and an angle grinder, pain in the ass.
Bed mounted and shaved gas door.
Now that everything was working right and the bed was on I decided that I wanted to do a front end swap. I was originally going to go with an 07 clip but I changed my mind. I remember coming across a bagged and body step side ranger with a mercury clip and I fell in love with it so I decided to go with that since I've only seen one other truck with it. Called up a junkyard and got an 01 explorer hood, fenders, grille and header panel since they are the exact same as the mercury mountaineer except for the grille and head lights.
Shots of the hood and fenders I bought from the junkyard.
Got the explorer hood mounted on the stock hinges. had to modify the hood a little bit.
Got the hood and grille mounted, hood still needs some adjusting on the corner by the wiper cowl. Cut off the front of the stock fender before the headlight.
Cut off the nose of the explorer fenders and bolted them to the stock fender using self tapping screws then welded the bolted sections together.
Some welding done.
Welding on the fender finished up and ready for body work.
Side view with the fender bolted up before welding.
Front view of the grille, hood and fenders bolted up.
Another view
And another view.
Started the body work on the fenders and shaving the body lines
Got the fenders all finished up
Finally got a license plate and my tail lights wired up
I took the truck out the day I got the tail lights wired up and the license plate and I was cruising with a buddy of mine and I aired the front up then down then back up while we were cruising and my upper ball joint on my drivers side snapped in half and the tie rod ball joint came out of socket. It was crazy. So I ended up stranded in the middle of the road for about an hour waiting for a tow truck to come tow me back to the house.
The tire actually tucked under the truck like this. If you look closely you can see the broken ball joint on the upper control arm and the out of socket joint on the tie rod.
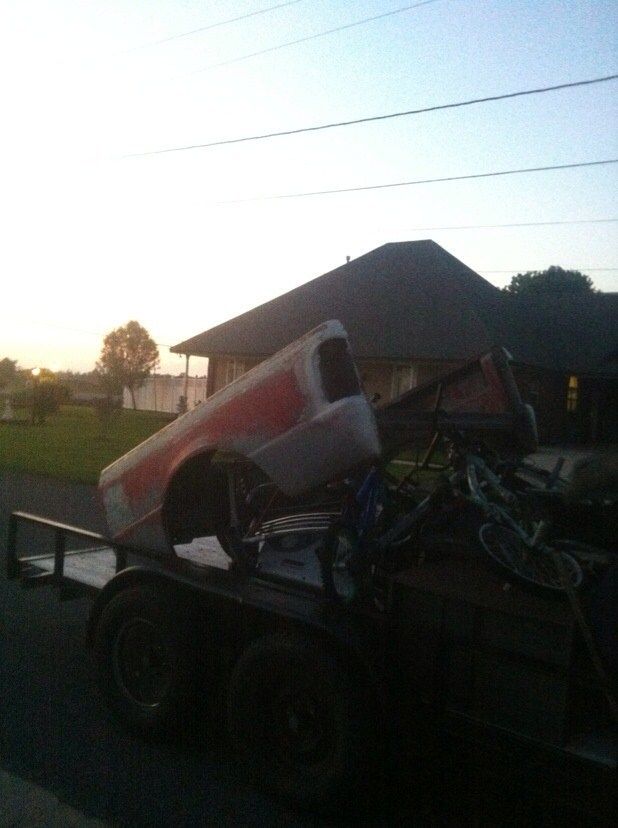
This is how I got home that day.
I ordered a new set of ball joints and tie rod end and replaced them and got back on the road. In the mean time my cali combo came in so I slapped that beast on. Here's a couple shots of the combo and truck:
Got the combo all straight and it was time to set up rear shocks. Here's the rear shock set up:
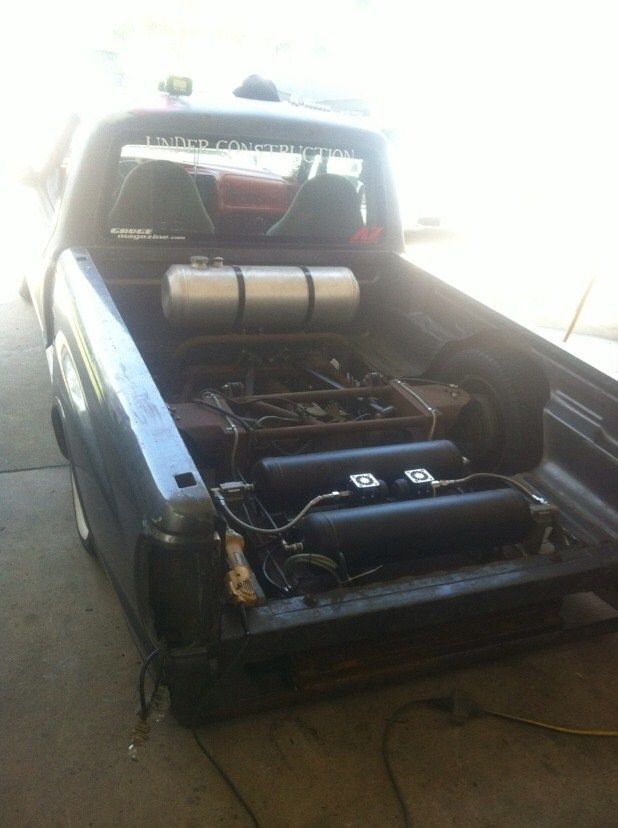
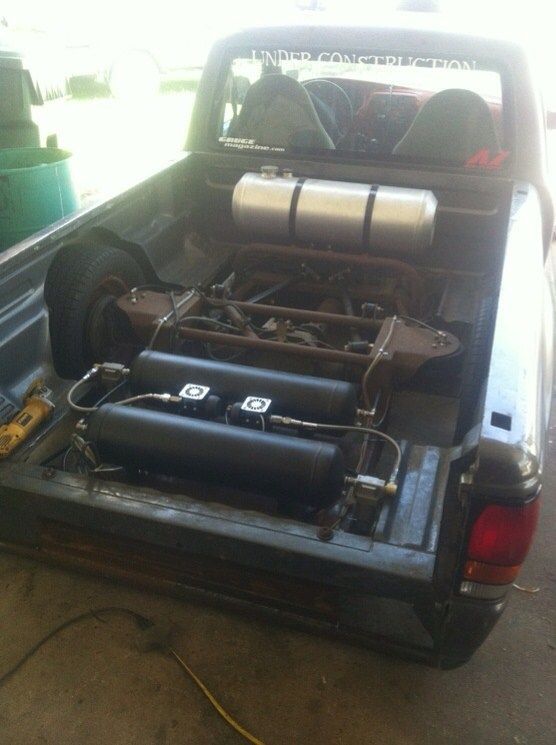
I tunneled the cab floor for the drive shaft because it was rubbing when I would cruise low. I don't really have any pictures of that. At one point my truck aired out on me on the highway when I was going almost 70 mph, I was trying to adjust my height and my valves got stuck open thank god I didn't lose control and wreck the truck or something like that. I ended up dropping the insurance on the truck and saving up for the accuair VU4 manifold which as been one of the best investments I have made for the truck. Worth every single penny. Also decided to run dual five gallon aluminum air tanks instead of one eight gallon steel tank.
It's beautiful. It's actually mounted inside of the cab and all the air lines run into the cab and plug into it. I'll post pictures of it later on.
The new rear set up. Broke down the other one and moved the compressors and got rid of the eight gallon tank. Just gotta add the second five gallon tank. I think it's cleaner this way. Also moved the battery back under the hood.
Cut out my tail light fillers and got rid of the tear drop tail lights. Decided to go back stock. Look better in my opinion.
Got all that crap squared away I put my sway bar back on and did my front shock set up finally. Came out pretty good. Made my own lower mounts.
Installed a plate box in the combo
After I did the plate box a few months ago the truck was at a stand still until around Christmas when I started working suicide doors. The suicide doors are finished for the most part just have to finish up a couple of things and body work on them. I also shaved the handles in the process.
Some pictures of the suicide doors and shaved handles:Z'd the hinges so the door will close properly.Modified hinge pockets that weld in the door where the hinge and the door bolt togetherPainted the hinges blackCutting holes for the latchesLatch all welded in.Striker welded inMounted the safety latch buttons in my headliner
Shaved door handles:
That's the progress of my ranger build as of 1-23-12. It's come a long way from a little over a year ago and it wouldn't have been possible without the support of the FPC Crew, friends and family. Everyone that has supported me and helped me out in anyway through out the build so far, thank you, you know who you are.
As far as future plans go:Finish up the suicide doors and install my shaved door kit along with the suicide safety latchesStock floor body dropOne off full custom chassis5.0 motor swapUpgrade to air zenith compressorsMisc. upgradesAir gaugesRight hand driveFull sheet metal bedCustom dash and interiorDifferent wheels maybe?Shaved body linesPaint
Who knows how it'll end up only time will tell but I will keep this thread updated as the build goes on. Thanks for looking.
After I put 5 inch drop on the rear.
Primed the whole truck out like a jackass and smoked the tail lights, I don't know what I was thinking at the time, I guess I thought I was cool haha.
C notched and added 4 inch blocks to the rear to give it a 9 inch drop total.
Cut my coil springs in the front to drop it about 4-5 inches. 5-9 drop total.
Roll pan installed, tail gate shaved. Rear view before I shaved my tail lights.
Tail light fillers tacked in
Decided to go ahead and shave my mirrors as well. My welding has improved since then.
Body work on the mirrors.
Finished body work on the tail lights and made cuts for my '32 Ford tear drops. Also shaved the holes on the top of the bed.
Re-primed the whole truck gray before a local show for some reason. Repainted my rims and got brand new tires. Added smaller mirrors and smoothed out my wiper cowl.
On December 3, 2010 a jeep slammed into me as I was crossing the highway on my way to work. Came out of no where. The result. By this point I extended my shifter and put a set of chopped Acura seats in the truck.
Another shot of the damage. This all happened right down the street from my house. My grandpa drug my truck off the highway and to my drive way with his suburban, haha.
The 'damage' on the jeep that hit me. I also got a ticket for failure to yield exiting a driveway. I found out later that his insurance company totaled out his jeep and he got a brand new one.. Must be nice.
Since my truck was wrecked there were only two things to really do with it: scrap it or rebuild the cab and bag it. I chose to rebuild the cab and bag it the only obvious choice really. I got to work pulling the drivers side door off and cutting out he wrecked section.
Wrecked section cut out. Oh check out those "speaker mounts" on the frame rail. Apparently the previous owner thought it'd be cool to mount some speakers under the truck. Haha.
With the truck being laid up I decided to pull the rear glass shave the rear of the cab, third break light and the upper cab 'seams' I guess you could call them.
I went to the local junkyard and got them to cut out a section of a cab for me to use. Picked up a new set of doors too. Got it all fitted and bolted in with self tapping screws so I could test fit my door and all.
Test fitted the door and it lines up perfectly with the body lines.
New cab section all welded in.
New fender and door all bolted up. Lines up awesome.
Better shot of the lines
Pulled the dash before I replaced the cab section and painted it whenever I was finished with the cab. Result.
I bought a new rim and new djm lower control arms and put those on and reassembled the front end
Finished the body work on the rear cab, third break light and cab seams. Got it all primed up and the rear glass back in and replaced the front windshield.
Frame step notched with an 8 inch notch. Cut out the spear tire thing and capped off the end of the frame. Made the tank mounts.
Welded in a bridge bar and got my upper 4 link mounts tacked in place and bolted the bars in. Eventually I welded them and I got the lower bars mounted. I moved the truck from the garage to the drive way and in that process I ended up bending the cross member the 4 link was welded too. So I cut the old one out and made a new one that clears the drive shaft too.
New 4 link cross member
Rear section with the new cross member welded in and the 4 link all bolted up.
Rear section, different angle.
The rangers don't lay true frame with the stock tranny cross member. I found out that Illusive Design does make a low profile tranny cross member that allows the rangers to lay true frame. So I ordered one and installed it.
Illusive Design cross memeber
Officially laying frame.
Fabbed up a fuel cell mount
Fuel cell mount all welded up
Before the fuel cell was bolted down
Ran some temp air lines and relocated the battery to the rear
Shot of the battery placement during the wiring process
I took the truck out a few times around the neighborhood before I was able to get a bed back on it. Here's a shot after her first run with all the air hooked up.
I had to cut the bed out to make room for the air tank, notch, and fuel cell. Pretty much the entire floor was cut out. Ignore the horrible cuts. They will be fixed one day when I sheet metal the bed. They were done with a sawzall and an angle grinder, pain in the ass.
Bed mounted and shaved gas door.
Now that everything was working right and the bed was on I decided that I wanted to do a front end swap. I was originally going to go with an 07 clip but I changed my mind. I remember coming across a bagged and body step side ranger with a mercury clip and I fell in love with it so I decided to go with that since I've only seen one other truck with it. Called up a junkyard and got an 01 explorer hood, fenders, grille and header panel since they are the exact same as the mercury mountaineer except for the grille and head lights.
Shots of the hood and fenders I bought from the junkyard.
Got the explorer hood mounted on the stock hinges. had to modify the hood a little bit.
Got the hood and grille mounted, hood still needs some adjusting on the corner by the wiper cowl. Cut off the front of the stock fender before the headlight.
Cut off the nose of the explorer fenders and bolted them to the stock fender using self tapping screws then welded the bolted sections together.
Some welding done.
Welding on the fender finished up and ready for body work.
Side view with the fender bolted up before welding.
Front view of the grille, hood and fenders bolted up.
Another view
And another view.
Started the body work on the fenders and shaving the body lines
Got the fenders all finished up
Finally got a license plate and my tail lights wired up
I took the truck out the day I got the tail lights wired up and the license plate and I was cruising with a buddy of mine and I aired the front up then down then back up while we were cruising and my upper ball joint on my drivers side snapped in half and the tie rod ball joint came out of socket. It was crazy. So I ended up stranded in the middle of the road for about an hour waiting for a tow truck to come tow me back to the house.
The tire actually tucked under the truck like this. If you look closely you can see the broken ball joint on the upper control arm and the out of socket joint on the tie rod.
This is how I got home that day.
I ordered a new set of ball joints and tie rod end and replaced them and got back on the road. In the mean time my cali combo came in so I slapped that beast on. Here's a couple shots of the combo and truck:
Got the combo all straight and it was time to set up rear shocks. Here's the rear shock set up:
I tunneled the cab floor for the drive shaft because it was rubbing when I would cruise low. I don't really have any pictures of that. At one point my truck aired out on me on the highway when I was going almost 70 mph, I was trying to adjust my height and my valves got stuck open thank god I didn't lose control and wreck the truck or something like that. I ended up dropping the insurance on the truck and saving up for the accuair VU4 manifold which as been one of the best investments I have made for the truck. Worth every single penny. Also decided to run dual five gallon aluminum air tanks instead of one eight gallon steel tank.
It's beautiful. It's actually mounted inside of the cab and all the air lines run into the cab and plug into it. I'll post pictures of it later on.
The new rear set up. Broke down the other one and moved the compressors and got rid of the eight gallon tank. Just gotta add the second five gallon tank. I think it's cleaner this way. Also moved the battery back under the hood.
Cut out my tail light fillers and got rid of the tear drop tail lights. Decided to go back stock. Look better in my opinion.
Got all that crap squared away I put my sway bar back on and did my front shock set up finally. Came out pretty good. Made my own lower mounts.
Installed a plate box in the combo
After I did the plate box a few months ago the truck was at a stand still until around Christmas when I started working suicide doors. The suicide doors are finished for the most part just have to finish up a couple of things and body work on them. I also shaved the handles in the process.
Some pictures of the suicide doors and shaved handles:Z'd the hinges so the door will close properly.Modified hinge pockets that weld in the door where the hinge and the door bolt togetherPainted the hinges blackCutting holes for the latchesLatch all welded in.Striker welded inMounted the safety latch buttons in my headliner
Shaved door handles:
That's the progress of my ranger build as of 1-23-12. It's come a long way from a little over a year ago and it wouldn't have been possible without the support of the FPC Crew, friends and family. Everyone that has supported me and helped me out in anyway through out the build so far, thank you, you know who you are.
As far as future plans go:Finish up the suicide doors and install my shaved door kit along with the suicide safety latchesStock floor body dropOne off full custom chassis5.0 motor swapUpgrade to air zenith compressorsMisc. upgradesAir gaugesRight hand driveFull sheet metal bedCustom dash and interiorDifferent wheels maybe?Shaved body linesPaint
Who knows how it'll end up only time will tell but I will keep this thread updated as the build goes on. Thanks for looking.
markmnotdead
+1y
The pictures are huge, I should have re-sized them before I posted them. I didn't realize they were this big. My bad.

lowjoe74
+1y
i dig it man!! keep on doing work!!!
markmnotdead
+1y
--------------------------------------------
lowjoe74 said:
i dig it man!! keep on doing work!!!
--------------------------------------------
Thanks man! I appreciate it!
lowjoe74 said:
i dig it man!! keep on doing work!!!
--------------------------------------------
Thanks man! I appreciate it!

strada shop
+1y
Edited: 1/24/2012 11:28:03 PM by strada shop
Your four link is all wrong! Your upper bushings are at two different angles and your instant center at ride hight is at the back off the cab.
Edit if you need some motor mounts i sell some that bolt to stock 4.0 motor mounts.
Your four link is all wrong! Your upper bushings are at two different angles and your instant center at ride hight is at the back off the cab.
Edit if you need some motor mounts i sell some that bolt to stock 4.0 motor mounts.

drpitlo
+1y
Good work on making repairs and doing your suspension but like strada said your 4 link is off your forward end off the bar ends need to intersect somewhere around the front bumper if you draw an imaginary line. How yours is set up now they will not ever intersect because your upper bars are so high.

jcjcsoccerkid
+1y
truck looks awesome
markmnotdead
+1y
It's been a while since I posted anything on here about the truck build. A few things have changed.
markmnotdead
+1y
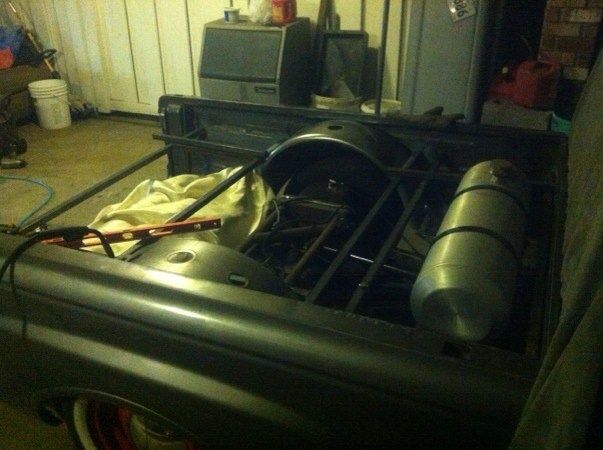
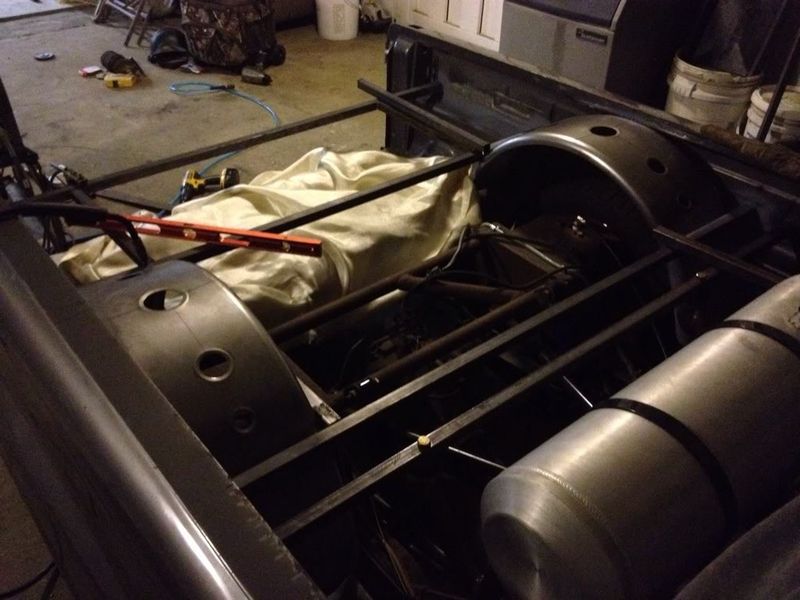
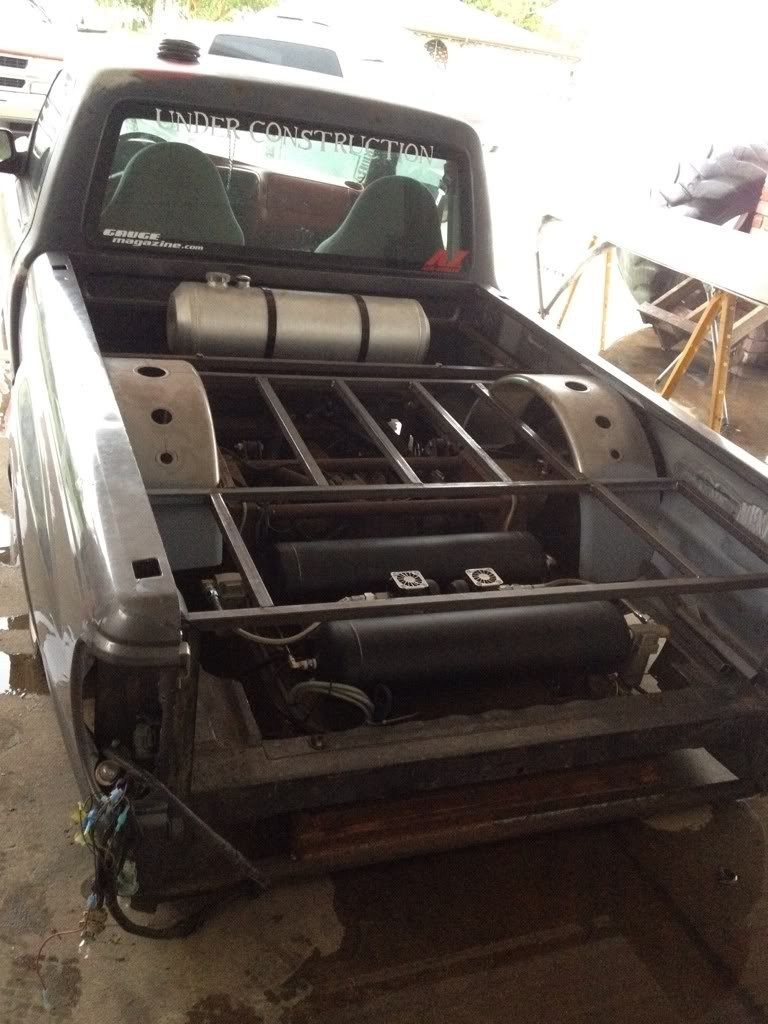
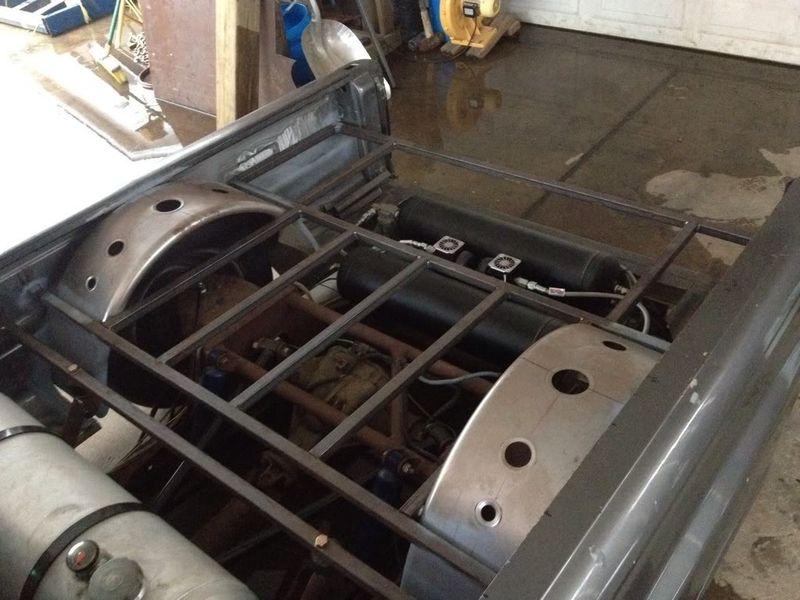
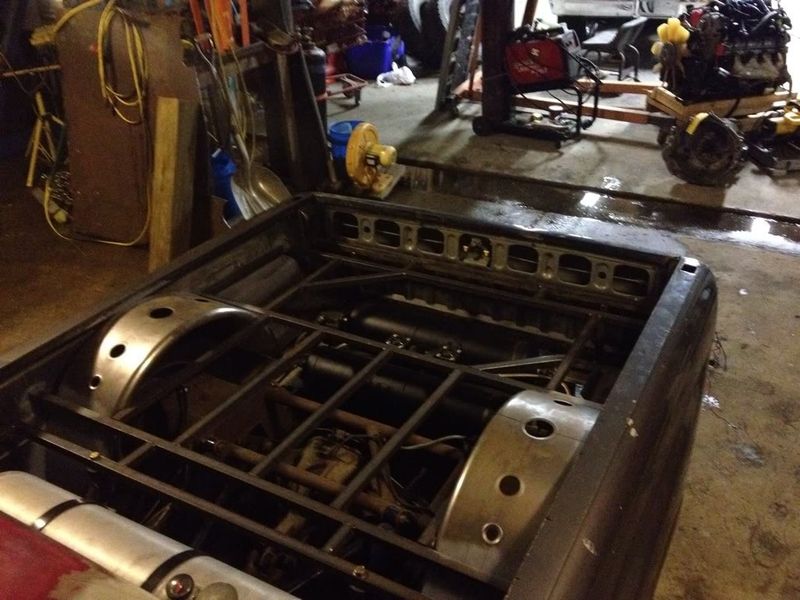
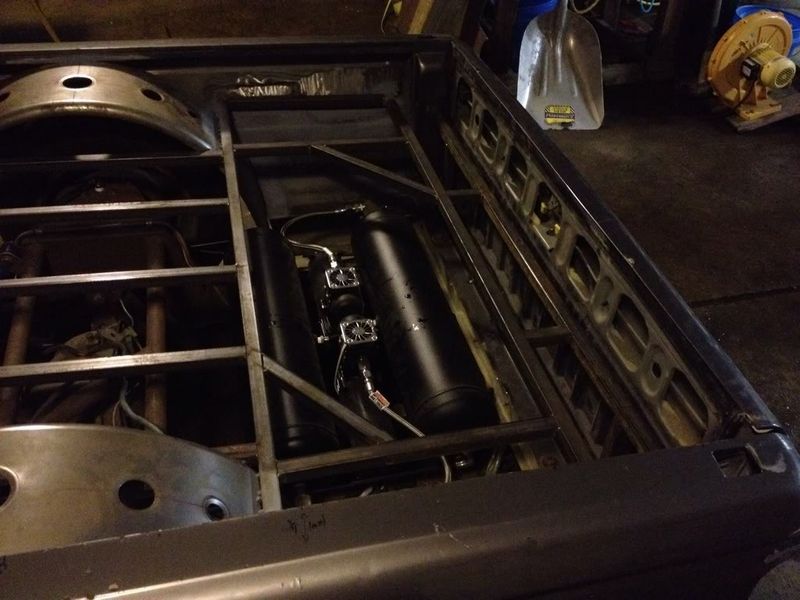
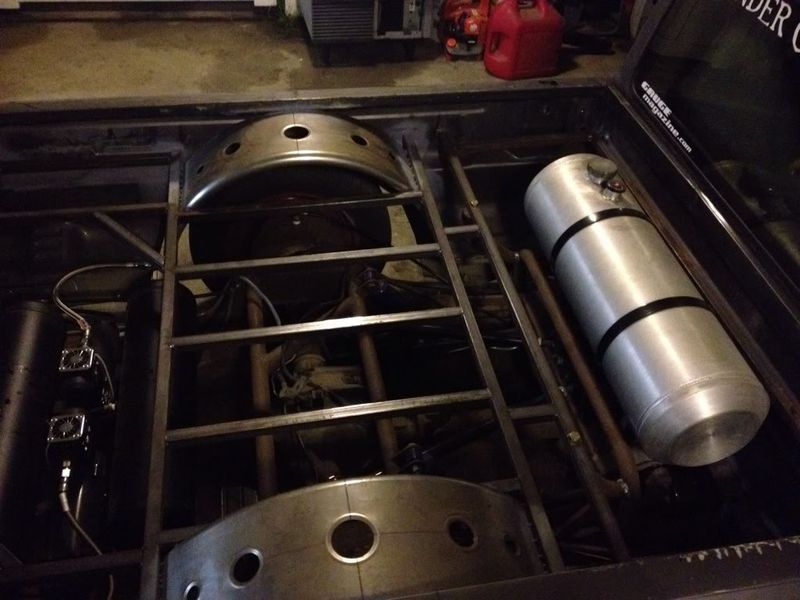
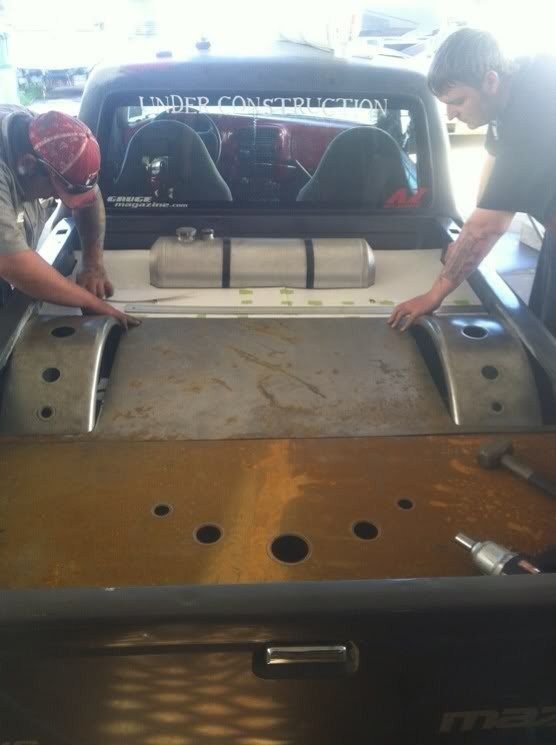
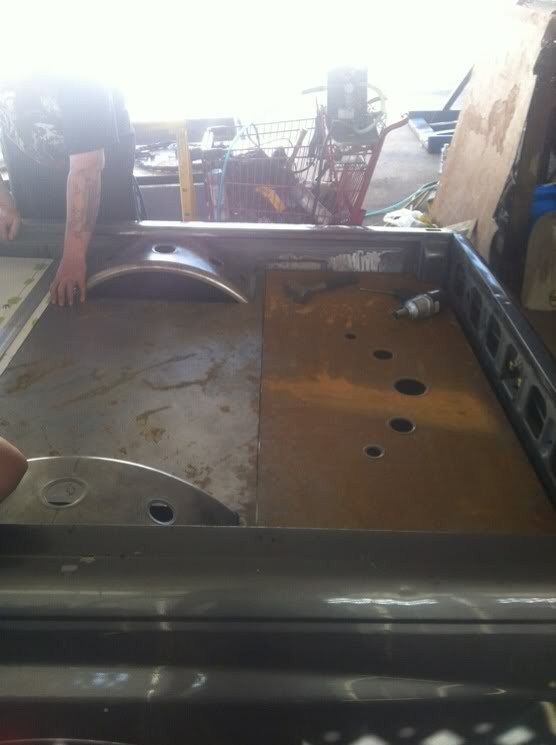
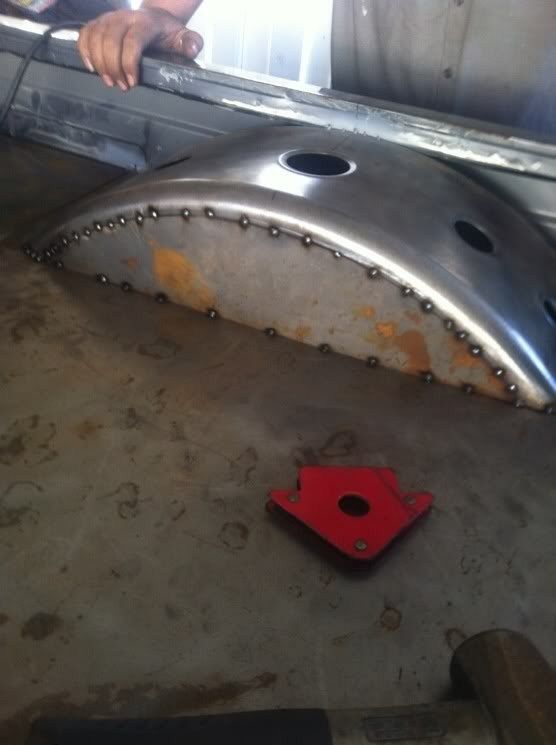
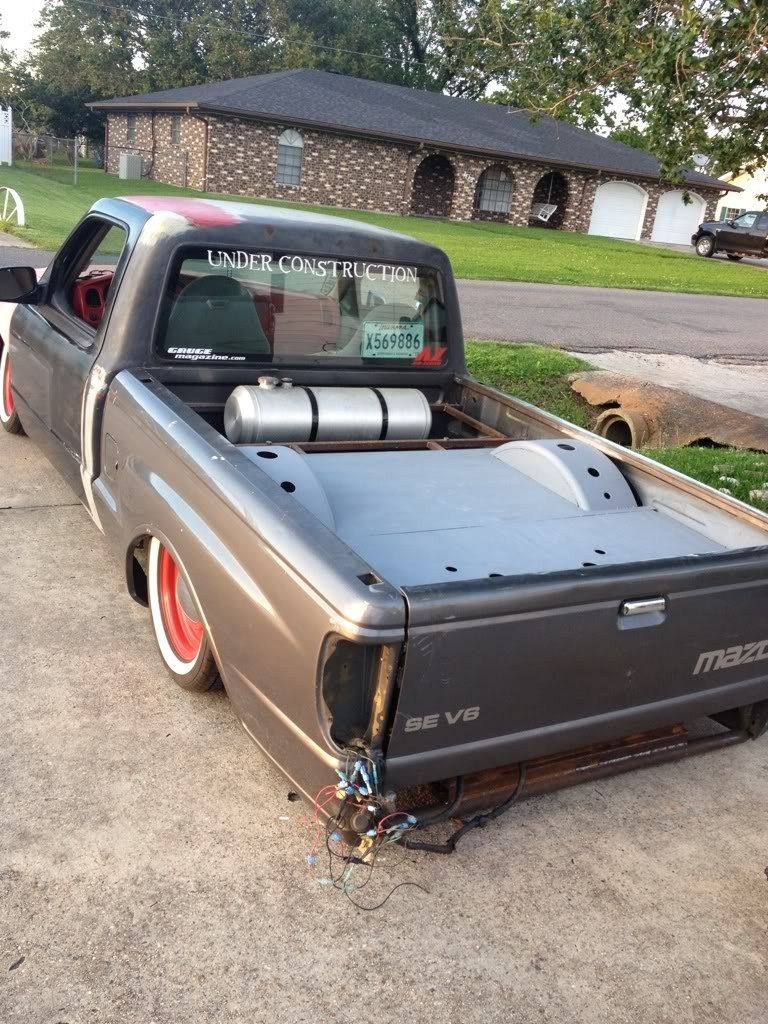
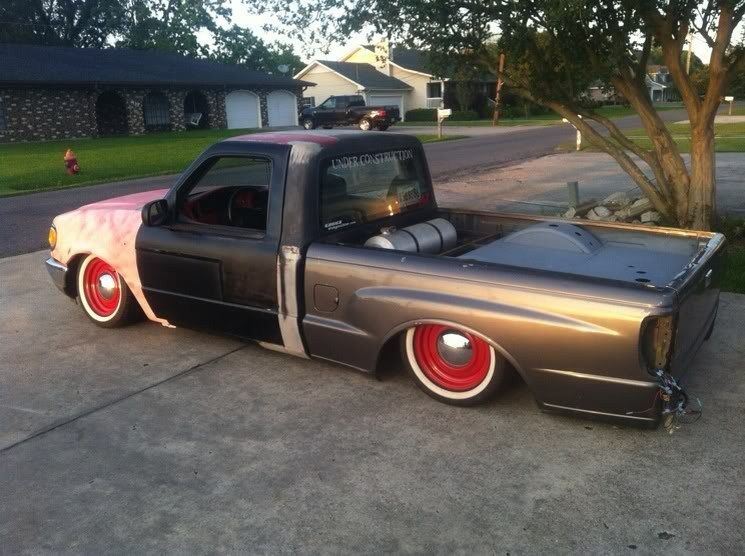
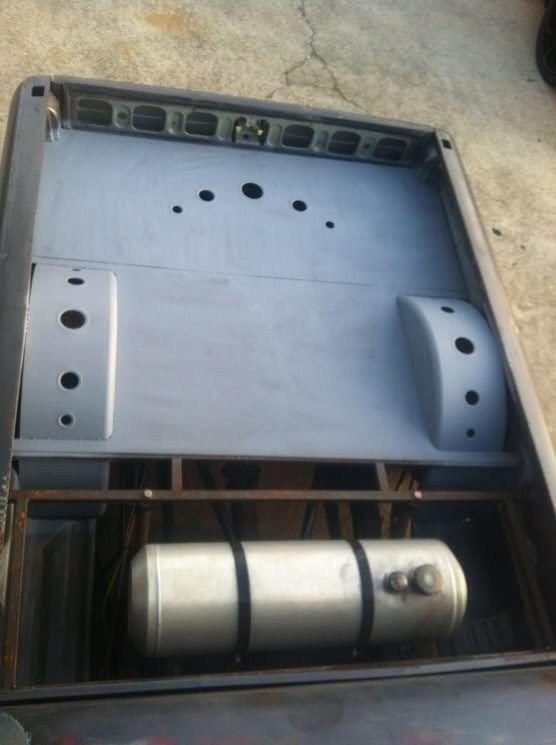
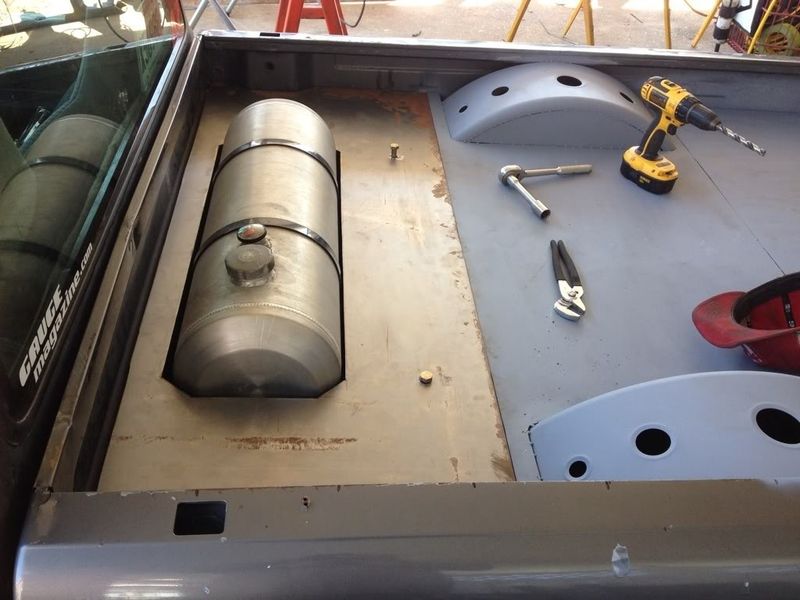
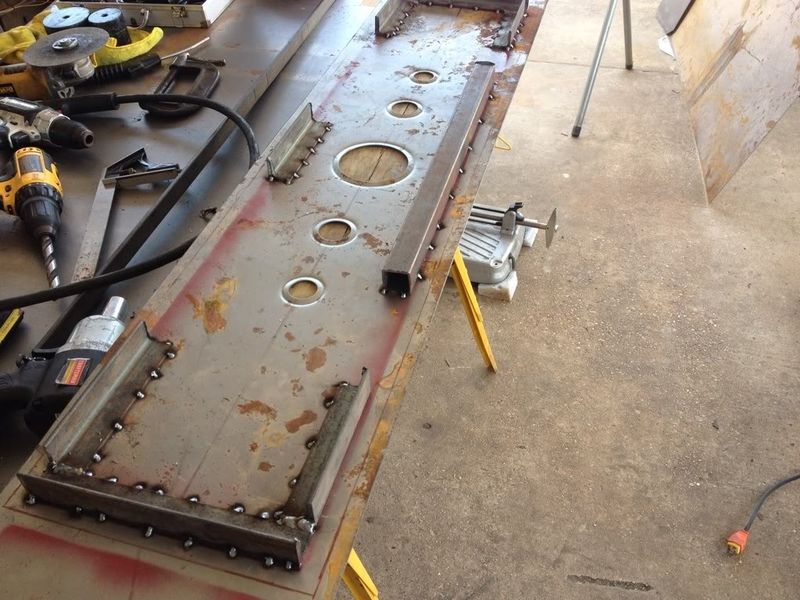
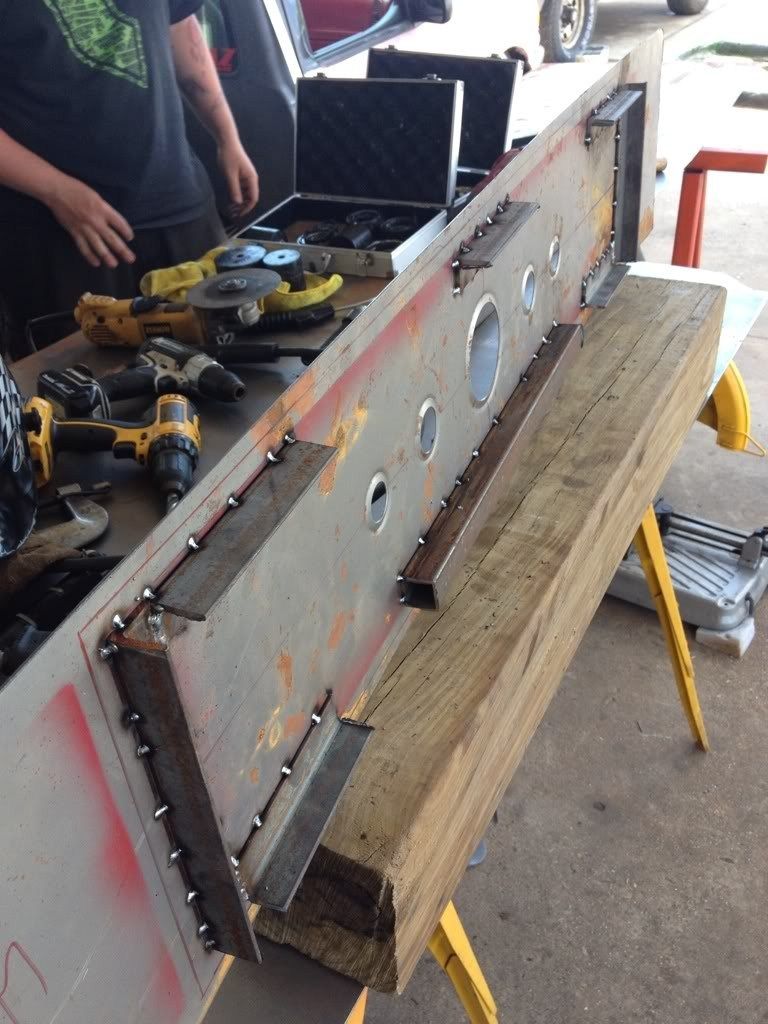
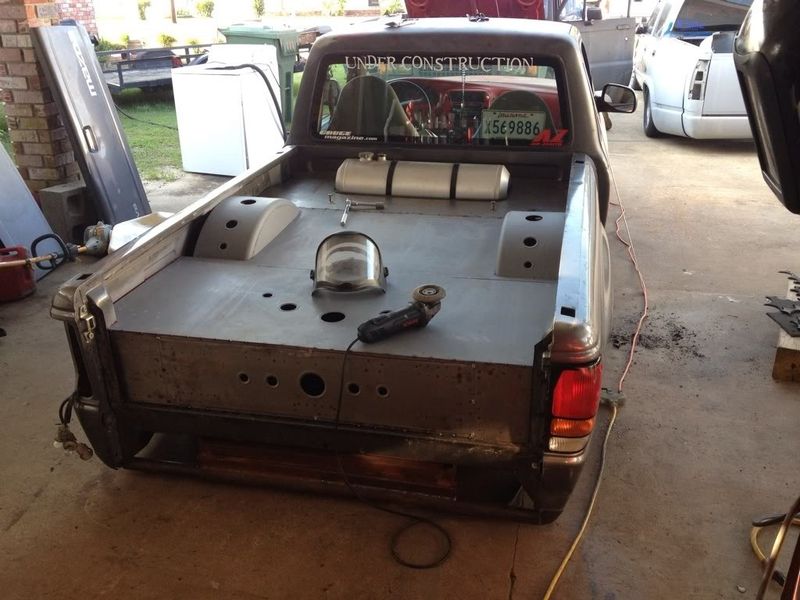
Recently decided to scrap my stock bed and go with something a little bit different. A Mazda bed. Cut out the bed floor and raised it and currently working on sheet metaling the floor and all that good stuff. I've got a good friend of mine whose doing the work, without him the bed floor wouldn't have come out as well as it has. Also upgraded to the accuair switch speed as well as dual AZ OB2's. Upgraded my alternator to a 220 amp. Cold air intake. Finally got my 5.0 just in the process of saving money to rebuild it the way that I want. Future plans for the near future hopefully.. stock floor body drop, motor swap, MMW control arms and notchless tie rods. Paint maybe? Waiting on my grant kustoms roll pan to come in too, should be in sometime this coming week. Here are a few pictures of the bed and the bed floor. I'm loving it.
The trucks has now been dubbed "Frankenstein" since it has so many different parts from other trucks.
That's all the progress pictures I have now. I pulled my transmission yesterday to change my clutch because it's completely shot. Should have the bed finished up by next weekend and it'll be Line-X'd whenever it's finished. The tops of the tubs will be painted so you will be able to see the dimple dies.
Also here's a quick dragging video we shot the other night on the way home from working on the bed.
http://youtu.be/sYk6kluMnd0


T
TRUBLAZIN
+1y
Truck looks killer. You have done some great work. Keep it up.


