Street Source is shutting down April 30th, 2026. Read the announcement

Step-by-step Airbrushed pinup

seanb
+1y
Edited: 11/9/2011 3:34:14 PM by seanb
Edited: 11/8/2011 8:10:26 AM by seanb
Back of a bike fender...
Edited: 11/8/2011 8:10:26 AM by seanb
Back of a bike fender...
seanb
+1y
Here's one that just came out in "Airbrush Step-By-Step" magazine. When I get a minute, I'll try to post some of the process I go through when doing these small beauties.

RedHJedi
+1y
Both look amazing!
Dave Mattingly
Latest Craze
Dave Mattingly
Latest Craze

Rob Clayhill
+1y
Ive always been amazed at how you airbrushers can do the work you do with such detail. Excellent work my friend, keep it up.

dumpednshaved
+1y
Looks great Sean. Keep the updates coming and keep up the great work. Once again, your work always amazes me.
S
StocksAndPrimer
+1y
those are sick! i want and pinup like that on my truck somehow...it would fit right in on my truck
seanb
+1y
Edited: 11/9/2011 3:27:33 PM by seanb
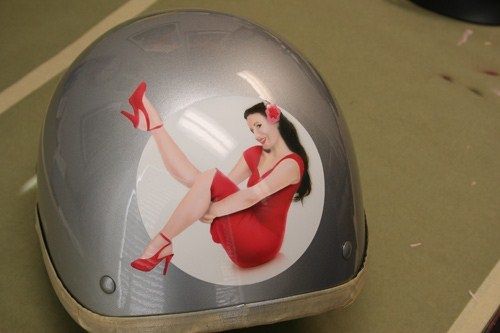
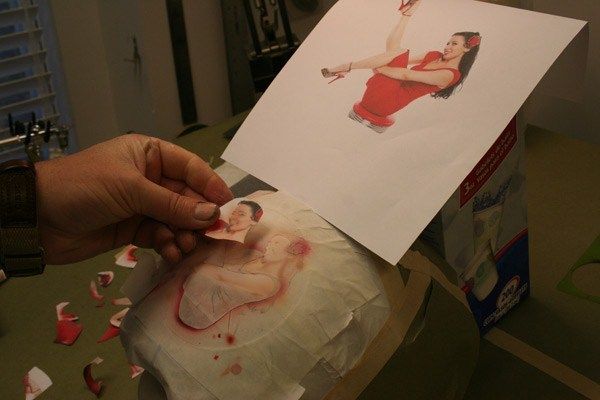
This is a little simplified, but here's a step-by-step of doing a small pinup like the one on the helmet above. I've omitted some things for the sake of space but you get the idea.
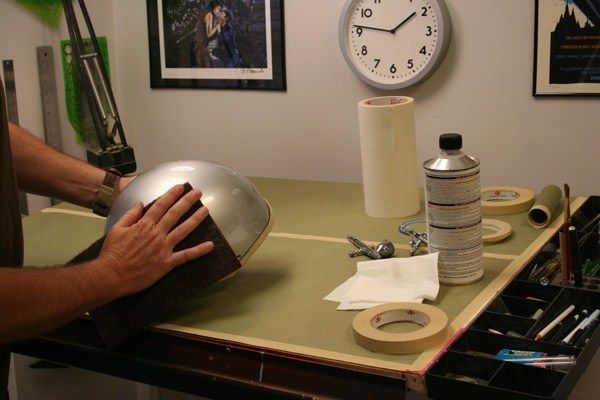
Step 1) Prep the helmet by scuffing it with a scotchbrite pad after you wipe it with some de-greaser. You may need to remove some decals and remove the gum.
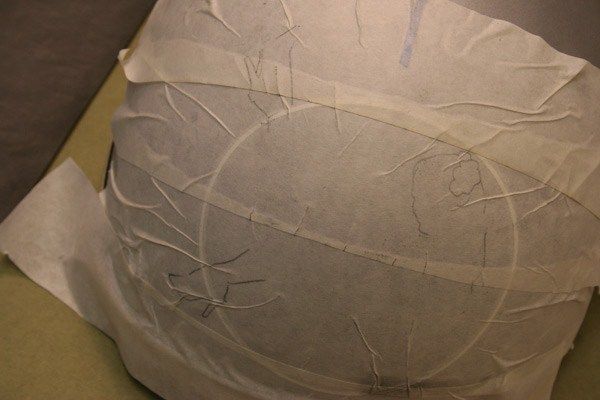
Step 2) I use sign transfer tape cut into 2" strips to mask the area I'm working in. I use carbon transfer paper to trace my image onto the transfer tape. Since her heals break out of a circle graphic, I trace those on to the paper so I know where to cut using my xacto knife.
Step 3) Carefully cut out the feet and heals where they break out of the circle and cut up to the circle to expose the area we'll be painting in. Once you remove the paper from this area, spray it with a base white.
Step 4) A re-cover the area I painted white with more transfer tape and trace my pinup over the area again. Now I can use an xacto to cut out the dress shapes. I remove shapes and keep them handy so I can replace them once I have my color down.
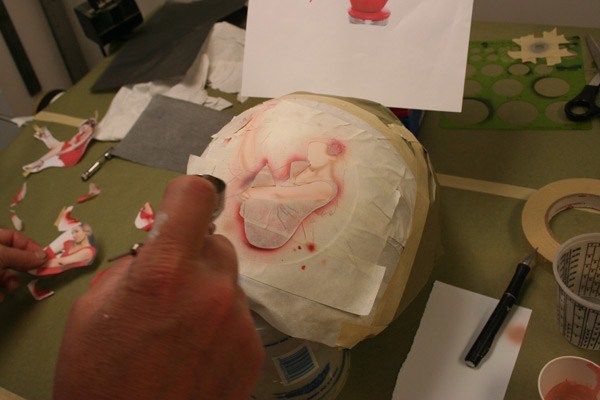
Step 5) I cut up duplicate copies of my reference photo and use it as a hand-held shield while I spray in details. For a hard edge, hold the shield right up to the surface and for softer edges, hold it further away or wiggle it slightly while you spray.
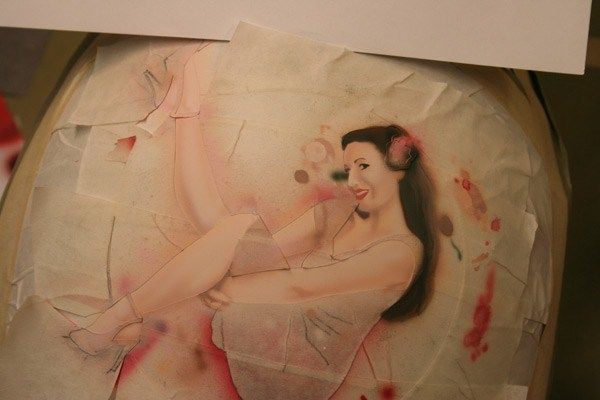
Step 6) Once I get all the dress areas painted in, I cover those back up with the tape I had cut out and removed earlier. Now I can start spraying the skin tones in.
Step 7) Once again, I cut up extra copies of my reference photo to make shields with. Around the face I like to cut out the nostrils, eyeliner, and lips which help establish landmarks on the face so I can fill in the rest. Don't overdo it. Go slow and build up the face carefully.
Step 8 ) Once the facial features are put in, move on to the hair area. Keep your spray somewhat soft around the face.
Step 9) You can use your xacto to lightly scratch in some stands of hair where it's highlighted. Don't try to paint every single strand. All that's left is to remove the masking and spray your clear over the art.
Hope these steps can help anyone out there interested in doing small subjects. By using these simple masking tips you can control your spray better and thus end up with a better product. Have fun and practice often.
This is a little simplified, but here's a step-by-step of doing a small pinup like the one on the helmet above. I've omitted some things for the sake of space but you get the idea.
Step 1) Prep the helmet by scuffing it with a scotchbrite pad after you wipe it with some de-greaser. You may need to remove some decals and remove the gum.
Step 2) I use sign transfer tape cut into 2" strips to mask the area I'm working in. I use carbon transfer paper to trace my image onto the transfer tape. Since her heals break out of a circle graphic, I trace those on to the paper so I know where to cut using my xacto knife.
Step 3) Carefully cut out the feet and heals where they break out of the circle and cut up to the circle to expose the area we'll be painting in. Once you remove the paper from this area, spray it with a base white.
Step 4) A re-cover the area I painted white with more transfer tape and trace my pinup over the area again. Now I can use an xacto to cut out the dress shapes. I remove shapes and keep them handy so I can replace them once I have my color down.
Step 5) I cut up duplicate copies of my reference photo and use it as a hand-held shield while I spray in details. For a hard edge, hold the shield right up to the surface and for softer edges, hold it further away or wiggle it slightly while you spray.
Step 6) Once I get all the dress areas painted in, I cover those back up with the tape I had cut out and removed earlier. Now I can start spraying the skin tones in.
Step 7) Once again, I cut up extra copies of my reference photo to make shields with. Around the face I like to cut out the nostrils, eyeliner, and lips which help establish landmarks on the face so I can fill in the rest. Don't overdo it. Go slow and build up the face carefully.
Step 8 ) Once the facial features are put in, move on to the hair area. Keep your spray somewhat soft around the face.
Step 9) You can use your xacto to lightly scratch in some stands of hair where it's highlighted. Don't try to paint every single strand. All that's left is to remove the masking and spray your clear over the art.
Hope these steps can help anyone out there interested in doing small subjects. By using these simple masking tips you can control your spray better and thus end up with a better product. Have fun and practice often.


Related Discussions in Body work and Paint
Thread
Posts
Last Post
4
G
last post by
gkc301 +1y
5

last post by
Bizzo +1y
0
R
last post by
Racer911 +1y